Go Back  Offshoreonly.com > Owners Forum > Chris Craft
New Chris Cat Project >

New Chris Cat Project

Notices

New Chris Cat Project

Thread Tools
 
Old 08-22-2012, 12:24 AM
  #11  
Platinum Member
Platinum Member
Thread Starter
iTrader: (1)
 
Join Date: Jul 2012
Location: Morehead City,NC
Posts: 227
Likes: 0
Received 0 Likes on 0 Posts
Default

Originally Posted by joe27baja
Im impressed my man...nice work. while you are there, any plans to cut the drives in higher?
Will for sure be upgrading to fives.....goin w exstention boxes as well. putting the old twos back on this round....but as you know nothing stays the same very long. Thanks for checking it out!
carolinacopters is offline  
Old 08-22-2012, 12:32 AM
  #12  
Platinum Member
Platinum Member
Thread Starter
iTrader: (1)
 
Join Date: Jul 2012
Location: Morehead City,NC
Posts: 227
Likes: 0
Received 0 Likes on 0 Posts
Default

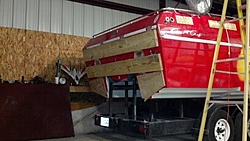
New Chris Cat Project-1343862793279.jpg

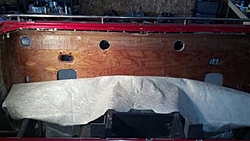
The stern and firewalls final fitting before glass. Got a little ahead of myself.....I left this pic out, trying to keep them in order.
carolinacopters is offline  
Old 08-22-2012, 12:42 AM
  #13  
Platinum Member
Platinum Member
Thread Starter
iTrader: (1)
 
Join Date: Jul 2012
Location: Morehead City,NC
Posts: 227
Likes: 0
Received 0 Likes on 0 Posts
Default

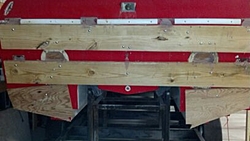
New Chris Cat Project-1343862104455.jpg

New Chris Cat Project-1343862129963.jpg
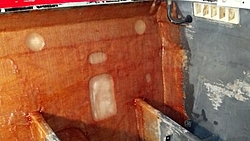
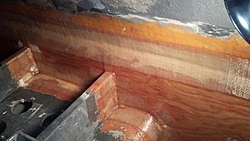
One final fit before the fiberglass, those things are tight getting in the engine compartment.
carolinacopters is offline  
Old 08-22-2012, 12:48 AM
  #14  
Platinum Member
Platinum Member
Thread Starter
iTrader: (1)
 
Join Date: Jul 2012
Location: Morehead City,NC
Posts: 227
Likes: 0
Received 0 Likes on 0 Posts
Default

New Chris Cat Project-1344027395444.jpg

New Chris Cat Project-1344027403330.jpg

New Chris Cat Project-1344027412246.jpg

New Chris Cat Project-1344027419241.jpg
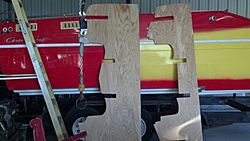
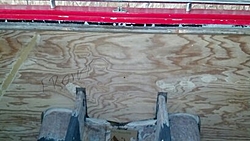
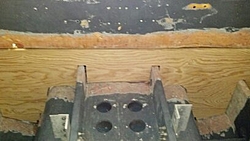
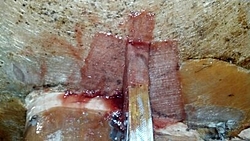
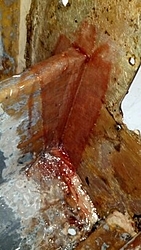
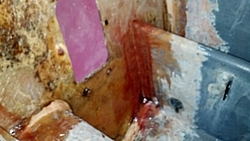
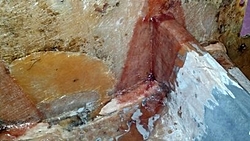
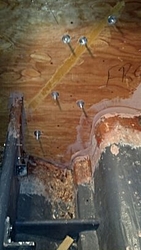
Before the wood is put in place....I had to continue the stringers to the outer shell of the transom. Once the stern was all dug out I had a two inch void between the two. You can see in the patterns I slotted the stern to slide over the stringers on all the replacement wood.
carolinacopters is offline  
Old 08-22-2012, 12:58 AM
  #15  
Platinum Member
Platinum Member
Thread Starter
iTrader: (1)
 
Join Date: Jul 2012
Location: Morehead City,NC
Posts: 227
Likes: 0
Received 0 Likes on 0 Posts
Default

New Chris Cat Project-1344044742826.jpg

New Chris Cat Project-1344044675509.jpg

New Chris Cat Project-1344044692733.jpg
This is where I put the squeeze on her to get her tight once the polybond was applied. May have showed this step already.....DUH. Cant help myself, this shiaat is cool as hell!
carolinacopters is offline  
Old 08-22-2012, 01:03 AM
  #16  
Platinum Member
Platinum Member
Thread Starter
iTrader: (1)
 
Join Date: Jul 2012
Location: Morehead City,NC
Posts: 227
Likes: 0
Received 0 Likes on 0 Posts
Default

New Chris Cat Project-1344368806275.jpg

New Chris Cat Project-1344368815368.jpg

New Chris Cat Project-1344368820547.jpg
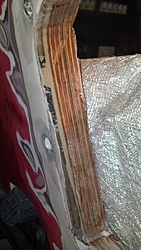
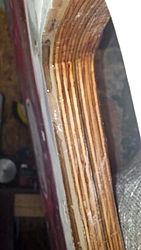
Here's the result of a good ole squeezing!
You can see the polybond done its job creating a nice solid core between the outer shell and the stern board. zoom in and check it out! Sweeeeet!
carolinacopters is offline  
Old 08-22-2012, 01:12 AM
  #17  
Platinum Member
Platinum Member
Thread Starter
iTrader: (1)
 
Join Date: Jul 2012
Location: Morehead City,NC
Posts: 227
Likes: 0
Received 0 Likes on 0 Posts
Default

New Chris Cat Project-1344368921902.jpg
Here we go.......sticky fingers. I laid up a nice thick layer around the perimeter of the stern board about twelve inches wide, then a nice thick piece of mat over the entire stern. At this point I dont need the cold beer.......High on styrene! wooohooo
Attached Thumbnails New Chris Cat Project-1344368878747.jpg  
carolinacopters is offline  
Old 08-22-2012, 01:18 AM
  #18  
Platinum Member
Platinum Member
Thread Starter
iTrader: (1)
 
Join Date: Jul 2012
Location: Morehead City,NC
Posts: 227
Likes: 0
Received 0 Likes on 0 Posts
Default

New Chris Cat Project-1344377947062.jpg

New Chris Cat Project-1344568844820.jpg
The top pic is the stern all laid up, only thing left is to smooth it up a little t make pertty. bottom pic is the forward firewall in the same state. I sure do feel good knowing all this new wood and glass are in place...Its like having a new boat!
carolinacopters is offline  
Old 08-22-2012, 01:30 AM
  #19  
Platinum Member
Platinum Member
Thread Starter
iTrader: (1)
 
Join Date: Jul 2012
Location: Morehead City,NC
Posts: 227
Likes: 0
Received 0 Likes on 0 Posts
Default

New Chris Cat Project-kitty-cat-14-.jpg
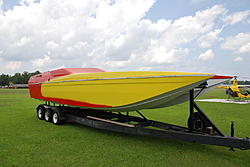
After getting all new wood and glass I started stripping and shaving......those rails and antenna mounts ECT....really dated the ole girl. Shes starting to look alot better! Holy crap that thing is sexy!!!! I have some guys that work at a local boat shop straitening her up and slicking her down. Should be shooting some primer by the end of this week. There is some long boarding goin on!
carolinacopters is offline  
Old 08-22-2012, 06:34 AM
  #20  
Platinum Member
Platinum Member
 
jeff32's Avatar
 
Join Date: Jun 2004
Location: St-Hyacinthe, quebec, canada
Posts: 7,726
Received 368 Likes on 247 Posts
Default

going fast !!!
jeff32 is offline  


Contact Us - Archive - Advertising - Cookie Policy - Privacy Statement - Terms of Service

Copyright © 2024 MH Sub I, LLC dba Internet Brands. All rights reserved. Use of this site indicates your consent to the Terms of Use.