

Got my Maggie!! Long term build thread intro...
 08-11-2014, 05:41 PM
#41
Registered
Thread Starter
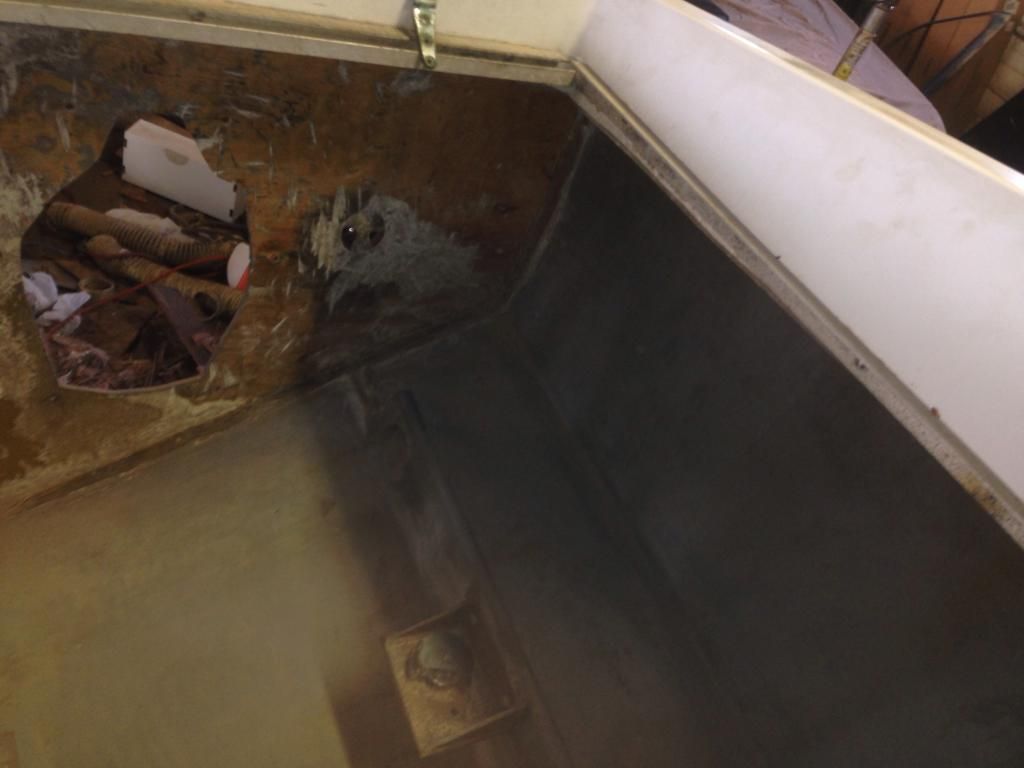
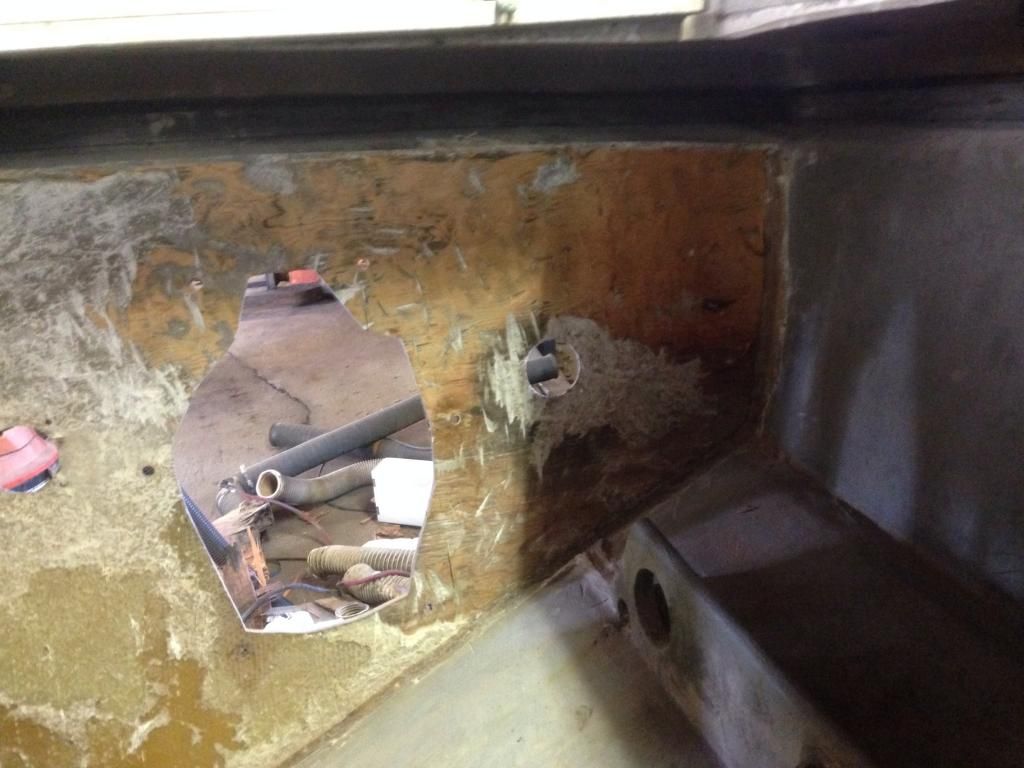
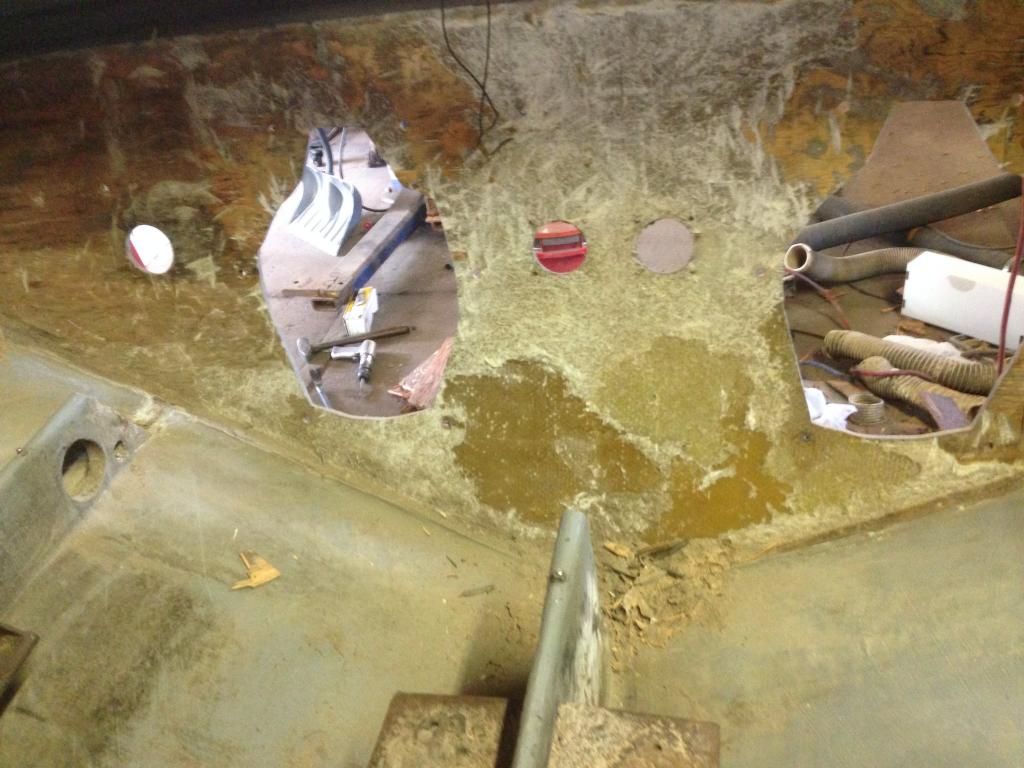
So I got home from work today and started on the transom, I cut the Keel stringer back an an angle to get it out of the way, and cut the inner fiberglass out , started pulling the old plywood out, I was surprised that the wood was not in one piece, there are 3 layers of 1/2" plywood but one was seamed down the middle, and the others seamed at the outer stringers. It does not look like it was replaced at any time, and I figured it would actually be easier on a new build to use 1 piece layers. another thing, there seems to be a layer of fiberglass between the hull and the wood, it was not adhered to the hull very well, and had voids that just lifted off, dod they cover the transom wood with a layer of glass before it was installed? If so should I do the same? Funny thing is the wood was good down around the drain hole and decent around the drive cutouts, but it was rotten around each of the thru transom exhausts. If it did not have the thru transom exhaust it would have been fine.
 08-12-2014, 12:32 AM
#42
Gold Member
[QUOTE=murfman;4168718]Looking at the bilge I have a few questions, first of all there is a pad under the starboard engine next to the keel stringer, is this factory? mounting point for the bilge pump? or is it a patch of some sort? I am going to replace the transom, and have seen where people cut the stringers at a 45 degree angle to allow the new transom to be installed. Is this an acceptable method? It would save me the process of pulling the deck. I thought that if I did this I would sandwich all 3 stringers with 3/4" marine plywood on both sides all the way up to the fuel tank bulkhead. I realize it may be over kill, but besides the extra 40 Lbs is it going to cause any other issues? This would effectively make the stringers 2 1/4" thick all the way to the first bulkhead. Also looking at the outer stringers, what if I were to build a shelf to the side of the hull from the stringer, it seems this would make it easier to keep the bilge clean. As there is not much room on the transom and I plan on adding 2 trim pumps and 2 tab pumps, plus possible adding fresh water cooling, real estate is getting tight. Can I glass in some plywood on the hull sides so I can mount my pumps there, tied in with the shelves to the outer stringers? I think I'm going to try to mount the batteries under the cockpit floor behind the fuel tanks, there is a decent amount of room there that is not used, and I think I can make access holes in the cockpit floor under the back seat to get to them. Should I add the herringbone style reinforcement to the floor, or an extra stringer on each side? Sorry for all the questions, but I want to do this once!!
The pad is factory for the bilge pump. Many of us that have restored our 27' Magnums have done so in what may be called freestyle restoration, that is as long as it makes YOU HAPPY it's the right way.....
The pad is factory for the bilge pump. Many of us that have restored our 27' Magnums have done so in what may be called freestyle restoration, that is as long as it makes YOU HAPPY it's the right way.....
08-12-2014, 04:04 PM
#43
Registered
Thread Starter
I guess what I'm asking is what is the best way to reinstall the stringers to make them as strong as possible? And is there a problem or disadvantage to glassing in wood to form a shelf from the outer stringers to the hull sides?
08-14-2014, 07:41 PM
#44
Registered
iTrader: (3)
Join Date: Sep 2008
Location: Bedford & Wolfeboro, NH
Posts: 455
Likes: 0
Received 0 Likes
on
0 Posts
Murfman,
You are into a big project, and it's nice to see another Magnum 27 being saved.
Many of your questions are issues I ran into as well as other here who have and are rebuilding and restoring these boats. I can only speak from my own experience and will try to share what I learned while rebuilding my 68 Vee windshield boat.
Engine spacing . . most early Volvo drive boats were set up on a 29-30" center to center engine spacing. It was very common to raise the drives on these boats 2". On a stock flat engine hatch this still allows everything to fit below the hatch with standard intake / carb set ups. This spacing works OK with stock manifolds. If you desire big power from twin engines, and will need headers, they will not fit that spacing!!! BTDT, made it work, but it was expensive and took a lot of time!
I rebuilt my transom, and cut my center stringer back to allow fitting in the new plywood. I did not build the new wood core to fit to the bottom of the Vee. The lower triangle about 5" up is solid fiberglass and through this I drilled my hull drain hole.
After I cut the new drive openings I sealed all the raw plywood with West Epoxy , letting it soak in as much as possible. My filler piece from the stringer to the transom was carefully fit in place and then tabbed with numerous layers of glass to the transom and 6" forward of the cut in the stringer.
You asked about shelves outboard of the outside stringer . . .I see no reason why this wouldn't work, but be careful not to bond this piece to the hull side, only to the top edge of the vee bottom. Donzi added ribs to the sides of the stringers and when they tabbed them to the hull sides they all caused fractures on the stringers and gelcoat stress marks on the sides. BTDT with my Corisican. The chine is a flex / stress point. I'm uncertain that this would happen on a hull as strong as a Magnum, but why find out once it's too late???
There is lots of other info on Magnum 27s on the Donzi.net site in the "Talk About Other Boats" section.
Most of my work is detailed on this thread with pictures:
http://www.donzi.net/forums/showthre...lies-Magnum-27
it is due for an update as I now have been running the boat all summer . . .
Good luck, keep the pictures coming!
Mario
.
08-14-2014, 08:54 PM
#45
Registered
Thread Starter
Thanks for the input. That is the info I was looking for. I think I'm going to follow some of the threads here that were guided by glass Dave and use 3M Nidabond to secure the transom to the hull, I am raising the drives and I think I will move each drive out board 1 1/2" to give me a little
Breathing room between the motors. I still have not decided on exhaust. There are only 2 choices for me, the Barr 1986 and up center riser manifolds or the HiTek stainless headers. Not sold on the HiTeks because of the issues f ing screenname had with his.
Breathing room between the motors. I still have not decided on exhaust. There are only 2 choices for me, the Barr 1986 and up center riser manifolds or the HiTek stainless headers. Not sold on the HiTeks because of the issues f ing screenname had with his.
08-17-2014, 03:51 PM
#46
Registered
Thread Starter
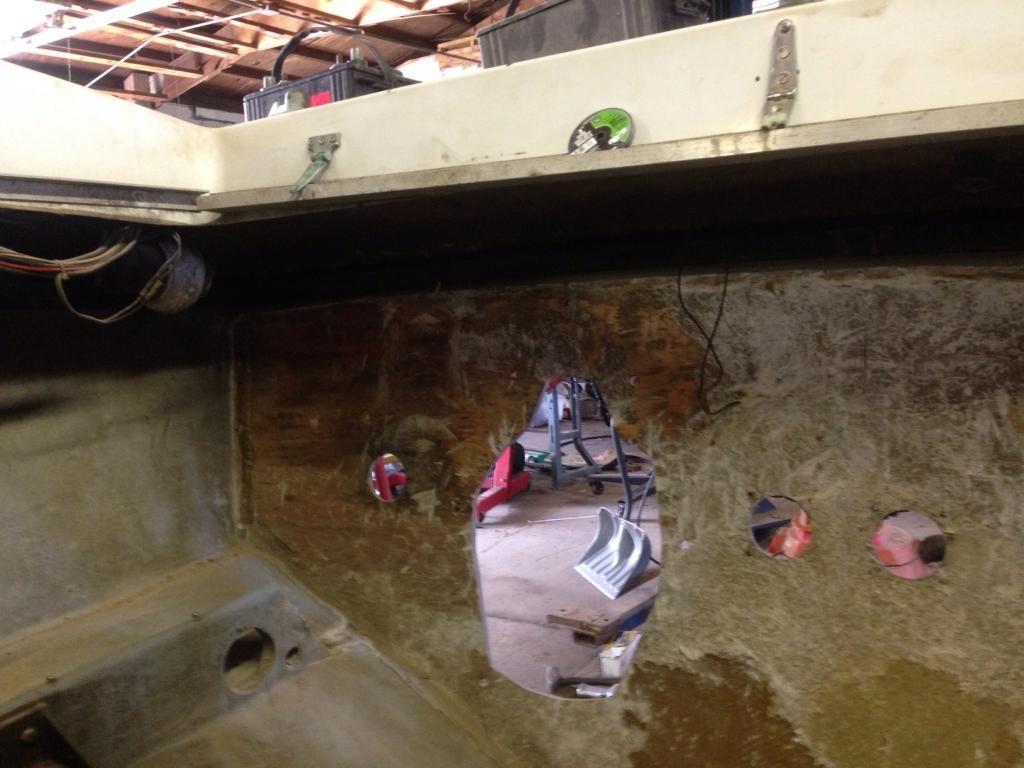
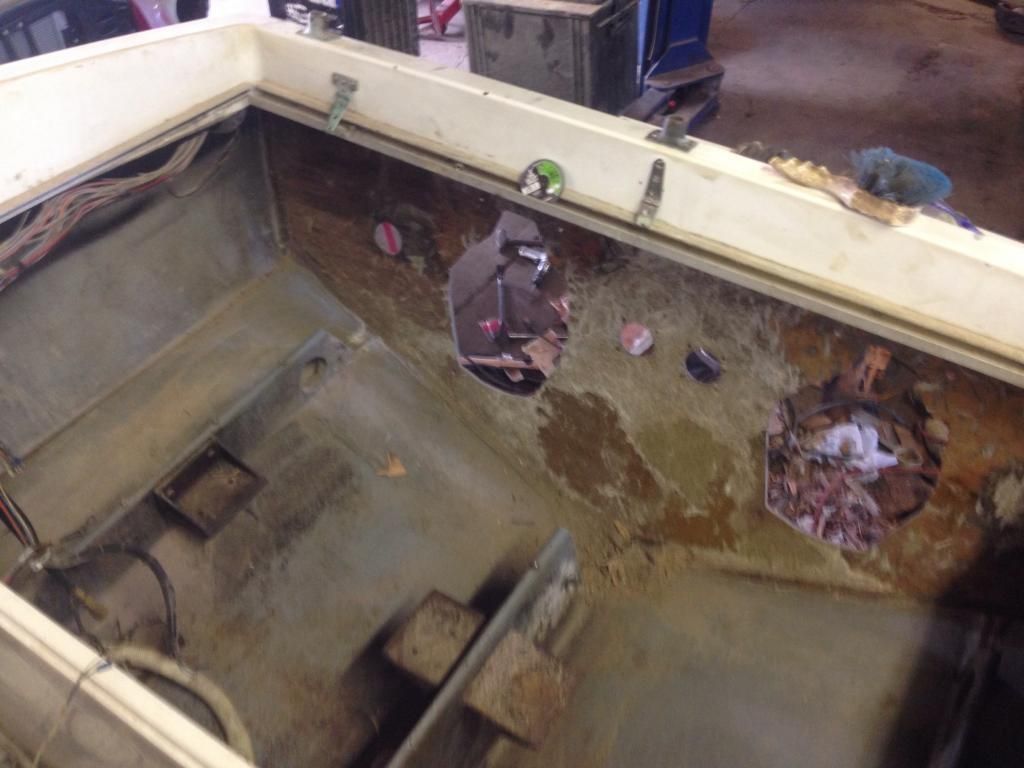
Well, I got 99% of the wood off the transom,luckily the stringers were dry and solid as a rock. I'll get the rest later this week with some 36 grit flap discs. I also picked up my second SP-A outdrive assy. When I reinstall the drives, I am going to raise the collar until it is at the flare at the top of the transom, that looks like it will raise my X ~ 3" is there any downside to moving the engines 3" further apart at the same time? It sure would help accessibility for service and maintenance.


 08-17-2014, 03:56 PM
#47
Registered
Thread Starter
Another thing it sure looks like plain old CDX plywood that I pulled out of there, and they sure didn't pay too much attention to tight gaps between the pieces either. It still lasted 42 years, hopefully I can make it last another 42...
08-17-2014, 04:12 PM
#48
Registered
iTrader: (3)
Join Date: Sep 2008
Location: Bedford & Wolfeboro, NH
Posts: 455
Likes: 0
Received 0 Likes
on
0 Posts
Good progress!
going up 3" on your X with the drives spread . .you're also moving up the vee . . so your drives will still be adequately submerged. Gaining space in the middle for service is good, but be aware of how much you loose along the sides . . .
Mario
going up 3" on your X with the drives spread . .you're also moving up the vee . . so your drives will still be adequately submerged. Gaining space in the middle for service is good, but be aware of how much you loose along the sides . . .
Mario
08-17-2014, 07:14 PM
#49
Registered
Thread Starter
The original exhaust took up half the engine compartment. The risers were at the front of the engine, and the exhaust ran back under the manifolds to the transom. Going with the se get rise exhaust and standard risers will free up lots of room in front of and next to the engines.
08-17-2014, 09:52 PM
#50
Gold Member
If you read glass Dave's recommendation on rebuilding transoms here on OSO CDX is just fine. Raising drives up 3" & around 33" centers should be just fine also... The only down side is finding props that work with your Volvo drive, Solas don't work when you raise the drives they slip bad. I'm running 23p Merc Mirage props as I have Merc spline shafts. Jeff & I making prop adapters but there not ready yet, Jeff's off racing in the Cowes Torquay race so they will have to wait till Jeff gets back to work on them.

