

1977 24-7 pantera restoration
 07-05-2016, 10:03 AM
#251
It works out well, as I can lift the engine up and down during mock up and that makes it easier to plumb under and around the bilge.
 08-18-2016, 02:24 PM
#252
Registered
Join Date: Aug 2016
Posts: 1
Likes: 0
Received 0 Likes
on
0 Posts
Robbie, This Pantera is SWEET! Amazing work! I happened upon this forum looking for the old SRV190 yesterday and totally blown away by the work you have done. I wouldn't expect anything less from you, you did such a great job on the old Sea Ray. Can't wait to hit the lake in the Pantera some day. I'll make a trip up there just for that. Keep up the nice work Rob. Do you still have the Sea Ray?
BTW, miss you.....hope all is well
Bud.
BTW, miss you.....hope all is well
Bud.
09-07-2016, 08:48 PM
#253
Been working on the boat just about daily.
The mock up and preliminary rigging has all been done. Time to seal all the mounting holes, mask the boat off and paint the bilge.
Pics of he masking:

Bilge painted with PPG concept. Same as the deck:
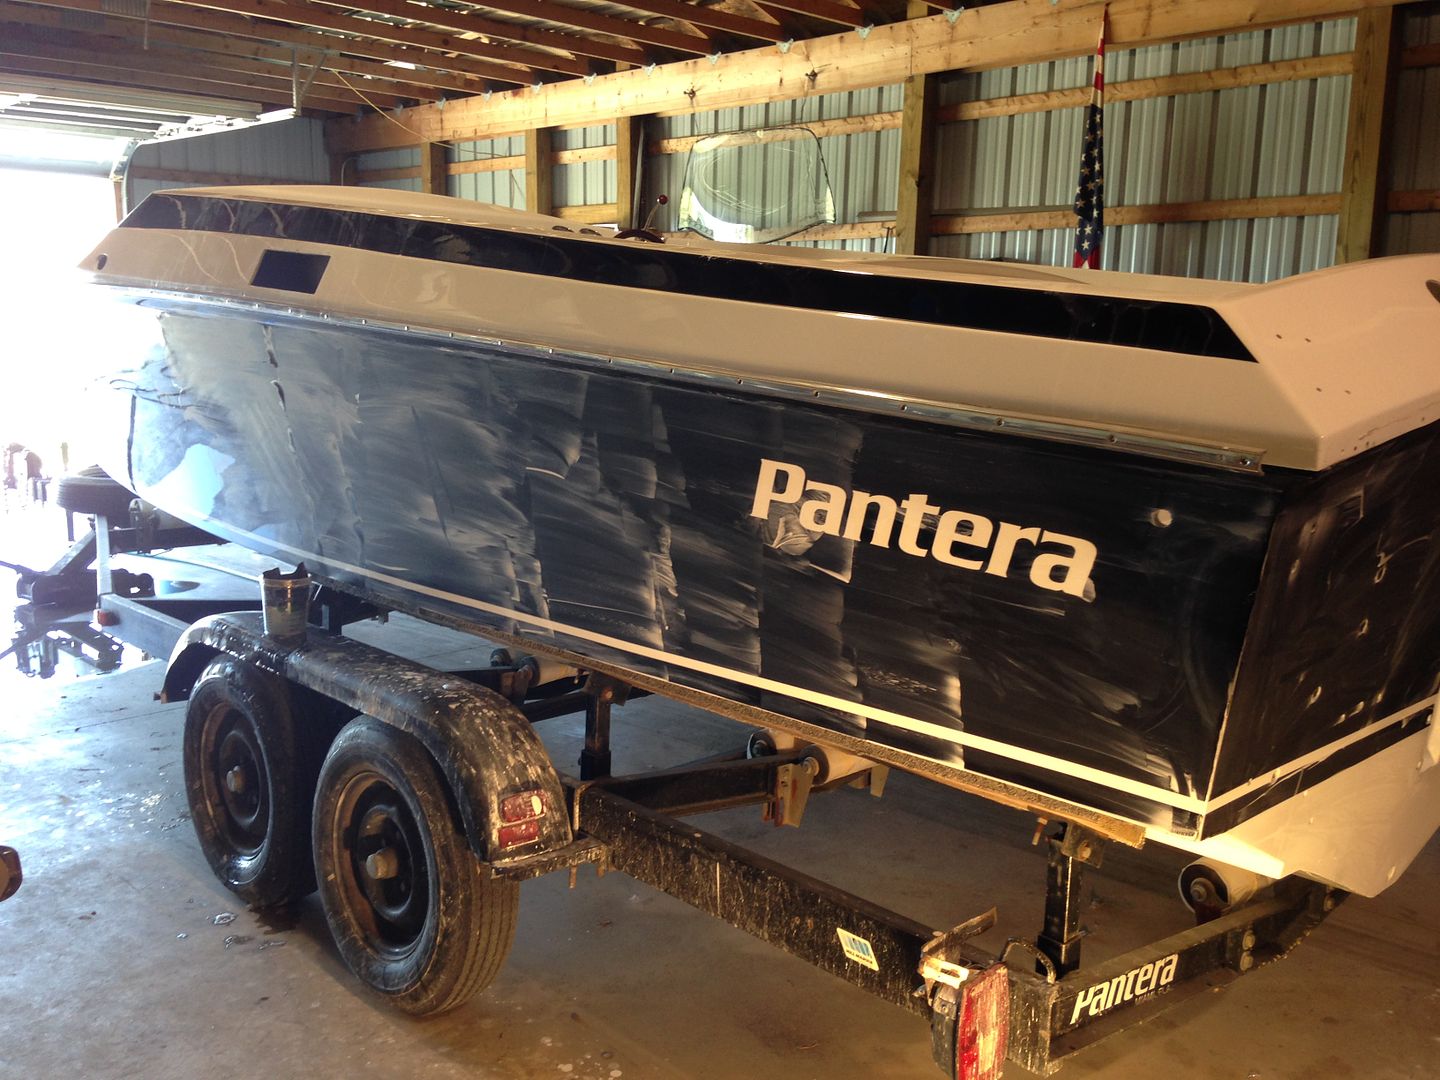
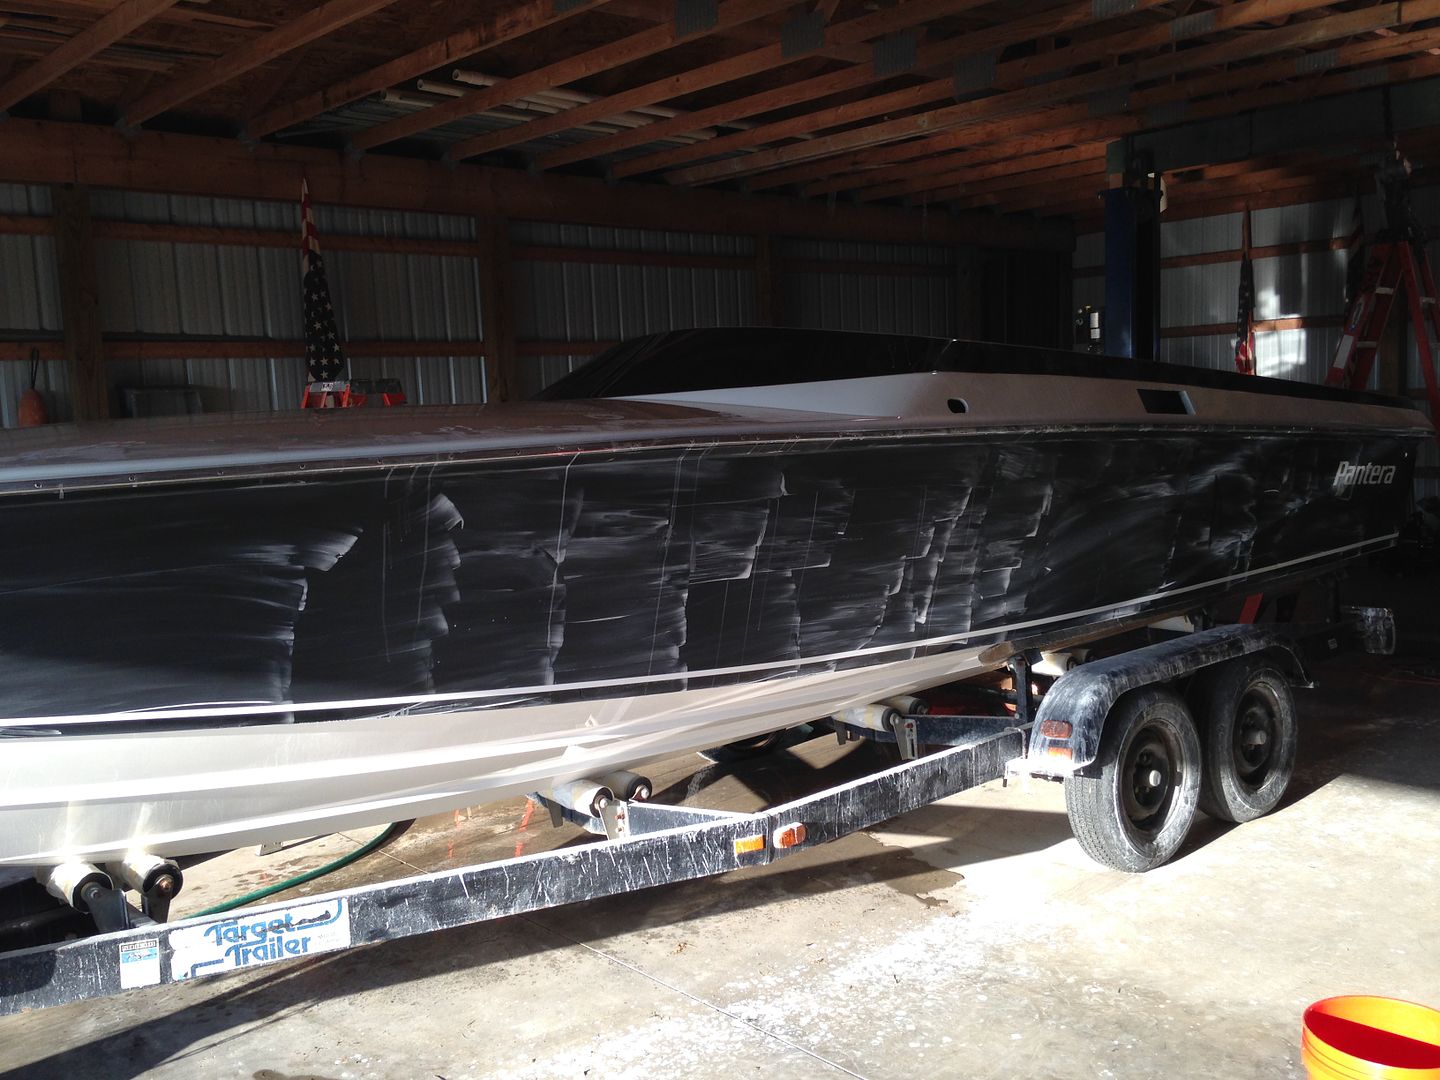
At this point, the paint has been "done" for two years. I color sanded and buffed it within a week or so of the final clear coat. Over the first six months or so I noticed it curing back and some very slight shrinkage around repair areas. It stabilized after the first year and is done now. After walking around the hull for two years and finding every minute blemish in different light, I had a "come to Jesus" moment and decided to cut and buff it back before final assembly. I didn't want to live with small imperfections that I know I could fix now.
Here it is after some love with 1200 wet:
The mock up and preliminary rigging has all been done. Time to seal all the mounting holes, mask the boat off and paint the bilge.
Pics of he masking:


Bilge painted with PPG concept. Same as the deck:


At this point, the paint has been "done" for two years. I color sanded and buffed it within a week or so of the final clear coat. Over the first six months or so I noticed it curing back and some very slight shrinkage around repair areas. It stabilized after the first year and is done now. After walking around the hull for two years and finding every minute blemish in different light, I had a "come to Jesus" moment and decided to cut and buff it back before final assembly. I didn't want to live with small imperfections that I know I could fix now.
Here it is after some love with 1200 wet:


Last edited by vintage chromoly; 09-07-2016 at 08:53 PM.
09-07-2016, 10:23 PM
#254
Gold Member
"How to make an old boat better than new, then make it perfect, improve on perfection, then make it better still"
(A 5 year epic, written produced and directed by VC, also starring VC)
The most meticulous rebuild I've had the pleasure of reading.
RR
(A 5 year epic, written produced and directed by VC, also starring VC)
The most meticulous rebuild I've had the pleasure of reading.
RR
09-19-2016, 06:26 PM
#255
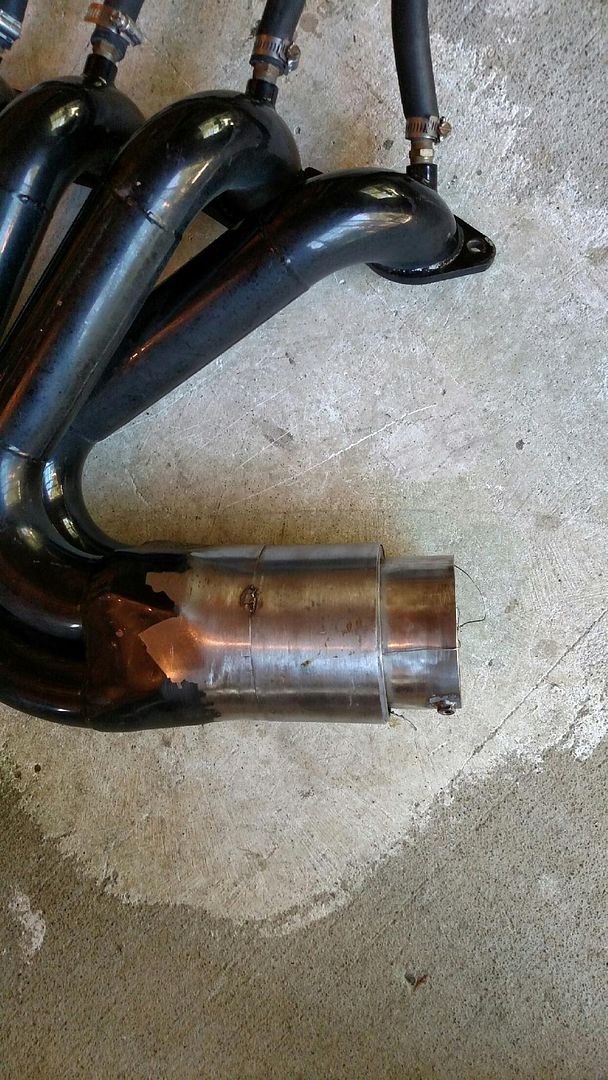
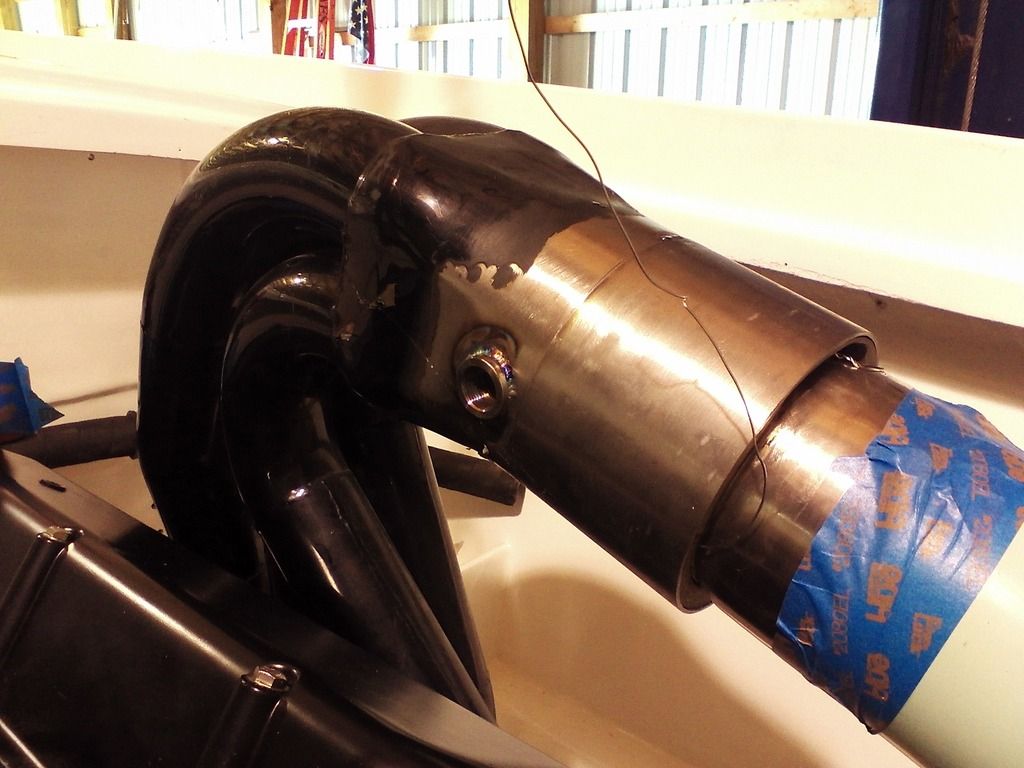
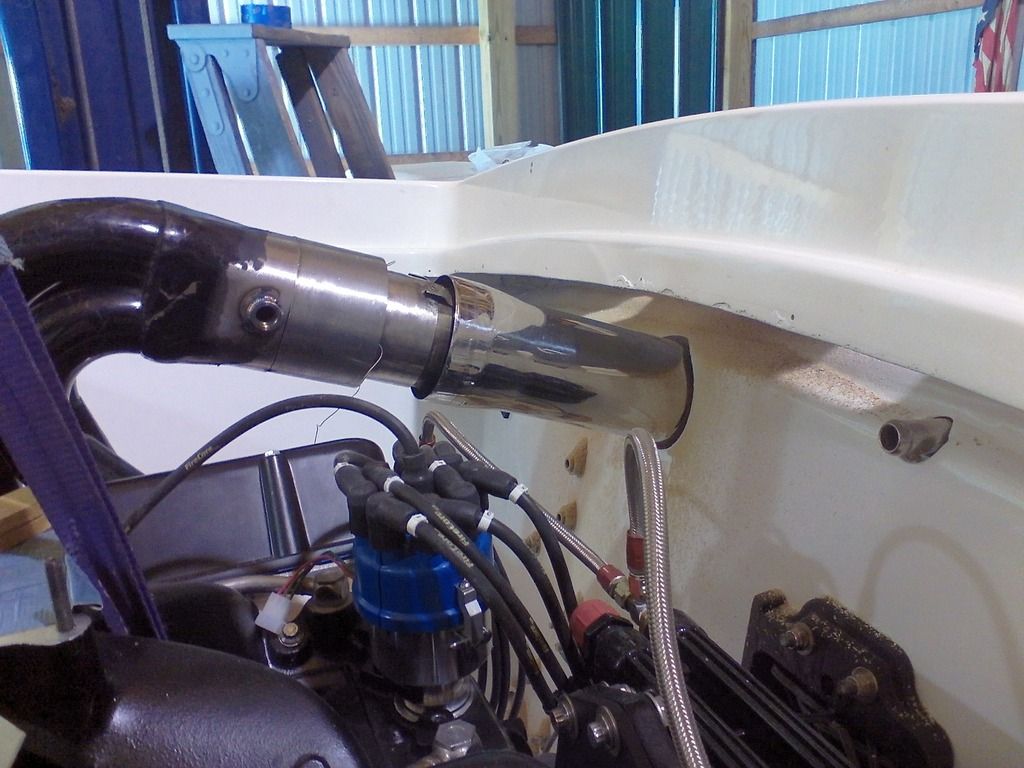
A good friend is busy modifying the Lightning headers. We had to cut and angle the collectors downward to clear the rubrail (this header was actually angled up at the collector before we cut it apart).
We added bungs for O2 sensors, but you can't see them in this pic as they are on the backside of the collector.
This one is headed back in the boat so we can determine where the hole in the transom will be. Once I drill this side, I'll duplicate the hole on the other side.to match.
We added bungs for O2 sensors, but you can't see them in this pic as they are on the backside of the collector.
This one is headed back in the boat so we can determine where the hole in the transom will be. Once I drill this side, I'll duplicate the hole on the other side.to match.
 10-11-2016, 05:12 PM
#256
Making progress on the project!
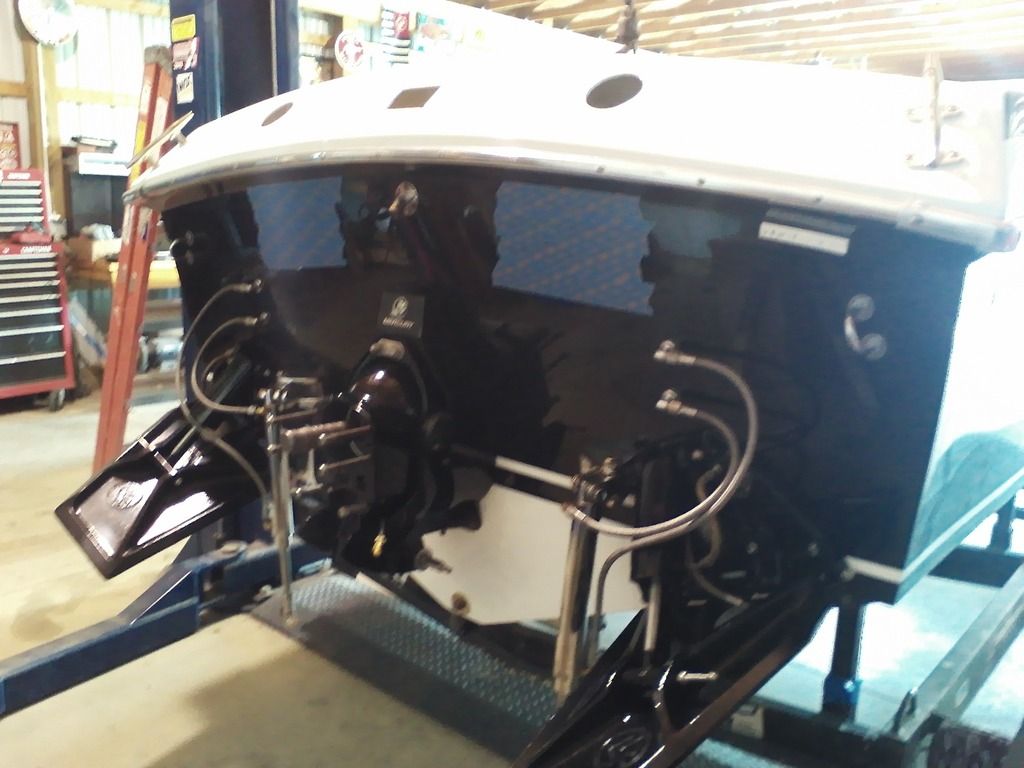
I finally was able to install some hardware in a permanent fashion. The transom is completely polished and received all its hardware.
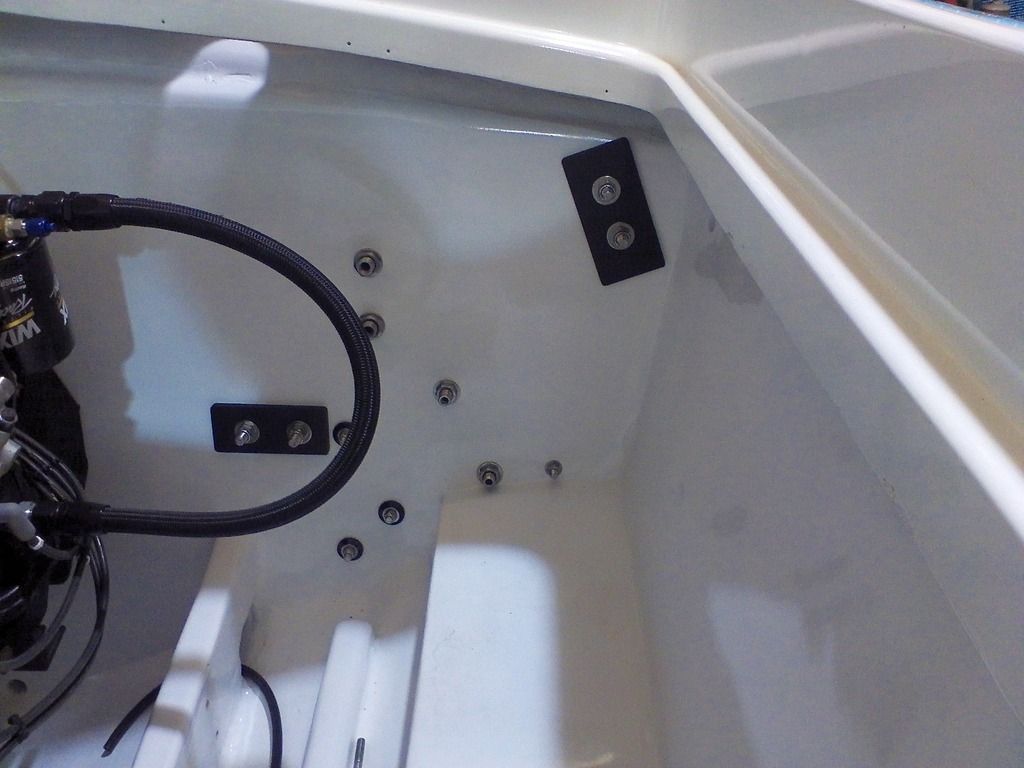
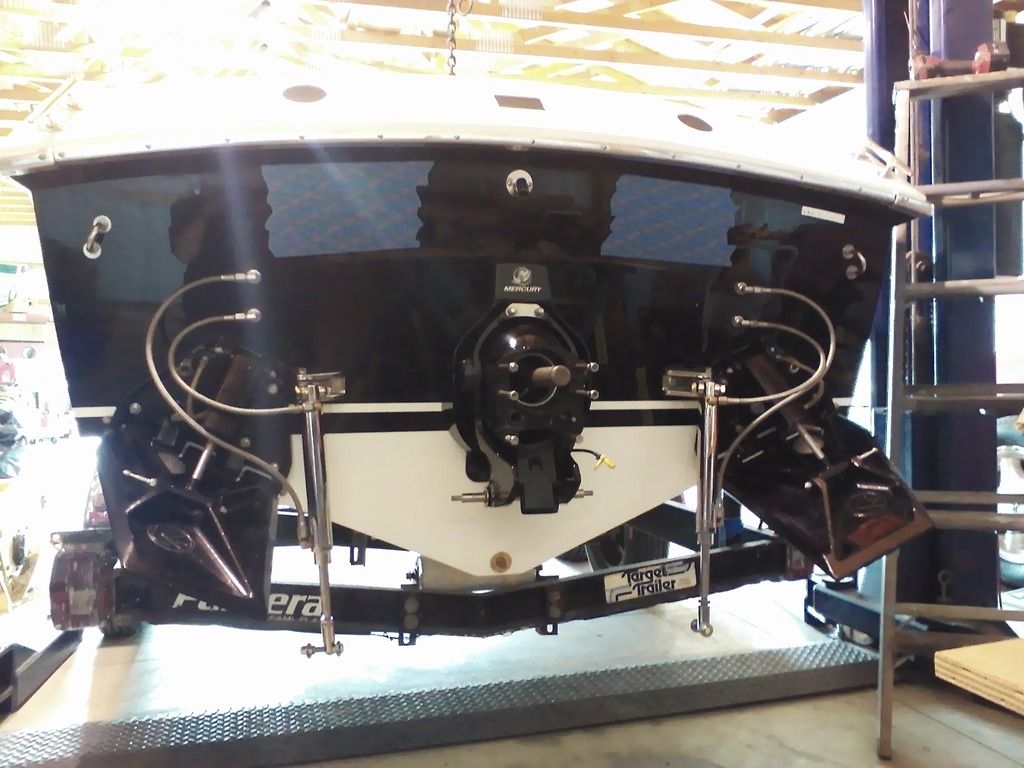
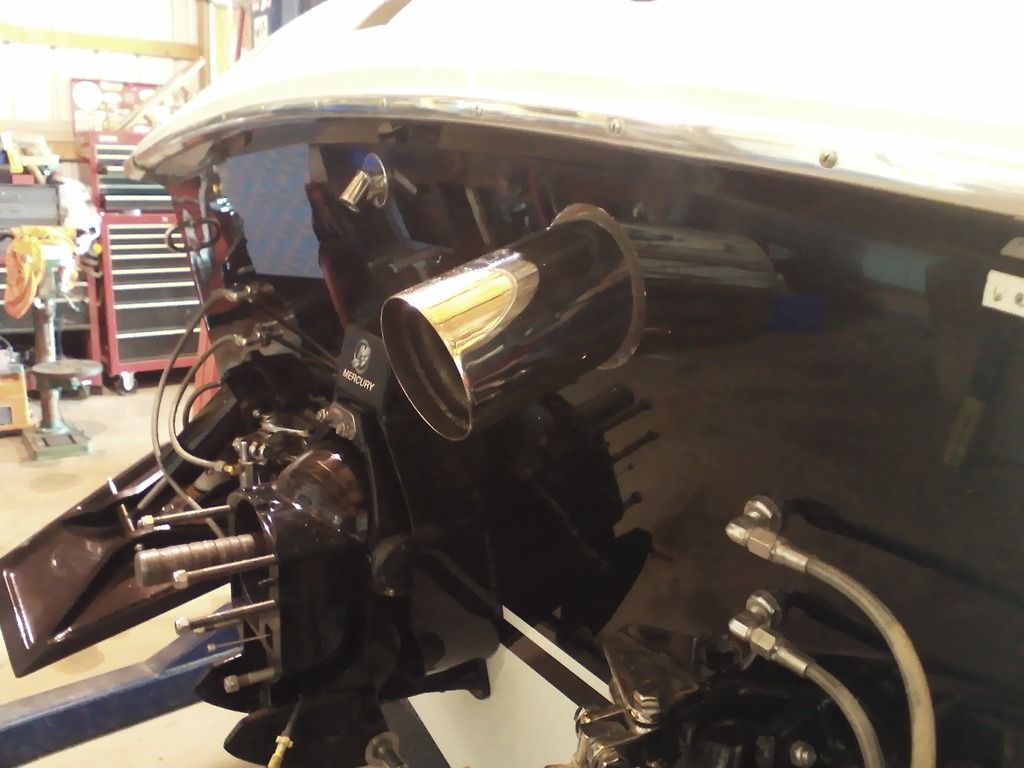
Also, finally got the first hole drilled for the dry pipes. The headers are being modified with O2 bungs and the collectors were cut apart to drop the pipes at a greater angle.
I used some drain pipe to plot out the angle and location of the hole:
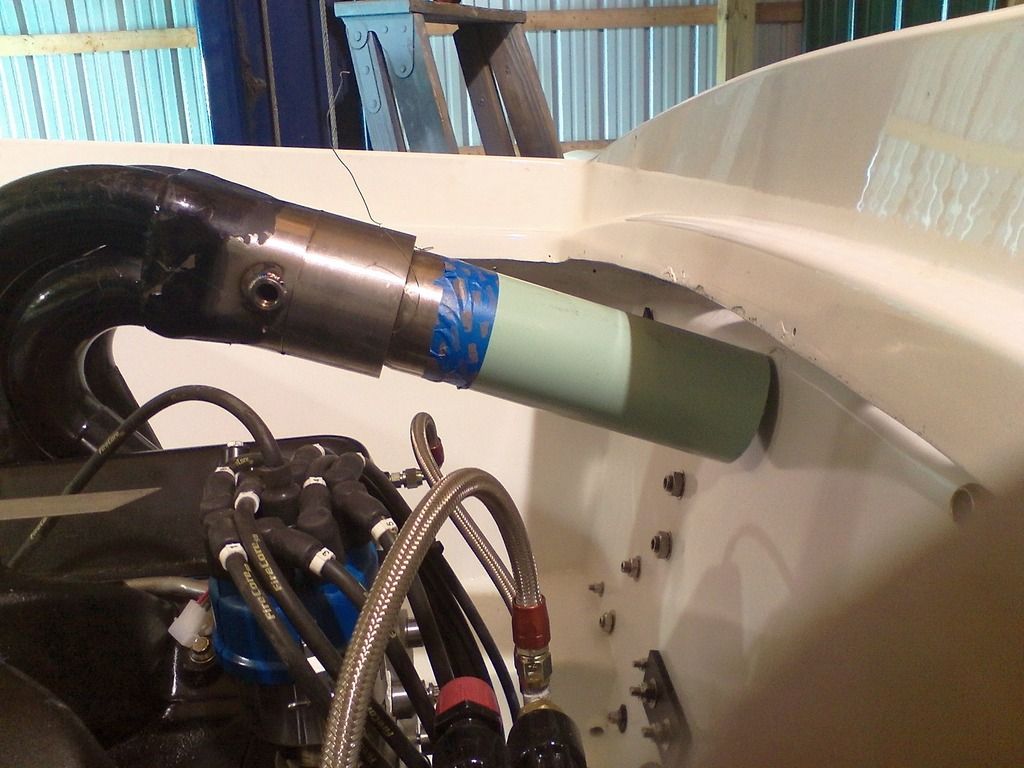
The modified collector:
The hole (this took a bit of finesse and some balling up! Didn't want to foul up this nice trans or drill the wrong location or angle. After some double checking, I let her rip!)
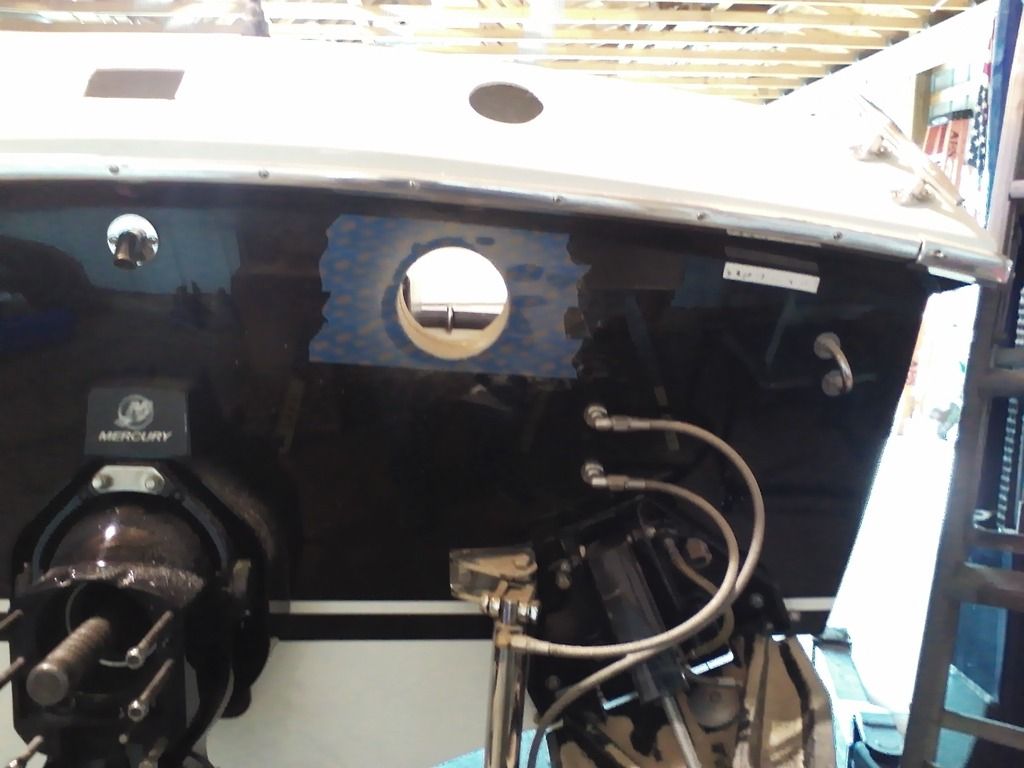
Pipe is in the hole!
I finally was able to install some hardware in a permanent fashion. The transom is completely polished and received all its hardware.


Also, finally got the first hole drilled for the dry pipes. The headers are being modified with O2 bungs and the collectors were cut apart to drop the pipes at a greater angle.
I used some drain pipe to plot out the angle and location of the hole:

The modified collector:

The hole (this took a bit of finesse and some balling up! Didn't want to foul up this nice trans or drill the wrong location or angle. After some double checking, I let her rip!)

Pipe is in the hole!

 10-11-2016, 05:57 PM
#257
Registered
Did you mean to put your tabs on that way? It's better the way you did it. Works more with less Imput
Great job you have done. Hope to get the chance go see it in person.
Great job you have done. Hope to get the chance go see it in person.
10-11-2016, 06:40 PM
#258
Actualy, I was going to mount the tabs horizontally and in near the strakes.
During mockup, I realized I didn't have the room to do so because of the steering.
I've read just about every thread on the subject, and came to the conclusion that each way has its merits and drawbacks. Hopefully, they work like you are saying.
Edit in. Are you talking about the "cut" on the tab being on the outside?
As far as that goes, I figured they would be more effective that way, but I can swap them if I want.
Last edited by vintage chromoly; 10-11-2016 at 06:42 PM.
10-11-2016, 09:49 PM
#260
Im gonna disagree on that one ! My 24 lost 5 MPH with the tabs mounted like that . They just create so much drag and scrub speed like crazy . I know you've already mounted them so its pointless to evan have this discussion now but in the long run if the boat doesn't meet your speed expectations that is a modification you can make down the road . But like everything else you have done to the boat it is all beautiful . Probably one of the best resto's ever on a Pantera .

