Transom and Stringer work - 233
 01-13-2013 | 05:09 PM
#1
Thread Starter
Registered
Joined: Jul 2012
Posts: 128
Likes: 1
From: Michigan
Currently working on my winter project, 1980 formula 233. I knew the transom was wet and have already pulled that apart. When I pulled the motor I noticed that 1 of the 4 lag bolts holding the motor mounts down had wet wood on it and was loose in the Hole.
I was planning on cutting the top off the stringers and replacing that wood as well. I tested drilled a couple spots along the stringer and the wood doesn't seem rotted and wet like I expected. Even right next to the holes for the lag bolts it seemed ok. I would have to imagine there is some wet wood in there either way if the lag bolt holes were that rotted. I plan on going to a custom mount that bolts into the side of the stringer instead of the top for better mounting
My questions are:
1. Is my best bet to still cut the tops off the stringer and start over? Are there any other safe alternatives?
2. If I cut the stringers, are there any critical measurements I should take first? I got the general height, but it is tough to be accurate because the glass on the bottom isn't perfectly smooth.
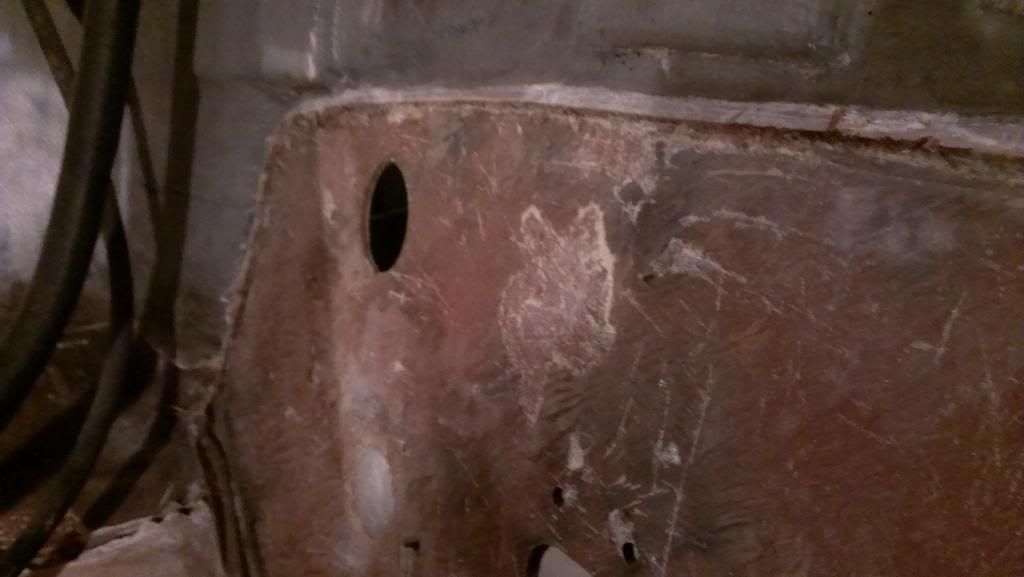
3. On the back fiberglass wall there is a thing "film" of wood left on it, what is the best way to remove this? See picture.
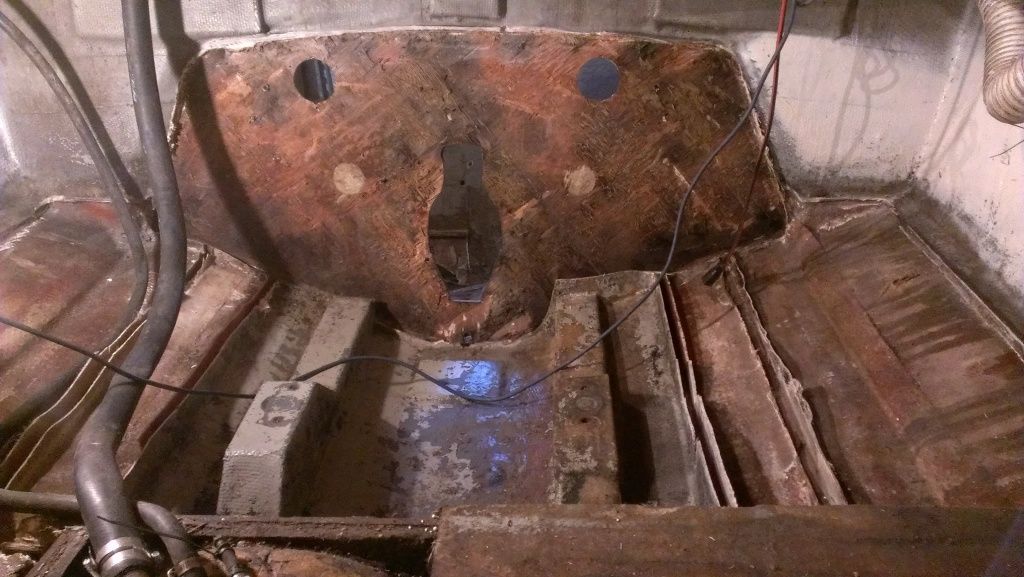
The transom cut out, where I currently am at in the project:
Pictures of the wet transom just for fun:


I was planning on cutting the top off the stringers and replacing that wood as well. I tested drilled a couple spots along the stringer and the wood doesn't seem rotted and wet like I expected. Even right next to the holes for the lag bolts it seemed ok. I would have to imagine there is some wet wood in there either way if the lag bolt holes were that rotted. I plan on going to a custom mount that bolts into the side of the stringer instead of the top for better mounting
My questions are:
1. Is my best bet to still cut the tops off the stringer and start over? Are there any other safe alternatives?
2. If I cut the stringers, are there any critical measurements I should take first? I got the general height, but it is tough to be accurate because the glass on the bottom isn't perfectly smooth.
3. On the back fiberglass wall there is a thing "film" of wood left on it, what is the best way to remove this? See picture.
The transom cut out, where I currently am at in the project:
Pictures of the wet transom just for fun:
Last edited by Deanrw3; 01-13-2013 at 05:25 PM.

 01-14-2013 | 06:52 PM
#5
Registered
Joined: Oct 2012
Posts: 896
Likes: 38
From: Buffalo NY
The motor mounts are just 4x4s with a bevel cut on bottom. I cut the whole thing out, made new ones and glassed them in. Just put a straight edge across the boat and measure down to the mounts. Then when you rebuild make sure the height is the same. Also measure center to center as well as how far from the transom.They were pretty easy to swap out.
01-17-2013 | 02:08 PM
#6
Thread Starter
Registered
Joined: Jul 2012
Posts: 128
Likes: 1
From: Michigan
Thanks 79, I dug into it and it made a lot more sense, wasn't as bad as I expected.
Jason, good to hear from you man. Hopfully I can get this behind me and see you back out on the water in the spring.
Jason, good to hear from you man. Hopfully I can get this behind me and see you back out on the water in the spring.
01-18-2013 | 12:24 AM
#7
Neno the mind boggler

Joined: Sep 2001
Posts: 13,080
Likes: 320
From: toledo oh
My questions are:
1. Is my best bet to still cut the tops off the stringer and start over? Are there any other safe alternatives?
2. If I cut the stringers, are there any critical measurements I should take first? I got the general height, but it is tough to be accurate because the glass on the bottom isn't perfectly smooth.
3. On the back fiberglass wall there is a thing "film" of wood left on it, what is the best way to remove this?
On number three there i have had many 80's Formulas apart and found a few of them had severe build issus on the transoms with very poor lamination and large voids where the wood should have been bonded to the outer skin. After grinding back the remnants of wood and smoothing as best i could the surface was still very un evan and would have been very difficult to wet bed the new transom in with mat. In these extreme cases I set the new transom in with CoreBond, works great and is pretty user friendly. Where are you at in MI?
__________________
Throttles- Cleveland Construction 377 Talon
08 OPA Class 1 National Champion
08 Class 1 Geico Triple Crown Champion
08 OPA High Points Champion
10 OPA Class 1 National Champion ( happy now Ed! )
Throttles- Cleveland Construction 377 Talon
08 OPA Class 1 National Champion
08 Class 1 Geico Triple Crown Champion
08 OPA High Points Champion
10 OPA Class 1 National Champion ( happy now Ed! )
01-18-2013 | 08:47 AM
#8
Thread Starter
Registered
Joined: Jul 2012
Posts: 128
Likes: 1
From: Michigan
On number three there i have had many 80's Formulas apart and found a few of them had severe build issus on the transoms with very poor lamination and large voids where the wood should have been bonded to the outer skin. After grinding back the remnants of wood and smoothing as best i could the surface was still very un evan and would have been very difficult to wet bed the new transom in with mat. In these extreme cases I set the new transom in with CoreBond, works great and is pretty user friendly. Where are you at in MI?
I'm not familiar with CoreBond, I will have to do some research into it. What does it consist of? Once I get it cleaned up a little more, I think I will have a better idea of what it looks like. I'm located just south of Grand Rapids, MI...