

Transom replacement full vs partial
 11-27-2013 | 09:38 AM
#1
Thread Starter
Banned
Joined: Jun 2013
Posts: 1,014
Likes: 0
From: AZ
Currently rebuilding a 93 Mirage trovare and need some opinions on repairing some slight water intrusion on the lower transom. All of the other surrounding wood is dry and rot free. This is what I have thus far. Appreciate the responses. I'm most concerned with strength as I'm installing a 600hp BBC. Thx
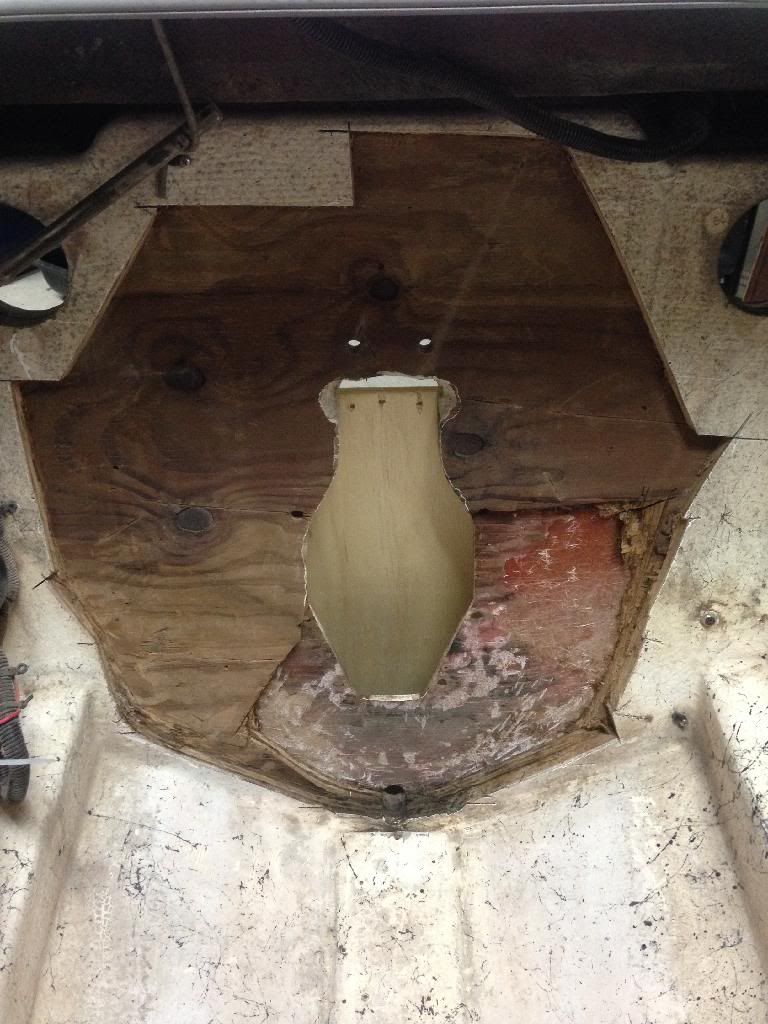
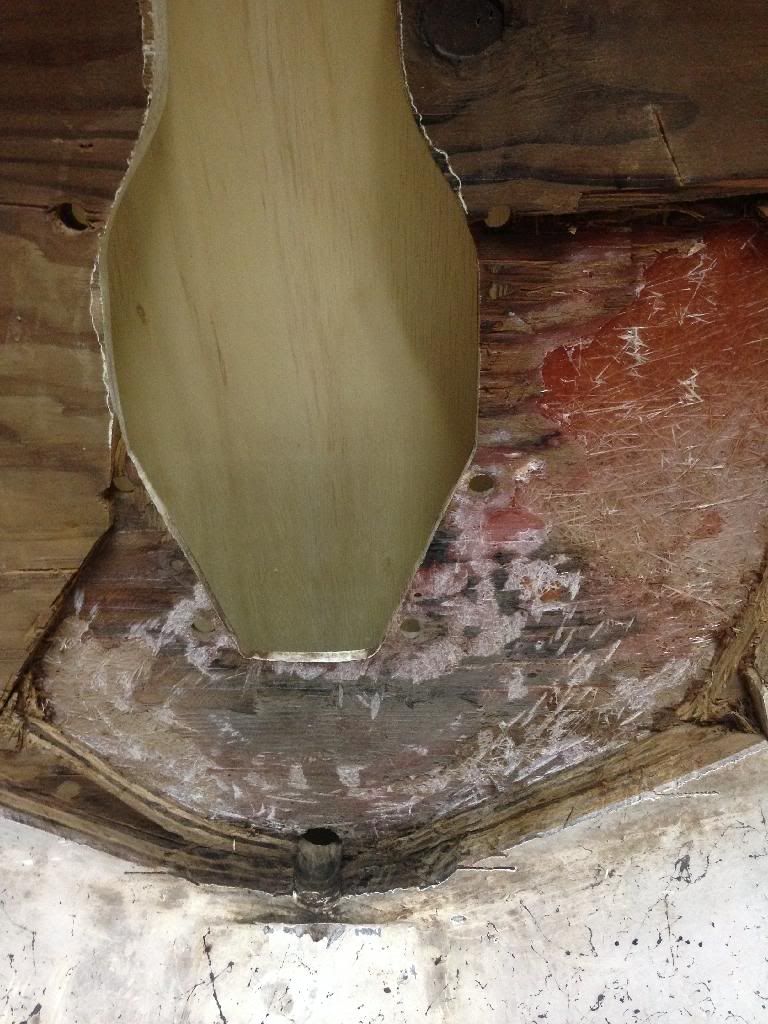
The worst part which was at the very lowest stud


Rest of the wood is rot free and dry


The worst part which was at the very lowest stud


Rest of the wood is rot free and dry

Last edited by Borgie; 11-27-2013 at 09:41 AM.
 11-27-2013 | 12:12 PM
#2
Neno the mind boggler

Joined: Sep 2001
Posts: 13,080
Likes: 320
From: toledo oh
time wise youll have about the same in either way. The prep needed to properly do a partial replacement is about the same as just doing the whole thing and you will have a far far better transom at the end. Shelfing in just the center section requires a stepped joint and it a pain to do and in an afternoon you could just have the entire old transom out ready for grinding (looks like your half way there already  ) . Been there dont that and there are very few circumstances that i would do a partial.
) . Been there dont that and there are very few circumstances that i would do a partial.
__________________
Throttles- Cleveland Construction 377 Talon
08 OPA Class 1 National Champion
08 Class 1 Geico Triple Crown Champion
08 OPA High Points Champion
10 OPA Class 1 National Champion ( happy now Ed! )
Throttles- Cleveland Construction 377 Talon
08 OPA Class 1 National Champion
08 Class 1 Geico Triple Crown Champion
08 OPA High Points Champion
10 OPA Class 1 National Champion ( happy now Ed! )
Last edited by glassdave; 11-27-2013 at 12:15 PM.
11-27-2013 | 12:22 PM
#3
Thread Starter
Banned
Joined: Jun 2013
Posts: 1,014
Likes: 0
From: AZ
Thanks Dave! Would it be best to just cut the stringers that tie into the old transom back a few inches to get all of of it out, then patch those back in once new transom is tabbed in? You can see from the photos how my transom is partially hidden by the laminated floor on the sides. Also, planning to place an order with US Composites today. How much vinyl ester, 1708, chop strand and cabosil should i order? Thanks for your time dave!


Last edited by Borgie; 11-27-2013 at 01:04 PM.
11-27-2013 | 01:38 PM
#4
Platinum Member
Joined: Jul 2008
Posts: 931
Likes: 0
From: Little River SC
I have to say; Beau, Dave is going to be the expert going forward to your transom replacement. From what; I'am seeing the lay-up looks pretty dry, especially between the 2 sections of plywood. Better get going on the de-rigging of the rest of the engine compartment.
11-27-2013 | 02:34 PM
#5
Neno the mind boggler
Joined: Sep 2001
Posts: 13,080
Likes: 320
From: toledo oh
for those corner sections because its boxed in you can get away with a butt joint there (as long as the wood left is dry). One quick question before moving forward with the how-to, what are you using to cut the old transom out with? Circular saw or??? i have some tips in that area that will help
__________________
Throttles- Cleveland Construction 377 Talon
08 OPA Class 1 National Champion
08 Class 1 Geico Triple Crown Champion
08 OPA High Points Champion
10 OPA Class 1 National Champion ( happy now Ed! )
Throttles- Cleveland Construction 377 Talon
08 OPA Class 1 National Champion
08 Class 1 Geico Triple Crown Champion
08 OPA High Points Champion
10 OPA Class 1 National Champion ( happy now Ed! )
Last edited by glassdave; 11-27-2013 at 02:43 PM.
11-27-2013 | 04:47 PM
#7
Registered
Joined: Mar 2011
Posts: 76
Likes: 0
just go at the whole thing and replace it. the work to detail in the little section its easier just to rip the whole thing out and do a whole repair... who knows you might find some more rot in those hidden areas!


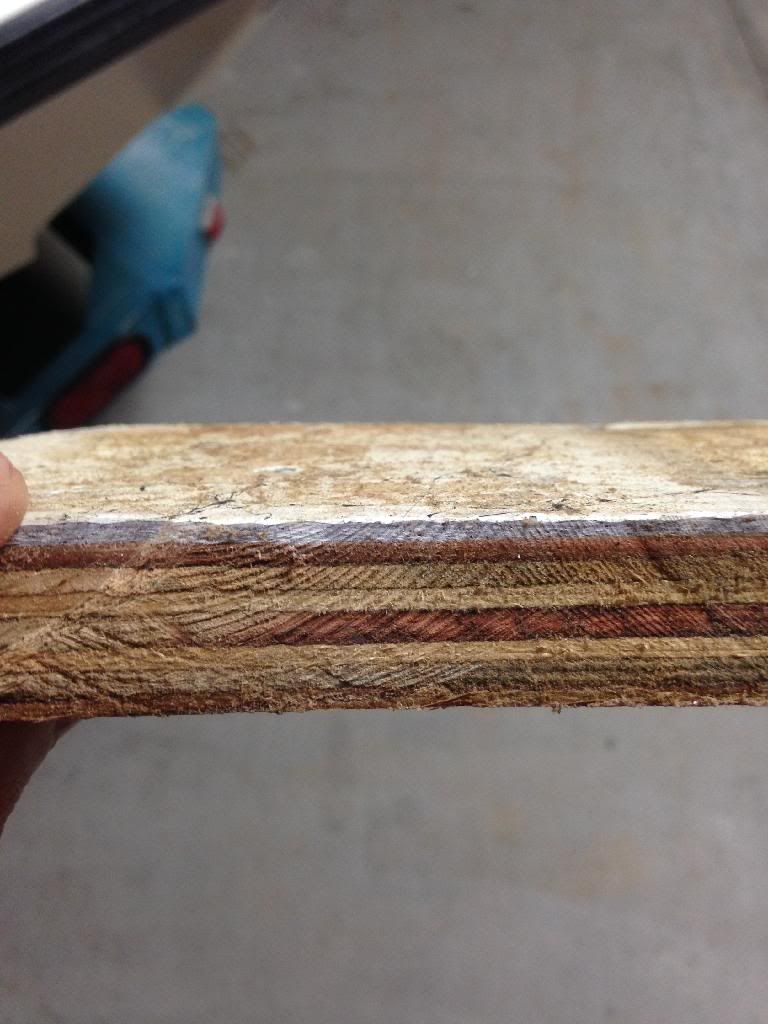
u can see the 4 layers of resin/glass in the slug from the drive cutout.

i dug all mine out with a oscilating saw... it cuts through glass easily and doesnt throw dust around like a typical rotating saw. to get the pieces that are stuck to the outside glass put a flat scraping bit on it... its amazing how well it chips that stuff off so you can get back down to bare glass. Harbor freight has a cheapo that'll get you through the job.

u can see the 4 layers of resin/glass in the slug from the drive cutout.
i dug all mine out with a oscilating saw... it cuts through glass easily and doesnt throw dust around like a typical rotating saw. to get the pieces that are stuck to the outside glass put a flat scraping bit on it... its amazing how well it chips that stuff off so you can get back down to bare glass. Harbor freight has a cheapo that'll get you through the job.
Last edited by ka0tyk; 11-27-2013 at 04:50 PM.
11-27-2013 | 09:18 PM
#8
Registered
Joined: Nov 2013
Posts: 18
Likes: 0
From: Dubai, United Arab Emirates
I have a twin engine 35" Cigarette Cafe Racer and have done only partial transom replacement. agree with your to do complete as your engine is out. Mine only had leakage from stbd side exhaust and it came out ok.


11-27-2013 | 10:53 PM
#10
Thread Starter
Banned
Joined: Jun 2013
Posts: 1,014
Likes: 0
From: AZ
Great work there guys! To answer the stringer question, yes I drilled them and they seem very solid and dry. I have a feeling the rest of the transom isn't going to be fun coming off as it appears solid and dry except for the very lower portion. Could be worse, so I'm pretty pleased. Thanks for all of the suggestions on this, it's very much appreciated! Hope you all have a great thanksgiving.

