

Transom/rear deck modifications
 03-20-2018, 07:18 PM
#1
Dear All
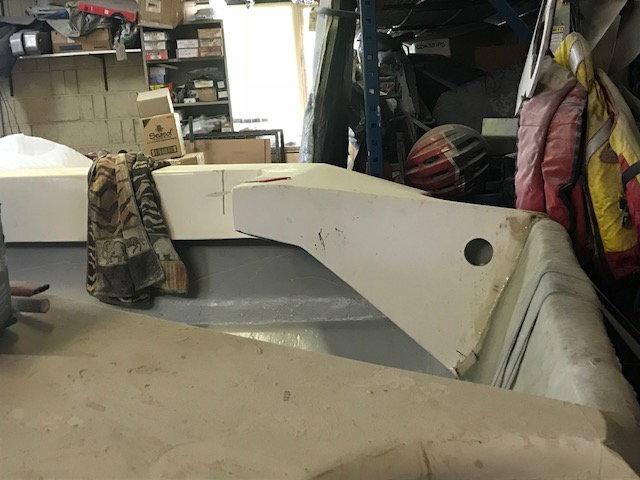
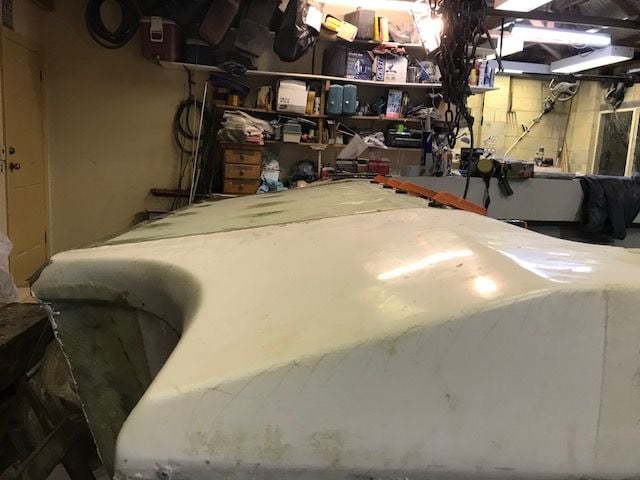
fixing up ski boat 22', have changed transom setup from outboard to Arneson surface drive
Need to modify back of boat as presently wash is likely to come over transom as originally boat was setup for outboard
So was thinking as engine sits forward of the transom as have gearbox and dropbox mounted between engine and transom, then need to cover in the rear
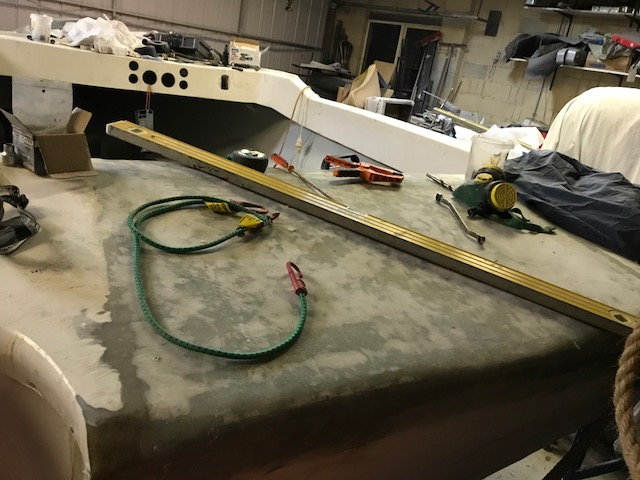
was thinking of using current deck lines, and then would construct engine hatch to cover engine
If this was closed in then would help to protect the trim tabs pumps, Arneson trim pump and bunch of other stuff from water in back of boat
What material would one use to close of the back deck of the boat, was thinking along the lines of using the Coosa 1/2" board (or marine ply) reinforced, with ribbing/structure to support, as may want to walk across the back of the board and need plenty of strength
assuming would just fabricate the structure, as opposed to making mould to build a outer skin/gelcoat etc
Then laying the usual 2* layers 2 oz CSM, 17 oz Multi axial fabric, then would need to gelcoat
If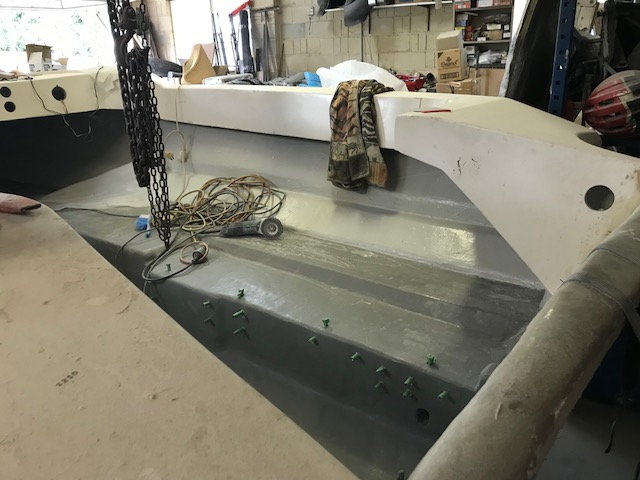
looking from back of transom forward

As boat is now open at back
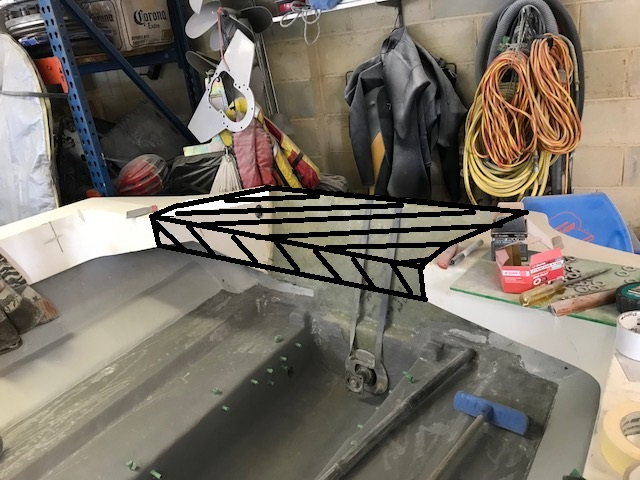
idea to fill in back by falling current deck lines
anyone can throw us some pointers would be good???
here are some pictures of what I was thinking current and filled idea
let us know what you think?
Brett
fixing up ski boat 22', have changed transom setup from outboard to Arneson surface drive
Need to modify back of boat as presently wash is likely to come over transom as originally boat was setup for outboard
So was thinking as engine sits forward of the transom as have gearbox and dropbox mounted between engine and transom, then need to cover in the rear
was thinking of using current deck lines, and then would construct engine hatch to cover engine
If this was closed in then would help to protect the trim tabs pumps, Arneson trim pump and bunch of other stuff from water in back of boat
What material would one use to close of the back deck of the boat, was thinking along the lines of using the Coosa 1/2" board (or marine ply) reinforced, with ribbing/structure to support, as may want to walk across the back of the board and need plenty of strength
assuming would just fabricate the structure, as opposed to making mould to build a outer skin/gelcoat etc
Then laying the usual 2* layers 2 oz CSM, 17 oz Multi axial fabric, then would need to gelcoat
If
looking from back of transom forward
As boat is now open at back
idea to fill in back by falling current deck lines
anyone can throw us some pointers would be good???
here are some pictures of what I was thinking current and filled idea
let us know what you think?
Brett
Last edited by brett fiddes; 03-20-2018 at 07:18 PM. Reason: spelling mistake
 03-20-2018, 07:50 PM
#2
like to see more pics of your project.
the idea that you drew in is a good one, making look stock like it was a factory option.
but add to it about 3-4 inches hanging out over the transom, to help stop reverse prop wash from doing what your trying to avoid.
look up member glass dave for materials and techniques.
skip ahead to 1:56 (good video, of another members arneson conversion, it was a good thread as well)
03-20-2018, 10:06 PM
#3
outonsafari
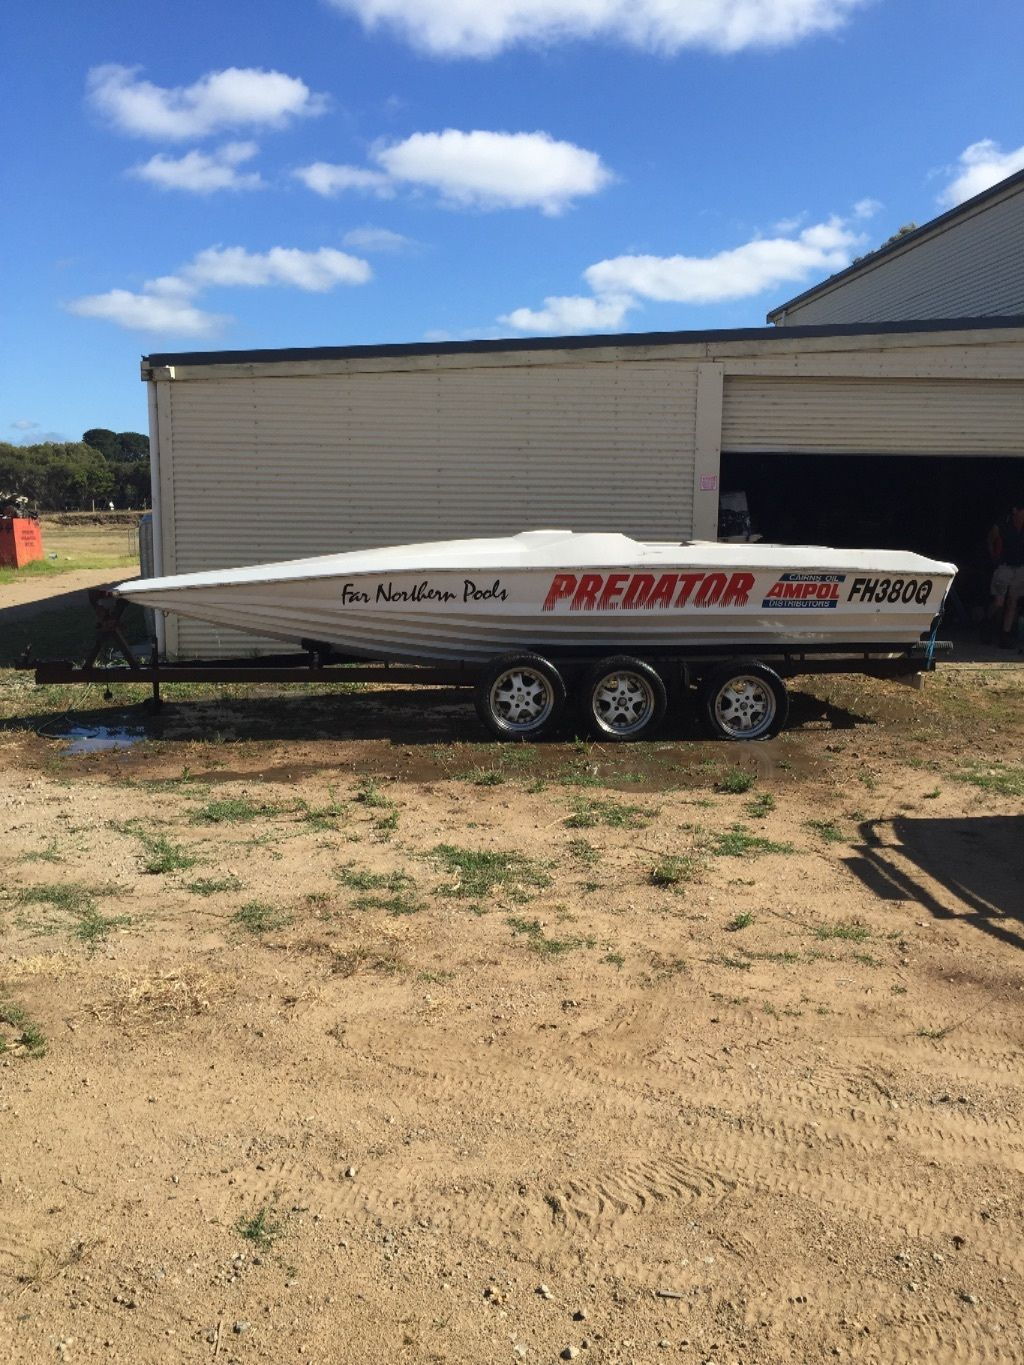
Thanks for the video clip, always liked Donzi don't see to many of them down under
the angle of transom if I can recall is close to 20 degrees except for the lower transom where arneson bolts up, where I encapsulated a wedge to get the angle needed
Outside of Transom at this stage has not been cleaned up, as inside boat at present
only decent picture of boat is prior to ripping the stringers and transom out, however apart from lower transom angle change rest of transom is same angle. Donzi seems to be not raked as my 20 degrees transom, not sure how this would play out?
I've never measured the dead rise

prior to transom modification still 20 degrees above arneson mounting
arneson mounted after transom mods
Thanks for the video clip, always liked Donzi don't see to many of them down under
the angle of transom if I can recall is close to 20 degrees except for the lower transom where arneson bolts up, where I encapsulated a wedge to get the angle needed
Outside of Transom at this stage has not been cleaned up, as inside boat at present
only decent picture of boat is prior to ripping the stringers and transom out, however apart from lower transom angle change rest of transom is same angle. Donzi seems to be not raked as my 20 degrees transom, not sure how this would play out?
I've never measured the dead rise
prior to transom modification still 20 degrees above arneson mounting
arneson mounted after transom mods
03-25-2018, 03:44 AM
#4
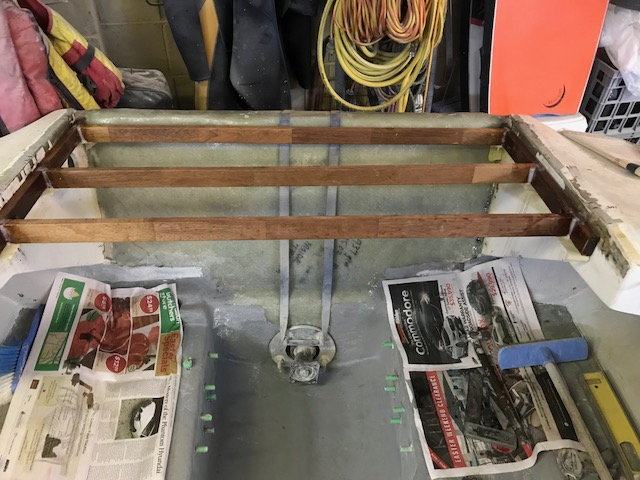
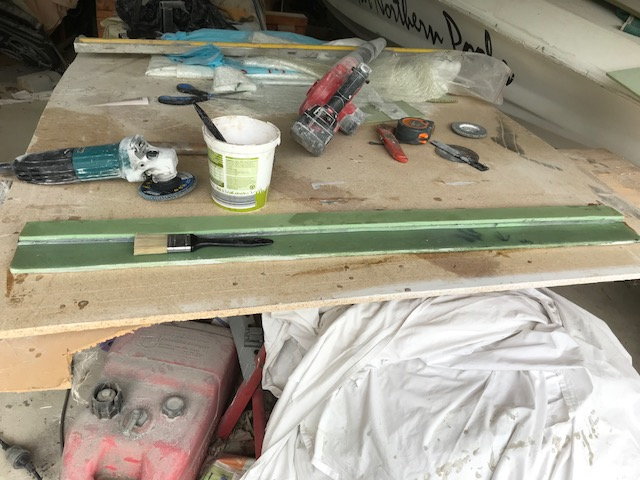
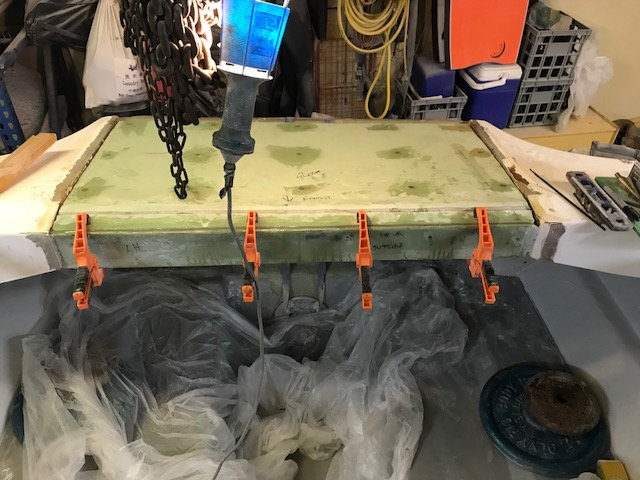
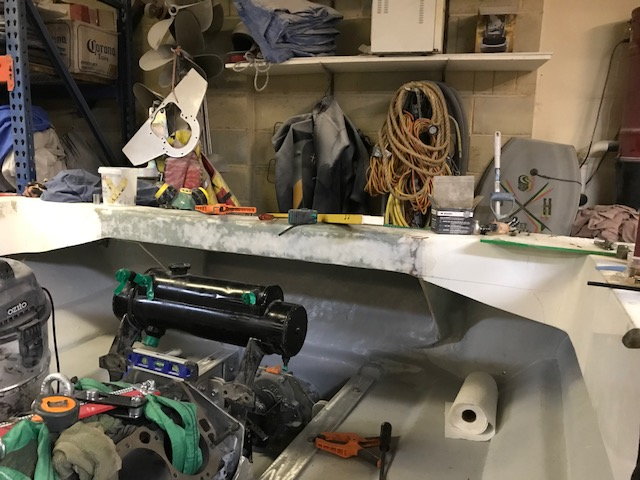
started playing in weekend with rear deck
built some bracing for 40x20mm hardwood, bolted (5/16" SS) and glued, then rebated the 2 main battens for the 3 cross braces
decided to use West epoxy 105/206/413 filler as had it here
Then started laminating 6mm Gurit board for rear deck 43x24" with Vinyl Easter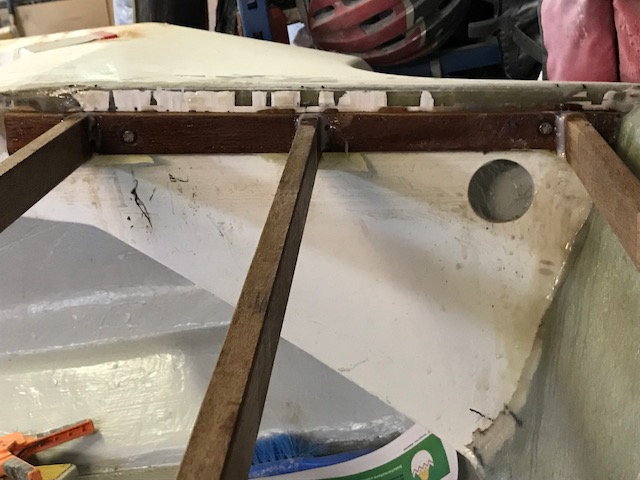
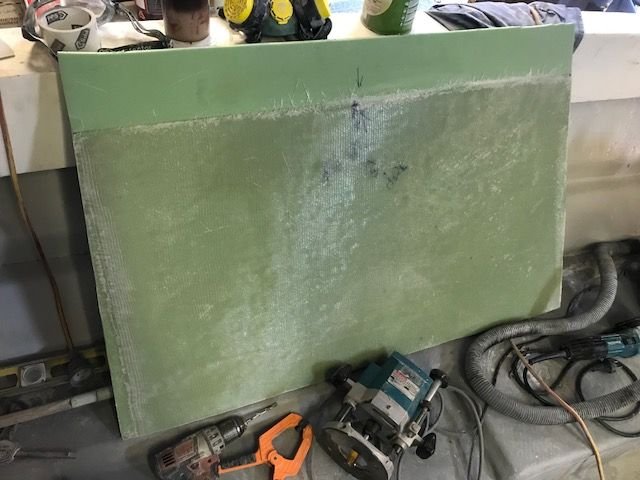
Used 1*2oz CSM, 1* 25oz biaxial on one side
sandwished 2oz CSM in between another 6mm board
will lay 2* layers of 2oz CSM and 25oz Biaxial which should bring the new deck +1mm lower than original rear deck
Need to finish fabricating lip on the new rear deck
built some bracing for 40x20mm hardwood, bolted (5/16" SS) and glued, then rebated the 2 main battens for the 3 cross braces
decided to use West epoxy 105/206/413 filler as had it here
Then started laminating 6mm Gurit board for rear deck 43x24" with Vinyl Easter
Used 1*2oz CSM, 1* 25oz biaxial on one side
sandwished 2oz CSM in between another 6mm board
will lay 2* layers of 2oz CSM and 25oz Biaxial which should bring the new deck +1mm lower than original rear deck
Need to finish fabricating lip on the new rear deck
04-02-2018, 07:34 AM
#5
spent weekend finishing laminating the insert
sealed the timber with VE
used 20* 3/8" dia x 2.5" long stainless tapered head bolts and nylock nuts
made up glue with VE and west #403, #413 high strength filler
recessed head bolts and PB over head
already for the 2oz CSM, 27 Oz biaxial
coming together
it will be big improvement over the original open hull
laminating the front fascia for new rear deck insert
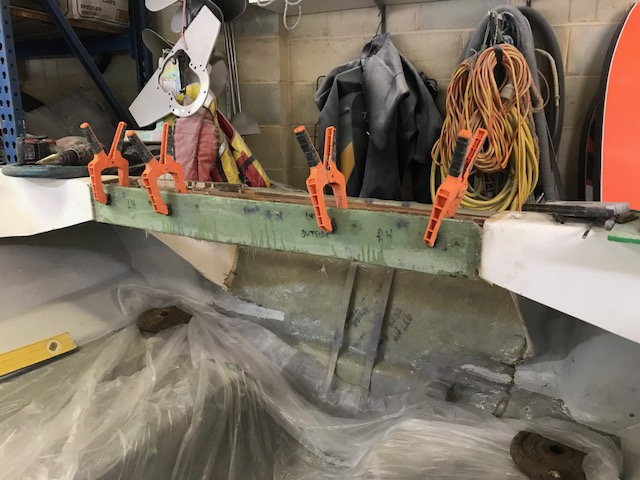
gluing fascia on to battens
rear view
glued and bolted new rear deck insert
side view
sealed the timber with VE
used 20* 3/8" dia x 2.5" long stainless tapered head bolts and nylock nuts
made up glue with VE and west #403, #413 high strength filler
recessed head bolts and PB over head
already for the 2oz CSM, 27 Oz biaxial
coming together
it will be big improvement over the original open hull
laminating the front fascia for new rear deck insert
gluing fascia on to battens
rear view
glued and bolted new rear deck insert
side view
05-23-2018, 08:36 AM
#6
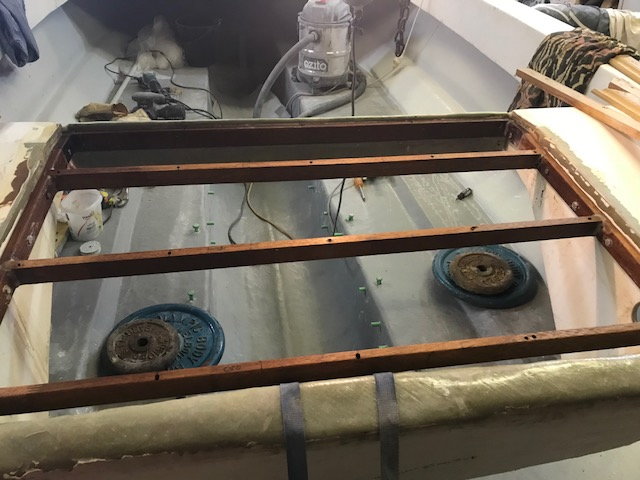
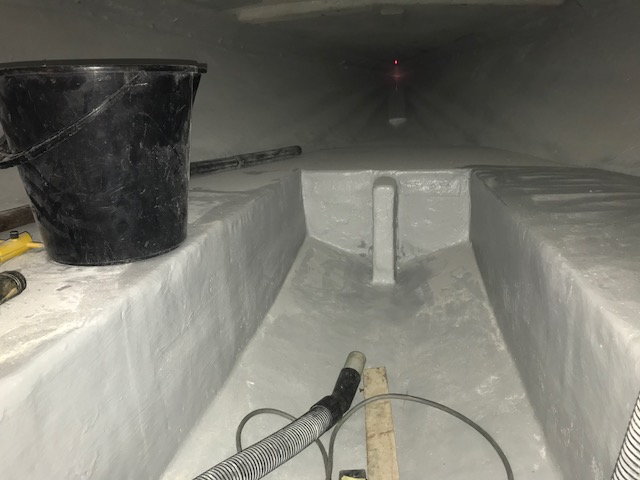
filled rear deck
filled rear deck
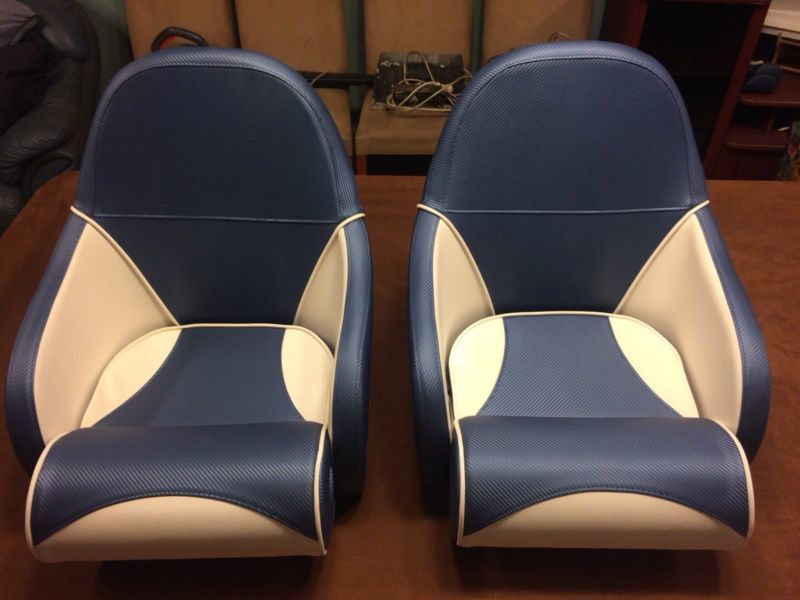
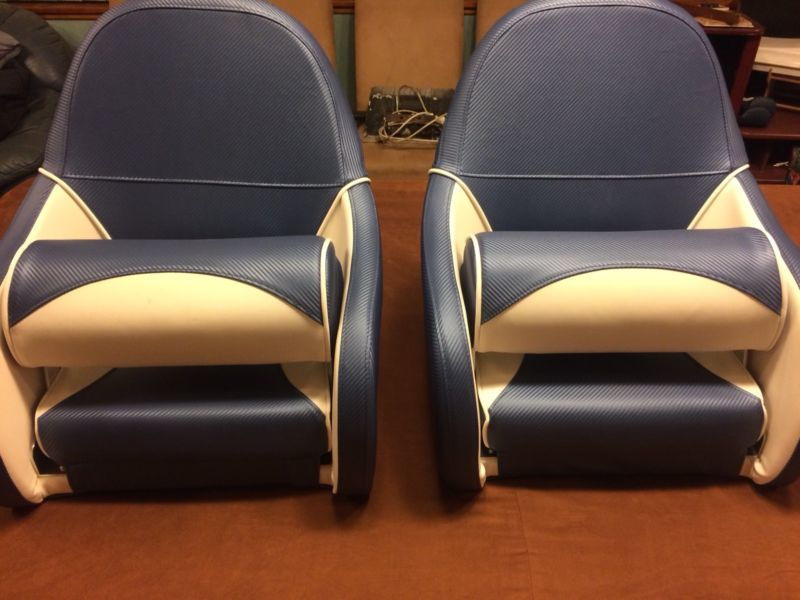
bolster seats which may use
1. Here is the update with rear deck insert:
placed a skim coat of PB on rear deck to fill the coarse surface finish from the 27oz biaxial cloth
Jumped up and down on the deck a few times, so seemed to pass the 100kg Oze test.
Needs to be filled and painted, however will get to this latter
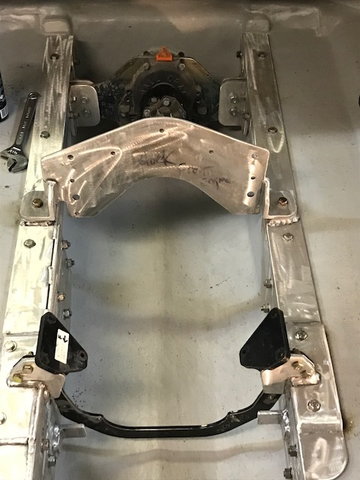
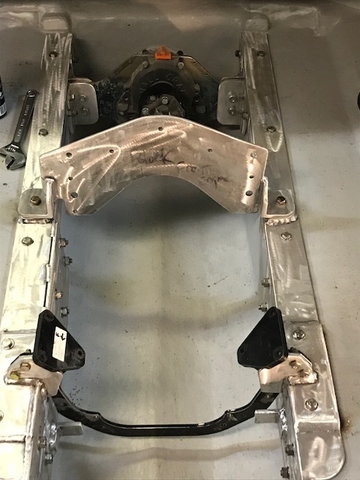
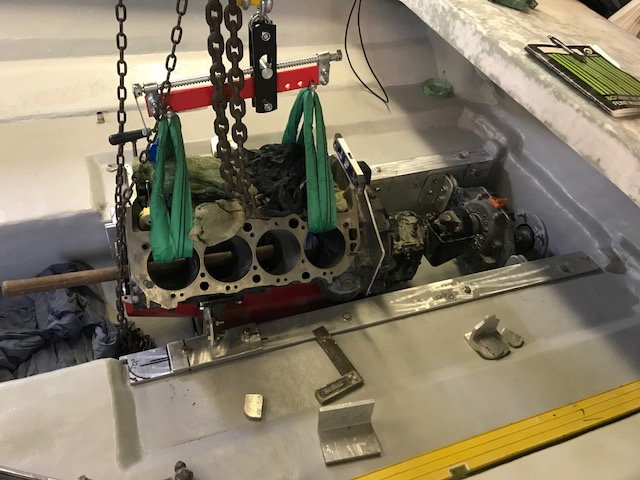
2. finished fabricating aluminium stringer support plates and engine mounts from 10mm (3/8" angle and plate
managed to get a a local welder who used a mig to weld up my handy work all came out fairly good,
the starboard side had slight misalignment with stringer plate but managed to drill out 3 of the 1/2" bolt holes to 5/8" and all was good,
when finished there will be large stainless steel washers and S/S flanged nylock nuts used
all 316 S/S threaded rod epoxied into stringers and under floor
On the vertical connected S/S bolts, drilled out holes into stringer then epoxied in 10mm x 40mm long S/S coupler nuts so they aren't going anywhere
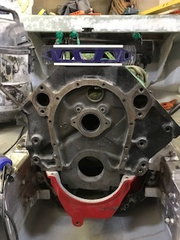
made up mid-plate between engine and crash gearbox from 6mm aluminium plate, which bolt down in similar way through top of stringers
3. fitting Char Lynn Helm 201-1007-003 (211-1007-003 new number) pump into dash, have a 3" column but dash is very thick and need a 6" column, have ordered waiting
4. Measure up the seats and location, could have room for 3 seats as i have 1930mm (76") across inside of boat and seat are 500mm wide
wont have room for rear seat, wanted to run some offshore Donzi/scarab seats, however know where to be seen down under
seats need to be mounted to floor so perhaps maximum 4-5" height to pack seat. I was asking in another post about suspension under seats
However most probably uncommon for ski boat (fun) as most of time thgese are on lake or river, however I'll be running in bay in harbour so will be taking a few waives
thought I might as well looks at this while setting up steering
5. pulled out the closed water system which managed to get 2* complete mercruiser 7.4 litre system from a guy which was repowering his 38ft boat with new 383 chev which came with there own closed cooling system, so picked these up at good price,
6. Purchased 1.25" water pickup, ball valve, and have Gil strainer that needs to be placed somewhere
7. started cutting some holes in dash for the Gaffrig Gauges
8. This is the problem when your starting with just the hull and its not a factory build, everything takes time to fit when youre doing it yourself
so many things to think about present, but its good to start the engineering side, as stuff at present going back into boat to set up
I'll post some pictures shortly
05-23-2018, 08:46 AM
#7
attached the pictures as were on my work PC
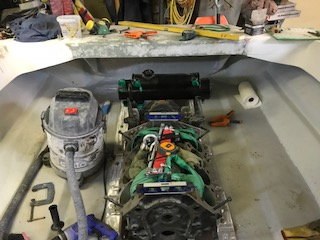
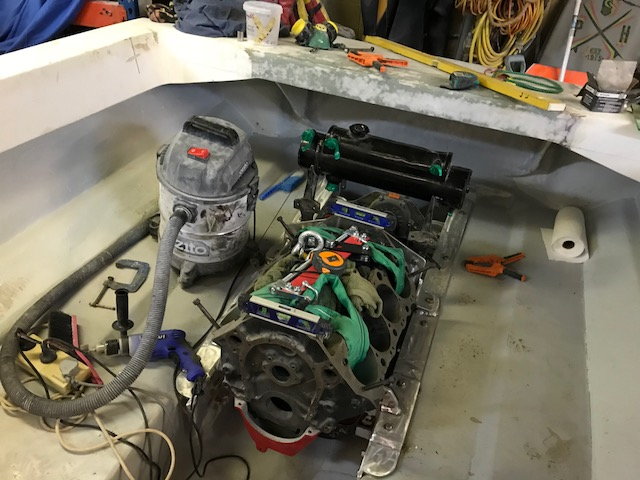
Need to position closed water system in front of engine, was trying it out at rear to see how hoses would work out
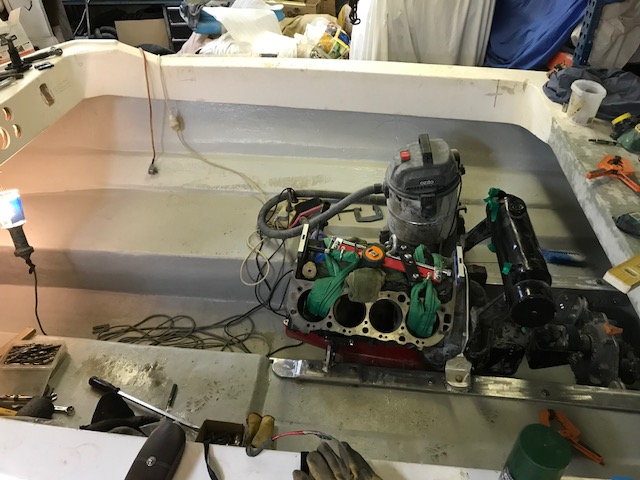
Fabrication using 10mm angle/plate along stringers and mounts to pick up the mercruiser saddle mount
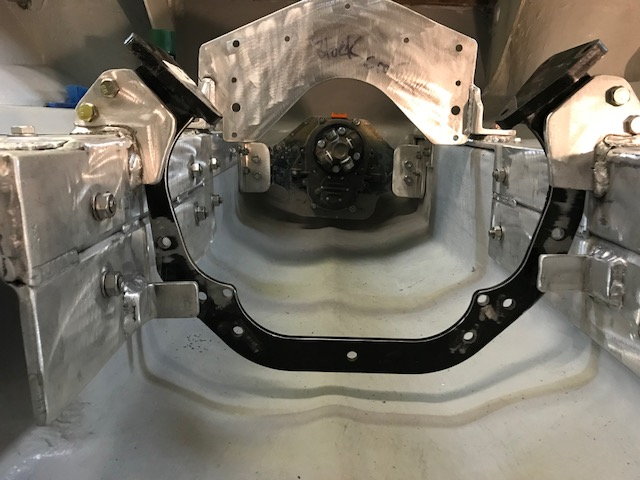
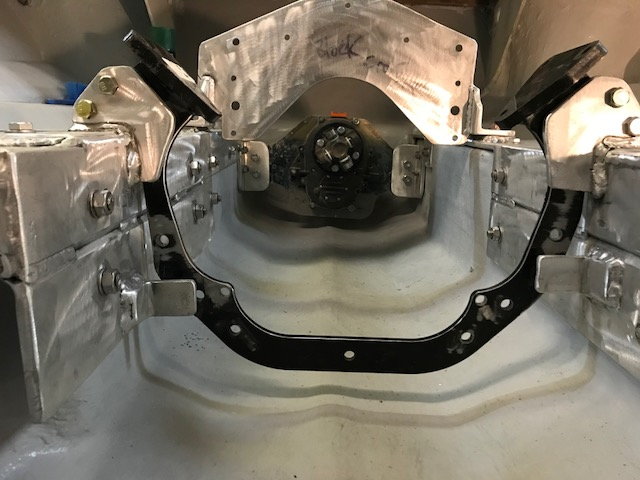
checking the centre of motor with laser pointed mounted in cam bearing location on engine if you look you can see red dot in centre up front
Need to position closed water system in front of engine, was trying it out at rear to see how hoses would work out
Fabrication using 10mm angle/plate along stringers and mounts to pick up the mercruiser saddle mount
checking the centre of motor with laser pointed mounted in cam bearing location on engine if you look you can see red dot in centre up front
 05-23-2018, 10:34 AM
#9
this is awesome, that boat will be a ton of fun when it's completed.
keep the thread updated, thought you gave up on it.
keep the thread updated, thought you gave up on it.
05-24-2018, 06:22 PM
#10
not given up, just need to work as well
I'm starting with just the hull, and need to add in the stuff as we go, however this is first boat project need to think ahead so don't stuff things up and have to redo the work
on the subject of closed water cooling
was going to use conventional 7.4 litre mercury heat exchanger as shown in picture. If using HX to cool half system, how much additional water would one need to allow in puke tank/radiator over flow/ expansion tank to cool twin turbo 502ci or 560ci BBC
Do you think additional gallon tank would be sufficient
Why use half cooling system?
as I have the twin mercury HX here and would like to utilise them, and am mindful of the additional heat that would be transferred into HX in i went full cooling system and routed the closed cooling system through aluminium exhaust
So starting off conservatively

