

Transom question Pantera 24SE from 1992
 01-25-2019, 07:05 AM
#1
Gold Member
Thread Starter
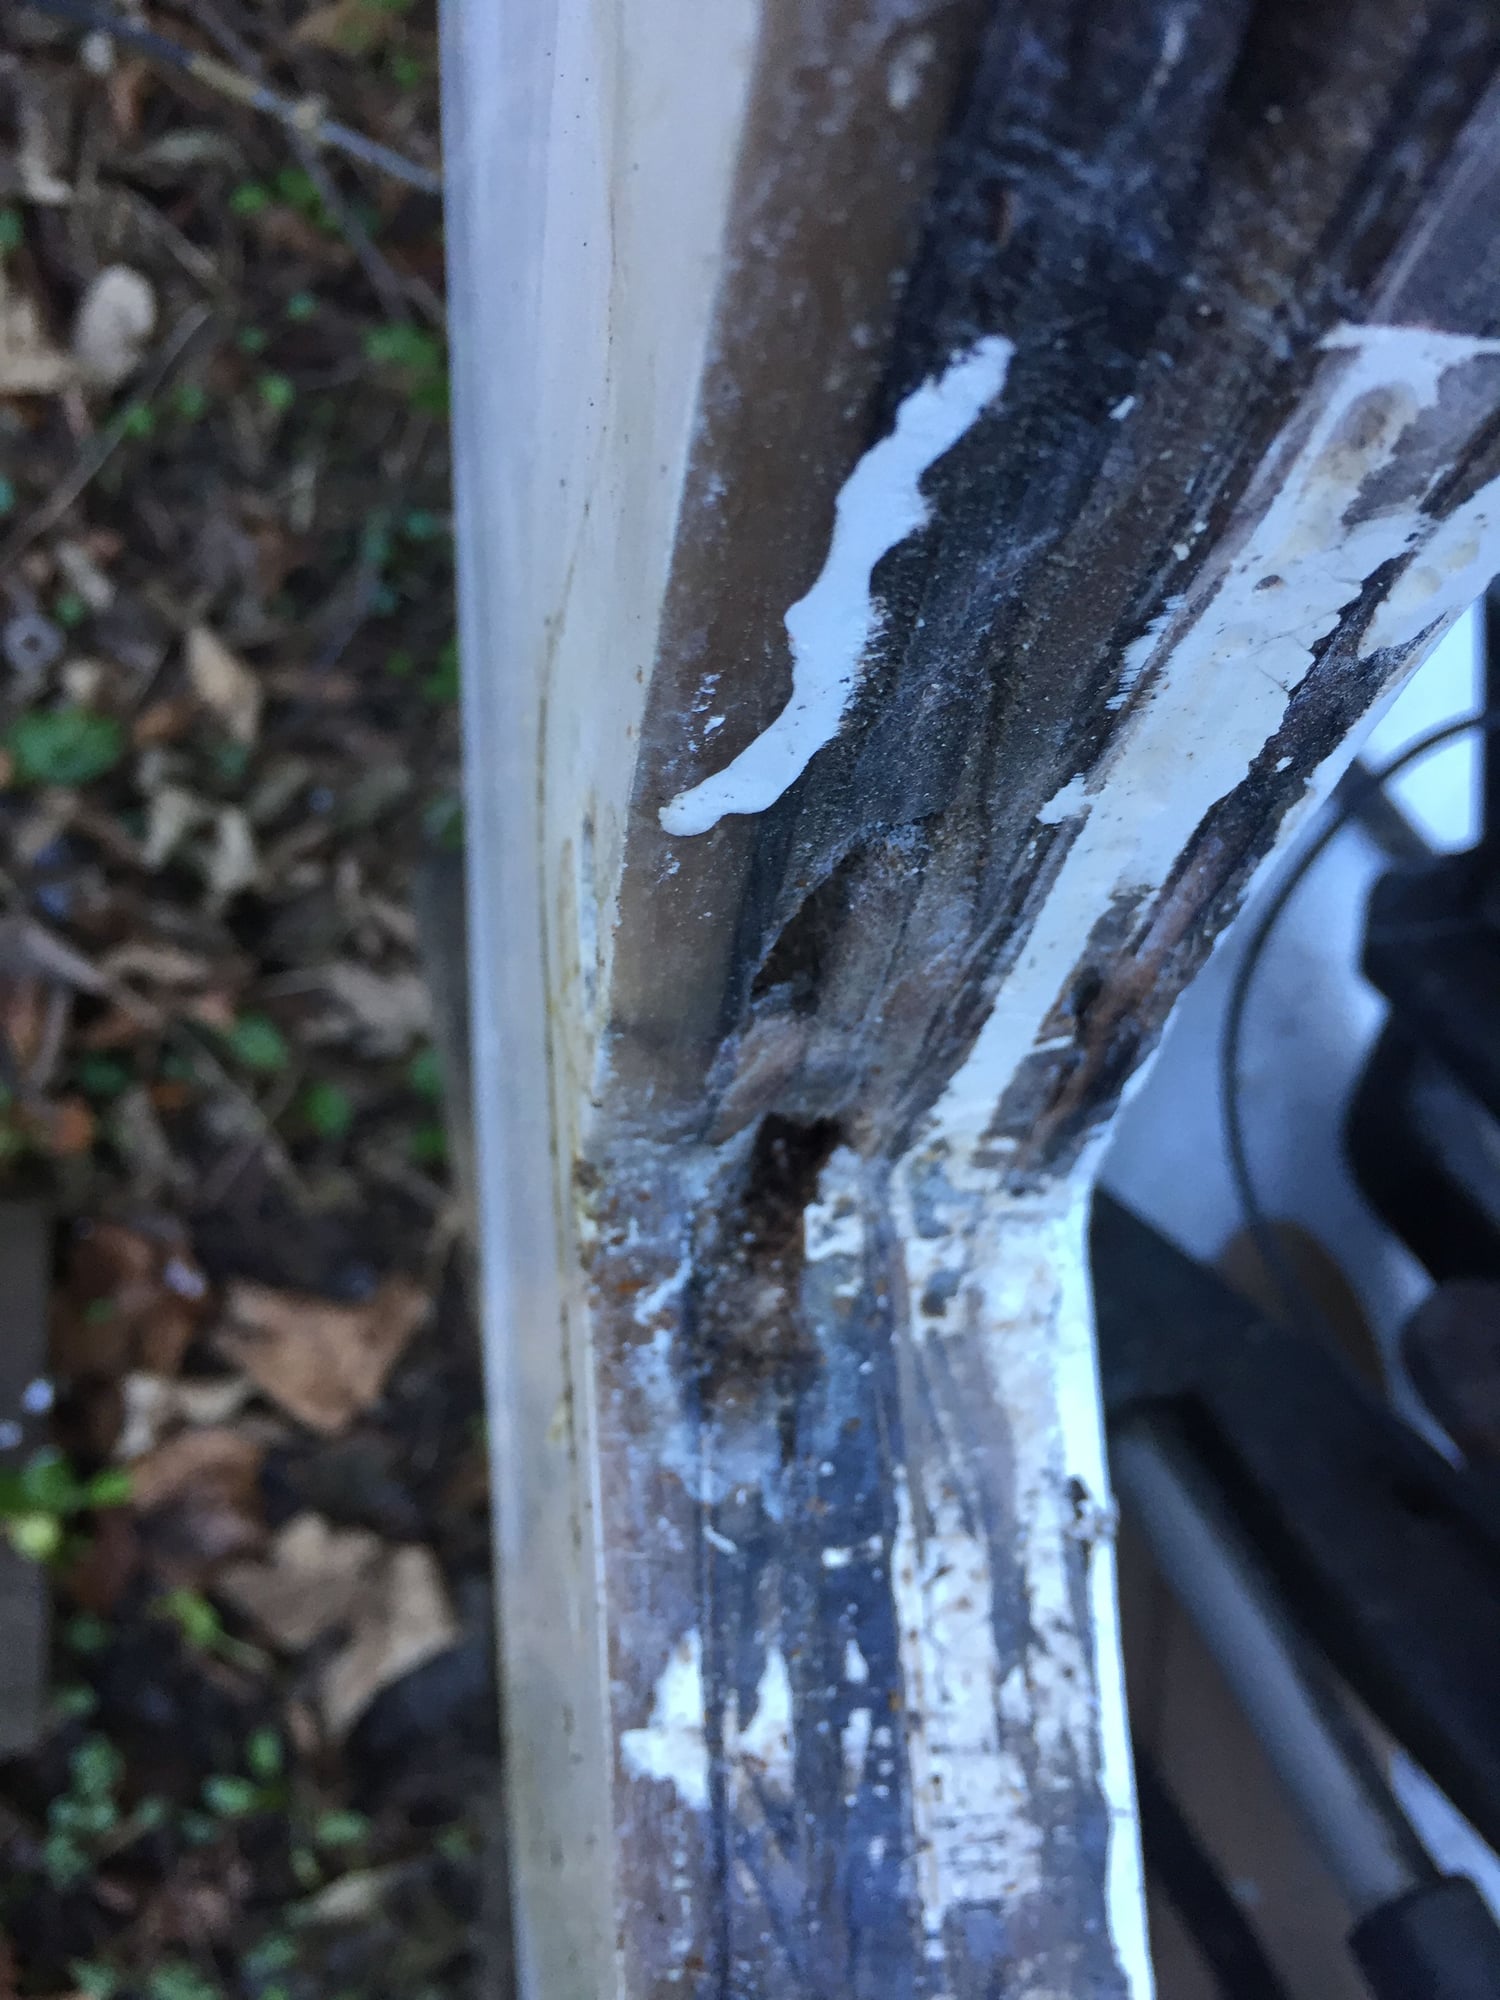
Pantera 24SE built 1992. When refreshing the engine I noted some corrosion on the transom plate of a BRAVO 1. When removed it revealed that there had been a leak in the transom and one stud and all 4off bolts had signs of corrosion reducing the section in several cases by half.The inner surface of the transom shows signs of indentation to about 1/16th of an inch as shown and Im not sure whether this is settling of the fibreglass or a soft transom core. Pantera transoms appear to be 2 inch in width, a 7/16� fibreglass outer section, a 1+3/8� ply core and a �� inner section.Question folks is do I need to cut out the transom or can I do a local repair? If local what should I do? Pics of the transom rot also shown;

 02-11-2019, 01:14 PM
#3
Gold Member
Thread Starter
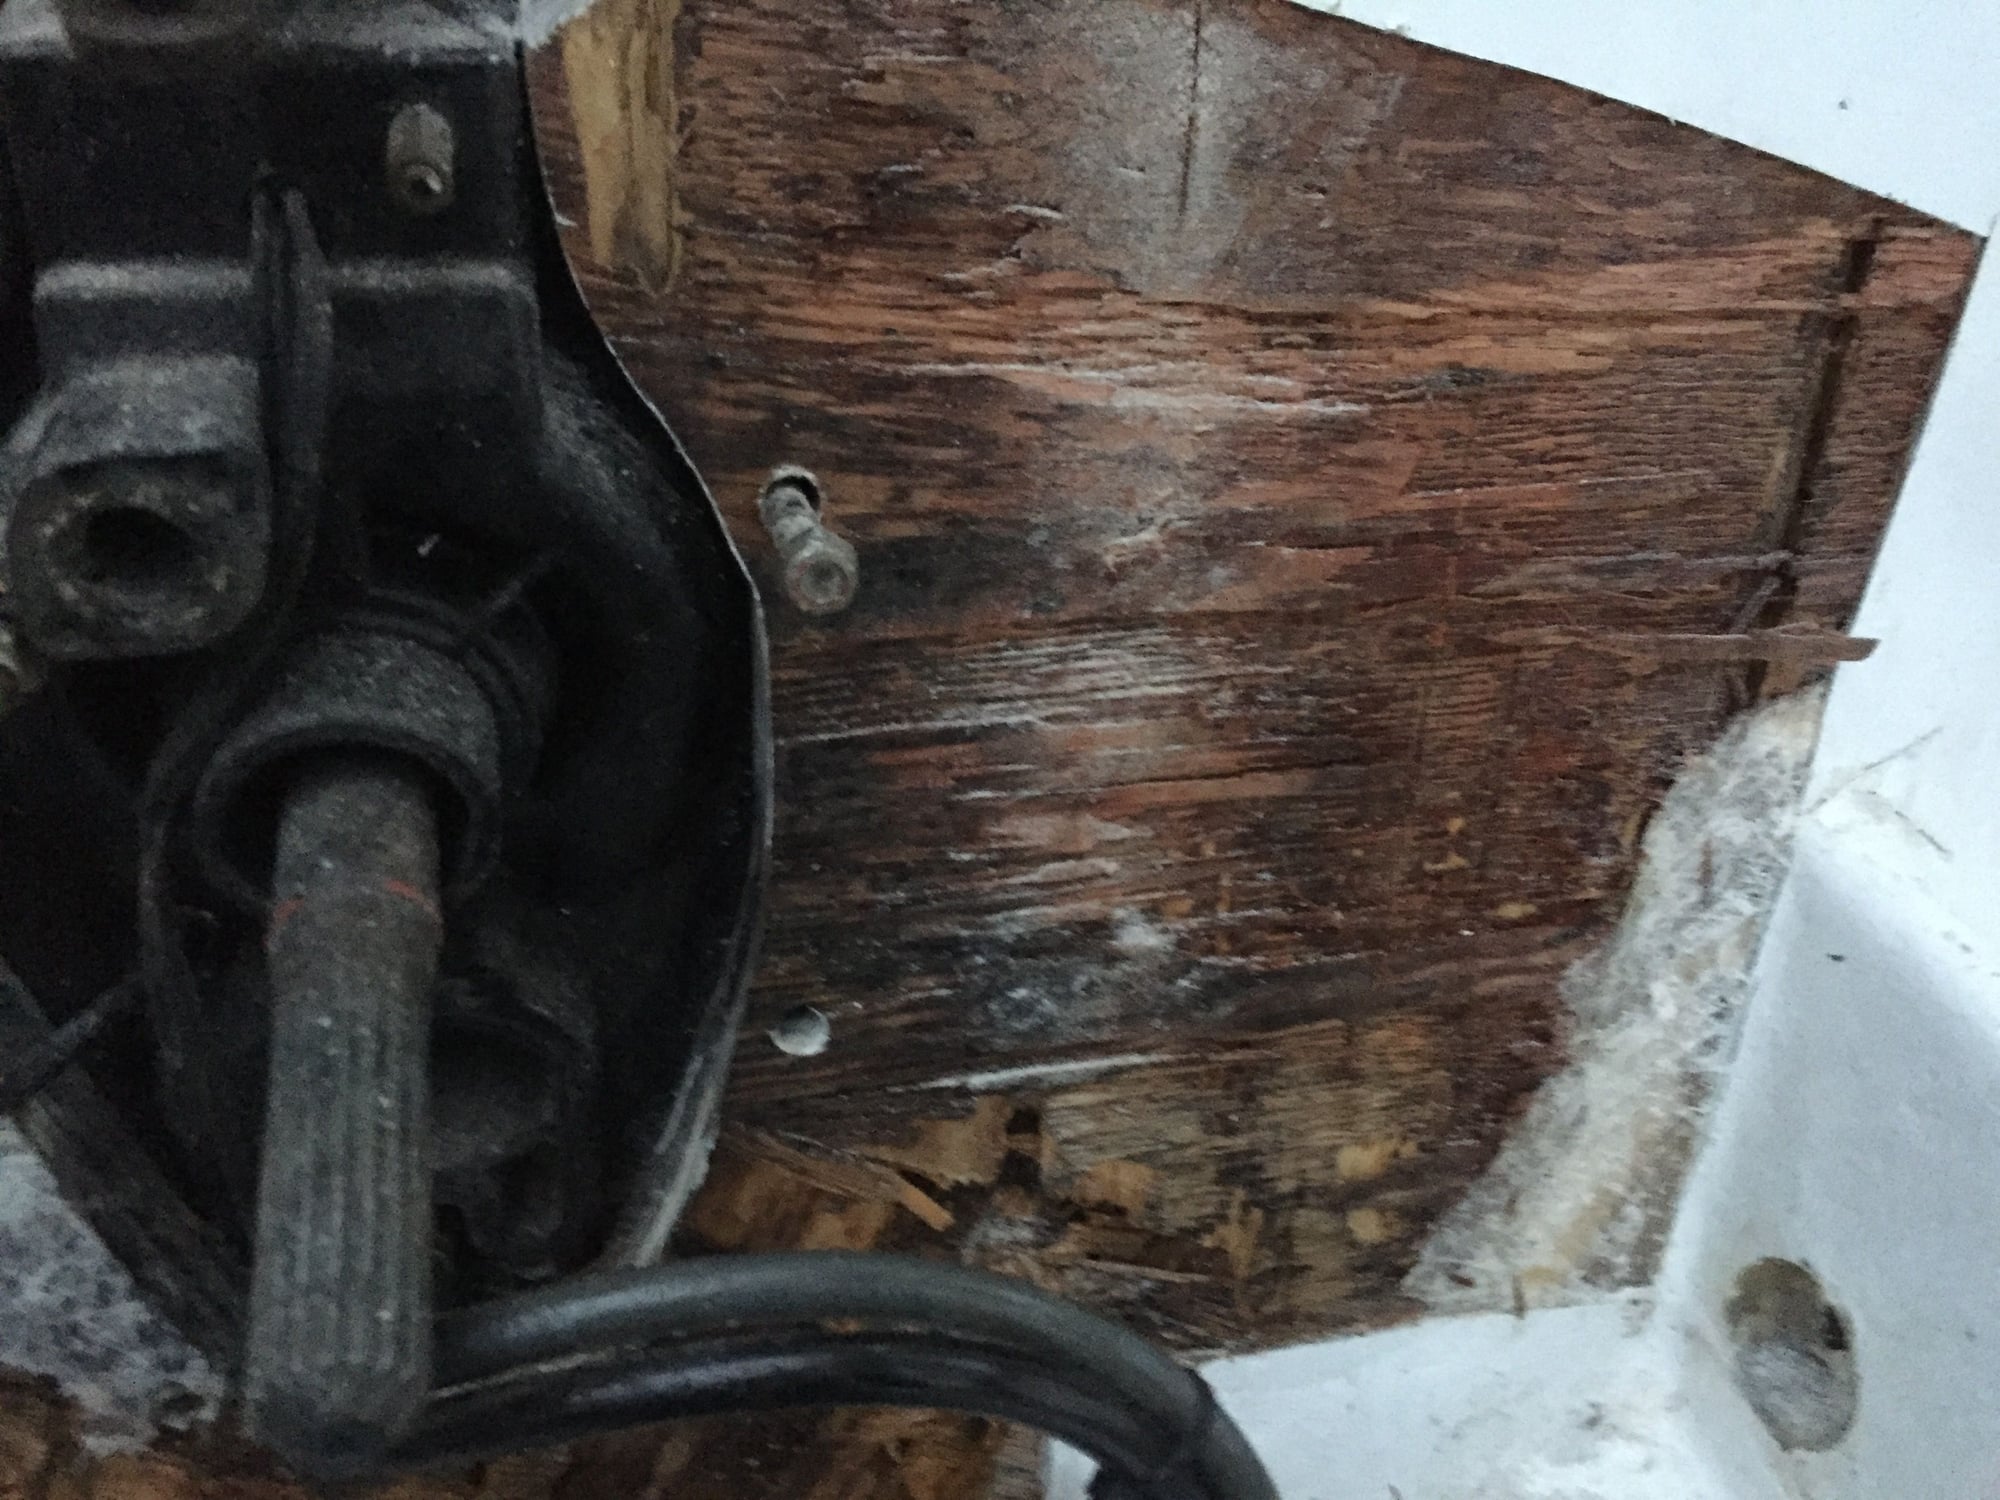
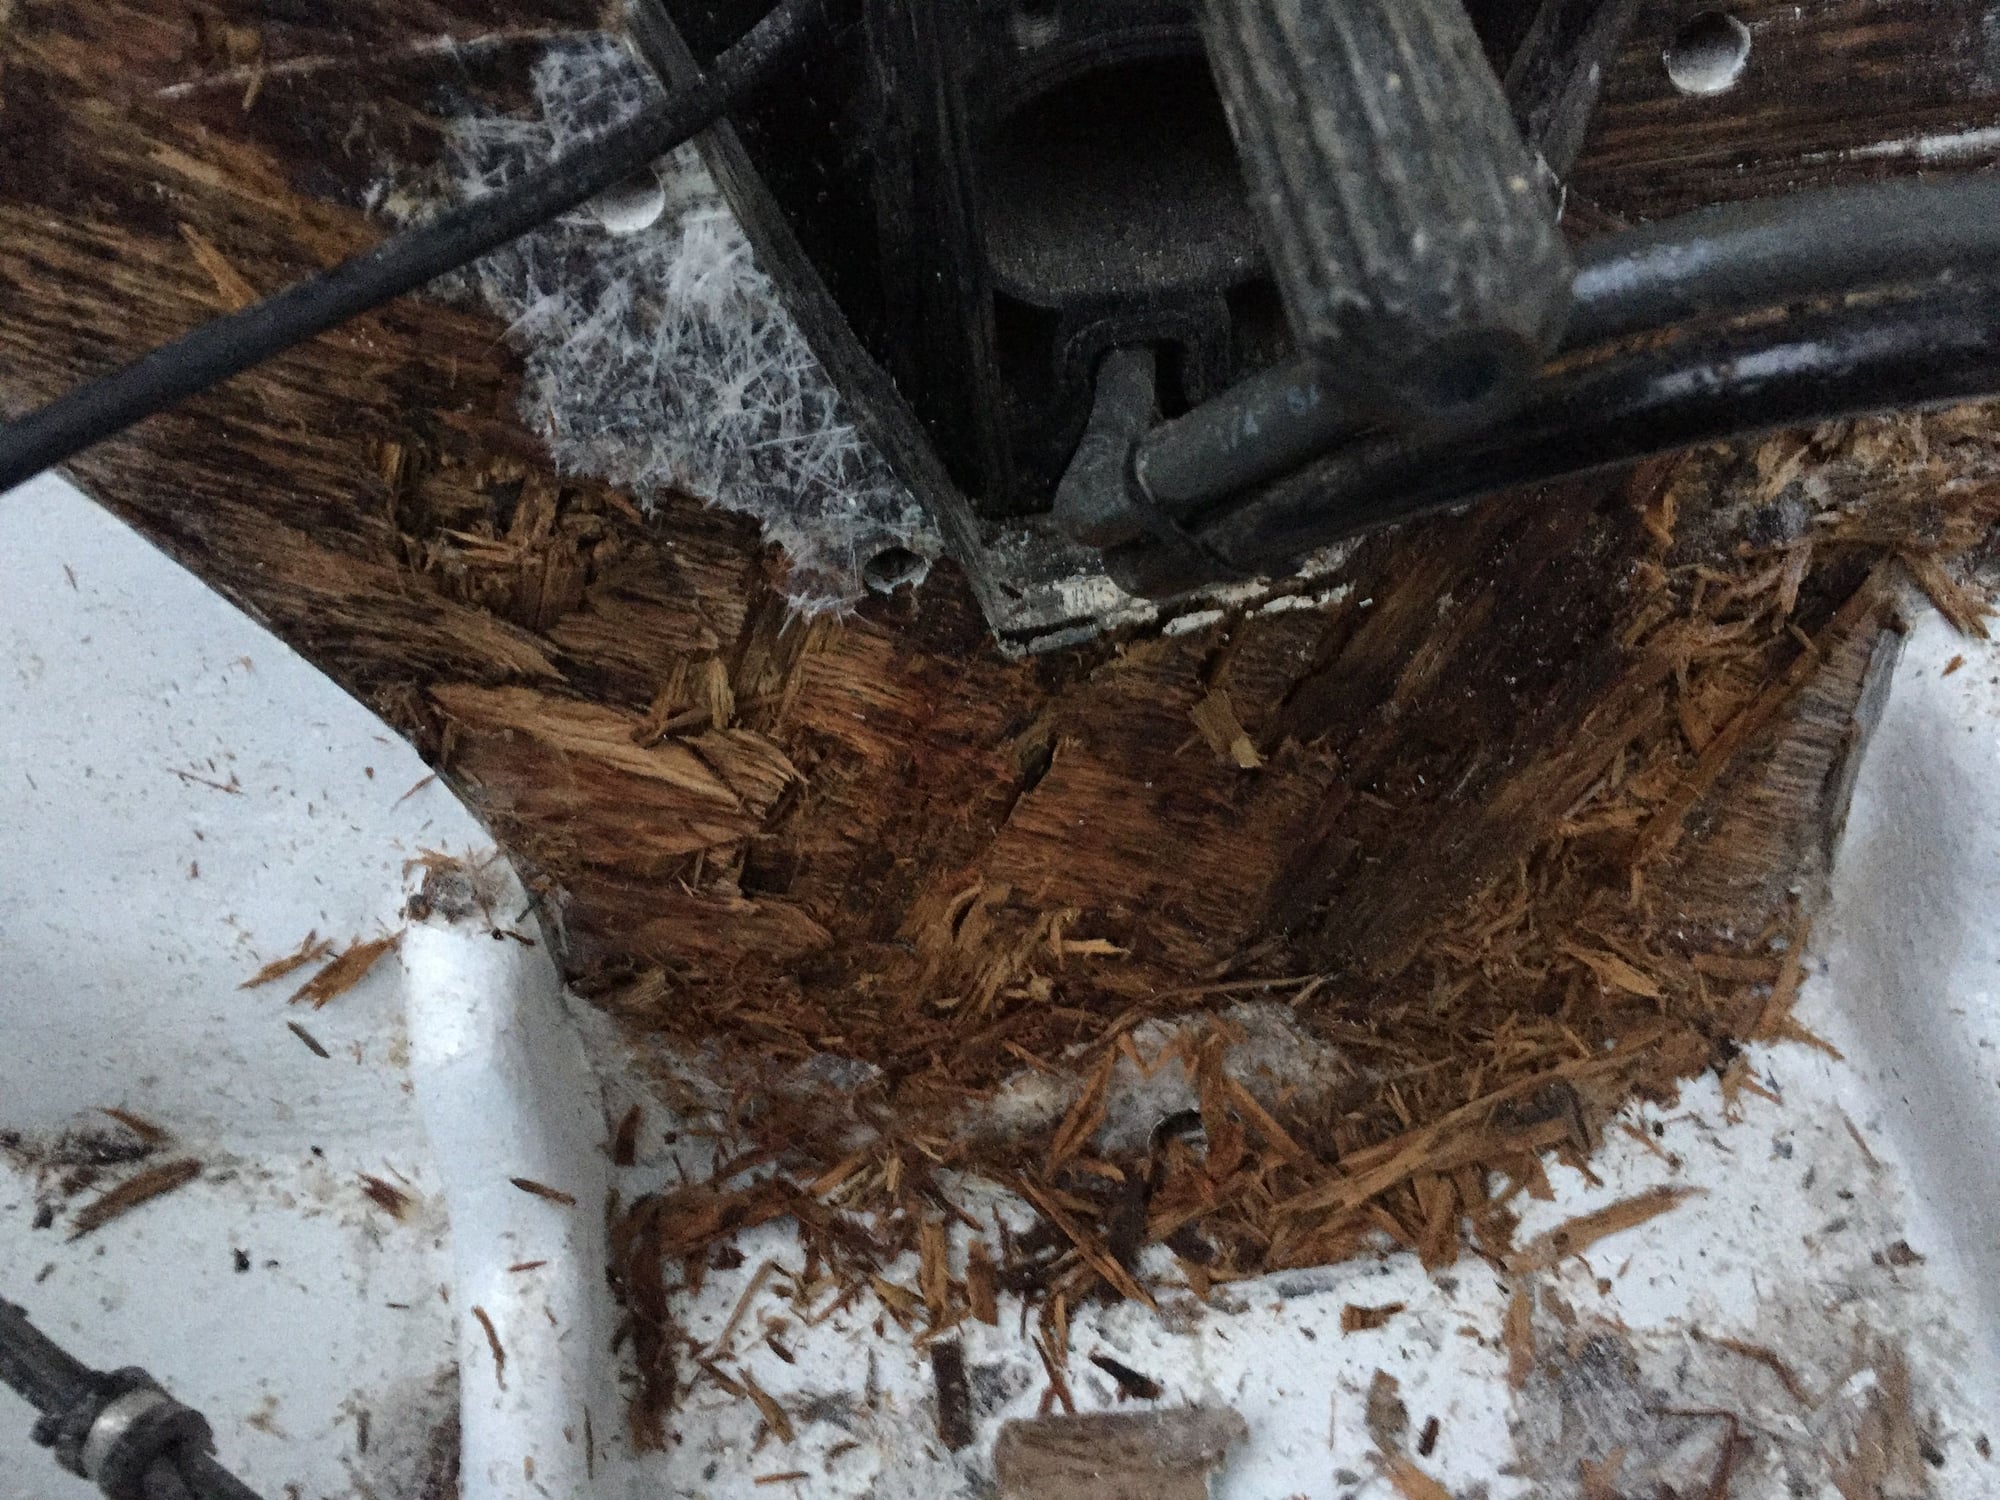
Got to boat at weekend. Initial drill brought out wet wood so I took a multi-tool cutter and opened up the inner fiberglass. First surprise is that the wood 1 3/8" is wet and some has gone very soft.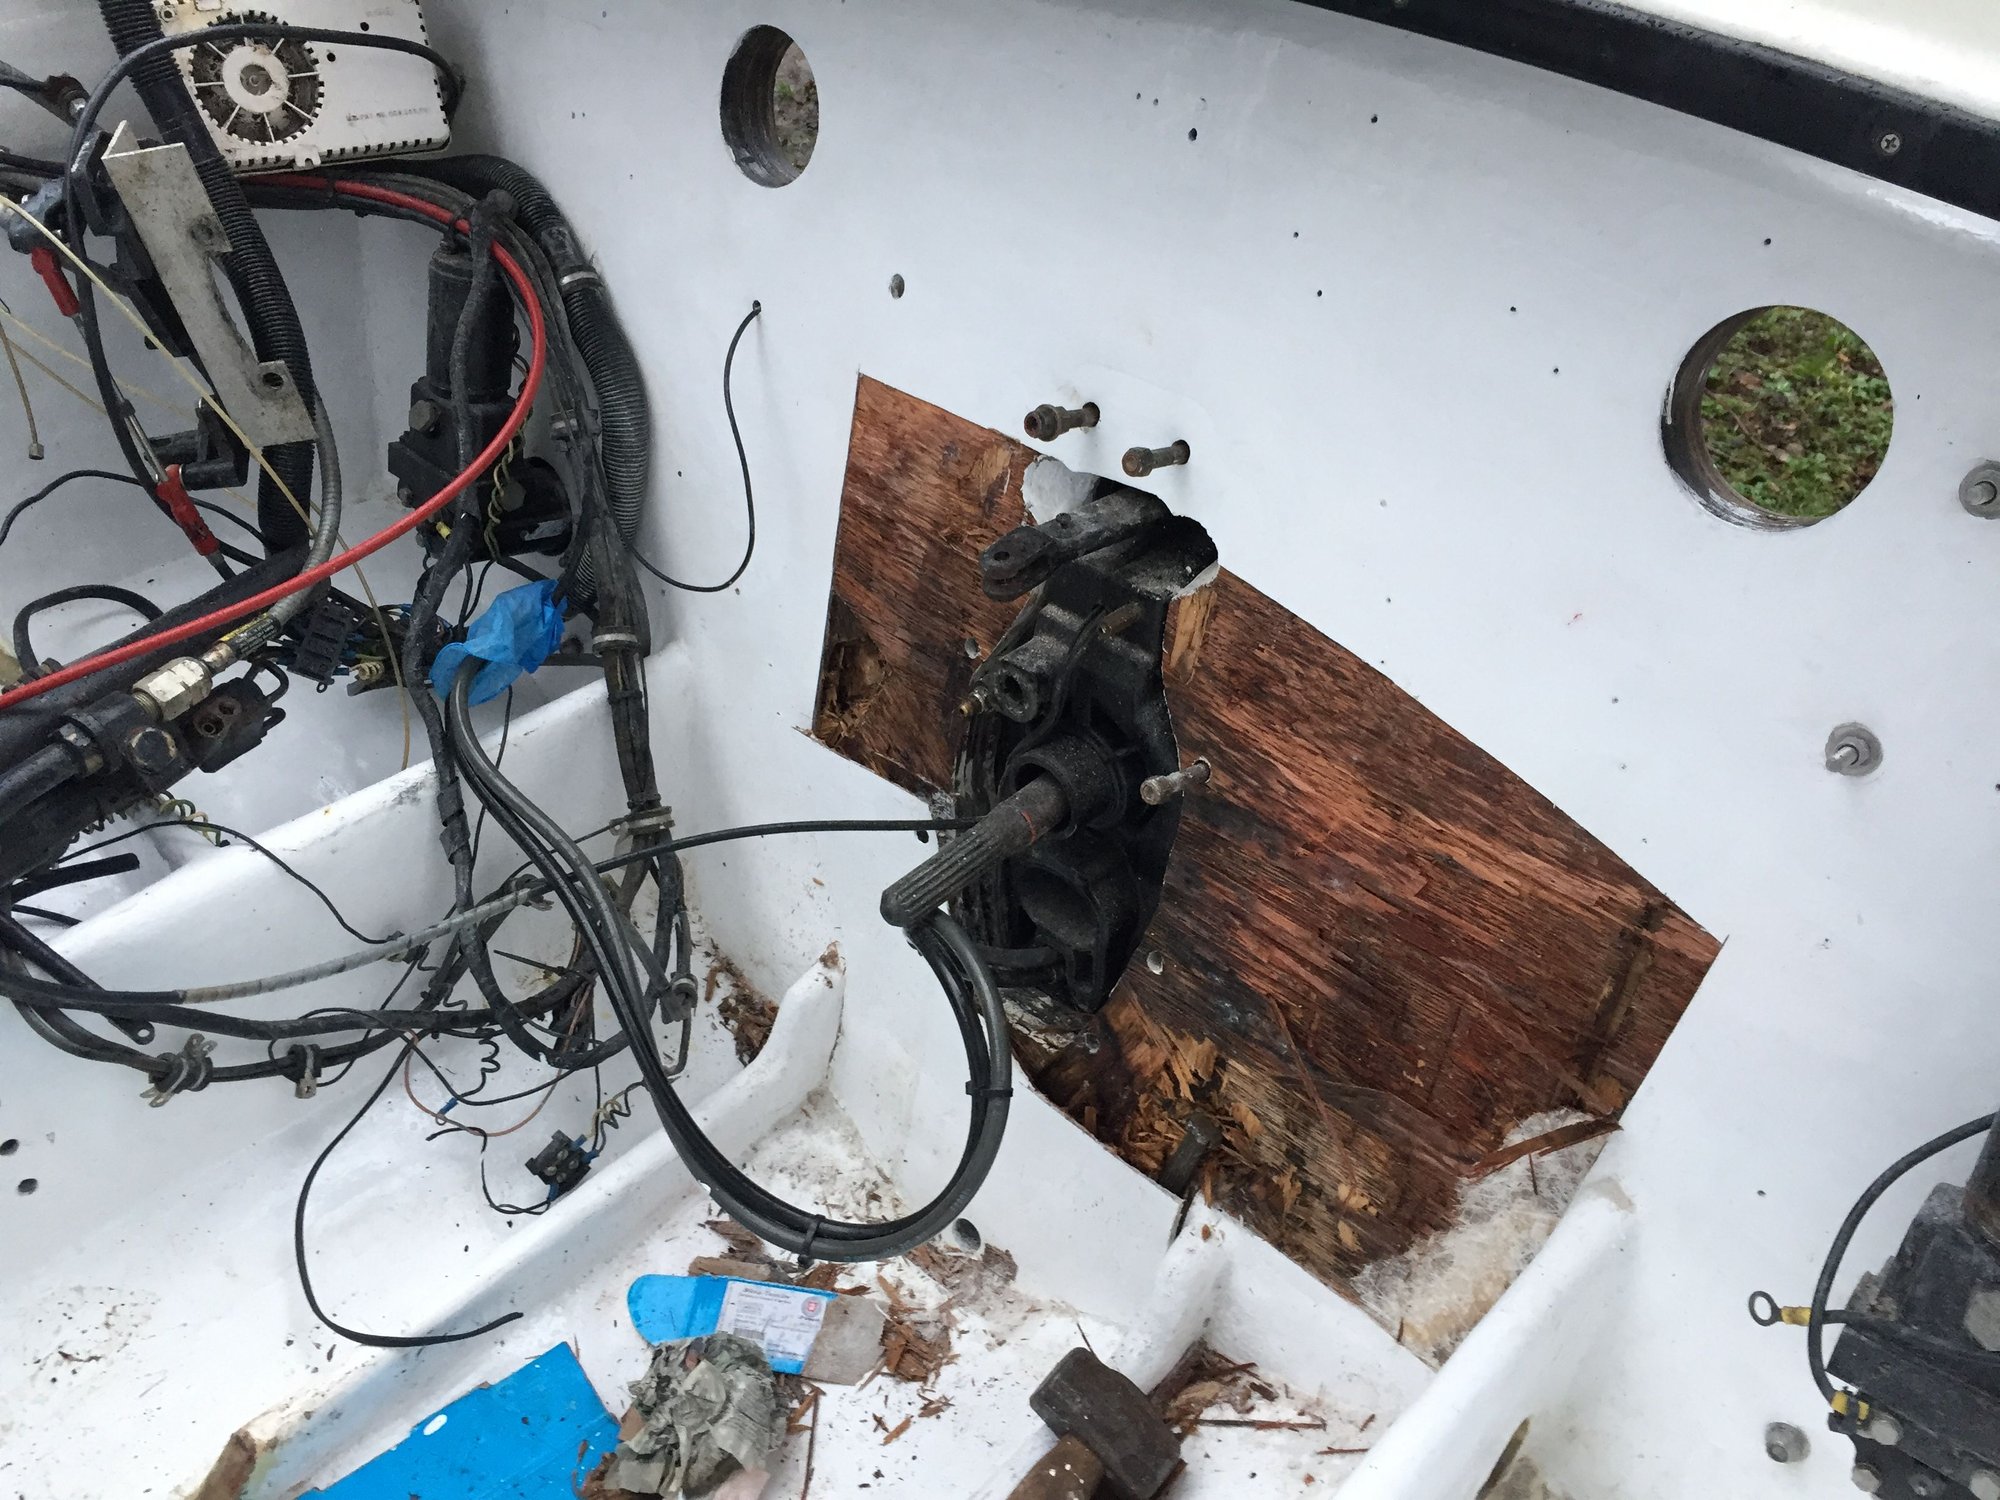
02-12-2019, 02:52 PM
#6
Registered
Cut,dig, grind out the rot and dry out whats left. Put fans on them. May take a couple days.
Done right, exterior ply and polyester resin is fine.
It failed due to lack of sealer or it breaking down at the drive, not how it was built.
Probably a layer of 3/4" ply w/a 1/2" layer stacked/glued to it.
I fit them dry, mark their edges to assure theyll fit when glassed together.
Put the 3/4" layer on a flat floor, pre-cut four layers of 2oz mat for between the two layers of ply.
Mix your resin, roll out your layers of glass then lay the 1/2" pc on top of the 3/4".
Drive drywall screws through top to bottom, every 6" or so to pull it together.
The \screws are only clamps and you remove them the next day.
Use similar process to install this core/patch to remaining transom. Normally two layers of 2 oz mat makes a great base (while still wet) to bond to.
Either make braces to hold it in place until the resin kicks or screw it in place which is my preference. Again, screws are only clamps and youll remove them next day.
Once thats done and cleaned up, mix up some putty/glue w/your resin, Cabosil powder (or similar), 1/8" glass fibers and fill the gaps around the edges and your screw holes.
Finish the outseide w/2 more layers of mat or 1708 cloth.
Easy, peasy.
Hope this helps.
Gary
Kelly u owe me
Typed this once and .erased it.

