

HP transom assbly torque

 06-22-2018, 08:01 AM
#2
Registered
I want to say it is in the 20 - 25 lb ft range. Someone will have the exact number.
 06-22-2018, 05:57 PM
#5
book #1 of service manual #39, page 2a-8, and i quote
tighten the transom assembly fasteners using an x pattern torque sequence starting from the middle fasteners.
tighten in small increments and go around the pattern several times until the proper torque is achieved.
so facing the inner transom plate; from left to right and from the top down, the x pattern toque sequence is,
5----7
3----2
1----4
8----6
i rechecked torque the next day to see if any squeezing of transom or stretching of bolts occured
there where no issues tho
Last edited by outonsafari; 06-22-2018 at 06:02 PM.
06-22-2018, 10:53 PM
#6
Banned
iTrader: (9)
the CORRECT info is 25 ft lbs for the nuts when installing the inner transom plate.
The torque pattern is very important. and torque very small increments using several passes with the torque wrench.
Using a X pattern starting from the middle fasteners and do so in small increments working up to 25 ft lbs.
going from top down for proper X pattern torque --- left to right ---- is correct above ----- starting with number 1 in lower left middle -- ( facing the nuts and studs.) starboard side ---
5 --- 7
3 --- 2
1 --- 4
8 --- 6
06-24-2018, 02:58 PM
#7
Got it all tightened down, and torqued to 25. No gaps and nothing cracked so I guess I did a decent job plugging the old cutout and cutting the new one. Now to figure out the front motor mounts. somebody needs to build an oso jig we can pass around instead of trying to drop a motor in align it as it hangs and contort yourself enough to drill the holes for the offshore mounts in the right place....
06-24-2018, 04:25 PM
#8
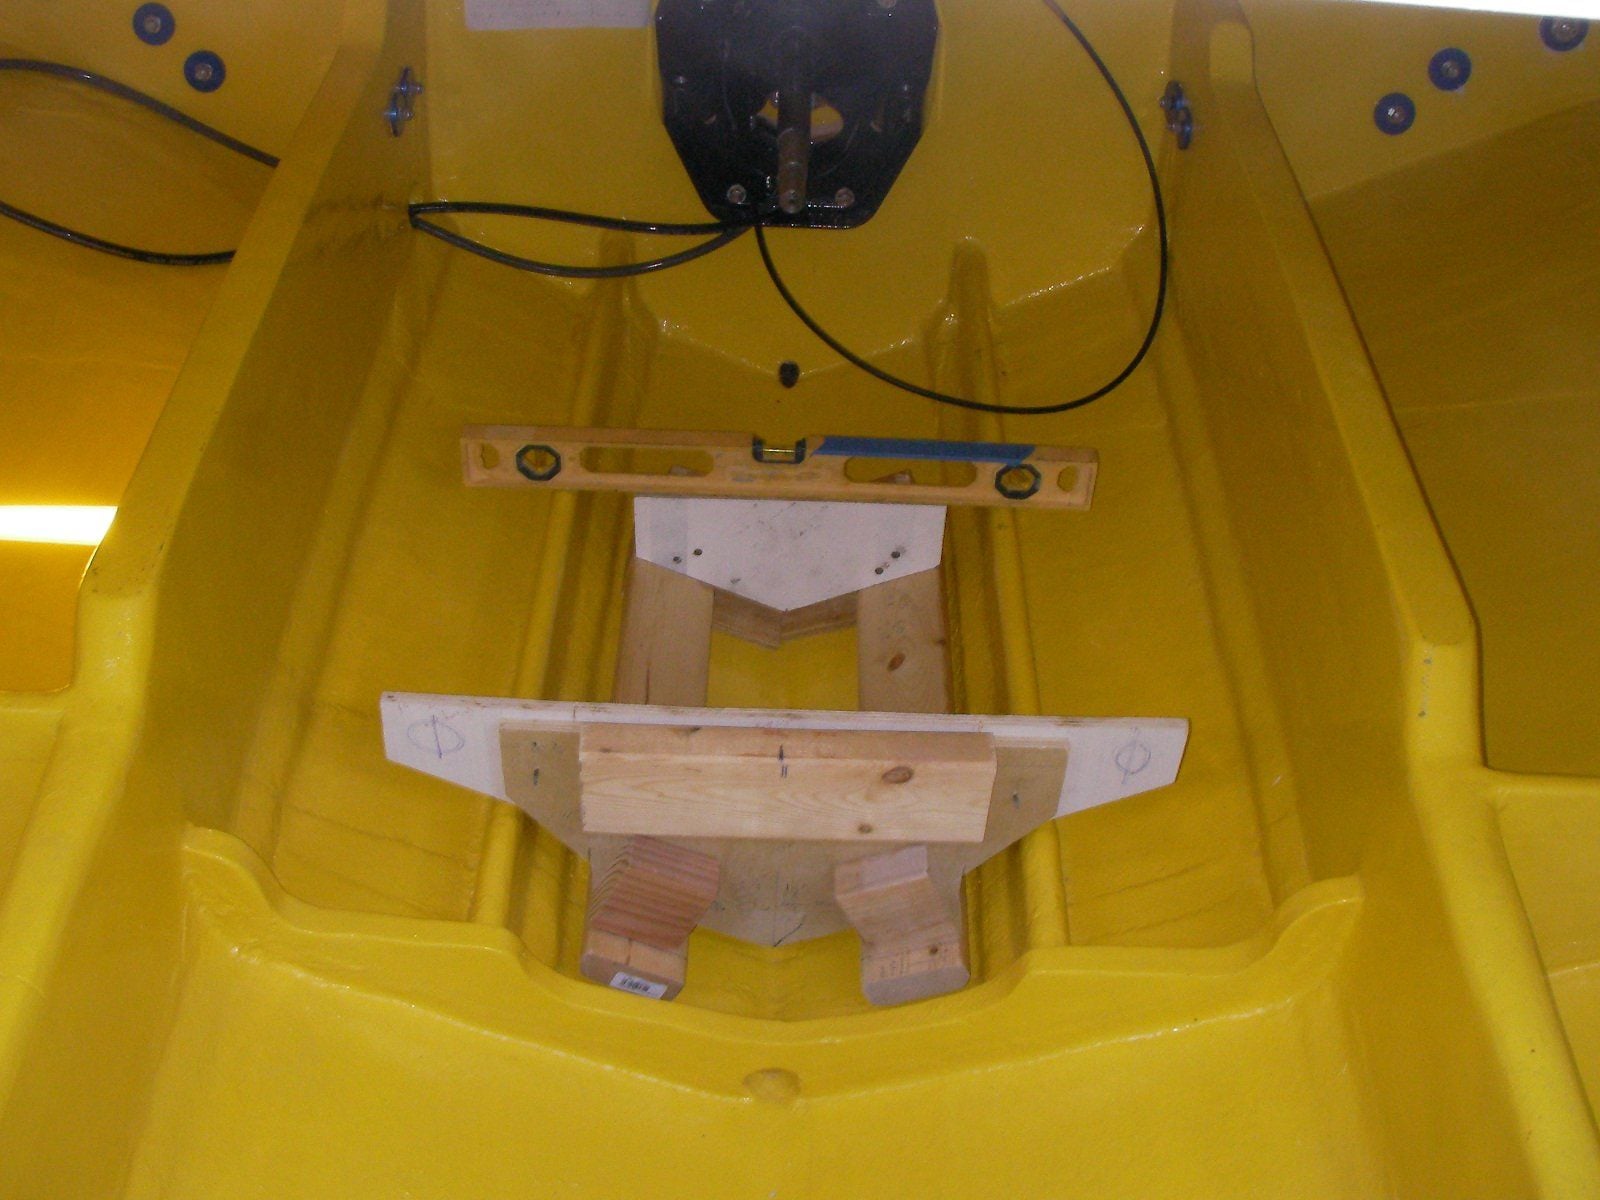
the plywood with the circles drawn on it was only to make sure the 496 front mount cleared the inner stringers.
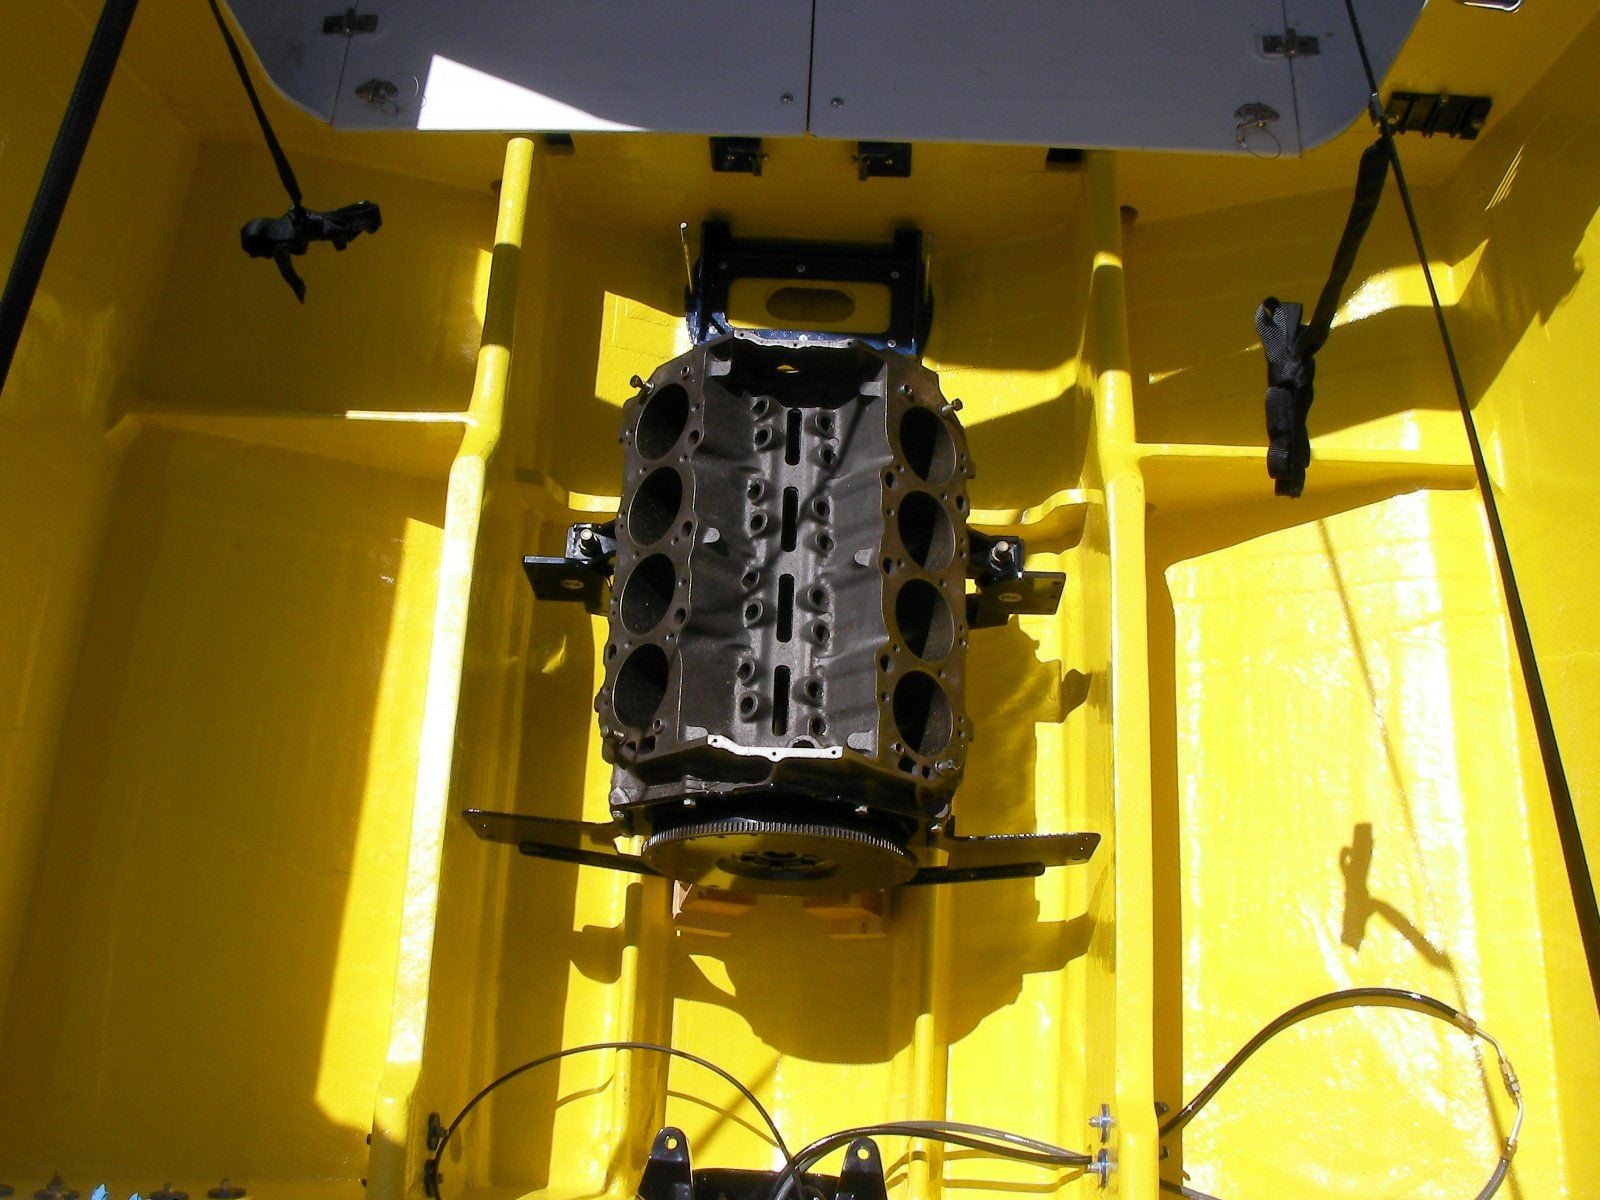
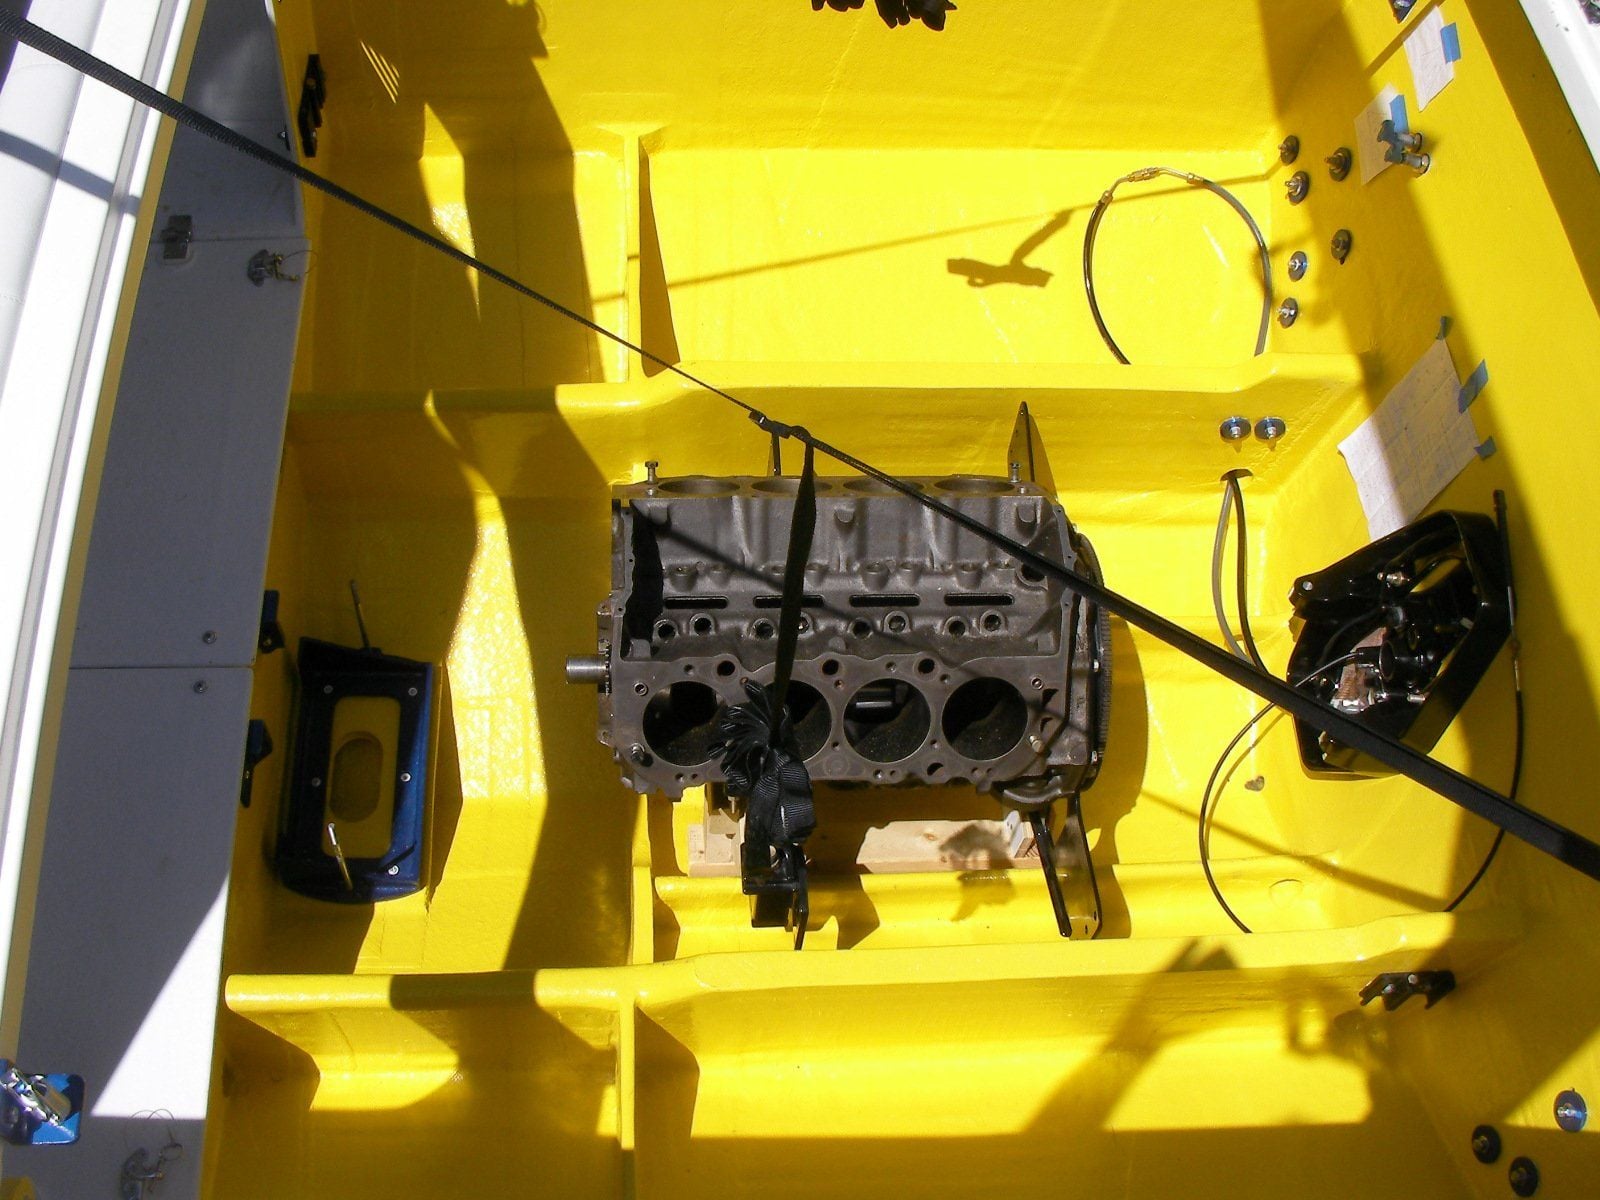
easy to make for singles or twins. the engine slides on the cradle side to side real easy, front to back by prying w/ a 2x4.
just slid it around till it was aligned. threw it out 2 weeks ago
even with just the crank, bearings flywheel pan and coupler, the engine had to come out to drill some of the holes.
transfer punches worked where the drill couldn't get to to mark the locations
your going on the transom right ?
how about some pics of the rebuild !
Last edited by outonsafari; 06-24-2018 at 04:31 PM.
06-24-2018, 05:13 PM
#9
Banned
iTrader: (9)
Got it all tightened down, and torqued to 25. No gaps and nothing cracked so I guess I did a decent job plugging the old cutout and cutting the new one. Now to figure out the front motor mounts. somebody needs to build an oso jig we can pass around instead of trying to drop a motor in align it as it hangs and contort yourself enough to drill the holes for the offshore mounts in the right place....
guess what there is one OEM builders use its called engine installation alignment jig --- special note I am not talking about engine alignment tool. - I am talking about the JIG.

