

93 Mirage 232 Trovare build
 03-23-2014 | 03:08 PM
#61
Registered
Joined: May 2004
Posts: 596
Likes: 1
From: Okanagan Falls BC. Canada
Borgie, aren't you going to drill and install drain holes in the stringers at the transom? I know it's dry in Arizona and the water vaporize quick but this would be the time to do before the engine goes in.
I got fiberglass tubes installed in my outers and centers >

I got fiberglass tubes installed in my outers and centers >
Last edited by spectras only; 03-23-2014 at 03:12 PM.
 03-23-2014 | 05:32 PM
#62
Thread Starter
Banned
Joined: Jun 2013
Posts: 1,014
Likes: 0
From: AZ
The way Mirage had it, the rear most compartment that butts up against the transom was filled with foam with no drains, middle empty access to the inner motor mounts with 1 large drain hole on each side, and forward compartment ahead of the engine stringer area filled with foam and sealed. I don't plan to re install foam, so I will probably bore a hole in each rearmost compartment for drainage. Also need to finish installing the main lower engine stringer framework. Going to use PVC corebonded and glassed into place.
Your mirage turned out beautifully! Can't wait until my bilge looks like that! Have a question for ya. Is your paint scheme OEM gel or did you have it painted later? Pretty nice scheme that compliments the trovare lines very well.
Your mirage turned out beautifully! Can't wait until my bilge looks like that! Have a question for ya. Is your paint scheme OEM gel or did you have it painted later? Pretty nice scheme that compliments the trovare lines very well.
Last edited by Borgie; 03-23-2014 at 05:37 PM.
03-23-2014 | 06:15 PM
#63
Registered
Joined: May 2004
Posts: 596
Likes: 1
From: Okanagan Falls BC. Canada
The way Mirage had it, the rear most compartment that butts up against the transom was filled with foam with no drains, middle empty access to the inner motor mounts with 1 large drain hole on each side, and forward compartment ahead of the engine stringer area filled with foam and sealed. I don't plan to re install foam, so I will probably bore a hole in each rearmost compartment for drainage. Also need to finish installing the main lower engine stringer framework. Going to use PVC corebonded and glassed into place.
Your mirage turned out beautifully! Can't wait until my bilge looks like that! Have a question for ya. Is your paint scheme OEM gel or did you have it painted later? Pretty nice scheme that compliments the trovare lines very well.
Your mirage turned out beautifully! Can't wait until my bilge looks like that! Have a question for ya. Is your paint scheme OEM gel or did you have it painted later? Pretty nice scheme that compliments the trovare lines very well.

Interestingly, my interior's colour scheme itself is pretty nice and comparable to the RPM's
but I just like that carbon fiber finish in the newer materials.Here's my original upholstery that's a heavy duty Naugahyde and stood the time for 24 years.
Last edited by spectras only; 03-23-2014 at 06:33 PM.
03-23-2014 | 07:23 PM
#64
Thread Starter
Banned
Joined: Jun 2013
Posts: 1,014
Likes: 0
From: AZ
It's funny because I found that exact picture of the RPM rear seat and fell in love with that color combo and already liked the carbon marine vinyl. Would look awesome in your boat for sure! Thinking about copying your paint scheme!
03-26-2014 | 05:27 PM
#65
Thread Starter
Banned
Joined: Jun 2013
Posts: 1,014
Likes: 0
From: AZ
Almost new Mercury HP gimble assembly with factory digital trim was delivered today! Big thanks to RAPTOR1 for a great deal! Doesn't even look like it was used. Going to be a great addition with my new power.

 04-08-2014 | 05:51 PM
#66
Thread Starter
Banned
Joined: Jun 2013
Posts: 1,014
Likes: 0
From: AZ
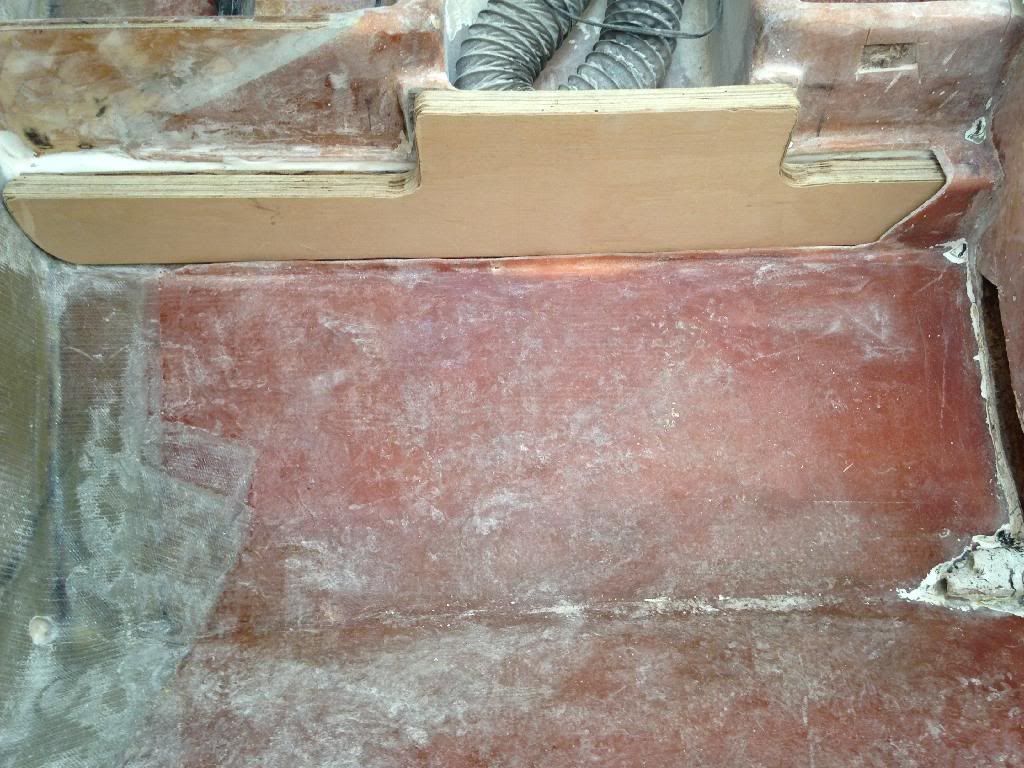
Got some time yesterday to do some more grinding and removed the remaining stringer wood from the forward bilge. Thankfully mirage used a fiberglass bulkhead, so the water didn't migrate any further in the hull. Middle part of the bulkhead was filled with foam and dry as a bone. Very happy with this news.


Template for engine rails:

3/4 marine plywood that I will be using to construct the engine rails/stringers prior to lamination:

All laminated:

Finishing the stringers tomorrow and hope to start final fiberglass work this weekend!


Template for engine rails:

3/4 marine plywood that I will be using to construct the engine rails/stringers prior to lamination:

All laminated:

Finishing the stringers tomorrow and hope to start final fiberglass work this weekend!
04-09-2014 | 10:31 PM
#67
Thread Starter
Banned
Joined: Jun 2013
Posts: 1,014
Likes: 0
From: AZ
More progress today...
Used corebond with a hot coat of VE on both sides of 3/4 marine plywood to make filler blocks for the front and rear areas behind the engine stringers. This makes everything flush so there are zero gaps behind.


Test fitting new engine stringers:
Decided after this test for that laminating 1 piece of 1/4 ply would make the fit perfect:

Very happy with how the transom turned out! Planning on glassing it with some 1708 so that it's water proof.
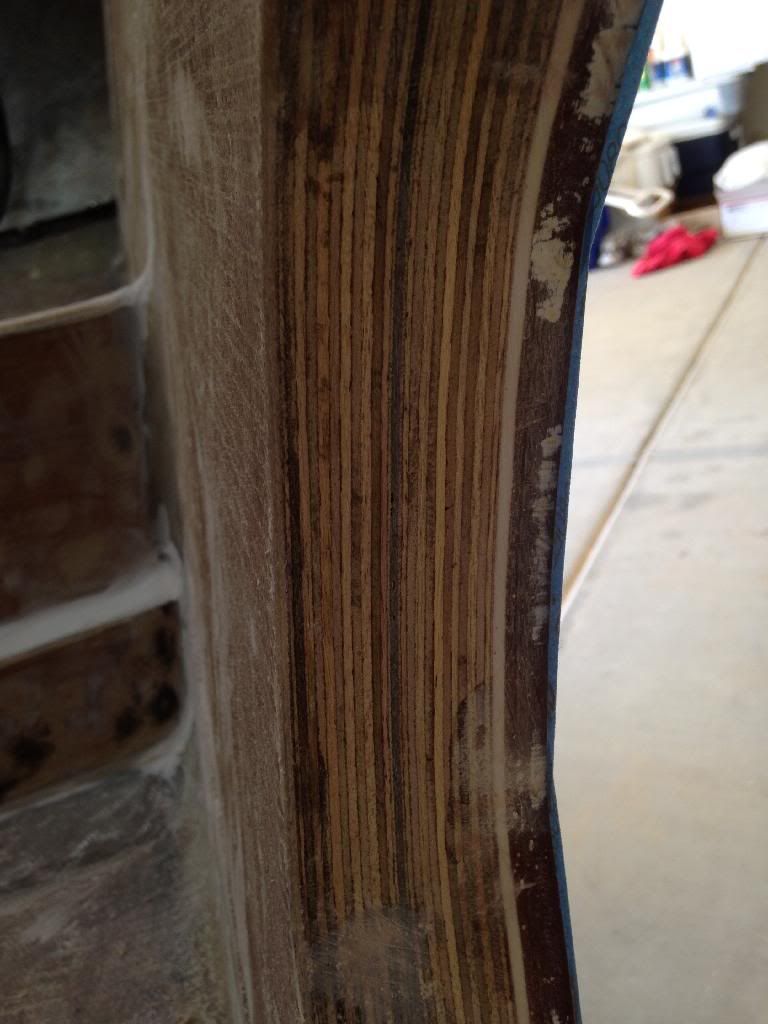
Forgive the dust and remember this is without the 1/4 ply lamination. That is drying as we speak!

Used corebond with a hot coat of VE on both sides of 3/4 marine plywood to make filler blocks for the front and rear areas behind the engine stringers. This makes everything flush so there are zero gaps behind.


Test fitting new engine stringers:

Decided after this test for that laminating 1 piece of 1/4 ply would make the fit perfect:

Very happy with how the transom turned out! Planning on glassing it with some 1708 so that it's water proof.

Forgive the dust and remember this is without the 1/4 ply lamination. That is drying as we speak!

Last edited by Borgie; 04-09-2014 at 10:34 PM.
04-10-2014 | 11:34 PM
#68
Registered
Joined: Feb 2012
Posts: 154
Likes: 0
From: Snohomish WA
Nice work Borgie. The pictures will help others do the same so keep documenting your rebuild. As discussed before, don't let the trolls get to you, keep doing it yourself and showing others how. Local lame assesses that hire out the work are just that, lame asses. Nice to see you found a spot to document your rebuild without the drama.
04-10-2014 | 11:51 PM
#69
Thread Starter
Banned
Joined: Jun 2013
Posts: 1,014
Likes: 0
From: AZ
Appreciate the kind words! Yes, my aim is to ultimately help others interested in the 232 or any other boat that needs a transom and stringers replaced. I have not only used this site as a stage to feature my project and the process, but have also received quite a bit of advice from some of the best in the business ie Glassdave, Bob Madara, Mark Rinda, Alex Haxby... The list goes on and I can't thank these guys enough!
I love this DIY stuff and never stop learning. When this 232 is done, it will be one of the best built out there. I'm making absolutely certain it is overbuilt and paying close attention to every detail as I go. Great to see you on here!
I love this DIY stuff and never stop learning. When this 232 is done, it will be one of the best built out there. I'm making absolutely certain it is overbuilt and paying close attention to every detail as I go. Great to see you on here!
Last edited by Borgie; 04-10-2014 at 11:54 PM.

