

Rub rail replacement
 08-03-2012 | 10:58 PM
#1
Thread Starter
Registered
Joined: Jun 2012
Posts: 155
Likes: 0
From: Erie, pa
Replaced the rub rail insert today on my 29 scarab. Wow what a task. If any of you attempt this I will tell you a heat gun and the roller tool used to install the seal on screen windows helps alit. Also only attempt with two people it's so much easier with an extra set of hands. I will be producing dash plates with winter. Carbon fiber or pretty much any other material you want. All cut of a cnc. Also if anyone knows where I can get the original rear seat for my 98 scarab please let me know I don't care if it needs recovered or not I have a brand new straight bench style seat in it now that I would work in on trade etc.
 08-05-2012 | 01:47 AM
#2
Registered
Joined: Jul 2001
Posts: 484
Likes: 1
From: Pomona,ca
Just had mine replaced ( insurance) ha!. Updated to the newer style flat with exposed stainless hex screws ( advised by the boat shop that did the gel coat repairs). It came out better than I thought it would.
08-05-2012 | 07:30 AM
#3
Thread Starter
Registered
Joined: Jun 2012
Posts: 155
Likes: 0
From: Erie, pa
Can you post a picture? How did was it covered by insurance? Guess its alittle late for that now ..
08-05-2012 | 07:51 AM
#4
Registered
Joined: Aug 2007
Posts: 2,960
Likes: 7
From: Sandown, NH - Sebago Lake Region, ME
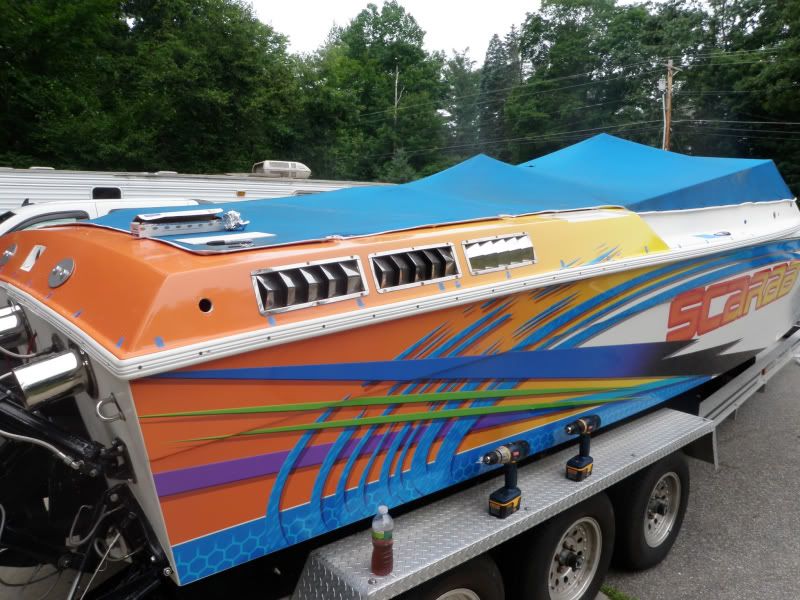
Here are a few pics of me installing the new rub rail on my scarab. This is the two piece design with a semi-rigid plastic backing. It was definetly a challenge to install and a heat gun was an absolute requirement but in the end.....what a difference!!


08-05-2012 | 07:55 AM
#5
Thread Starter
Registered
Joined: Jun 2012
Posts: 155
Likes: 0
From: Erie, pa
Very nice !! I see you needed some water lol. So did I it was very hot the day we installed and it is hard work. We did it with no heat on the first side and by side two we added another friend to the mix. One to push the insert in one to hold it up as we went and the lead guy with a heat gun
08-05-2012 | 07:59 AM
#6
Registered
Joined: Aug 2007
Posts: 2,960
Likes: 7
From: Sandown, NH - Sebago Lake Region, ME
Very nice !! I see you needed some water lol. So did I it was very hot the day we installed and it is hard work. We did it with no heat on the first side and by side two we added another friend to the mix. One to push the insert in one to hold it up as we went and the lead guy with a heat gun
08-05-2012 | 08:36 AM
#7
Thread Starter
Registered
Joined: Jun 2012
Posts: 155
Likes: 0
From: Erie, pa
Only pics I will have to offer is after pics. I can do them tomorrow when I go into work as that's where the boat is currently. I wish I had befores though because everyone that walks into the shop and looks at the boat goes wow that made a huge difference. The old stuff was yellowed and was in section with huge and I'm talking a foot or better gaps in it. This boat has come oh so very far. When I bought it is was missing seats needed paint work etc. again. No before pics.......... If I ever do this again I will document better but I feel the next boat I buy will be turn key unless the deal is one that is not able to be passed up. I love doin the work to a boat and by that I don't do it all I hire alot of it out but I just love to see the progress. Next to around it would be cheaper as I have more knowledge now and could do more myself


