


Another '79 Formula 255 Liberator
 07-18-2014 | 10:05 AM
#1
Thread Starter
Registered
Joined: Jun 2014
Posts: 50
Likes: 0
From: Fort Myers, FL
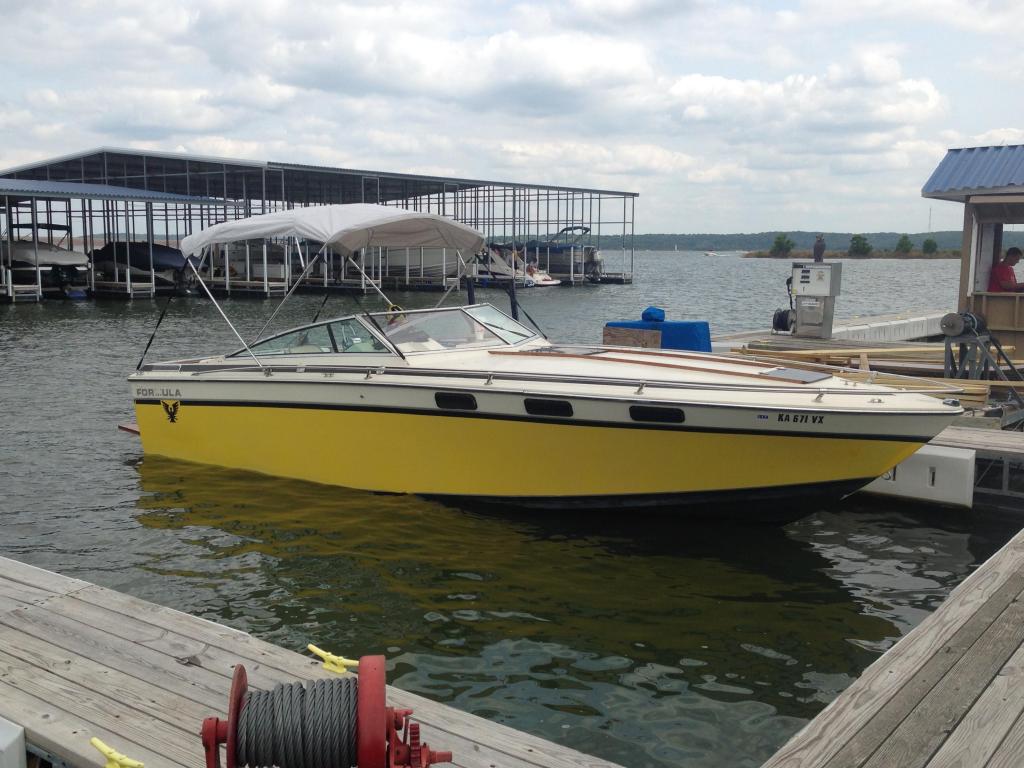
Well gang, I've read through a couple resto threads, and with cautious optimism, I'm starting my own! We recently became proud owners of this 255:

We had a 32' Carver Mariner we restored a few years ago, but found we weren't spending much time aboard, and wanted to get something trailer able. We had a 16' Seadoo Challenger twin Jetboat for a while but it was way too small and didn't have any of the amenities we wanted. A short search brought us to this 255, and a little bit of research showed it to be a good enough deal to warrant the work she needs. So we are off on a new adventure!
We had a bearing go out on the trailer on the way home from purchasing, wiped out the starb outdrive on our first test run (no lube= bad news) and have had to fix a few other little issues just trying to get her on the water. We are encouraged by the apparent 'following' the model seems to have, as well as the attention she gets on the ramp. We will be doing numerous projects as time permits, have a few small ones already done and will post up pics and details shortly.
Looks like a great forum, and a wonderful bunch of members- looking forward to lots of interaction!!
 07-20-2014 | 10:19 PM
#2
Thread Starter
Registered
Joined: Jun 2014
Posts: 50
Likes: 0
From: Fort Myers, FL
A few more photos of the boat;
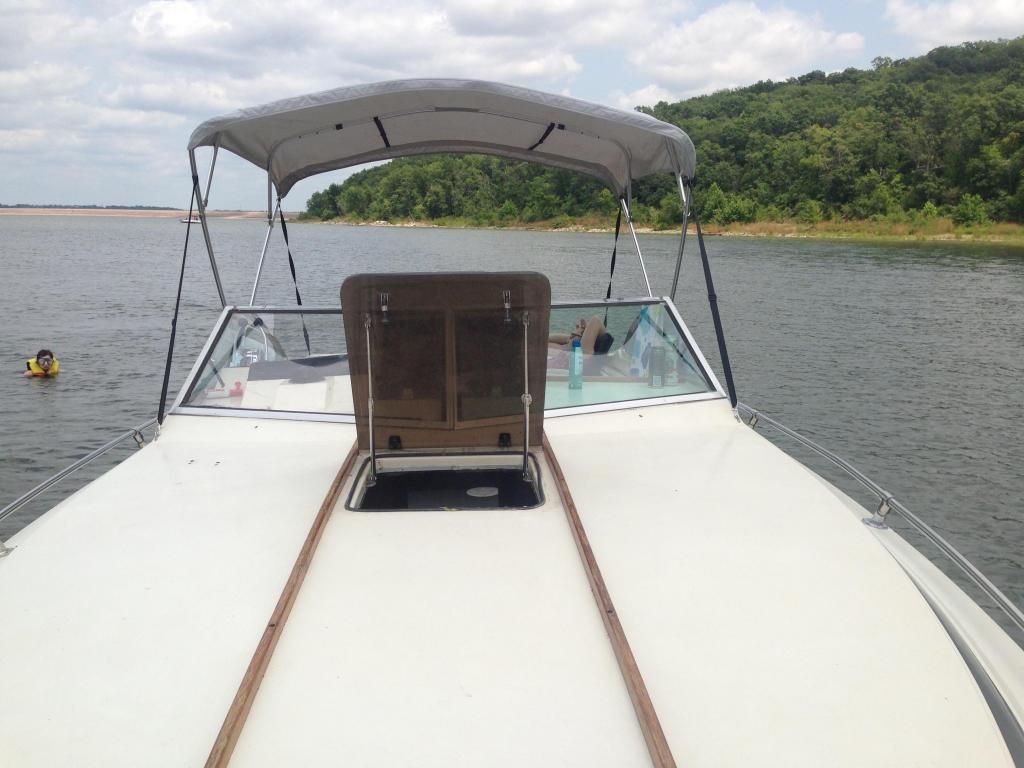
and a quick video runnin across the lake;
http://vid1172.photobucket.com/albums/r564/socialtherapy2/IMG_9239_zpse7885464.mp4
and a quick video runnin across the lake;
http://vid1172.photobucket.com/albums/r564/socialtherapy2/IMG_9239_zpse7885464.mp4
07-20-2014 | 10:29 PM
#3
Thread Starter
Registered
Joined: Jun 2014
Posts: 50
Likes: 0
From: Fort Myers, FL
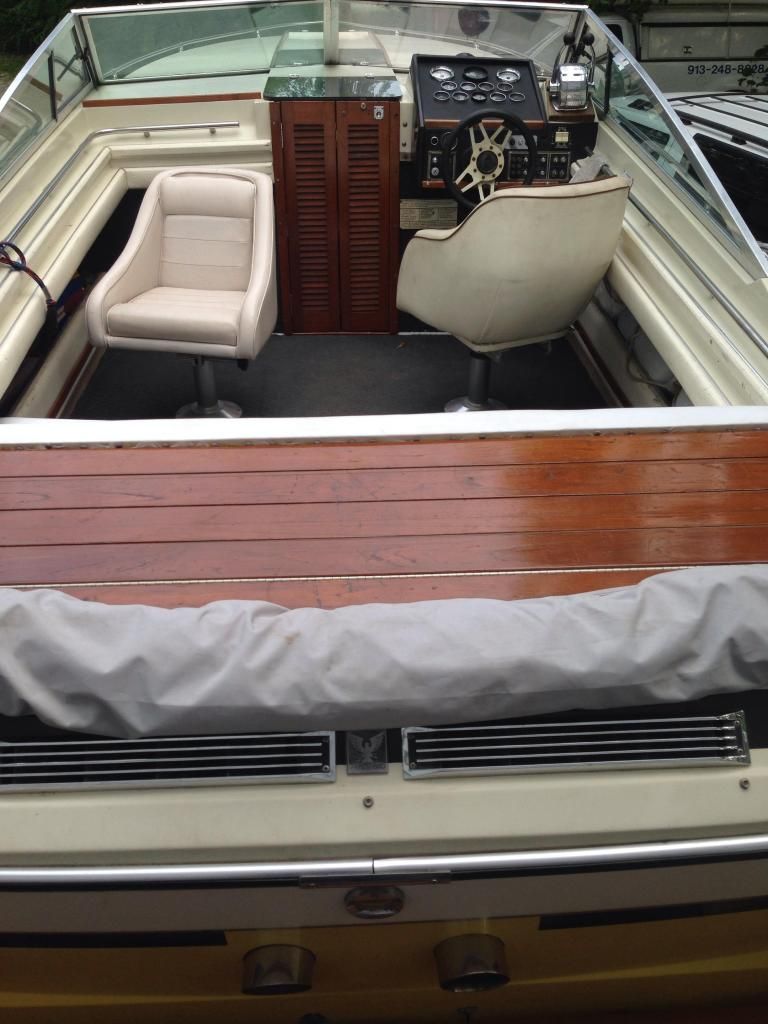
My first upgrade project was the controls mount. The wood base was a bit worn, and though easily repairable I thought updating to something more 'current' might look better. I wanted to get a bit more room as well, so I made a trim plate from 1/4" Lexan, painted the back black, and replaced the wood. I completed this project while cleaning, checking, and lubing the stock Morse controls (thinking this was part of my shifting problem). Photos:
Before:

"Machining" the new trim:

Finished trim ring:

Mock-up with control:

Finished install:


If you look close in the last photo, you can see the edge of the trim ring (top right in the photo) and see that the color is on the back of the Lexan. I'm seriously considering re-doing this one, and making a new instrument panel the same way but using a yellow that matches the boat instead of black.
Before:
"Machining" the new trim:
Finished trim ring:
Mock-up with control:
Finished install:
If you look close in the last photo, you can see the edge of the trim ring (top right in the photo) and see that the color is on the back of the Lexan. I'm seriously considering re-doing this one, and making a new instrument panel the same way but using a yellow that matches the boat instead of black.
07-20-2014 | 10:37 PM
#4
Thread Starter
Registered
Joined: Jun 2014
Posts: 50
Likes: 0
From: Fort Myers, FL
My second project was to fab up some adaptor plates for new shift interrupt switches (merc part NLA- wasn't quite ready to spend $200 per engine for the 'upgrade' and set myself up for needing new trim pumps and more just because the $11 switches were missing). The previous owner thought it was a good idea to remove the switches- we all know how well that went!
I just cut a couple pieces of 1/8" aluminum 'scrap' big enough to allow mounting the new switches on the existing threaded studs, here they are cut, rough finished, drilled and countersunk:

Here one is with the switch mount screws in place, ready to install on the shift plate:

And here it is installed in the boat. Tested this weekend, and they both work perfect!!

More projects to come soon... much more interesting too I hope!
I just cut a couple pieces of 1/8" aluminum 'scrap' big enough to allow mounting the new switches on the existing threaded studs, here they are cut, rough finished, drilled and countersunk:
Here one is with the switch mount screws in place, ready to install on the shift plate:
And here it is installed in the boat. Tested this weekend, and they both work perfect!!
More projects to come soon... much more interesting too I hope!
07-22-2014 | 10:03 PM
#6
Thread Starter
Registered
Joined: Jun 2014
Posts: 50
Likes: 0
From: Fort Myers, FL
Thanks Sprink! I've run through your thread... wow! I'm sure there will be PLENTY of questions, all of your work and photos have certainly given us a starting point though! We're looking forward to this project, a little at a time. I turned a '77 Carver Mariner 3396 that was destined for the scrap yard into a 14k boat in one winter (and only dumped about 5k into it), not expecting similar results, but know we can make this a really nice boat regardless! We'll be keeping an eye on your project for ideas- not a prayer of catching up though! LOL
07-23-2014 | 08:55 AM
#8
Thread Starter
Registered
Joined: Jun 2014
Posts: 50
Likes: 0
From: Fort Myers, FL
I don't know if it's mostly original, I do know the rear bench has been changed- it's obviously not factory but may be close, and on the port side just inside the door I think is supposed to be a fridge- the PO paneled in the space and installed a set of drawers (cheap plastic stuff). I plan to re-install a fridge there! Here's what I have handy, I'll try to post some better ones later...

This was one of the seller's photos- it looks pink, but it's worse...
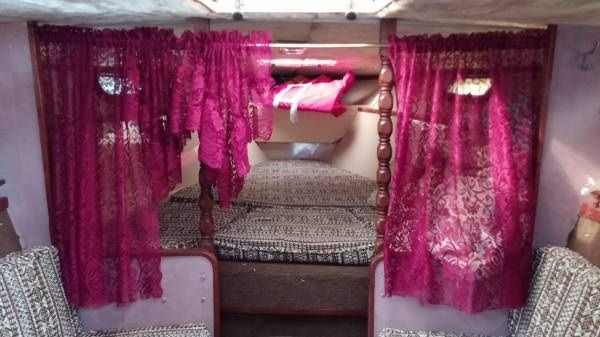
This was one of the seller's photos- it looks pink, but it's worse...
07-23-2014 | 09:47 PM
#10
Thread Starter
Registered
Joined: Jun 2014
Posts: 50
Likes: 0
From: Fort Myers, FL
I'll take some pictures tomorrow (got home too late tonight, hate taking pix in the dark!). The rear deck "Sun pad" is teak, it covers a shallow full-beam storage compartment above the engines. The front of that is fiberglass on the top half, and carpeted wood hinged to the fiberglass on the bottom half, it has a lip at the bottom that supports the seat bottom, and the seat back. The seat back is wider than the opening for the engine compartment, and it just sits across the storage bins on either side. the front of the seat bottom is wood with some speakers and a battery switch. That front panel is attached to the side compartments with frame brackets (face mount 90* angles). It really isn't a very good setup, difficult to access for service and repairs, not super secure, and just not very professional looking.
As for the interior of the cabin... well... the original 'wall paper' is a textured surface, someone painted it the color you see in the pix, it's sorta rosy tan, and the curtain was a dark maroon, makes it look pink inside- really not cool at all but it's a low priority. I'm still working out the 'not very marine' repairs on the engines and drives, got it running really well and fairly reliably- we want to get a little use out of it this summer and will dive into the big stuff in the off season... I hope. LOL
I'll get some good detail photos tomorrow- should be a nice day, and I have some projects planned anyway!

