1990 Century Ultra III
 05-11-2020 | 07:59 AM
#1
Thread Starter
Platinum Member

Joined: Jan 2005
Posts: 1,157
Likes: 520
From: Owen Sound Ont.
Ok, so I have done some fiberglass repair on my old POS since I pulled the engines.
My goal with the boat is to run it for a couple of years until a decent hull comes along (something 30' to 35' that can handle Lake Huron) then put my drive train in it.
Last year I did the stringers on the stb side, the bulkhead at the engine compartment and some extra support for the hull under the engines. I thought I was done for a couple of years, or at least until I find a shell that I like better.
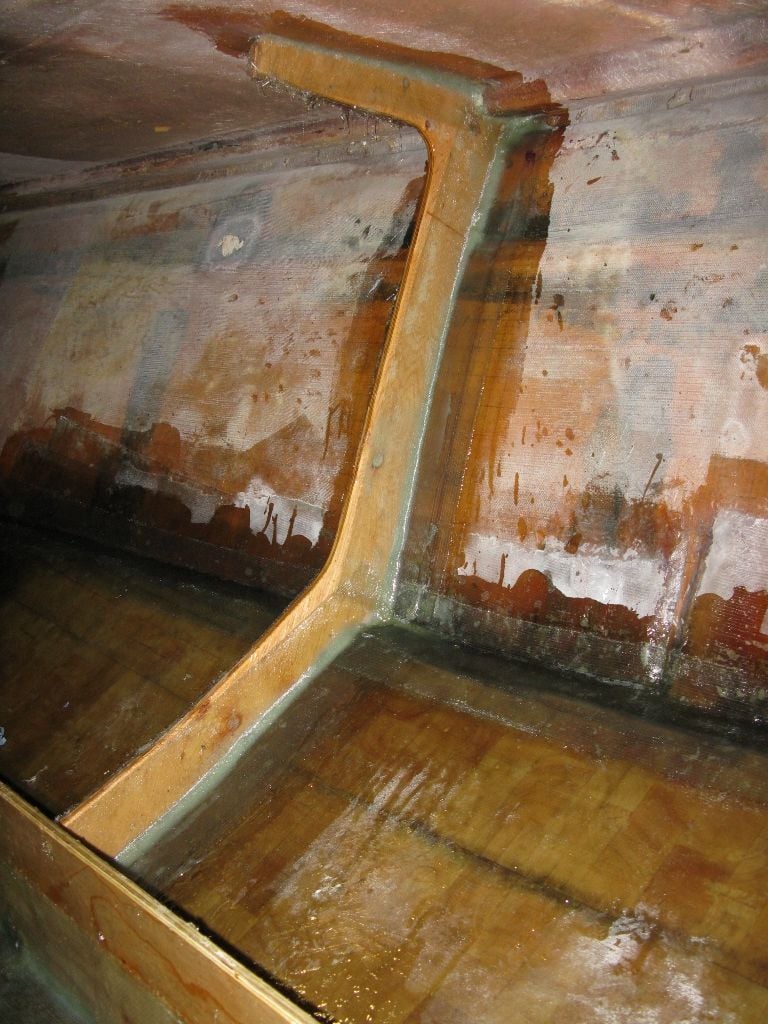
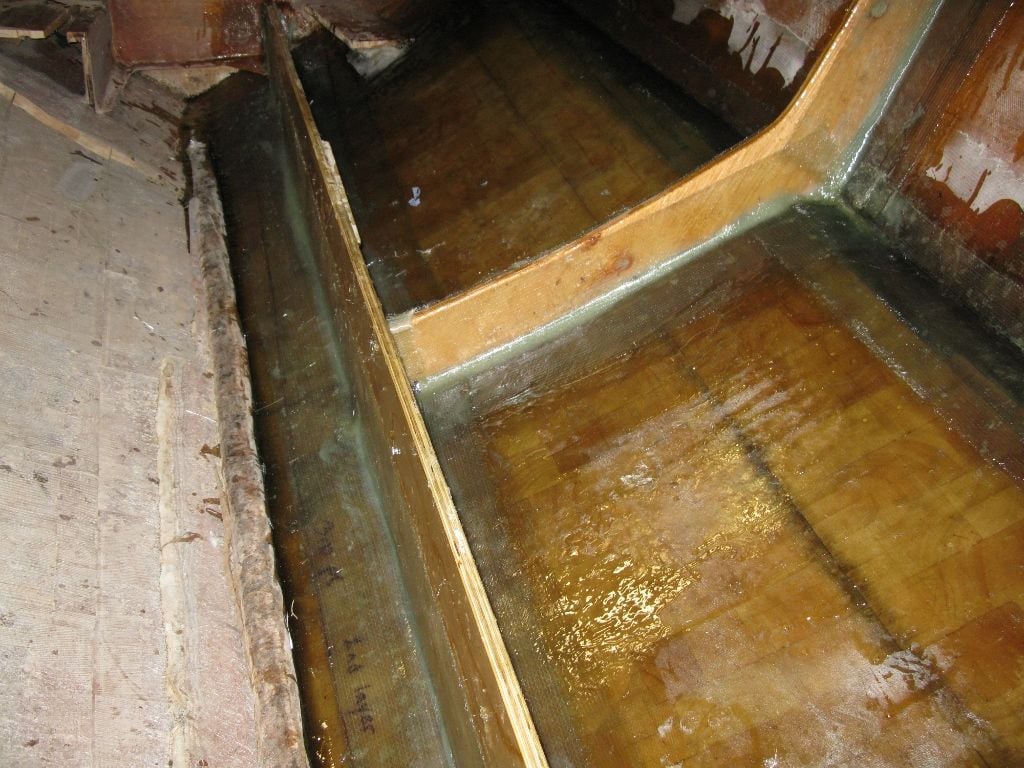
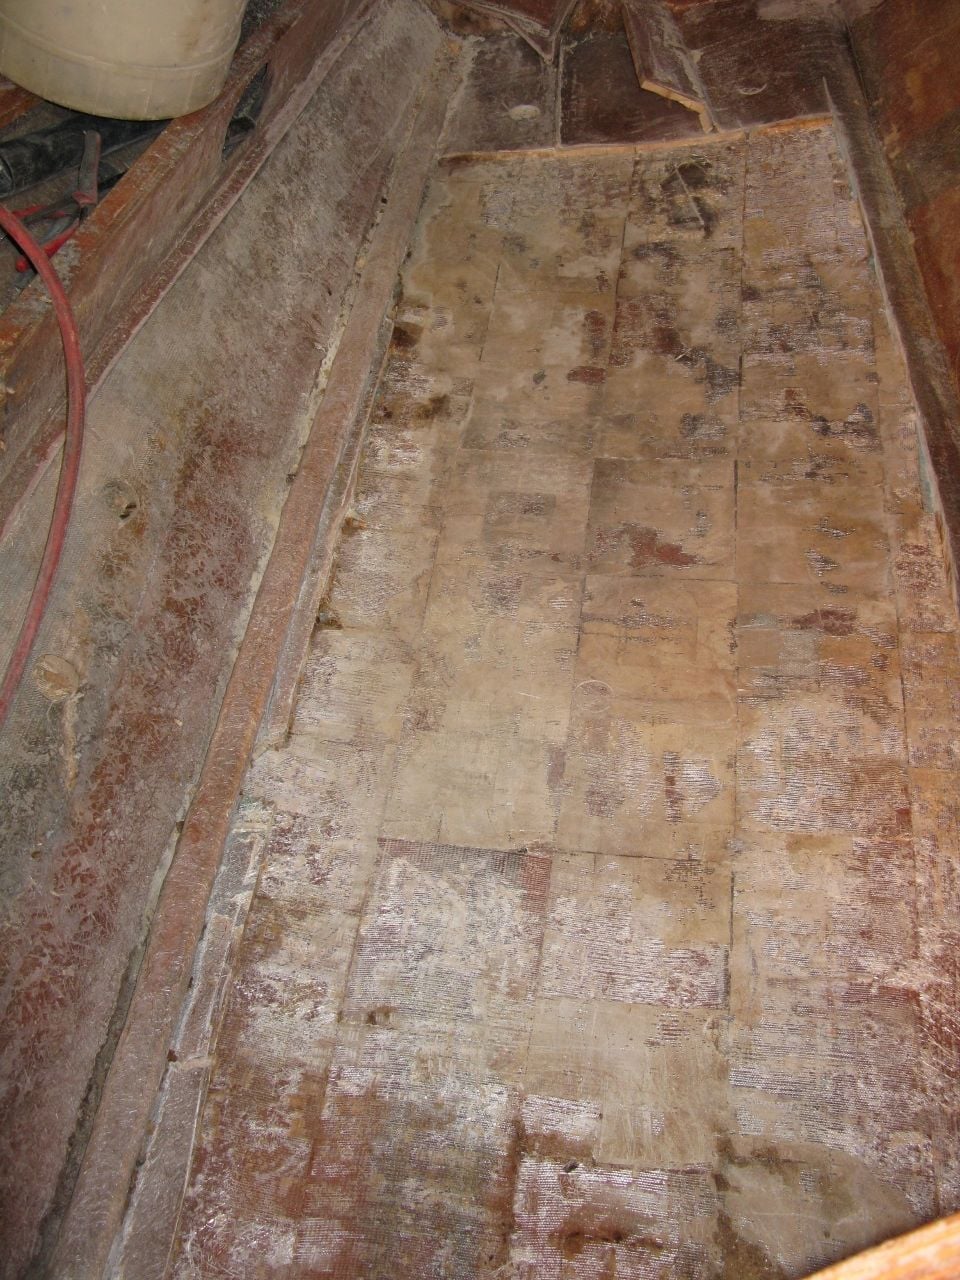
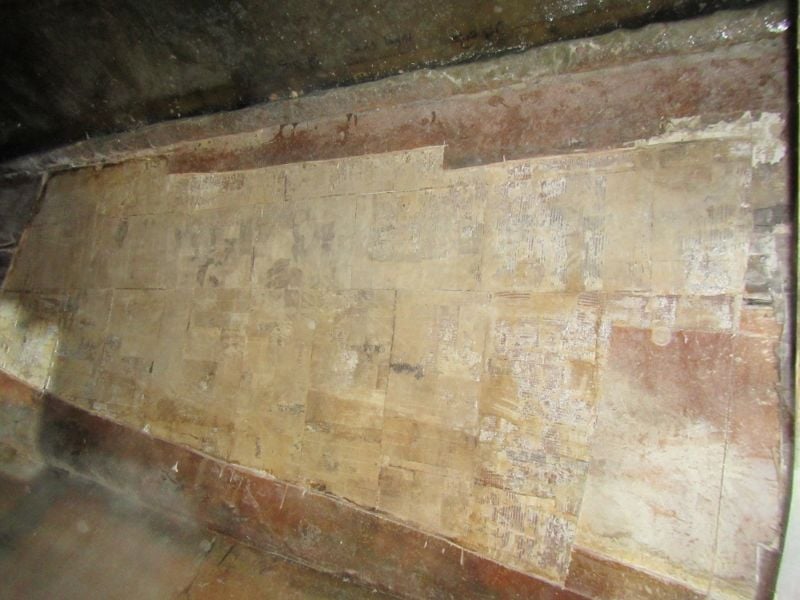
This spring, I noticed the floor in the cabin had de laminated from the substrate, no problem, or so I thought. Just pull up the floor and replace it right?
Once the floor was out I saw that the tabbing at the stringer (which was only on one side of the stringer, by the way) was moving, so I figured, no problem I'll do the stringers too!
I cut the loose glass, pulled it out and surprise!
All that was underneath was compost!
Gotta love balsa
So after some colorful language possibly a thrown item or two, a vision of running the chainsaw through it reminiscent of an old Boston Whaler advertisement!
I decided to try and make it safe at least
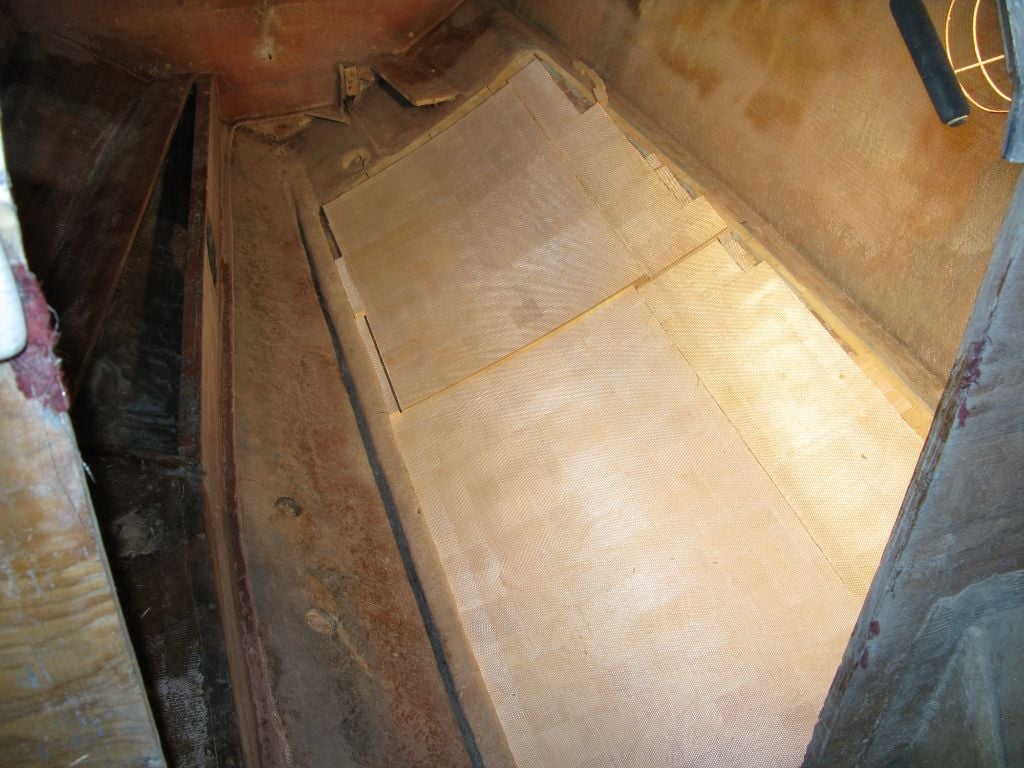
Now the rot is out, new balsa in and glassed, I would have had the stringer and bulkhead in this weekend, but ran out of resin yesterday.
Pretty happy with it, but the layer of 1708 I rolled out for under the stringer and bulkhead has more bubbles than I would have been happy with, but the resin gelled on me before I had it all rolled out.
My goal with the boat is to run it for a couple of years until a decent hull comes along (something 30' to 35' that can handle Lake Huron) then put my drive train in it.
Last year I did the stringers on the stb side, the bulkhead at the engine compartment and some extra support for the hull under the engines. I thought I was done for a couple of years, or at least until I find a shell that I like better.
This spring, I noticed the floor in the cabin had de laminated from the substrate, no problem, or so I thought. Just pull up the floor and replace it right?
Once the floor was out I saw that the tabbing at the stringer (which was only on one side of the stringer, by the way) was moving, so I figured, no problem I'll do the stringers too!
I cut the loose glass, pulled it out and surprise!
All that was underneath was compost!
Gotta love balsa
So after some colorful language possibly a thrown item or two, a vision of running the chainsaw through it reminiscent of an old Boston Whaler advertisement!
I decided to try and make it safe at least
Now the rot is out, new balsa in and glassed, I would have had the stringer and bulkhead in this weekend, but ran out of resin yesterday.
Pretty happy with it, but the layer of 1708 I rolled out for under the stringer and bulkhead has more bubbles than I would have been happy with, but the resin gelled on me before I had it all rolled out.
 05-12-2020 | 06:27 AM
#2
Thread Starter
Platinum Member
Joined: Jan 2005
Posts: 1,157
Likes: 520
From: Owen Sound Ont.
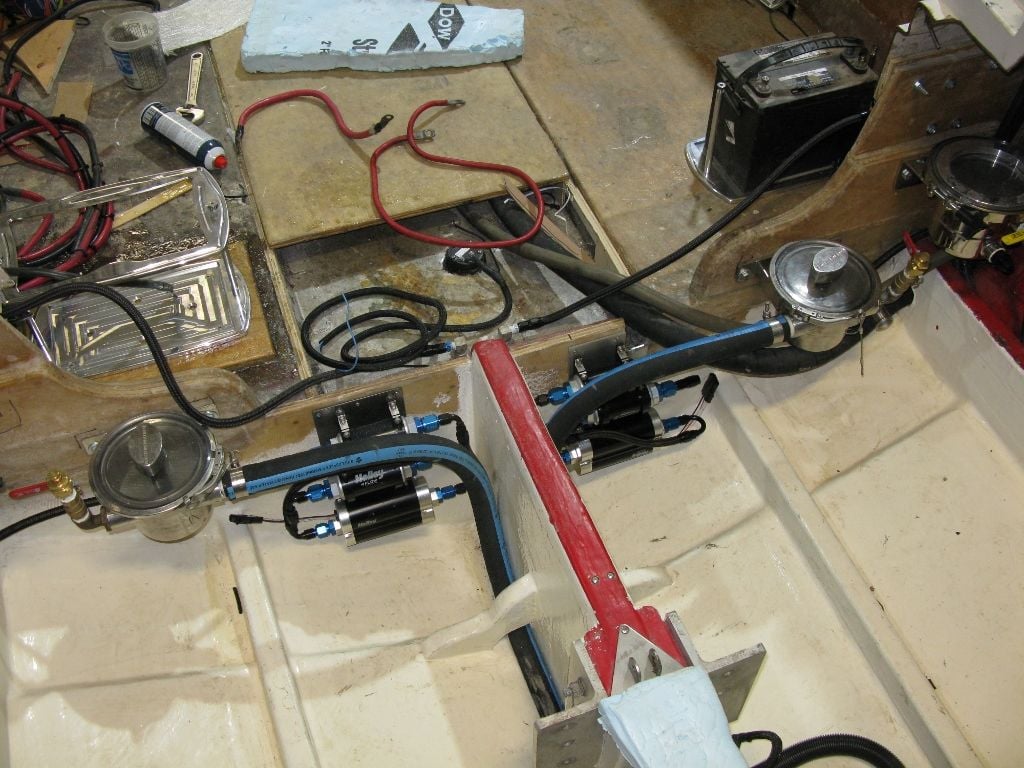
So while waiting for more resin, I figured I'd check some more off the list
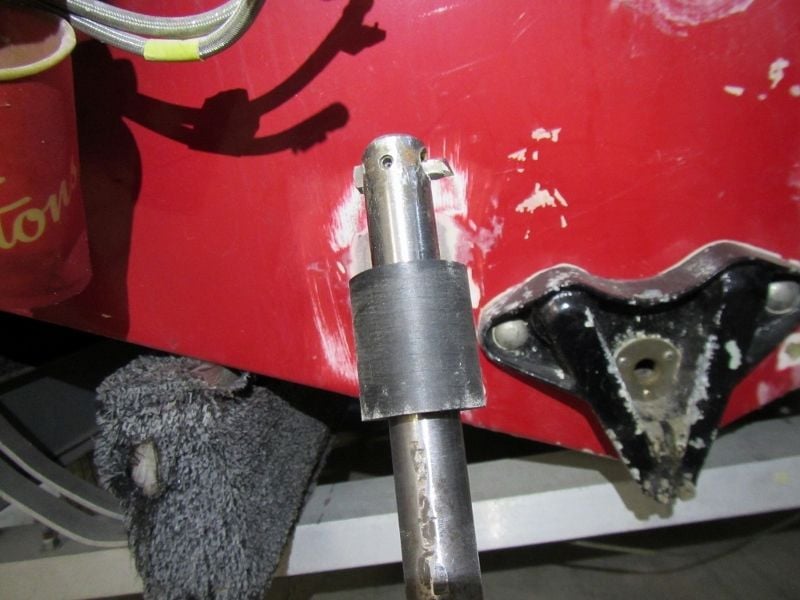
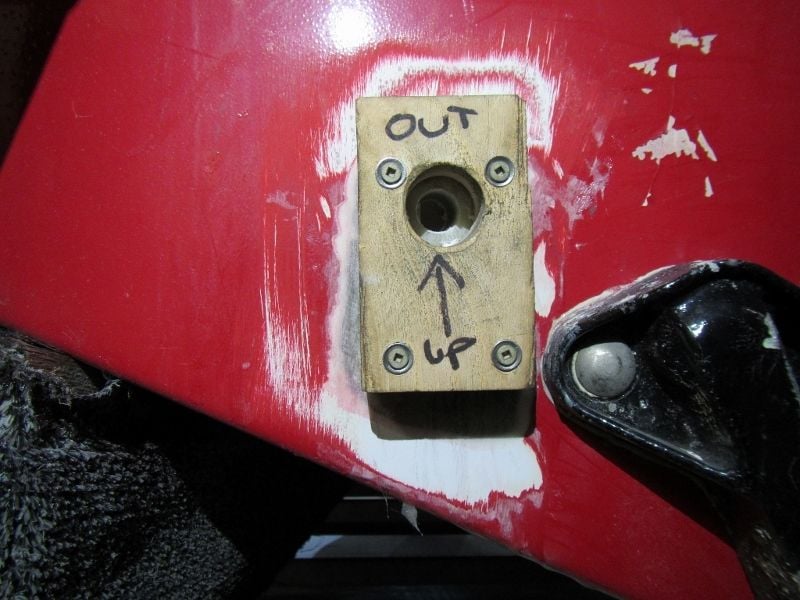
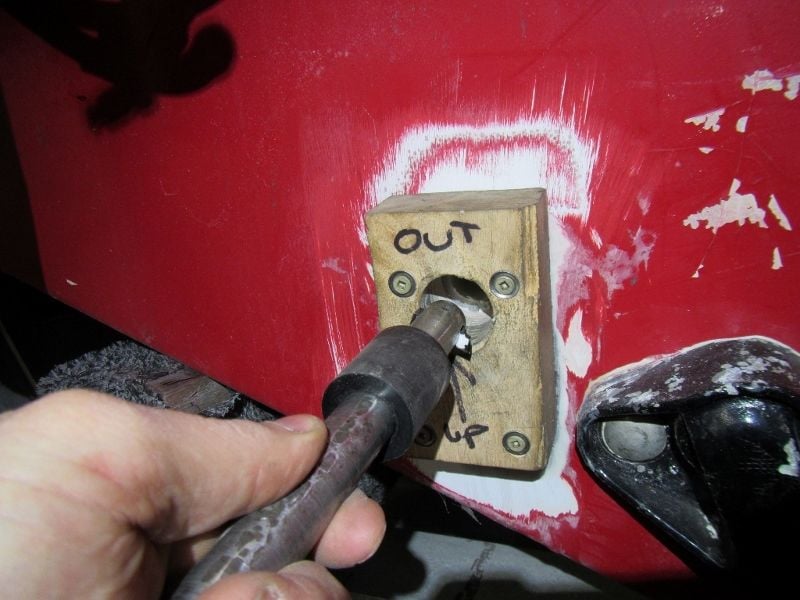
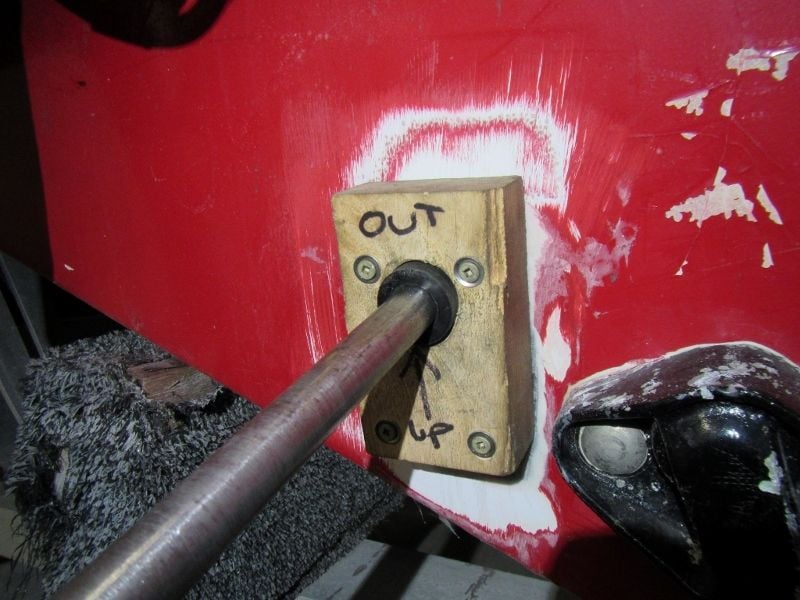
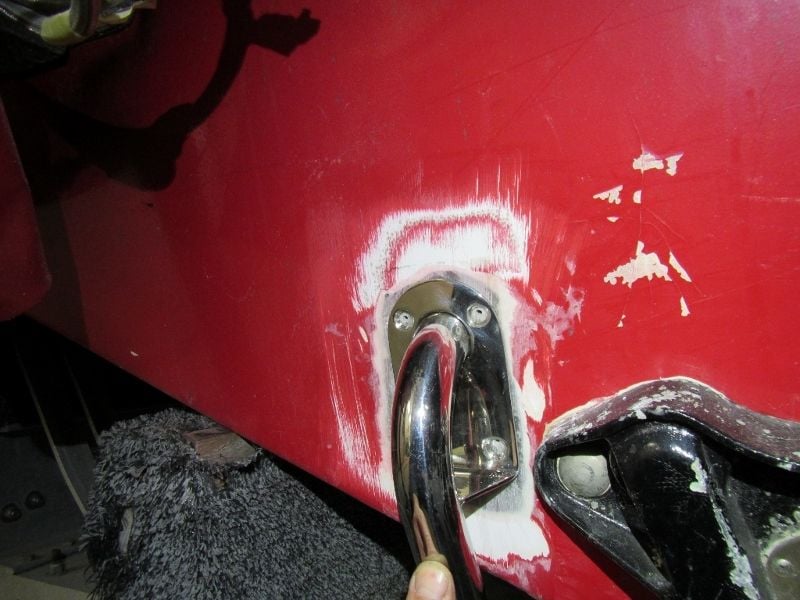
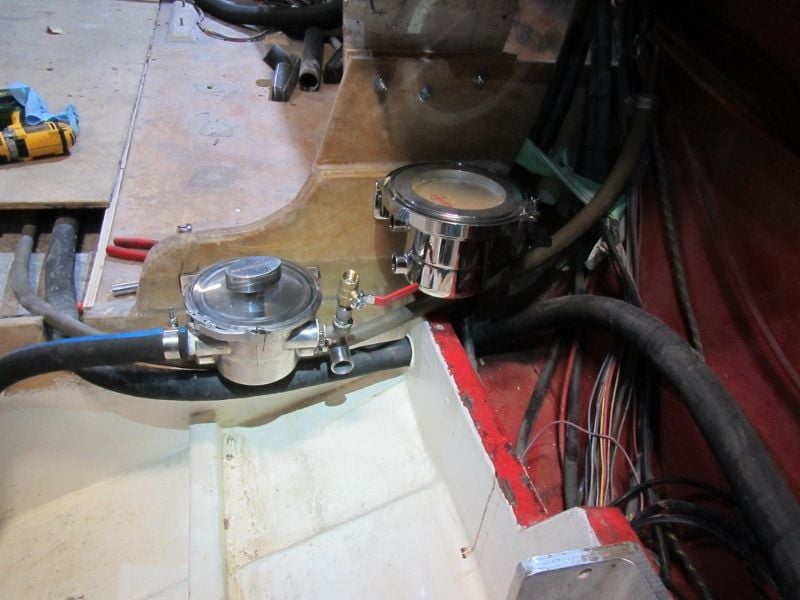
last night was finish the prep for the installation of the water pickups for the inter coolers
Last summer I first tried just free hand a hole saw, what a mess that was
Then I made the hole oversize then filled it with reinforced epoxy, and had to sleep on it to think of a way to solve this problem.
Due to the angle of the tube and the close proximity of the fasteners I made a jig and boring bar to cut it out

 05-28-2020 | 11:34 AM
#6
Thread Starter
Platinum Member
Joined: Jan 2005
Posts: 1,157
Likes: 520
From: Owen Sound Ont.
Thank you!
I sprayed it, my first time using gel. It was actually way easier than I was expecting. Just used one of my HVLP primer guns with the biggest tip I had. The only pain was cleaning the gun thoroughly between coats. 4 wet coats of gel, last one with air dry, next evening sand progressively to 1000 wet and quick polish
It was just a small area I sprayed, batches were 100 grams, I just used white even though my transom is red because I expect to be re-doing the transom in a few years (the wood is damp)
Next time I will buy an actual gel gun with disposable cup
06-26-2020 | 06:24 AM
#8
Thread Starter
Platinum Member
Joined: Jan 2005
Posts: 1,157
Likes: 520
From: Owen Sound Ont.
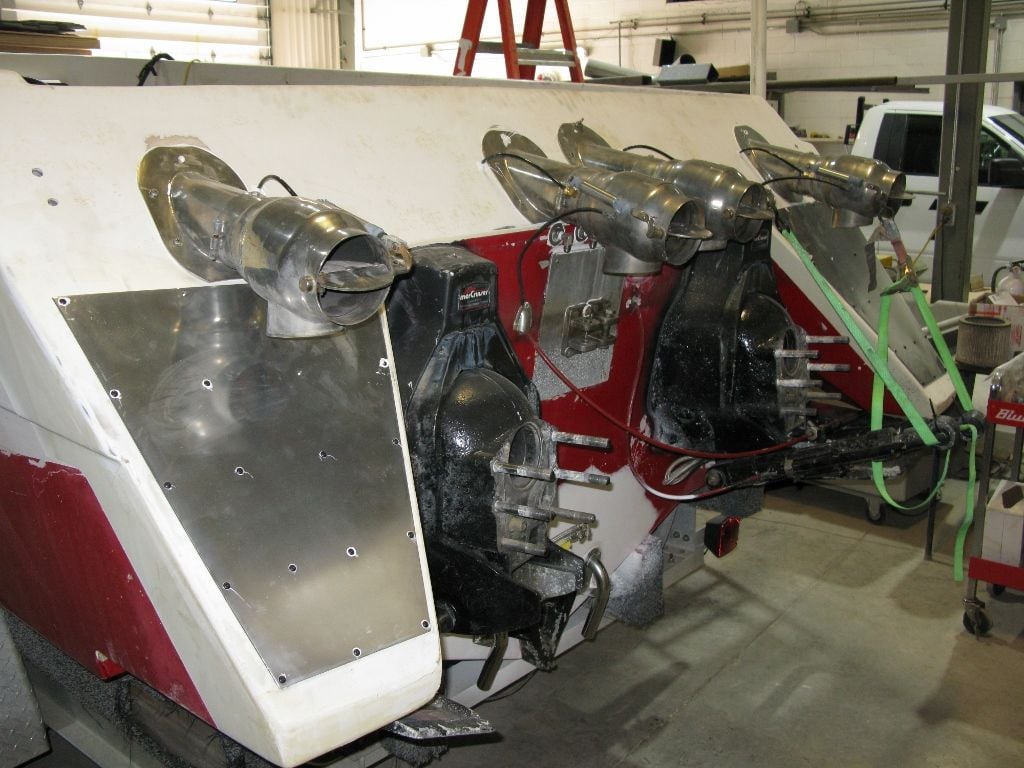
So an update on the progress
Engines are close to being ready to drop in, I have assembled them so they are completely modular, just plug in harness and water and good to go. Lots of little fabrication work to do, I was powder coating all the fabricated parts for the engines because they will be 100% no matter what I do with the hull in the future, but my oven died. I just want to get out this summer, so raw aluminum parts and rattle can paint will have to do!
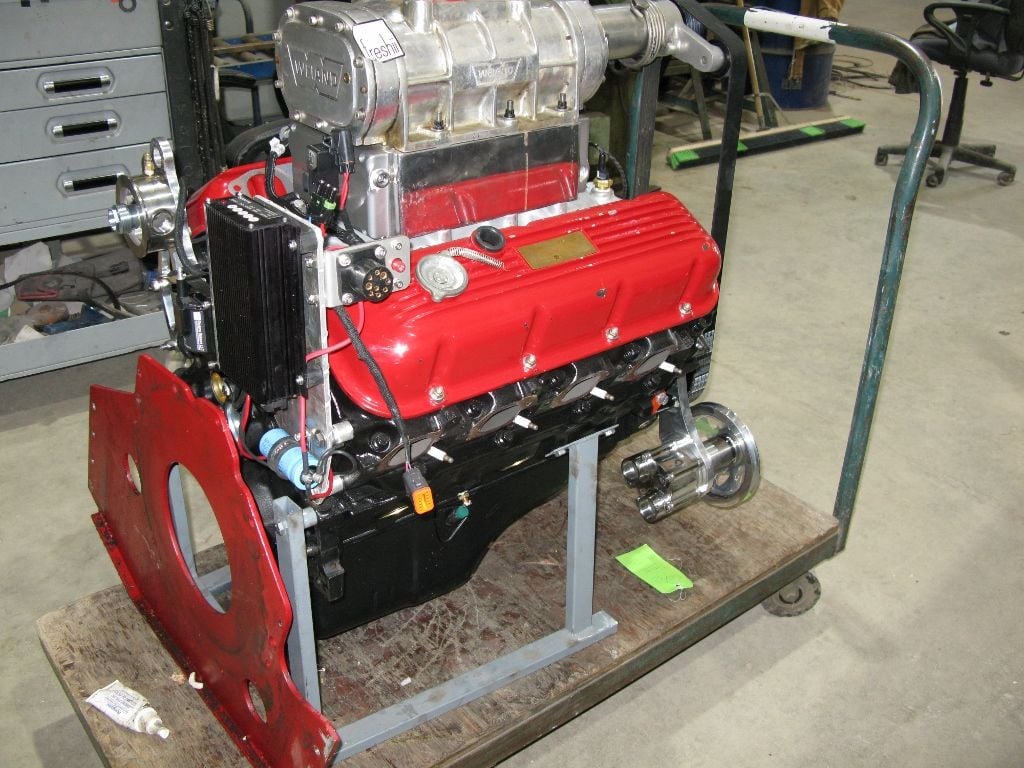
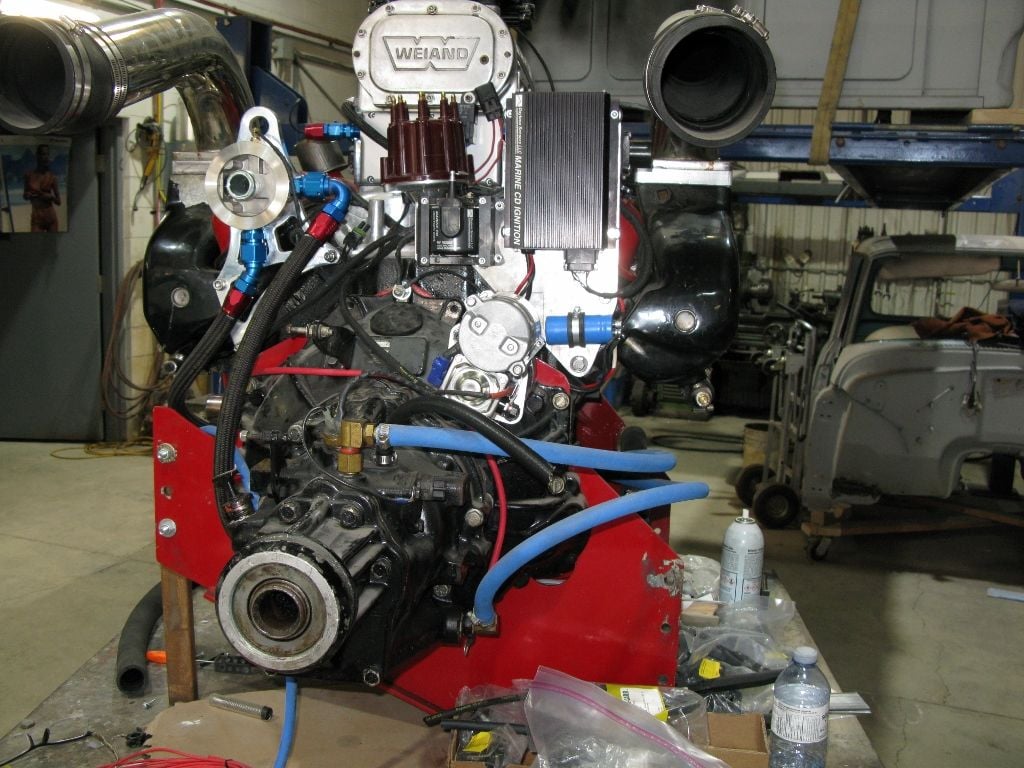

Engines are close to being ready to drop in, I have assembled them so they are completely modular, just plug in harness and water and good to go. Lots of little fabrication work to do, I was powder coating all the fabricated parts for the engines because they will be 100% no matter what I do with the hull in the future, but my oven died. I just want to get out this summer, so raw aluminum parts and rattle can paint will have to do!
06-26-2020 | 06:27 AM
#9
Thread Starter
Platinum Member
Joined: Jan 2005
Posts: 1,157
Likes: 520
From: Owen Sound Ont.
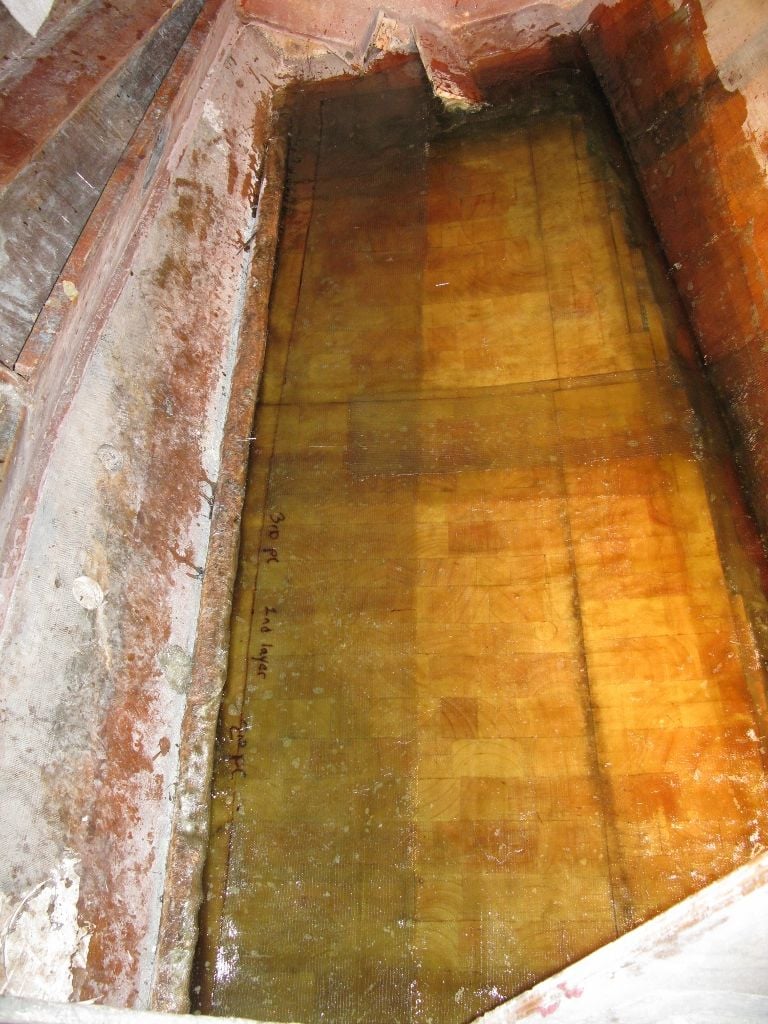
Glass work in the cabin is progressing slowly, one side is almost done, need to tidy it up and add one more layer of glass. I added a rib, not sure if its a good move to stiffen it up or not. Guess I'll find out