

Laminating 13' stringer corebond or cloth?
 05-07-2021 | 09:10 AM
#1
Thread Starter
Registered

Joined: Apr 2011
Posts: 374
Likes: 2
From: mckinney texas
I am making a 3/4"x 13' stringer from 2 layers of 3/8" plywood. I have corebond, ve resin, 1708 cloth, and mat.. What would be the best method to use to glue the 2 layers of 3/8 together
2nd question when using corebond they mention primer. Do i put down some ve resin before the corebond. And wet or dry then sand ?
thanks replacing bulkheads and stringer in 402sr1
2nd question when using corebond they mention primer. Do i put down some ve resin before the corebond. And wet or dry then sand ?
thanks replacing bulkheads and stringer in 402sr1
Last edited by chris302; 05-07-2021 at 09:37 AM. Reason: Add words
 05-07-2021 | 04:52 PM
#2

*

Joined: Nov 2002
Posts: 1,027
Likes: 138
From: PortRoyal Bermuda
If it was me I'd do the same thing as when I had to laminate the 2 3/4' pieces of ply together to make a new transom slug.
1st completely seal all the plywood surfaces with resin , let cure , sand then another coat of resin. Sand again then put a layer of chop strand on both 'interior' surfaces and clamp together.
Remember , trying to do the layup on dry wood results in a compromised bond as the raw wood wicks the resin away from the cloth. That also applies to when it comes time to glass the new stringers in.
Might also be worthwhile to make sure the base of the new stringers are angled to match the inside of the hull angle so you avoid the hard edge/void under the stringer.
As for the Corebond question , I don't know .
05-07-2021 | 08:58 PM
#3
Registered

Joined: May 2009
Posts: 1,942
Likes: 527


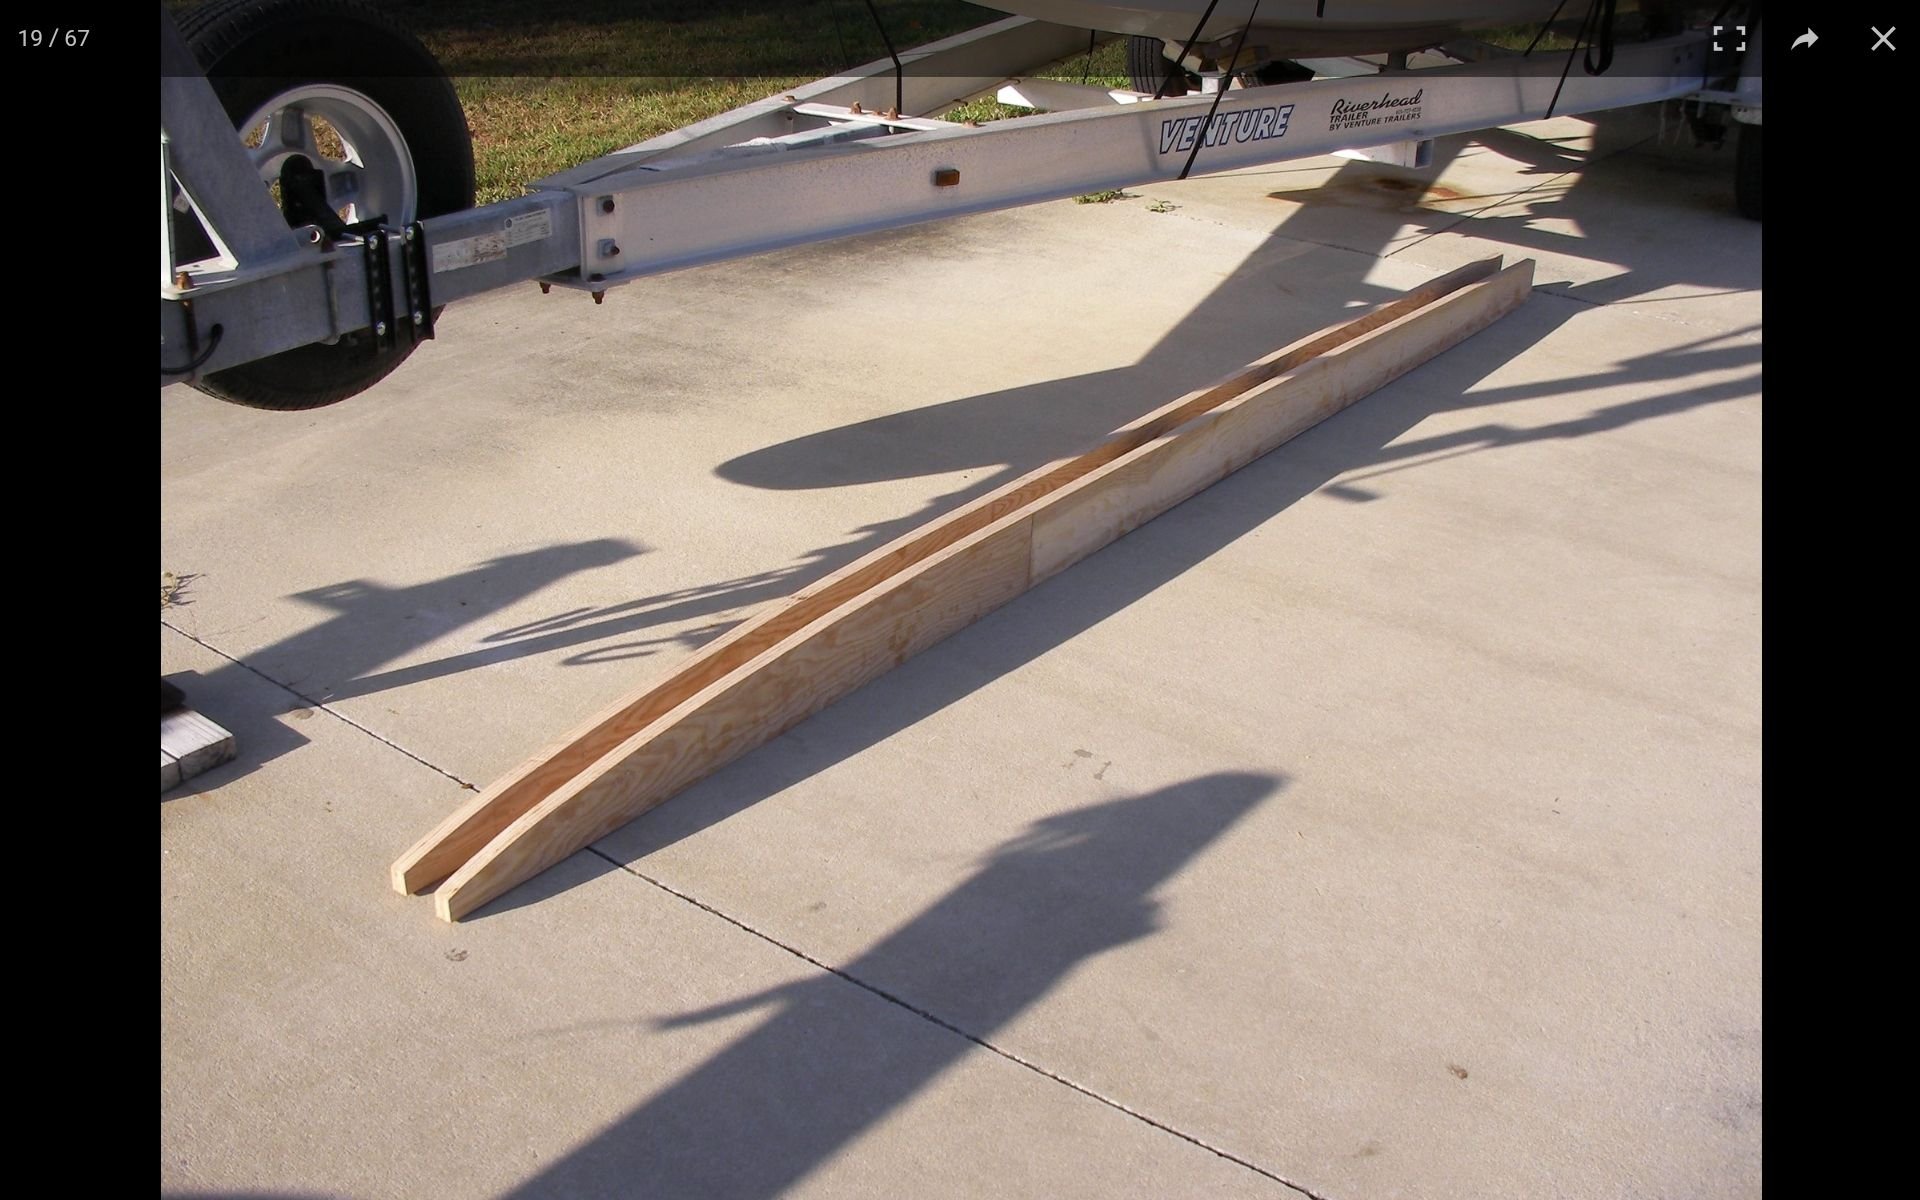


these are 12 feet long, double 1/2 marine ply staggered seams bonded together.
Think like your making yourself a sandwich.
lay out the 2 sides and roll or sqeegee on some resin.
lay on your glass, wet it out and bubble roll it.
place the side without material (mat) resin side down and screw them together.
Do it wet, 2 mixes, 1 mix for the ply, 1 mix for the mat.
roll the mat up, soup the mat mix on the ply then unroll it right down the board, use a dry roller to press the mat down so the resin soaks thru.
dry roller in strong hand, wet roller in off hand, sqeegee in back pocket and bubble roller in your mouth
i'm not kidding have everything on hand and in reach.
mine were laid out so they bowed away from eachother, once both were assembled they got shimmed and clamped together.
they cured arrow straight. Cut to fit longitudinally and ground to fit the deadrise. All marked with a compass, easy and accurate.
if your making 1 stringer, don't spoon fit the 2 sides to eachother, lay your boards so each side bow away from each other
(think coke bottle/ female figure) that way the screws pull them together for a straight stringer.
think it thru, plan it out, prepare, prepare some more and have back up everything on hand in case it hits the fan.
mine were made with ve resin and some cloth i had on hand, you have mat and that will be perfect.
the recipe for mine i got from our resident pro here on offshore, i followed his advice noted the important steps and had great results.
couldn't have done it without his help.
these where my first pair of stringers, all scraps from cutting to fit, and core samples from drain plugs are solid, the layers of ply comes apart before the bond fails
the screws get removed, holes drilled and doweled.
Last edited by outonsafari; 05-07-2021 at 09:16 PM.


