

Replacement Merc 496 Fuel Rail
 09-30-2024 | 09:24 AM
#1
Thread Starter
VIP Member


Joined: Jun 2021
Posts: 3,550
Likes: 2,147
From: SW Ohio
Guys,
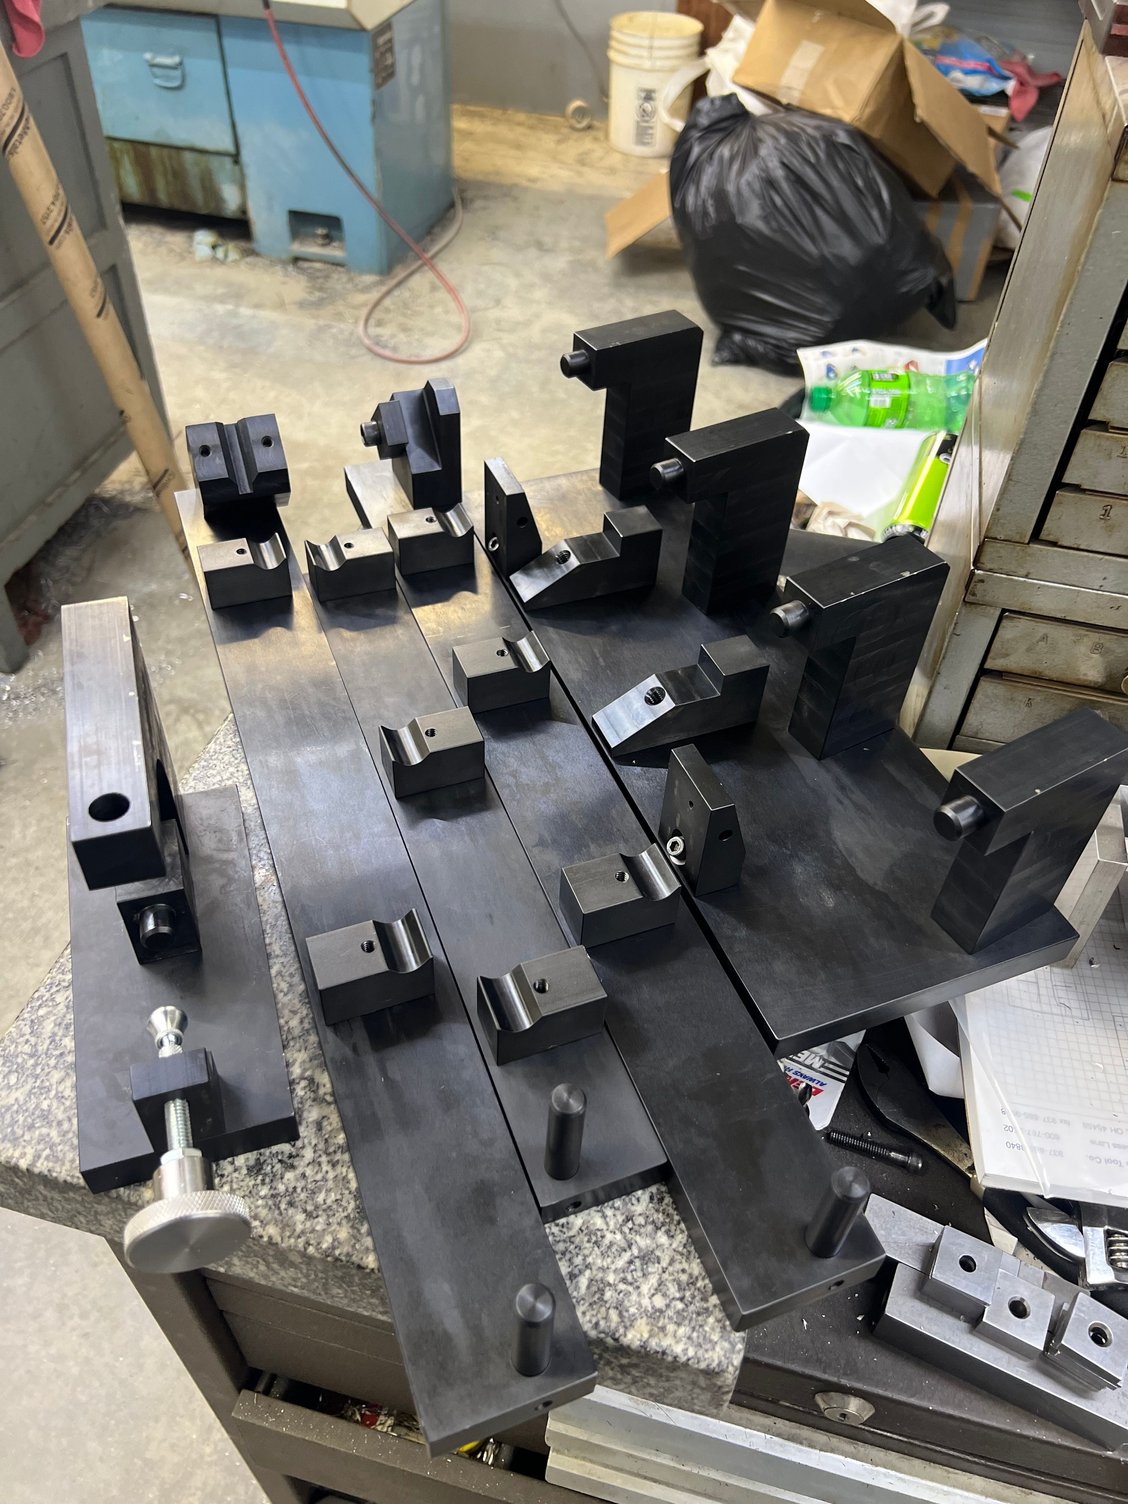
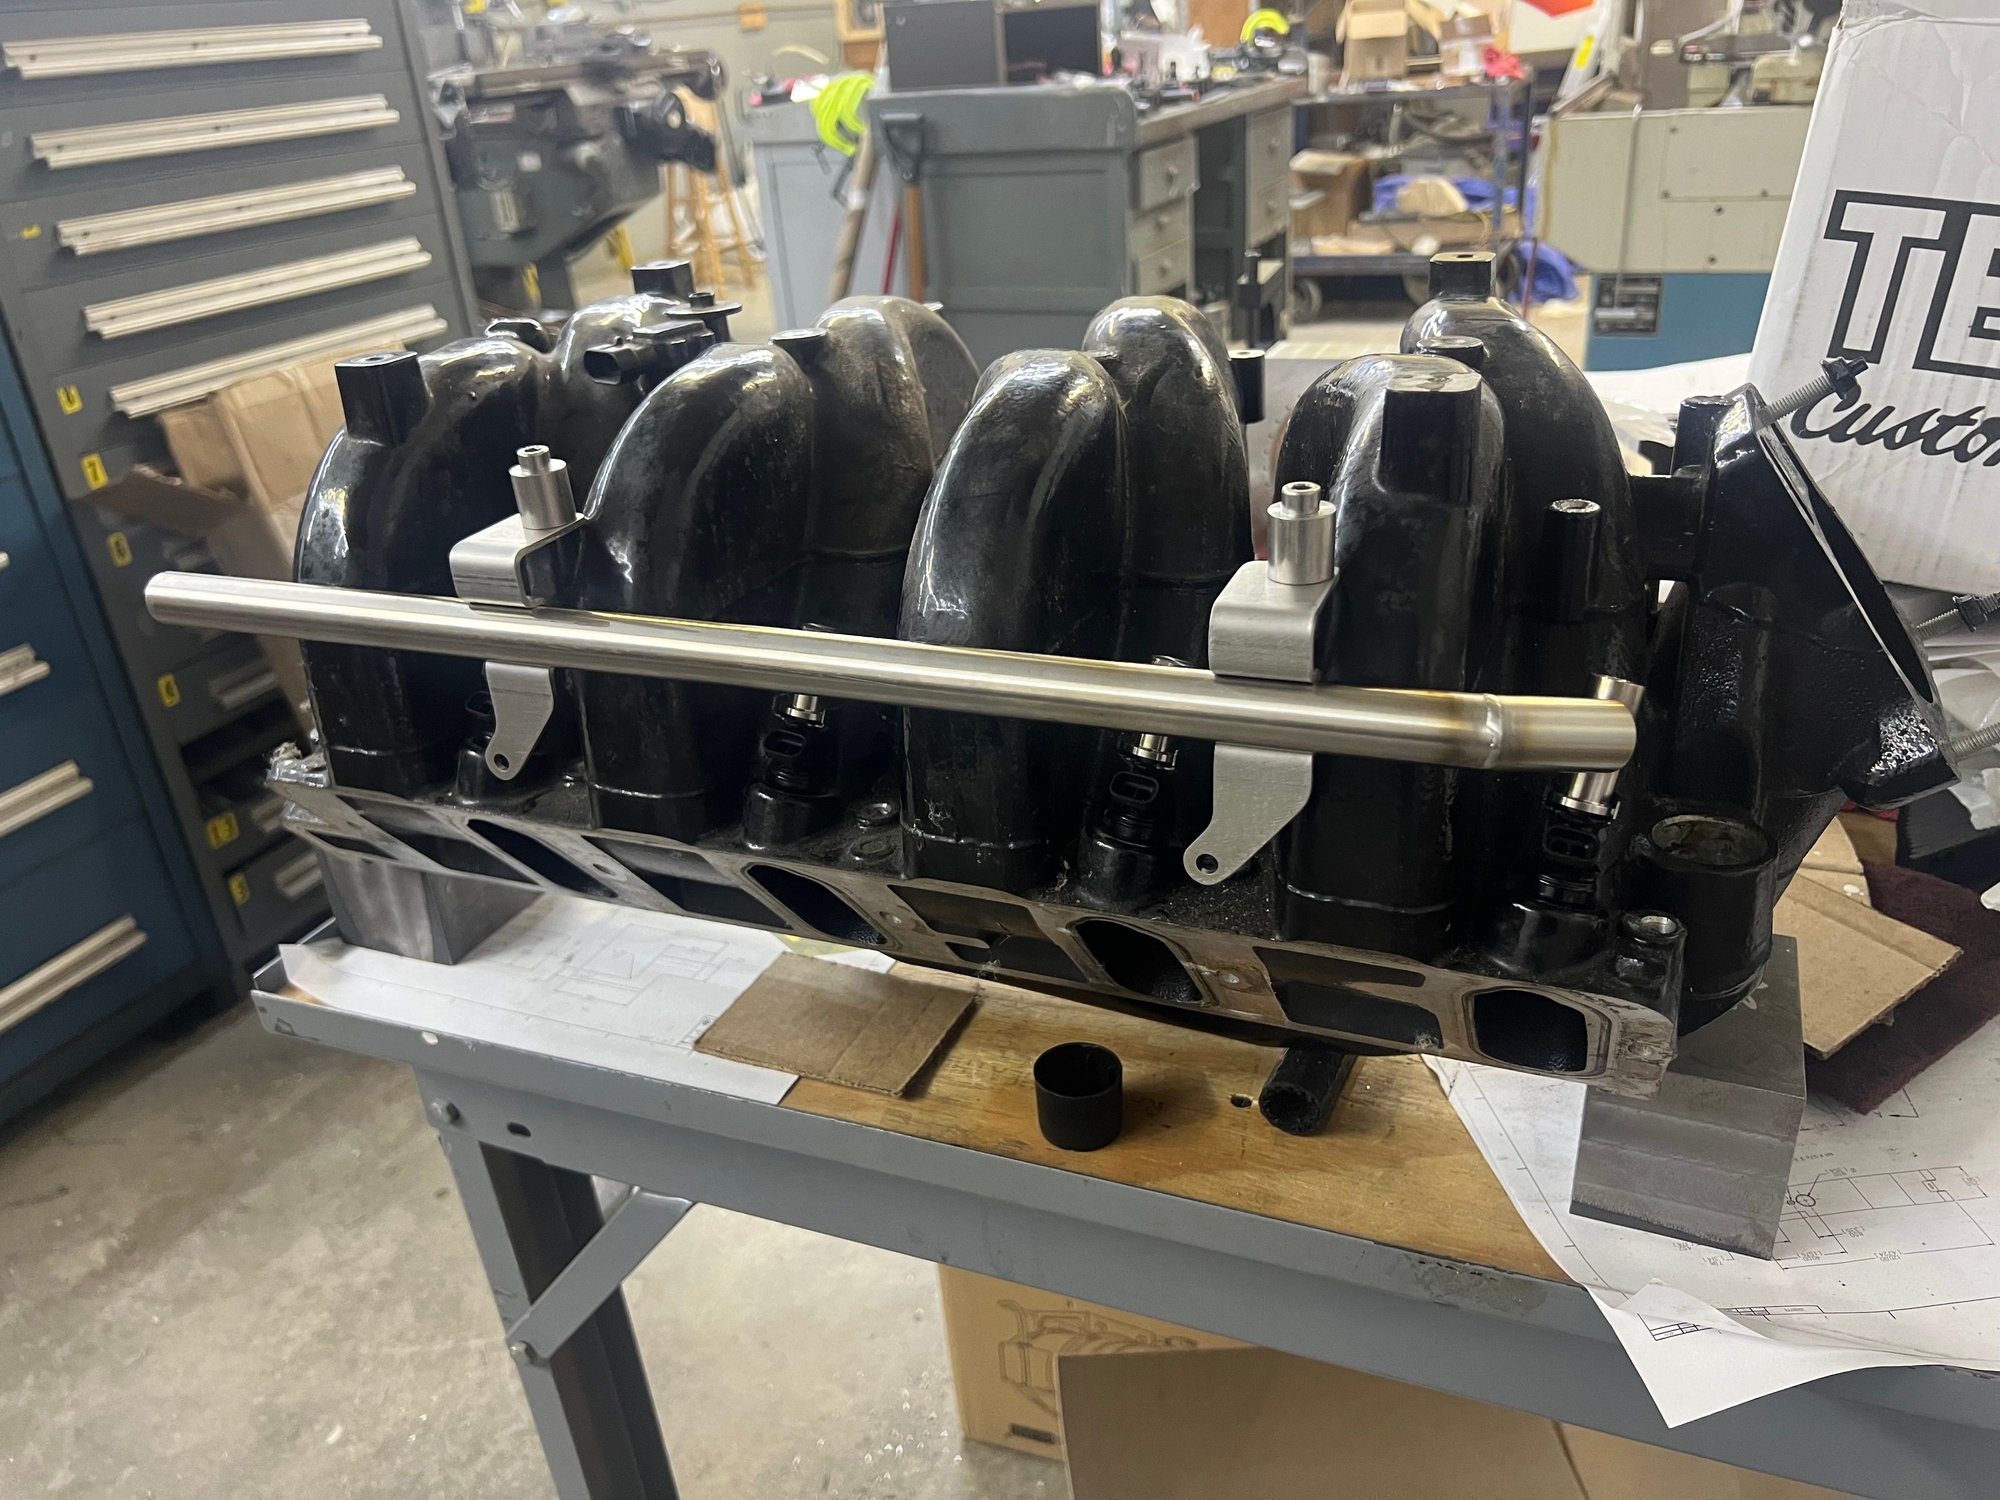
As mentioned in my recent “Hurt 496”, thread, I am developing an “80% drop-in” replacement for the 496 fuel rail. The end user will have to plumb them in and provide their own fuel pressure regulator. All the fixturing is machined and ready to go to black oxide (as a rust preventative), and all the components for the rails are ready to start the welding process.
Here is the teaser:
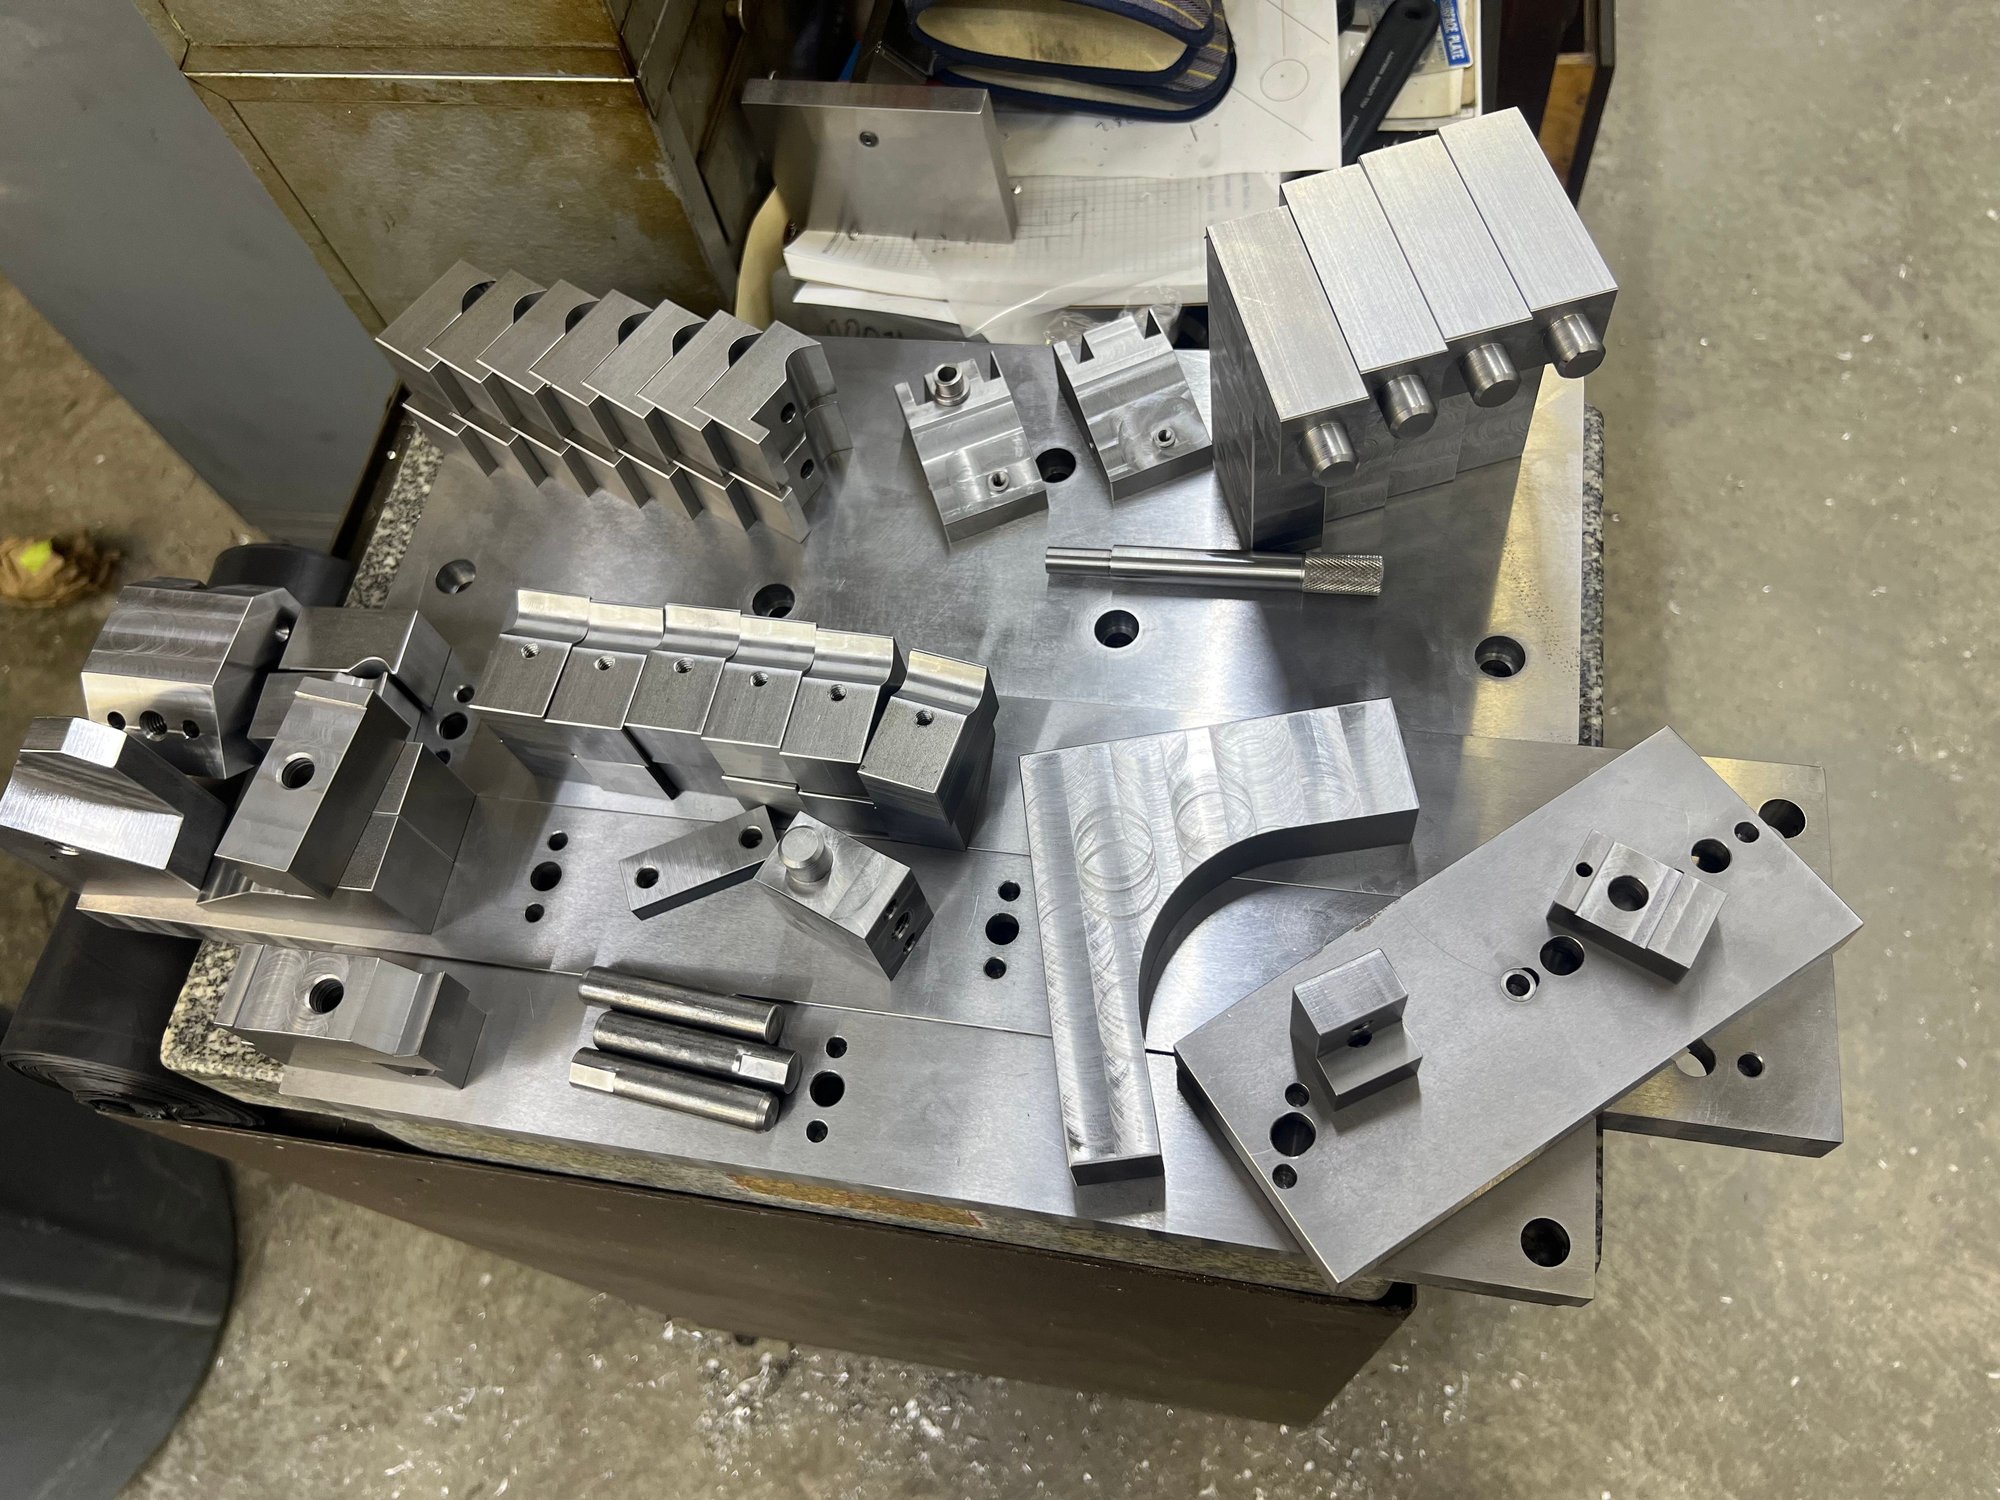
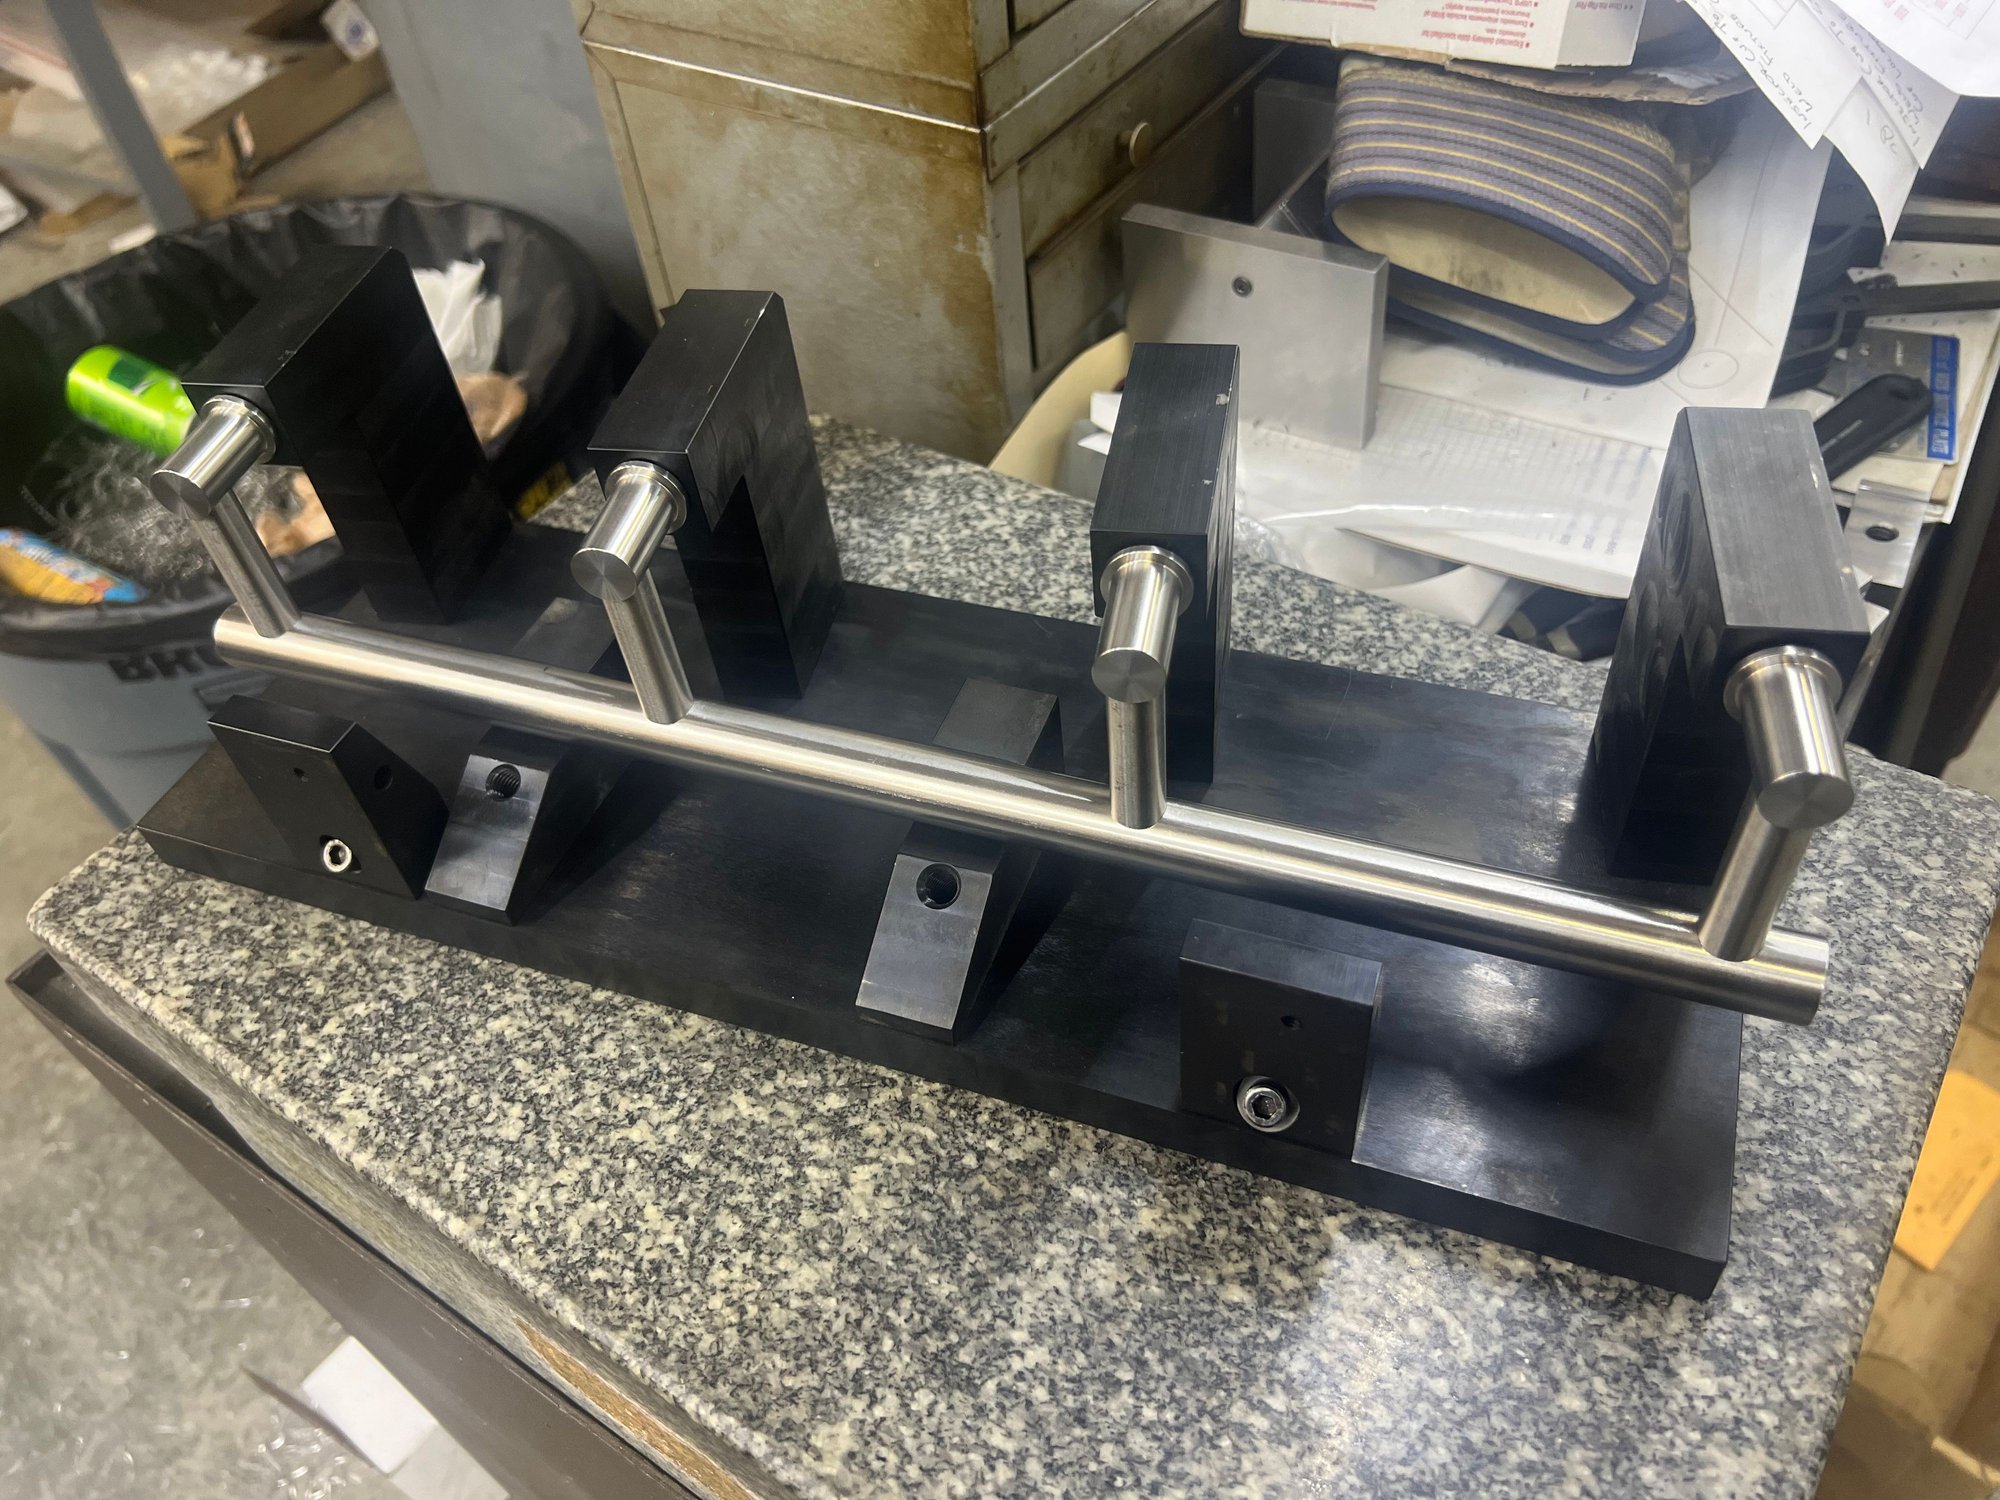
Fixturing components. There are four individual fixtures, each with their own place in the order of operations.
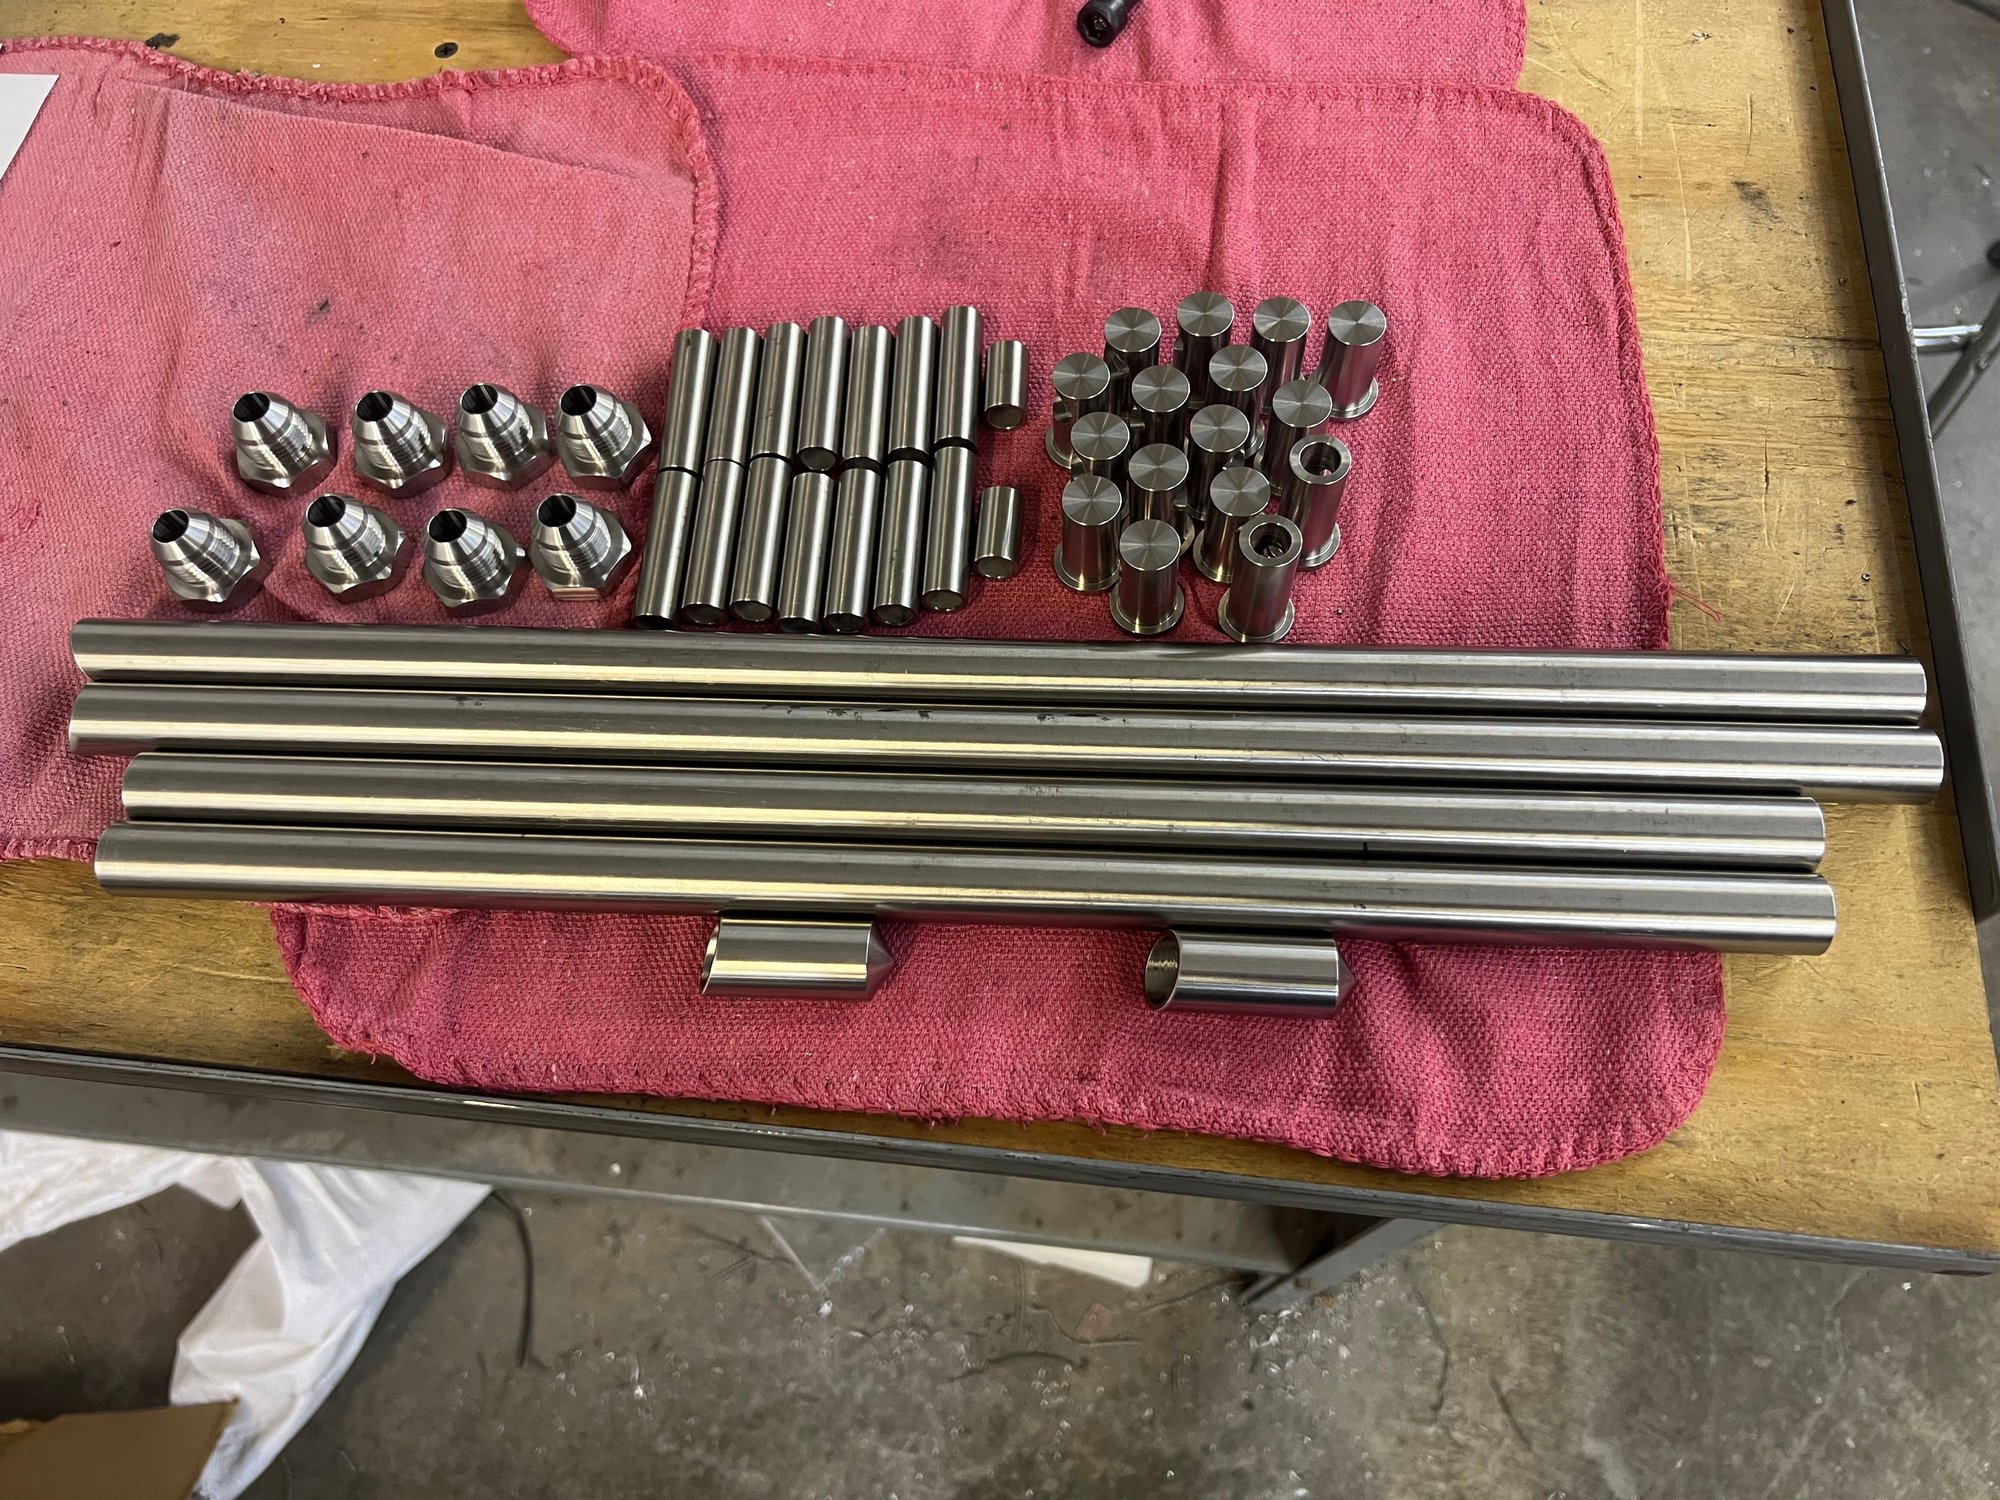
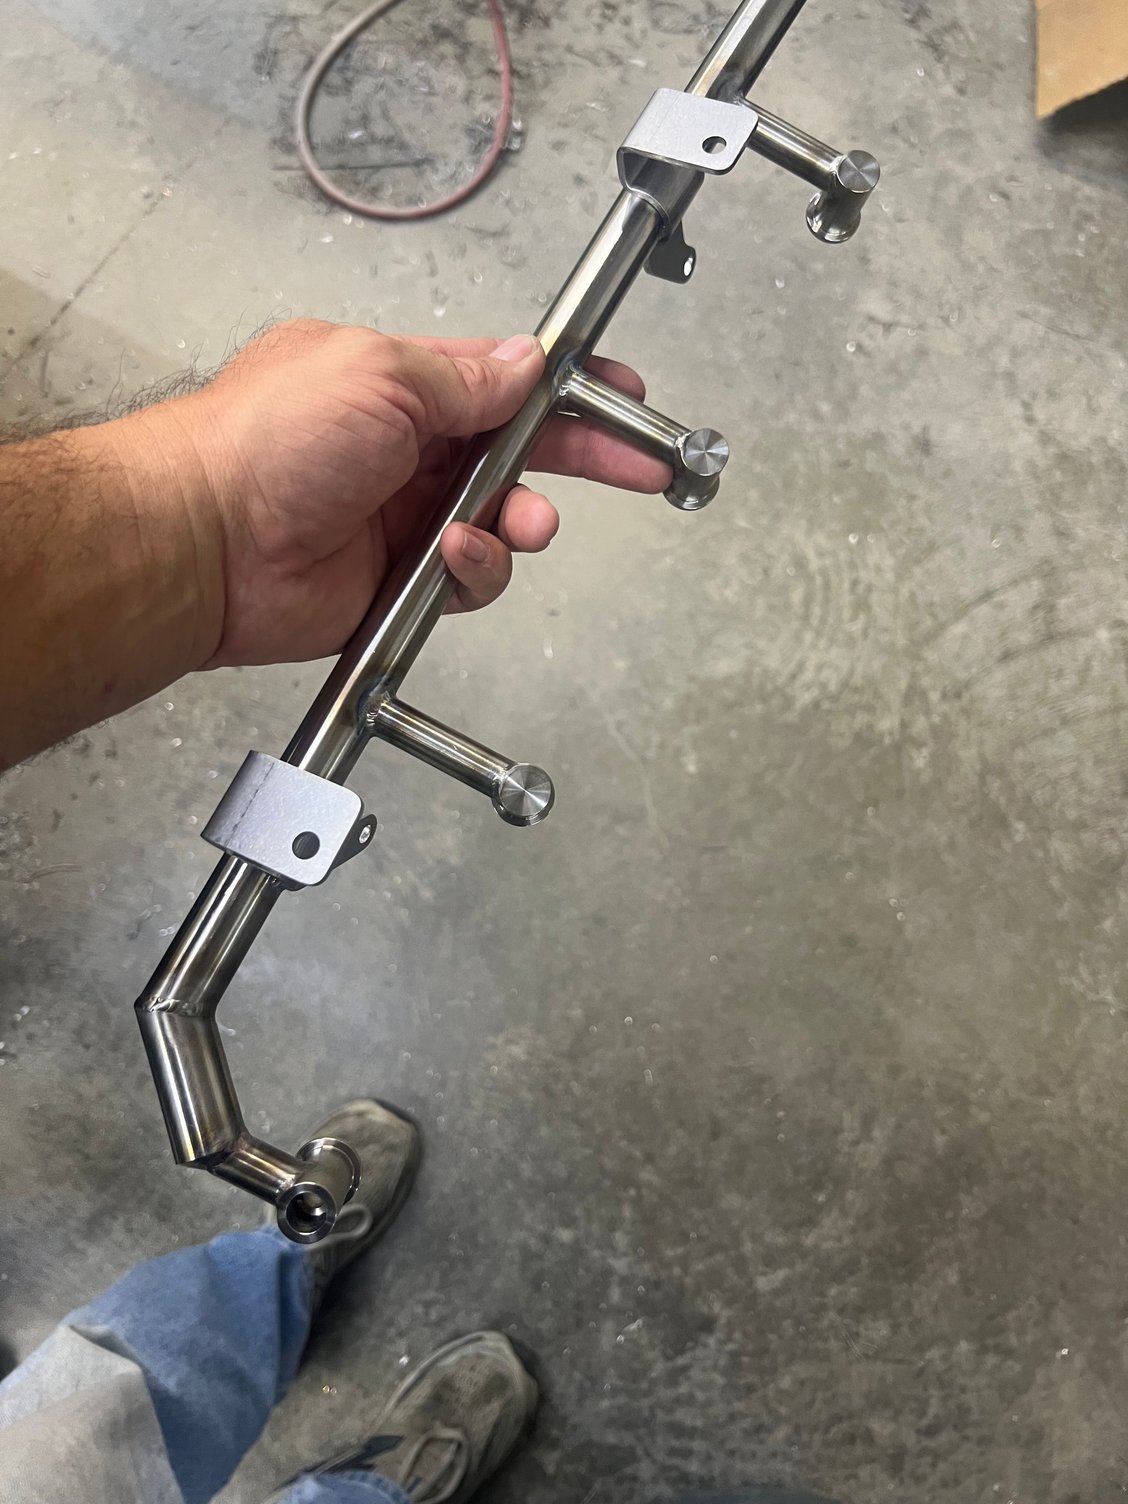
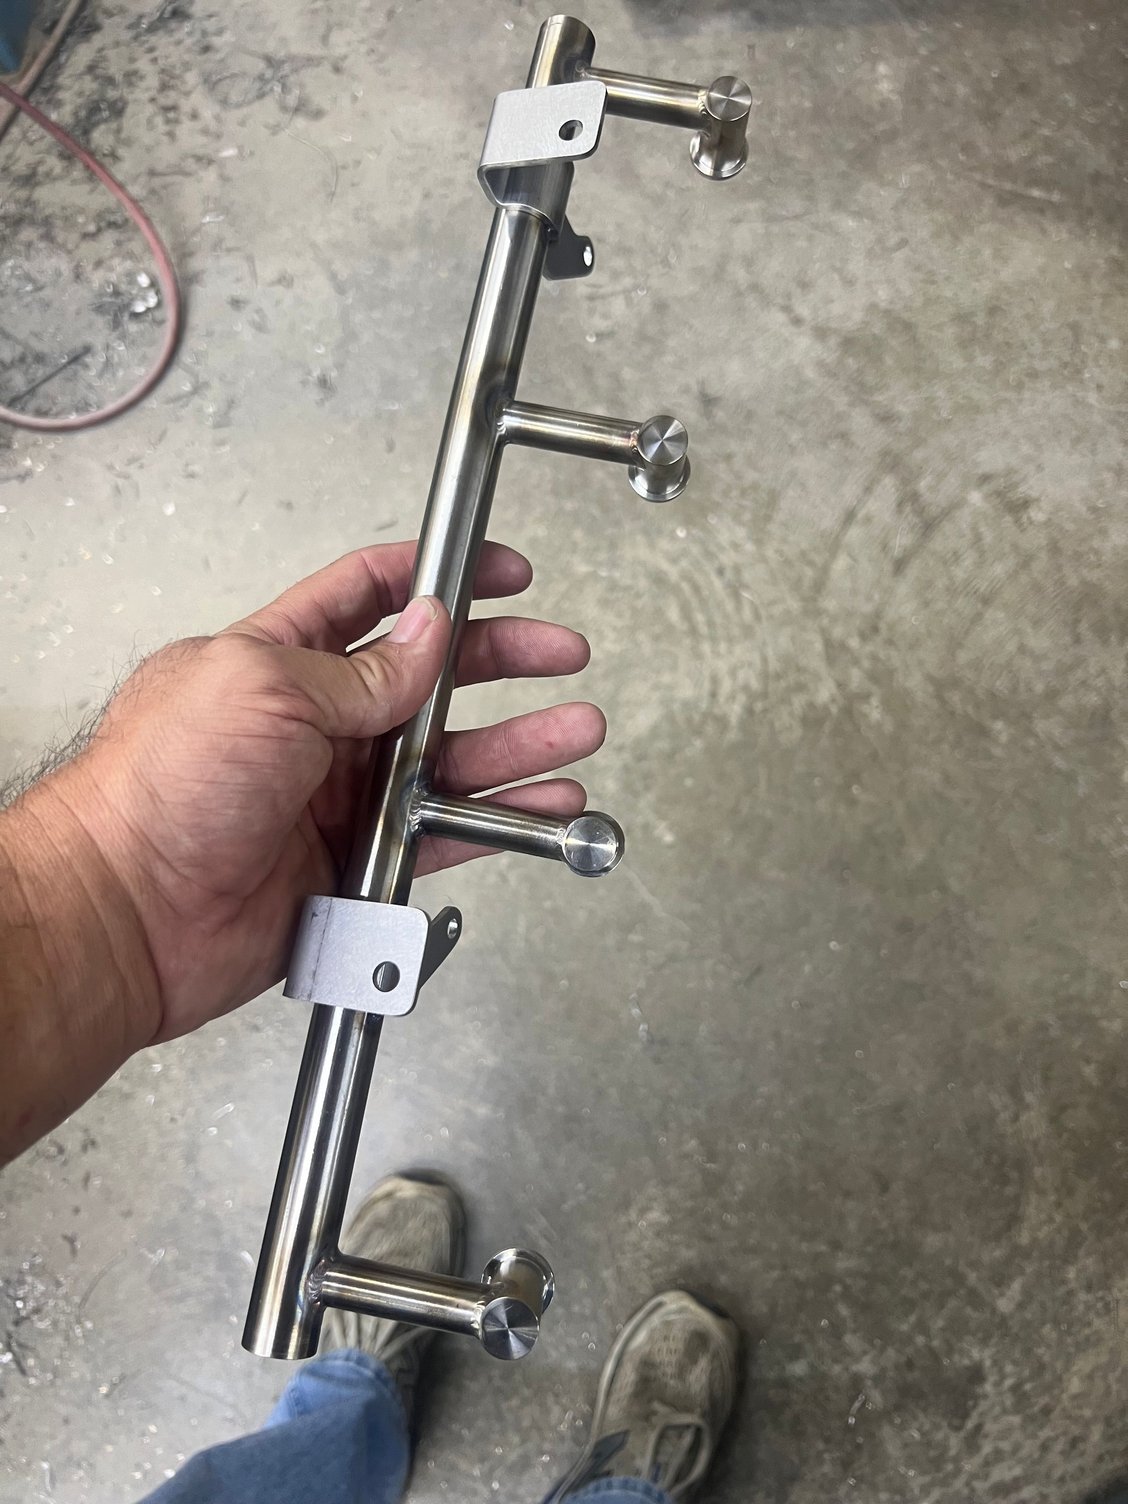
Rail components for two complete sets of rails. The injector cups and AN bungs are machined from bar stock. All 316ss. The mounting tabs, also 316ss, are not included in the pic, as I don't have them from the sheet metal shop yet, but will be included on the rails.
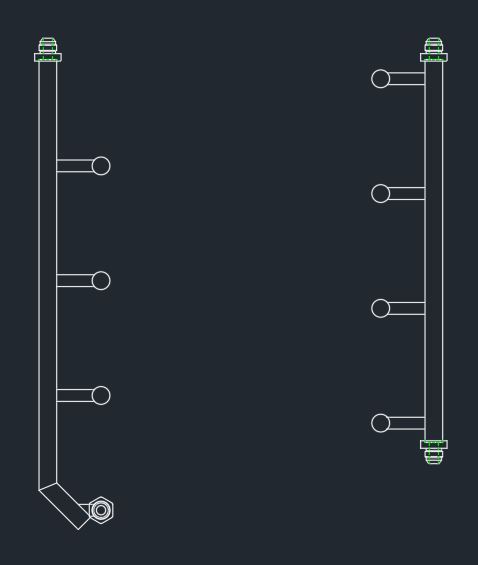
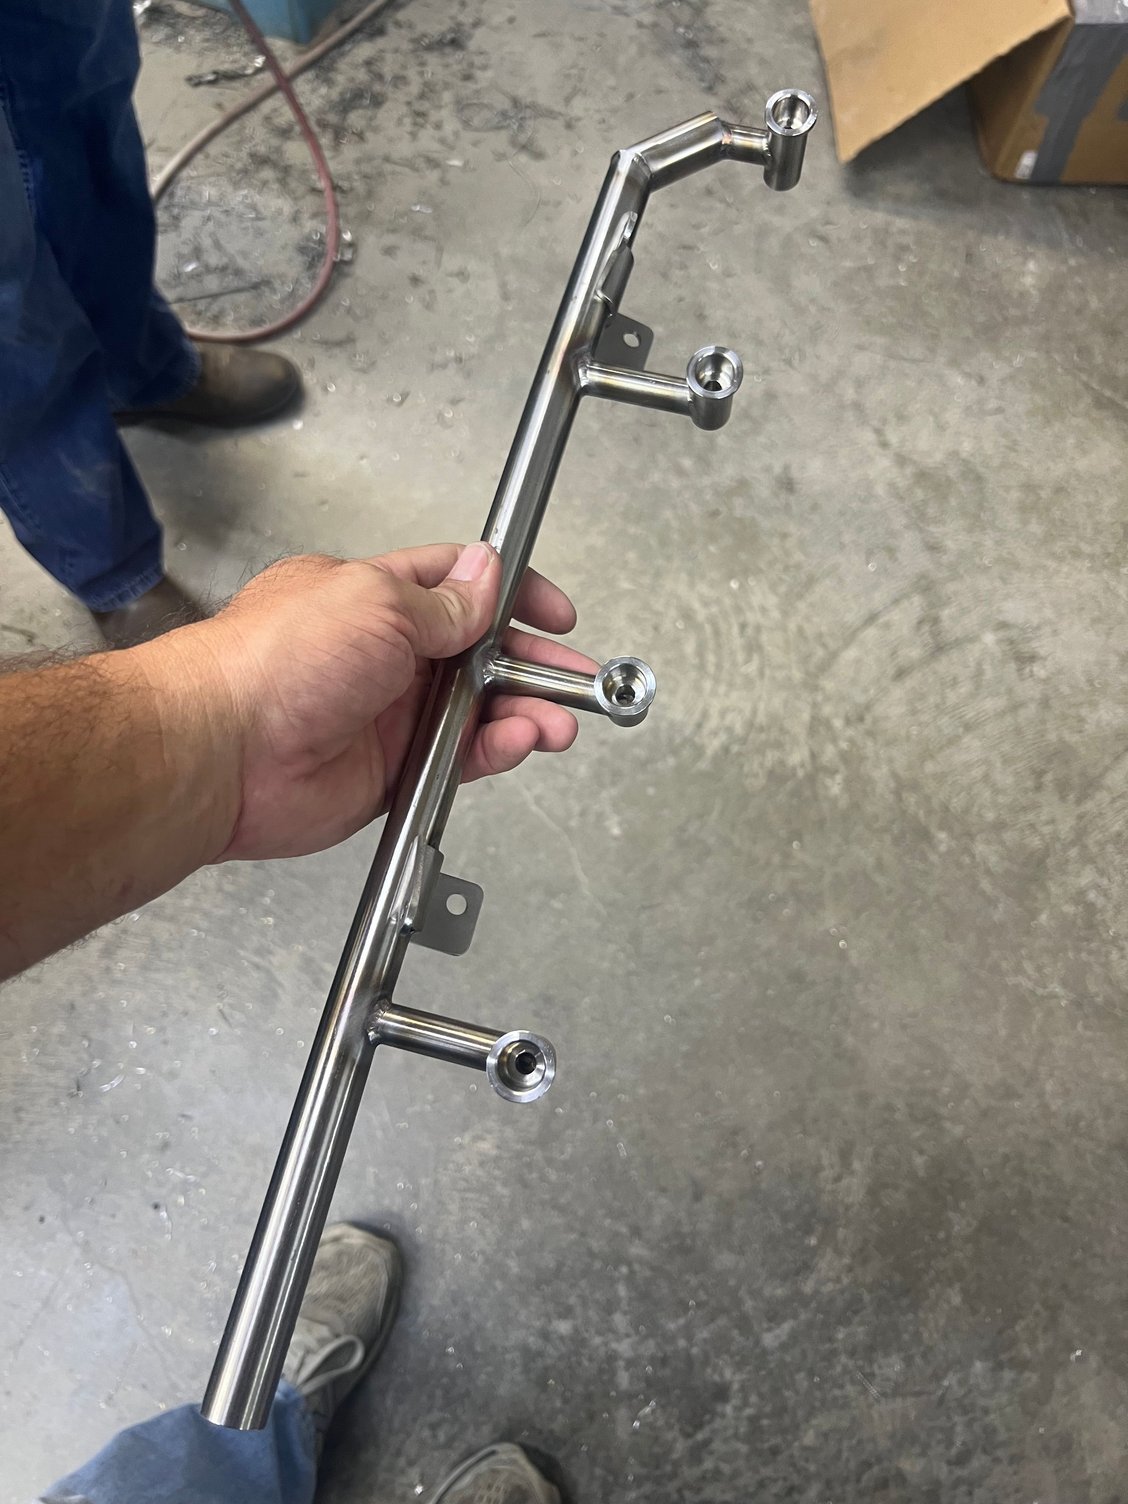
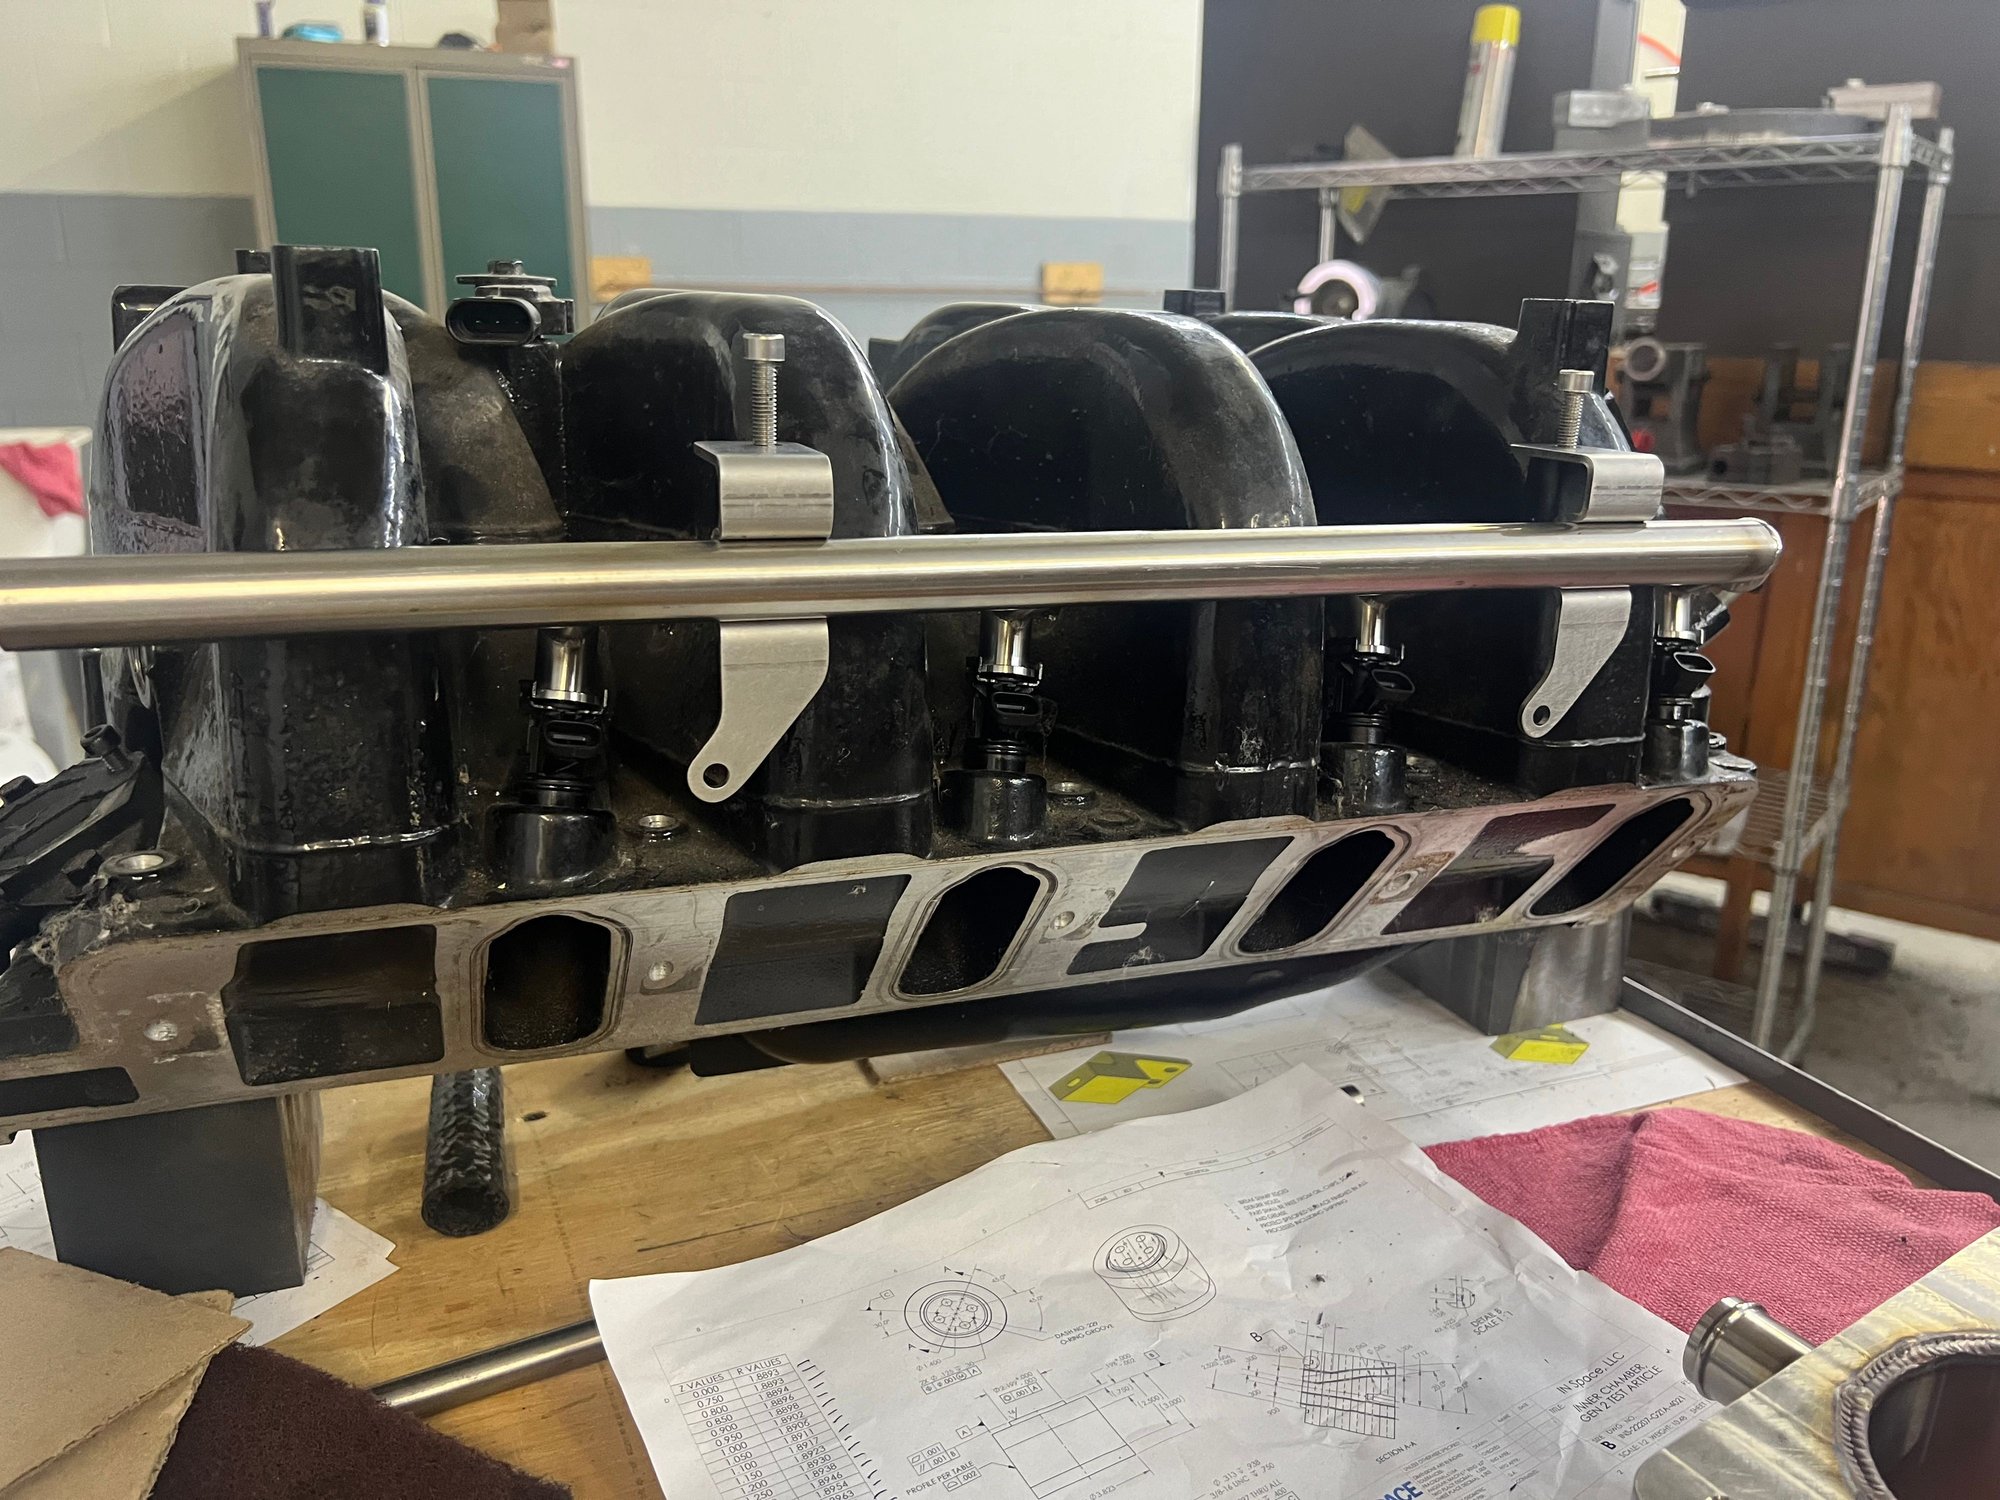
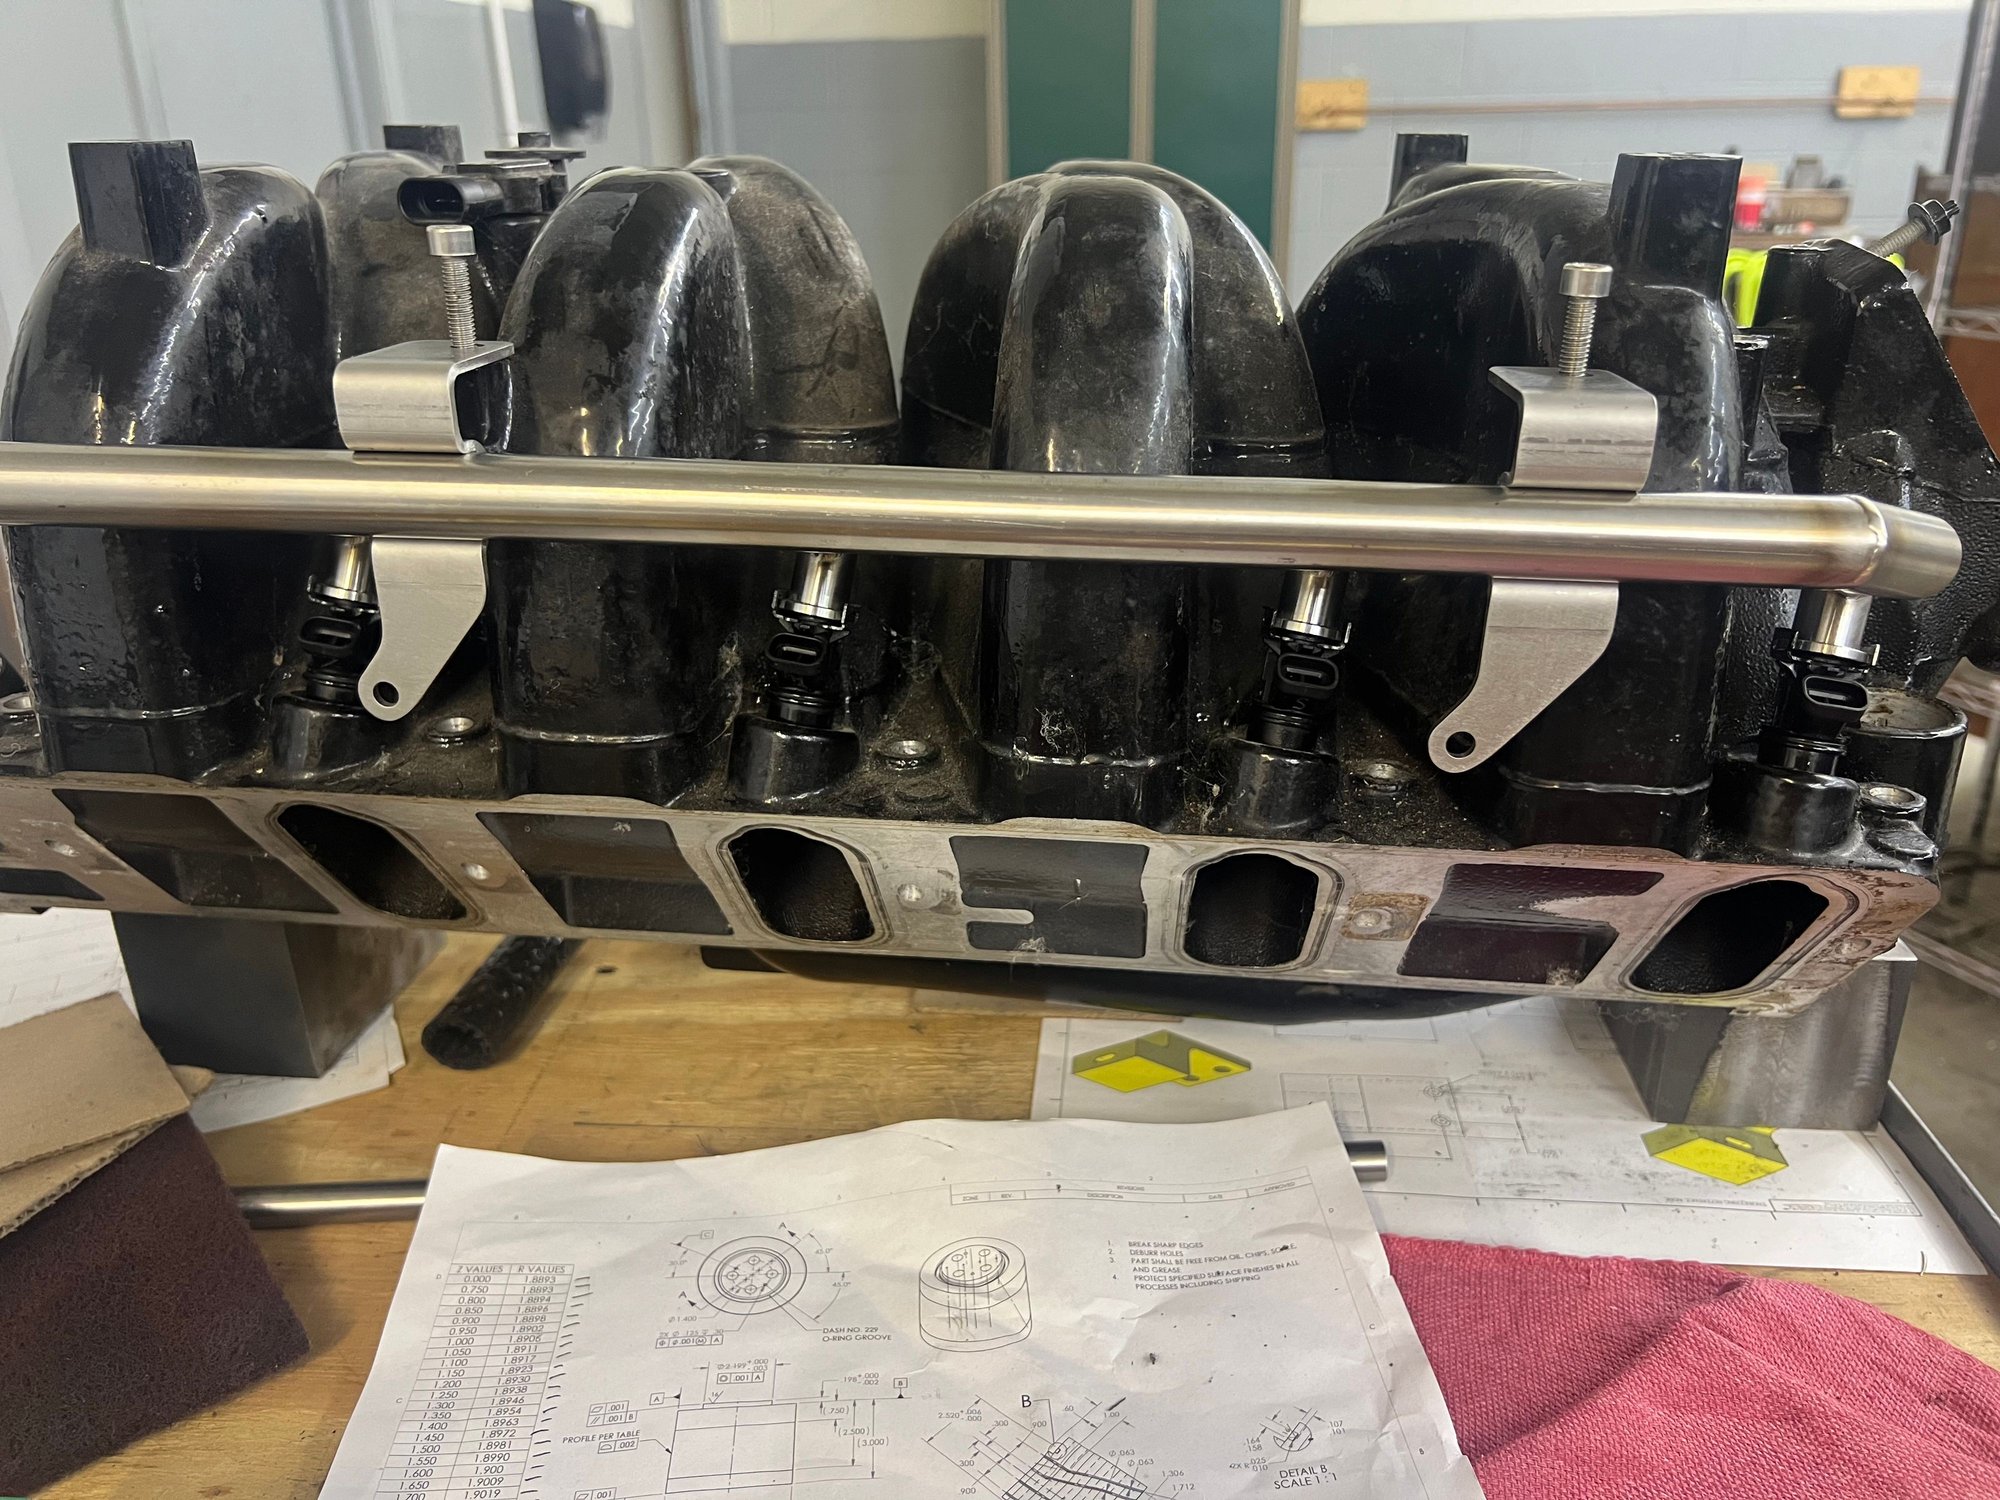
This is the layout, looking at the engine from the cockpit, toward the transom. My plan for mine is to supply the front port side, bridge across the rear and return from the starboard from, out the top of the injector cup. This should allow for the purging of air almost immediately.
More to come.
Thanks. Brad.
As mentioned in my recent “Hurt 496”, thread, I am developing an “80% drop-in” replacement for the 496 fuel rail. The end user will have to plumb them in and provide their own fuel pressure regulator. All the fixturing is machined and ready to go to black oxide (as a rust preventative), and all the components for the rails are ready to start the welding process.
Here is the teaser:
Fixturing components. There are four individual fixtures, each with their own place in the order of operations.
Rail components for two complete sets of rails. The injector cups and AN bungs are machined from bar stock. All 316ss. The mounting tabs, also 316ss, are not included in the pic, as I don't have them from the sheet metal shop yet, but will be included on the rails.
This is the layout, looking at the engine from the cockpit, toward the transom. My plan for mine is to supply the front port side, bridge across the rear and return from the starboard from, out the top of the injector cup. This should allow for the purging of air almost immediately.
More to come.
Thanks. Brad.
Last edited by Brad Christy; 09-30-2024 at 09:30 AM.

 10-18-2024 | 04:56 PM
#3
Thread Starter
VIP Member
Joined: Jun 2021
Posts: 3,550
Likes: 2,147
From: SW Ohio
Guys,
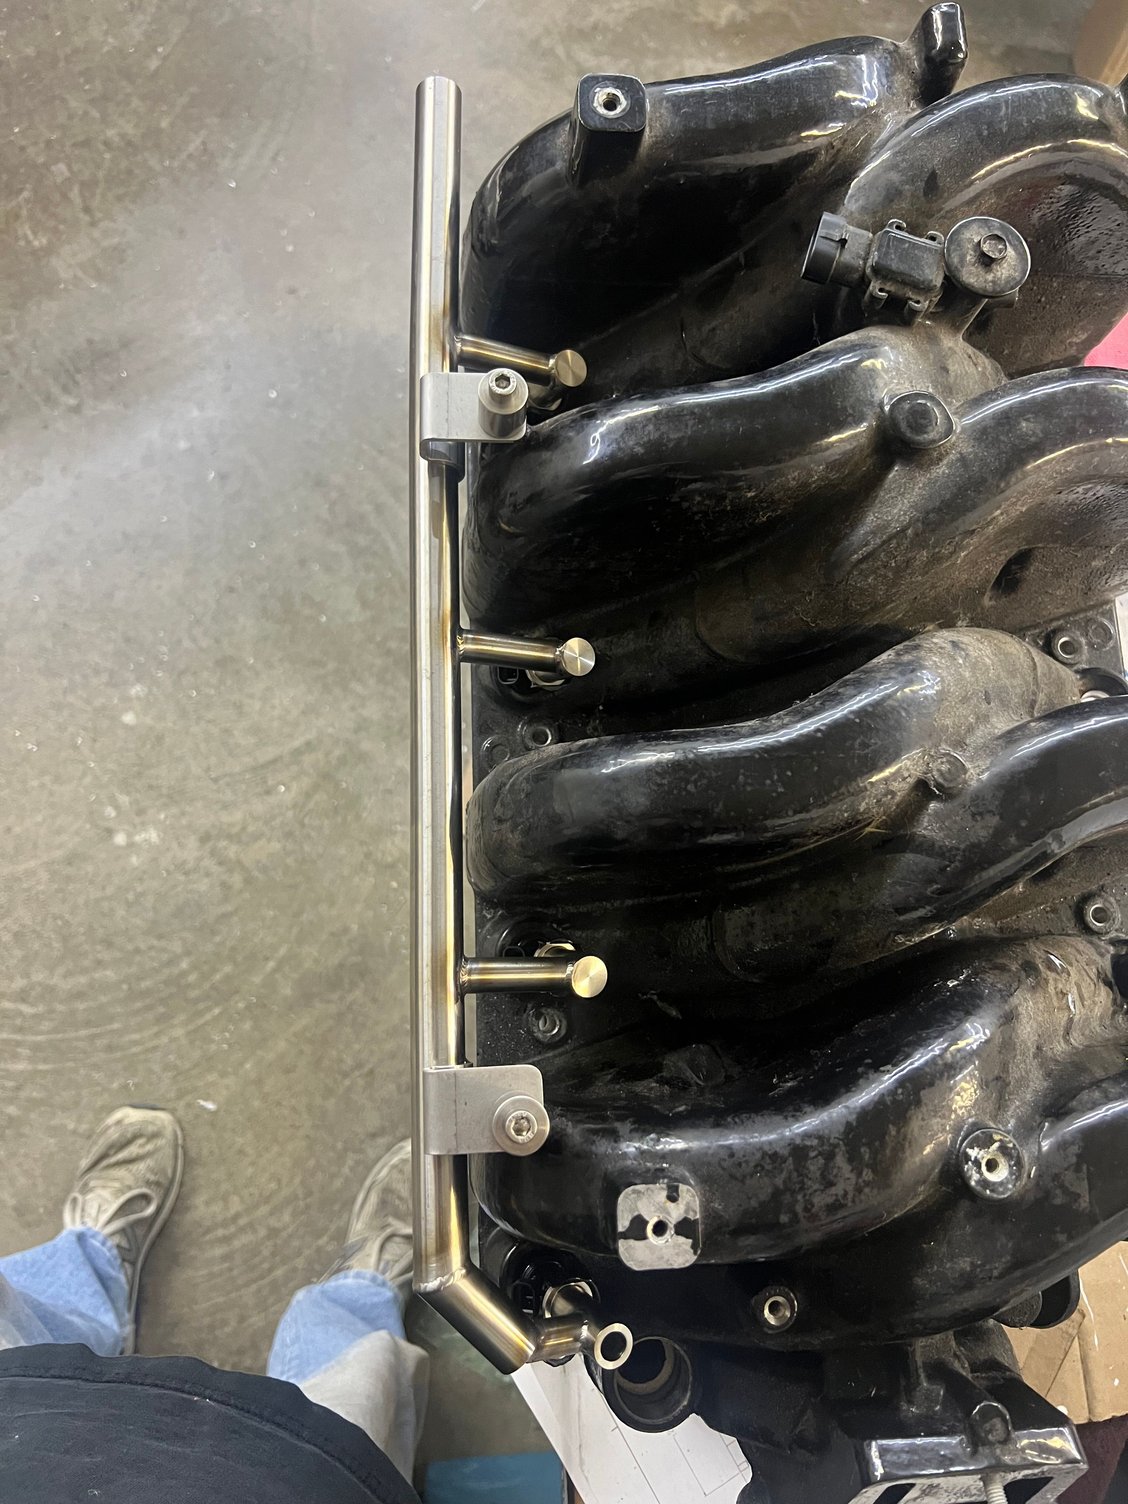
Starboard side rail is done, less the AN fittings to be welded on. The welder buddy has Fridays off, and he�s otherwise engaged both weekend days, so progress is slow. We ran out of time for today, but the injectors are in place. I�ve made up some injector cup plugs that are held in by the same clips that hold the injectors in, and we will be doing a pressure test on the rails as soon as the AN fittings are on.
Thanks. Brad.
 10-18-2024 | 08:52 PM
#6
Thread Starter
VIP Member
Joined: Jun 2021
Posts: 3,550
Likes: 2,147
From: SW Ohio
Seriously�.?
My nephew sent me a link for one. And you�re right. They wanted $5500 for it. I thought it HAD to be a joke. The link is down now, so, I guess SOMEBODY was that desperate.
Thanks. Brad.
 10-26-2024 | 05:27 PM
#8
Thread Starter
VIP Member
Joined: Jun 2021
Posts: 3,550
Likes: 2,147
From: SW Ohio
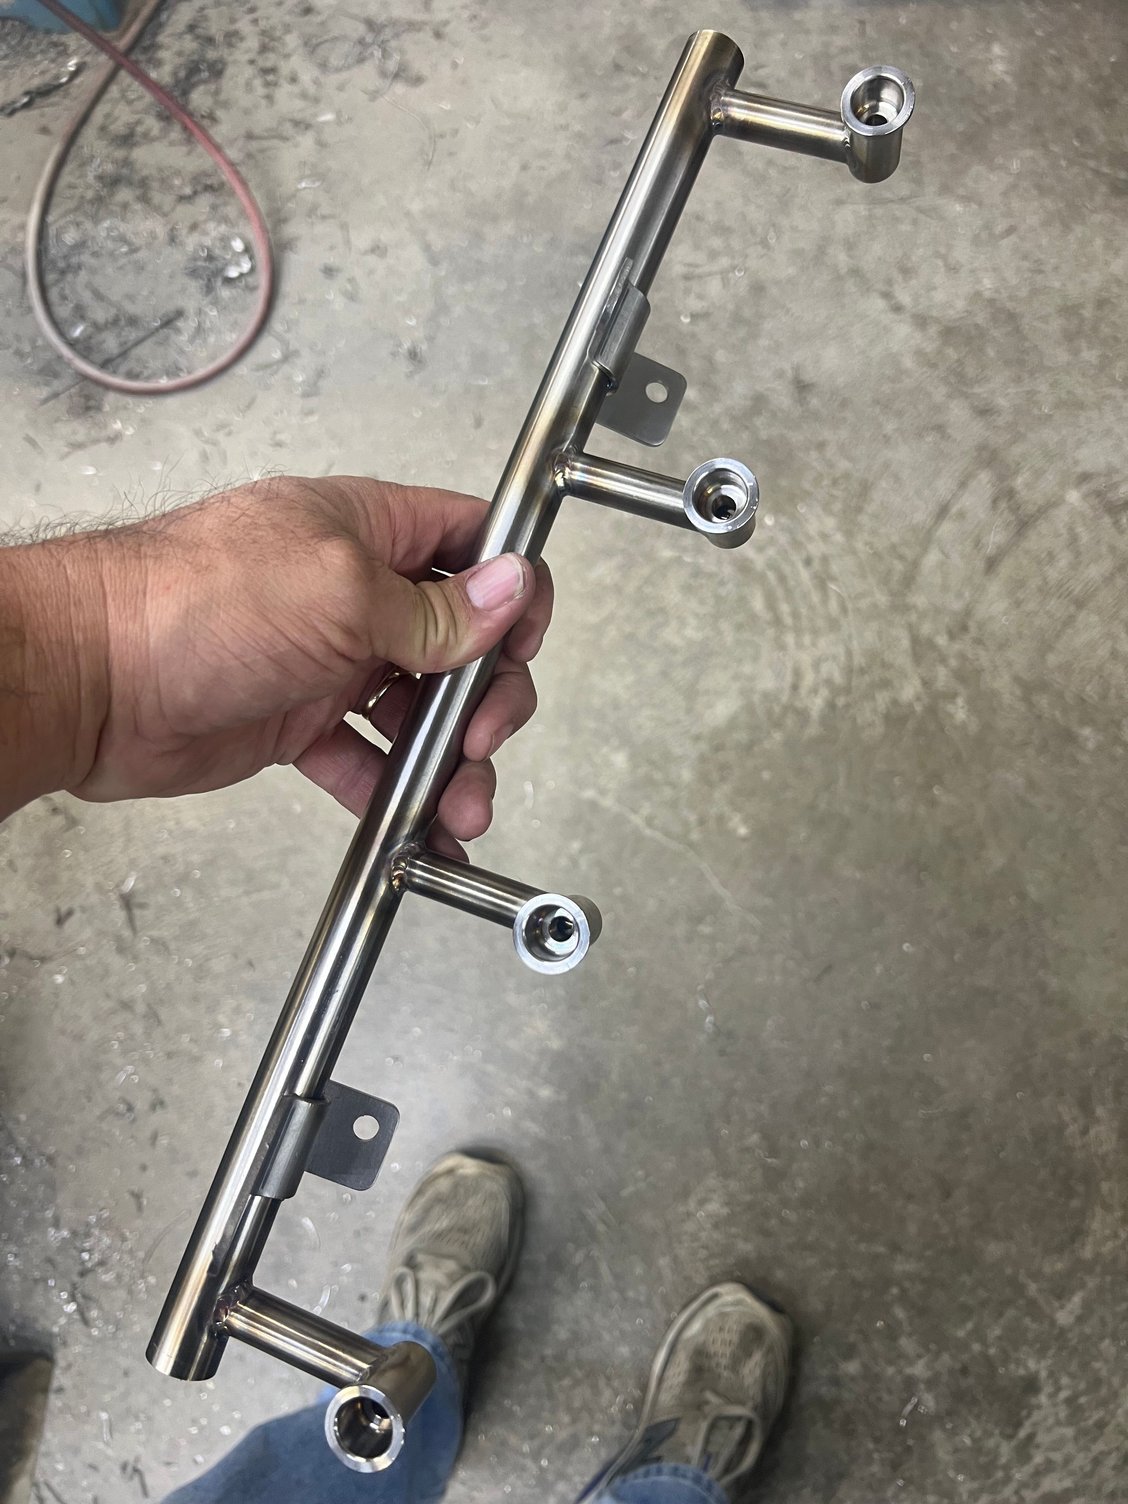
Guys,


Here they are. Finished and ready to roll. I made two sets; one standard drop-in for OEM injectors, and one set with modified mounting brackets that were tacked on location, using a set of spacers to account for injector height, on the injectors on the manifold, custom fit for a set or 80lb injectors the guy that�s building my engine made me a can�t-pass deal on. I�m thinking of making a set of modular brackets that will clamp in place for custom fitting to non-OEM injectors, that can then be tacked in place by the end user once location is established.
The heat tarnish will be gone before any go out, even if I have to scrub it off with Scotch-Brite. An anodizing shop I use frequently tells me that a muriatic acid bath and passivation should leave them sparkly clean.
Who wants to guinea pig the OEM injector set? I can�t wait to test them out myself, but over currently got a pile of parts, waiting for a block to return for the machine shop.
Thanks. Brad.
Last edited by Brad Christy; 10-26-2024 at 05:31 PM.
10-26-2024 | 06:04 PM
#9
Registered

Joined: Nov 2004
Posts: 14,173
Likes: 3,730
From: On A Dirt Floor
10-26-2024 | 06:22 PM
#10
Thread Starter
VIP Member
Joined: Jun 2021
Posts: 3,550
Likes: 2,147
From: SW Ohio
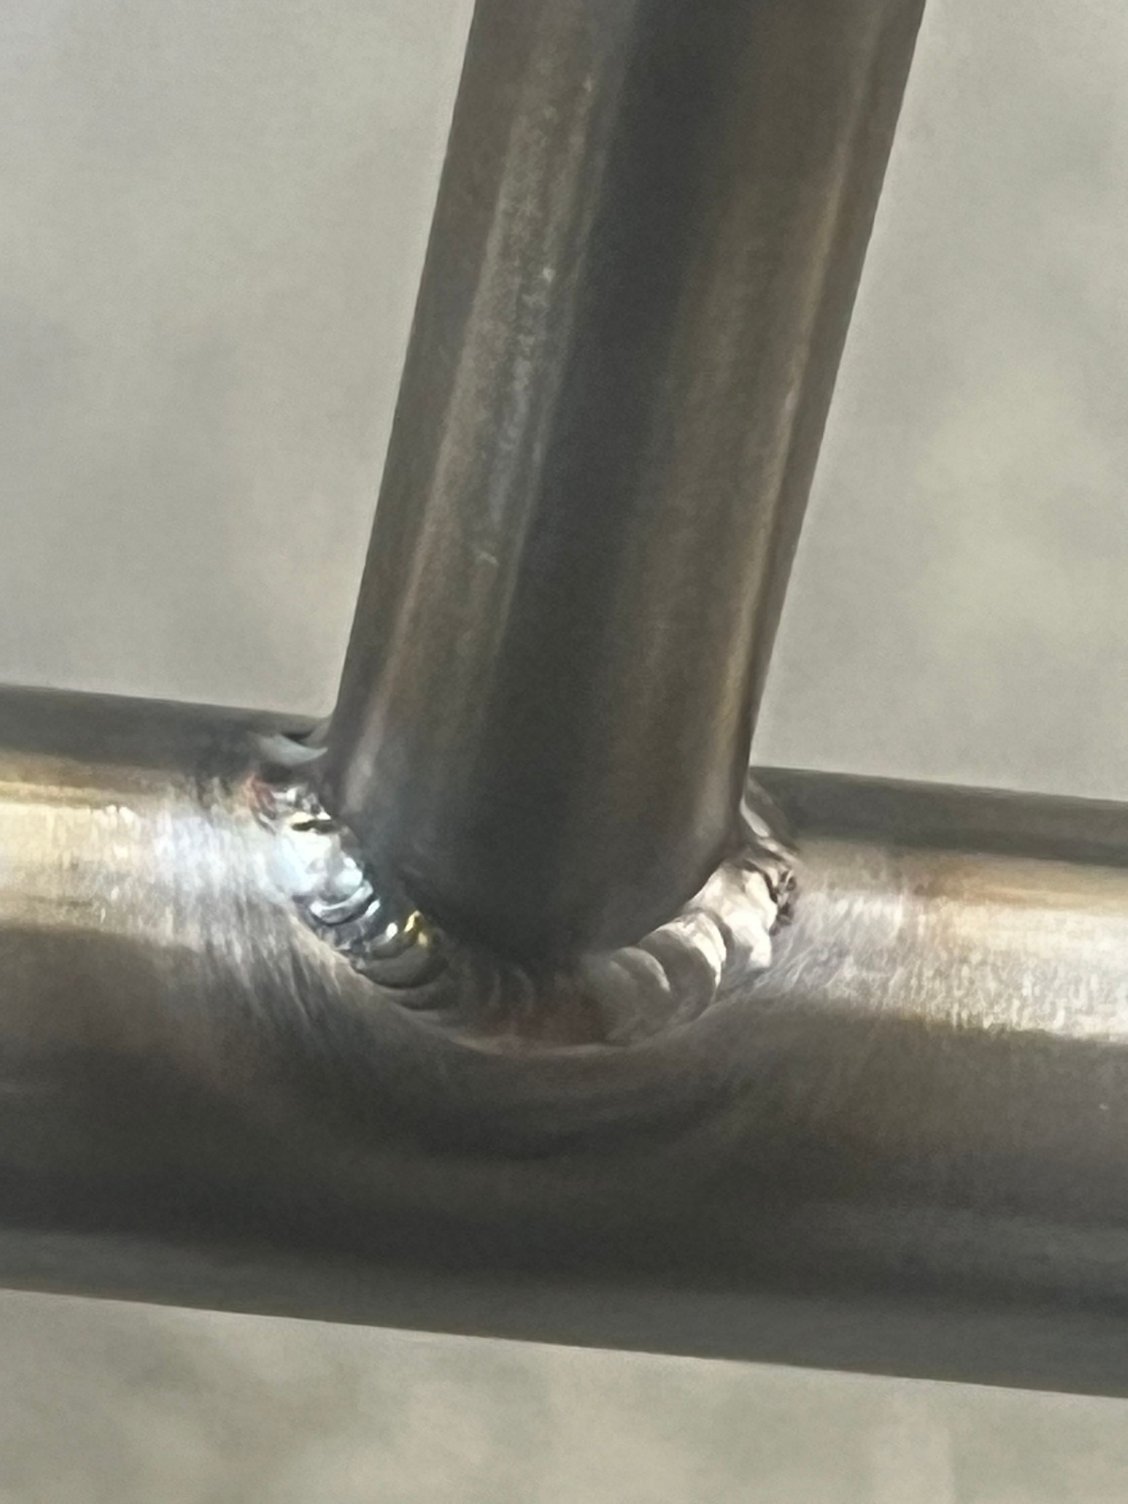
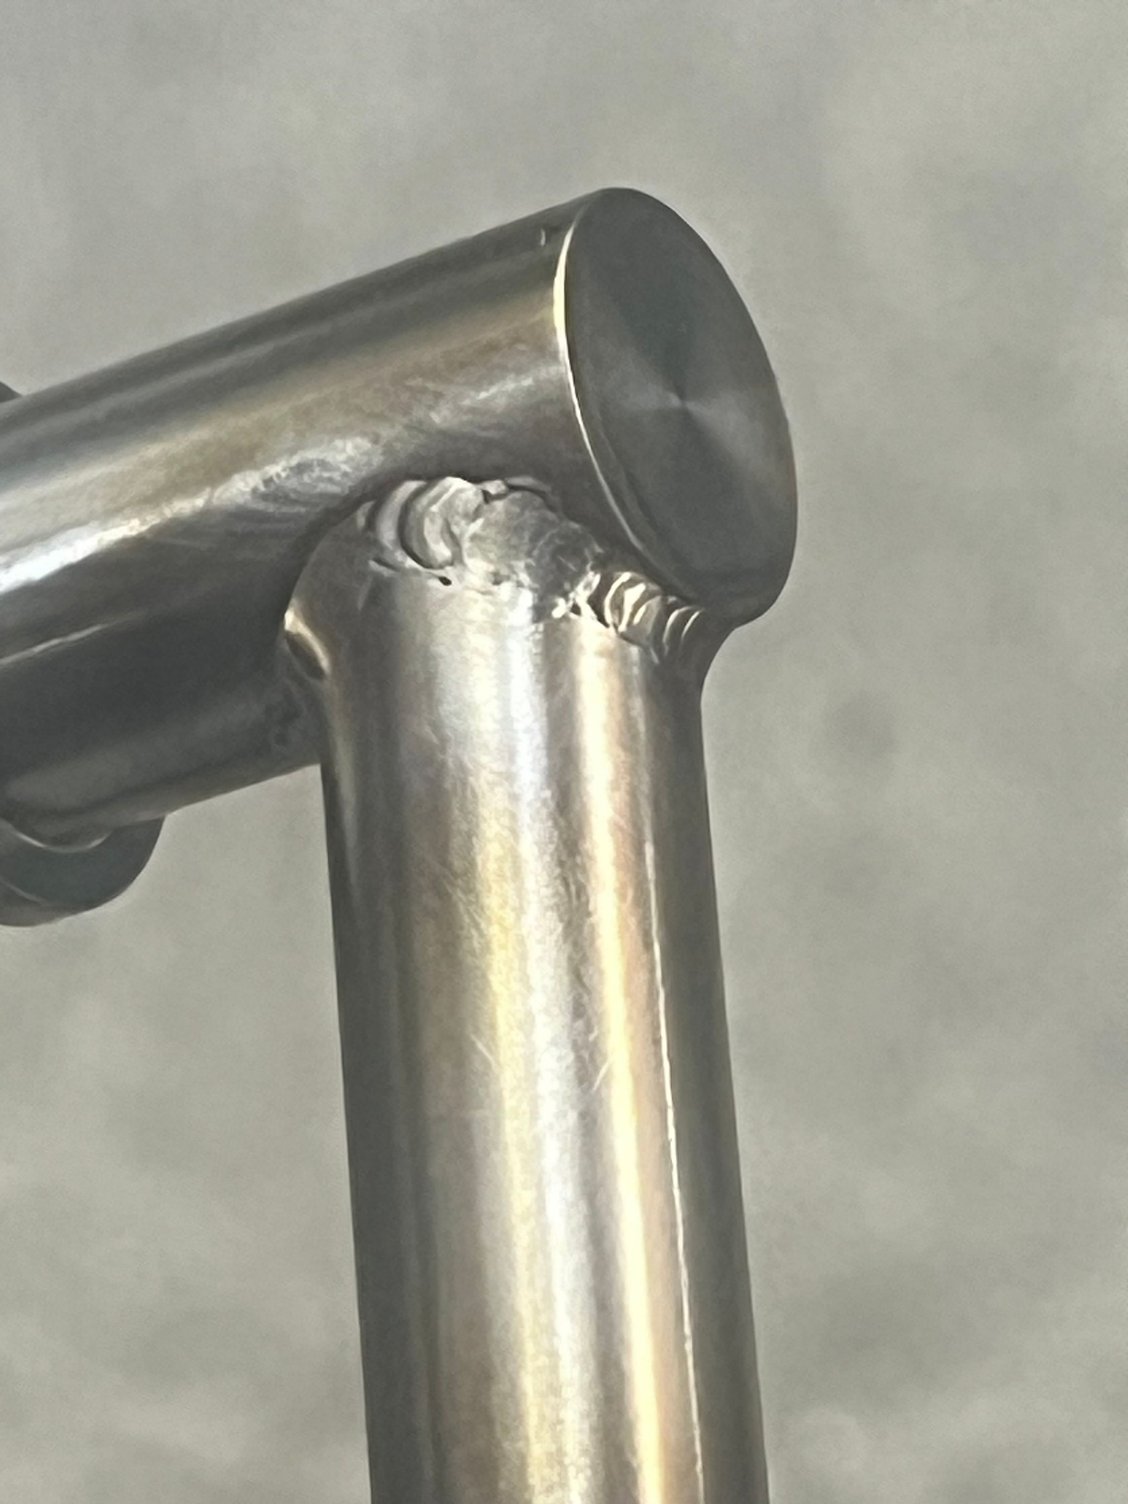
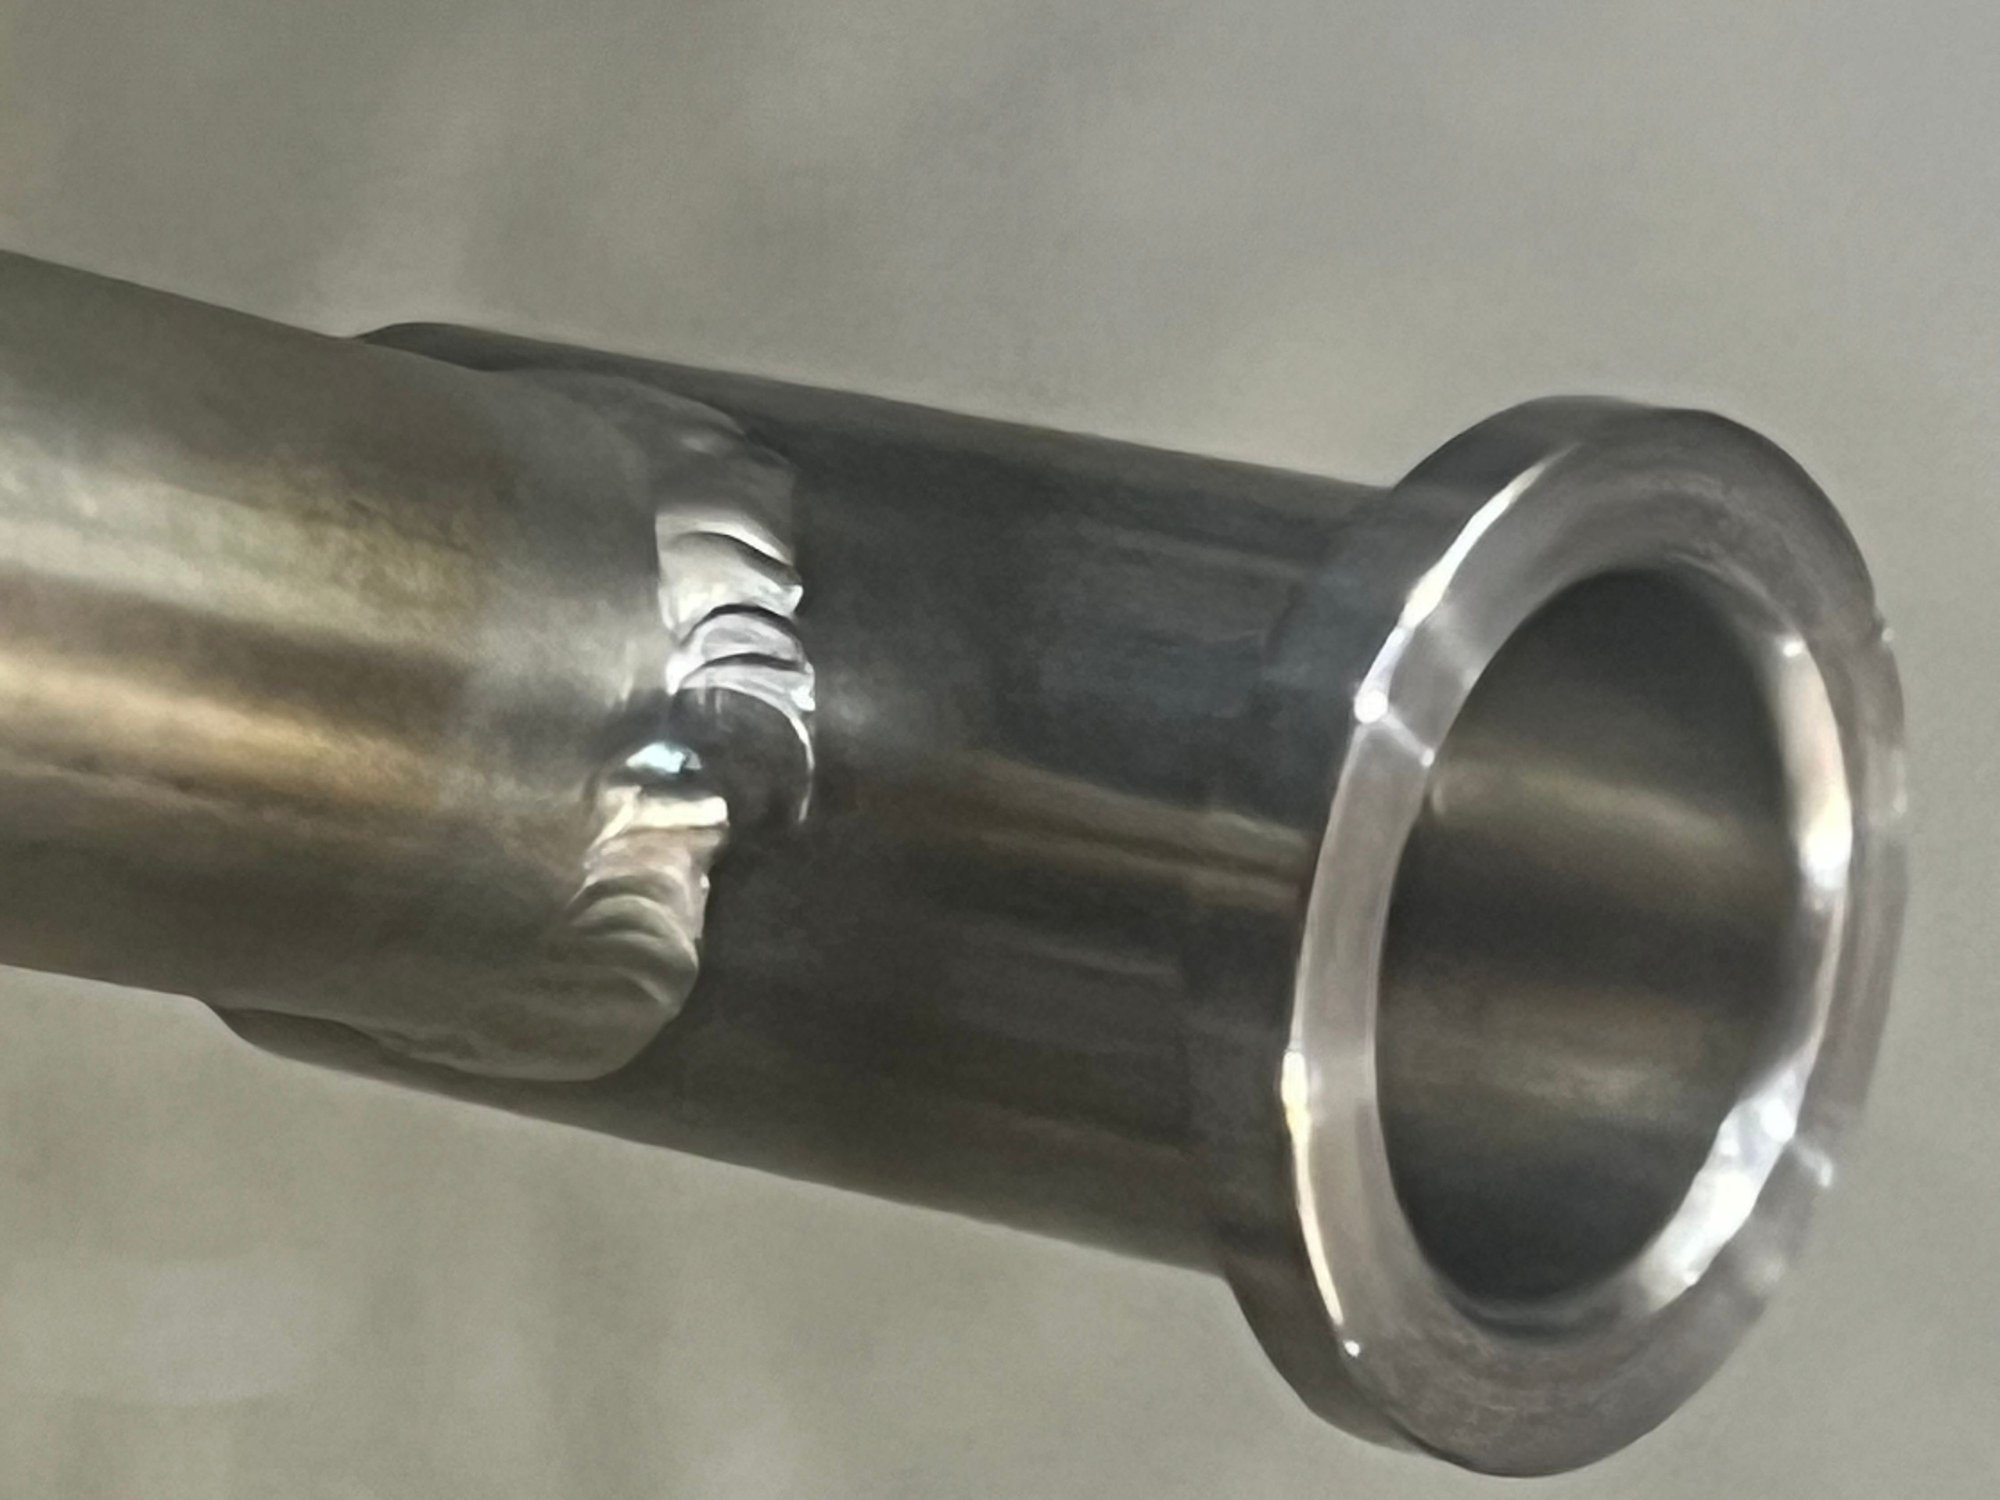
I�m sure it�s just a start/stop point for the weld, but they will be pressure tested at 120lbs under water. Already the plan.
I�ve made up a set of plugs that go in the injector cups, held in place with the same clips that are used in application and utilize the same O-rings the injectors have (they can be seen on the left in the first pic in post #8), and I will acquire a couple of AN ORB caps, one of which will be modified and fit with a ball valve and a quick disconnect. I will pressurize them, close the ball valve, disconnect, dunk them in a tank and watch for bubbles.
Thanks. Brad.
Last edited by Brad Christy; 10-26-2024 at 10:11 PM.

