

#6 Lower Satin (Refinish)
 03-13-2026 | 03:56 PM
#1
Thread Starter
Registered

Joined: Nov 2007
Posts: 4,029
Likes: 510
From: Cleveland, Ohio
Hello.
I am currently trying to get this one:

To look more like this one:
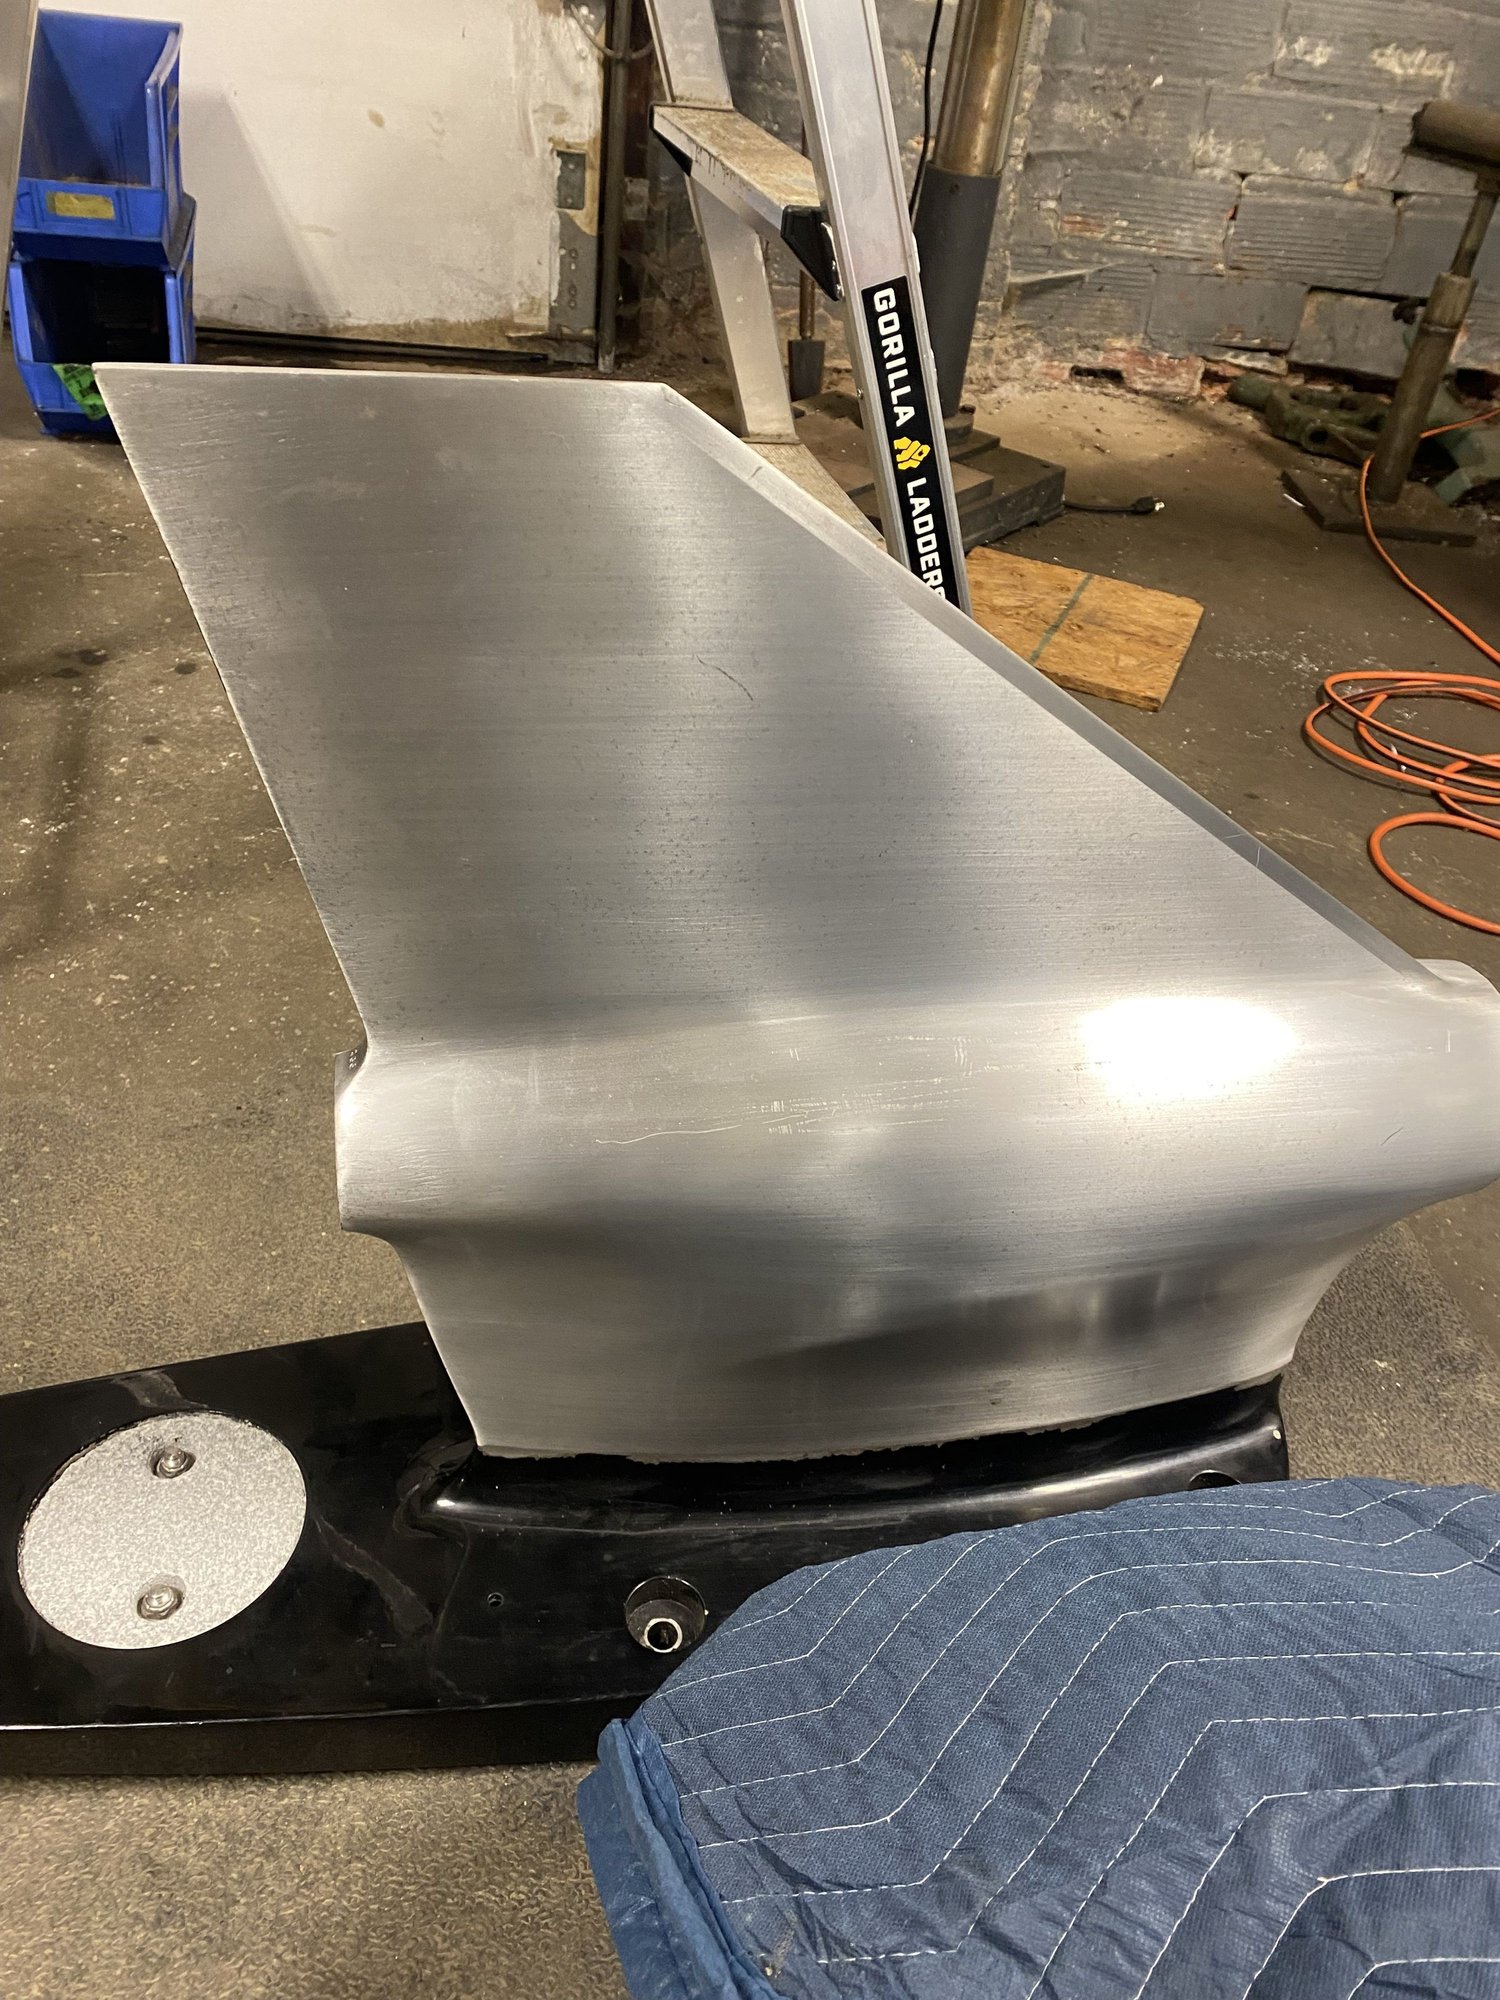
Now, the mint one is clear coated. I am getting close, but wondered if anyone has the correct recipe for the process.
So far:
1. 80 grit
2. 120 grit
3. Red scotch brite w/ a little wd40
4. Gray scotch brite
I am not getting the right satin �sheen� prior to clear coat on the original surface. (See first pic)
It looks worse in person, pic makes it look better than what I have.
Q: Glass bead, 220 grit? Help?
Any clues here?
I am currently trying to get this one:
To look more like this one:
Now, the mint one is clear coated. I am getting close, but wondered if anyone has the correct recipe for the process.
So far:
1. 80 grit
2. 120 grit
3. Red scotch brite w/ a little wd40
4. Gray scotch brite
I am not getting the right satin �sheen� prior to clear coat on the original surface. (See first pic)
It looks worse in person, pic makes it look better than what I have.
Q: Glass bead, 220 grit? Help?
Any clues here?


 03-13-2026 | 04:46 PM
#3
Registered

Joined: Sep 2014
Posts: 871
Likes: 259
From: Portland, OR
The Wilson one looks like all the pitting was sanded out of before the final "scuff". Hard to tell by the pics, but I'd say the bad one needs it all sanded out of it first then should be fairly easy to match. By the time you are done sanding you may have just saved $5k in blueprinting! 
03-13-2026 | 09:19 PM
#5
Registered
Joined: Feb 2024
Posts: 110
Likes: 54
I see about 20 hours difference. You are far from getting a good finish on the one. 180, 220, 320, then 400 grit will get you close for a satin finish. There are a lot of pits that need to come out of that one. The high the grit the more you will see the imperfections. As you work up in grit the more you need to sand in the same direction.Wet sanding will work better and make the emery cloth last longer or wet sandpaper. There is a lot of contour there so a sanding sponge would help instead of a sanding block. I can just say it is a lot of work but will look great. Mr Christy should know about this in tool making. I was one as well. Stoning and sanding for days to 1200-2000 grit on tool steel and aluminum to get mirror finishes.
03-13-2026 | 10:02 PM
#6
Thread Starter
Registered
Joined: Nov 2007
Posts: 4,029
Likes: 510
From: Cleveland, Ohio
Thank you for the input - there�s no shortcuts here I see.
I�ll give that a try, just didn�t want to head down the wrong path.
I�m sure Wilson does an awesome job on these lowers, I�ve seen their work and was always impressed. Just trying to get them to match up.
I�ll give that a try, just didn�t want to head down the wrong path.
I�m sure Wilson does an awesome job on these lowers, I�ve seen their work and was always impressed. Just trying to get them to match up.
03-13-2026 | 10:05 PM
#7
Thread Starter
Registered
Joined: Nov 2007
Posts: 4,029
Likes: 510
From: Cleveland, Ohio
The Wilson one looks like all the pitting was sanded out of before the final "scuff". Hard to tell by the pics, but I'd say the bad one needs it all sanded out of it first then should be fairly easy to match. By the time you are done sanding you may have just saved $5k in blueprinting!
I�m sure Wilson does a few trick things on these.
03-13-2026 | 10:27 PM
#8
Registered
Joined: Feb 2024
Posts: 110
Likes: 54
To be honest the last big polish job I had for a hotrod engine got sent out, twice. Once and was perfect them was on fire, fuel leak, and dry chemical extingisher made a mess of everthing but saved the wiring. Local polish shop maybe the way to go. A few hundred $$ then ***** if it is not what you want.


