

Trailer Upgrades...I have questions

 10-11-2008, 07:13 PM
#32
Registered
Thread Starter
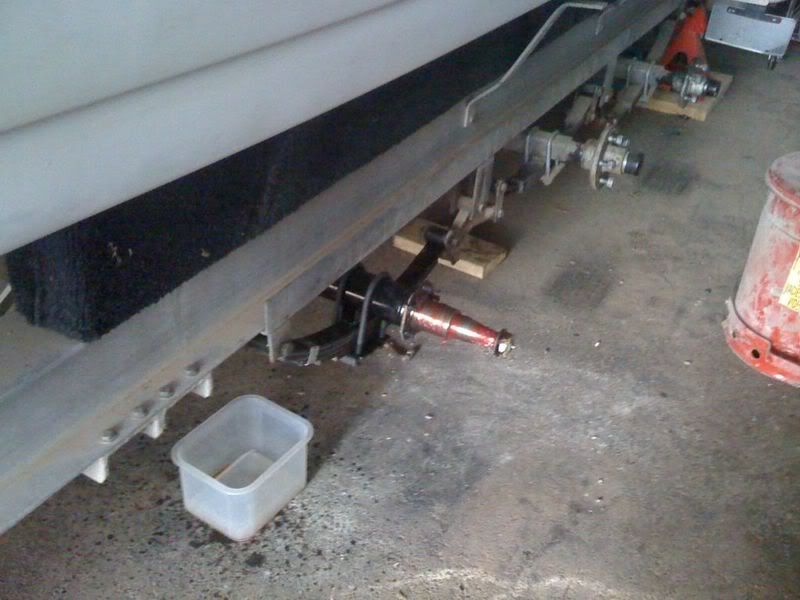
I installed one of the axles this afternoon. Bolts right up, but I am going to replace the shackles. I have new bolts for the axles but after looking at the old ones I am going to replace all the bolts in the suspension, they are just $1 each locally at Commercial Trialer.
10-12-2008, 12:03 AM
#33
Platinum Member
Hi BenPerfected...I will chime in and answer your questions:
The VIN will remain unchanged as the manufacturer stamped and labeled the trailer during its original manufacturing process. What needs to be addressed at this point in time is the current registration. After completing the rebuild project, load up the boat, gear, fuel, water, etc. and tow the fully loaded trailer to a nearby public scale. Ask the scale master to weigh your trailer and give you a scale ticket for your records. That number will reflect your gross weight for the trailer. Your Texas title and currect registration receipt will reflect the empty weight of your trailer. Subtract the empty weight from the gross weight. That number will indicate your current carrying capacity. Compare your new gross weight to your current registered gross weight. If the numbers are different, a trip to tax assessors office is necessary. If your new gross weight is higher than the old, ask the tax assessor to raise your registered gross weight. This will result in a slightly higher annual registration fee.....If the new gross weight is lower than the old, your annual fee can be reduced as you are purchasing to much registration. It is important for the actual gross weight to be similar to the registered gross weight while pulling the trailer on a public highway. If the registered weight is lower than actual, the operator is committing the offense known as "over registered weight". The offense is a Class C misdemeanor ($1-200 fine plus court costs) in Texas. The trailer is subject to immediate registration and penalty.
I hope this information is helpful to you....let me know if you have additional questions.
Also, remember, in Texas, an actual, registered or a manufacturer's gross weight rating above 4500 lbs will require an annual MVI inspection certificate. There are some exceptions to MVI, but a boat trailer is not one of them....barryd
10-17-2011, 09:43 PM
#34
Registered
Thread Starter
How about a resurection of the thread...
Since taking on the project I had a few things that stood in the way, buying a new home and the Sea Ray that we used while the Formula took a back seat. I just started back on the project and ran into a few things of concern. I noticed some broken welds on the spring hangers after moving the boat to my new home and raising it back in the air. The hangers were welded onto an angle iron and bolted to one side of the bottom flange of the I-beam. I have read several I-beam failures over the past several months due to flange failure from improper crossbeam mounts. I dont have any flange damage, but I decided to make a stronger hanger for the axles. New 6 inch c-channel with the new hangers welded on and 5/8 grade 8 bolts will hold the new running gear.
Here is the old angle brackets and the new c-channel.

Test fitting the axles.
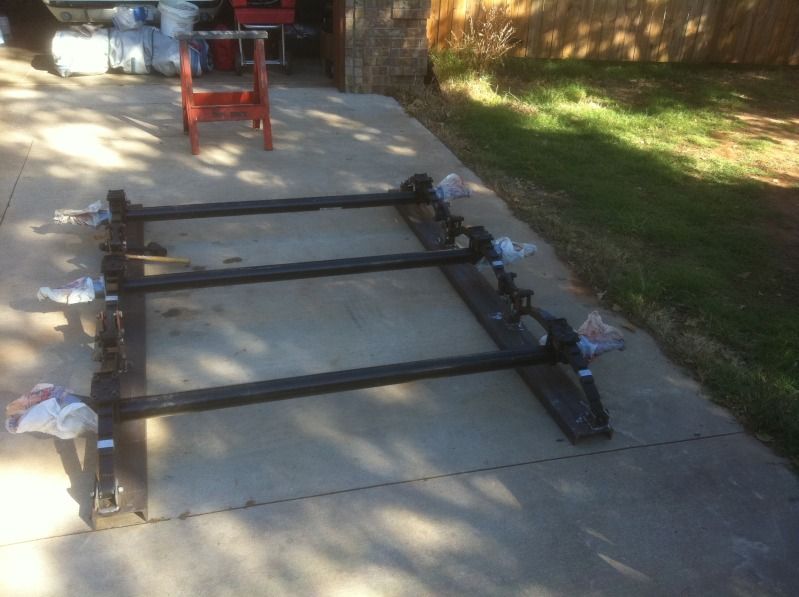
Now its time to sandblast the parts and either galvanize or get a good undercoat paint on them. I also have a new hitch at the welders and triple axle fenders that I got cheap because of surface rust from being left outside. Hopefully this will keep on the front burner and nothing else pop up on the honeydo list...
Since taking on the project I had a few things that stood in the way, buying a new home and the Sea Ray that we used while the Formula took a back seat. I just started back on the project and ran into a few things of concern. I noticed some broken welds on the spring hangers after moving the boat to my new home and raising it back in the air. The hangers were welded onto an angle iron and bolted to one side of the bottom flange of the I-beam. I have read several I-beam failures over the past several months due to flange failure from improper crossbeam mounts. I dont have any flange damage, but I decided to make a stronger hanger for the axles. New 6 inch c-channel with the new hangers welded on and 5/8 grade 8 bolts will hold the new running gear.
Here is the old angle brackets and the new c-channel.
Test fitting the axles.
Now its time to sandblast the parts and either galvanize or get a good undercoat paint on them. I also have a new hitch at the welders and triple axle fenders that I got cheap because of surface rust from being left outside. Hopefully this will keep on the front burner and nothing else pop up on the honeydo list...
 10-28-2011, 06:16 PM
#36
Registered
Thread Starter
All six Kodiaks arrived today...
Time to get the trailer tongue finished and the axles square. I was looking at the directions on the Kodiaks and it looks like they recomend the calipers mounted towards the rear of the trailer. I always thought it was more efficient to mount disk brakes in front of the axle centerline. Am I looking at the directions wrong or is there something I am missing out on???
Time to get the trailer tongue finished and the axles square. I was looking at the directions on the Kodiaks and it looks like they recomend the calipers mounted towards the rear of the trailer. I always thought it was more efficient to mount disk brakes in front of the axle centerline. Am I looking at the directions wrong or is there something I am missing out on???
10-30-2011, 11:19 PM
#37
Registered
Thread Starter
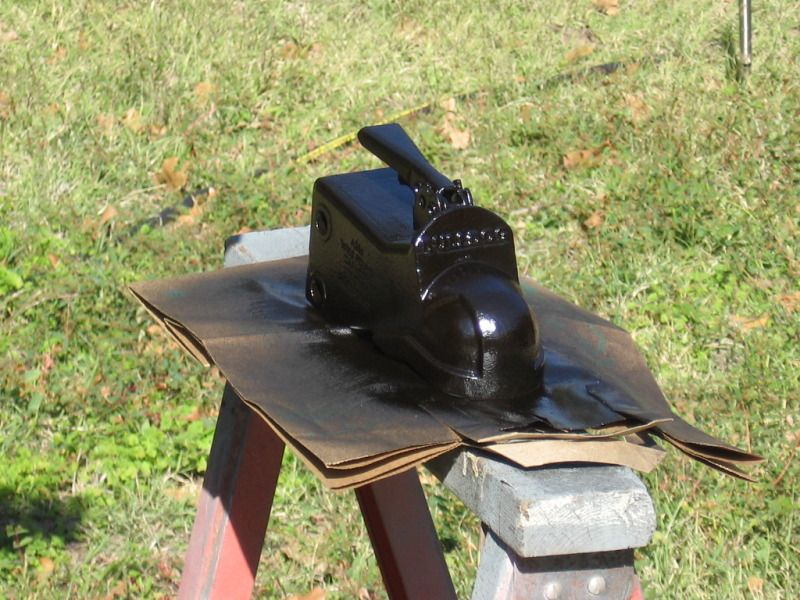
I had the tongue welded with some new additions. The old tongue had a 12K pound surge brake actuator bolted on. With the new EOH ssystem I wanted rid of the actuator. I know some have just welded and pinned the surge but I really did not like that route. I had an adjustable bracket welded on and added an 8K pound Fulton drop jack and a couple of tie down loops for the chain. I used a zinc primer and then used rubberized coating. The first coat of the Bondo brand undercoat did not stick so I sanded it all off and used the Rustoleum brand undercoating and it stuck good. I will be drilling new holes to mount the I-Beams and using 5/8 grade 8 bolts to keep it together.
the old tongue
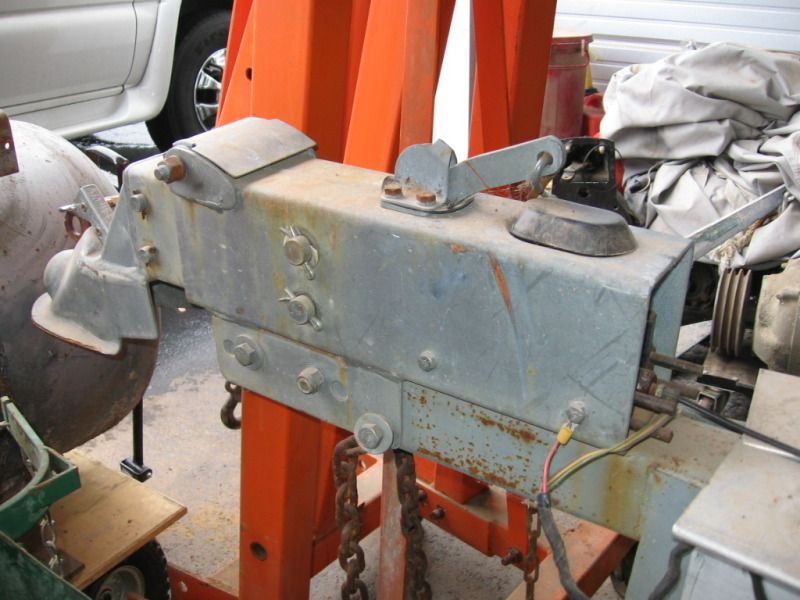
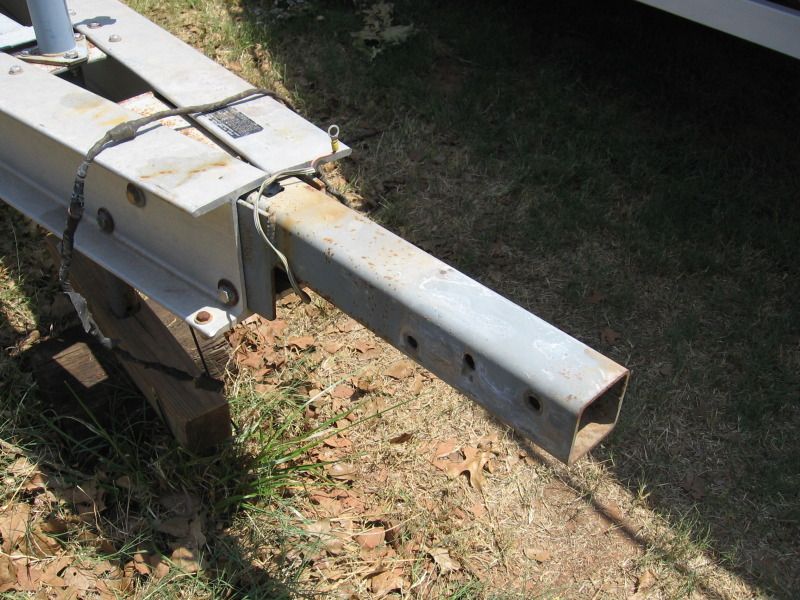
The new one drying with a few coats of undercoating for protection.
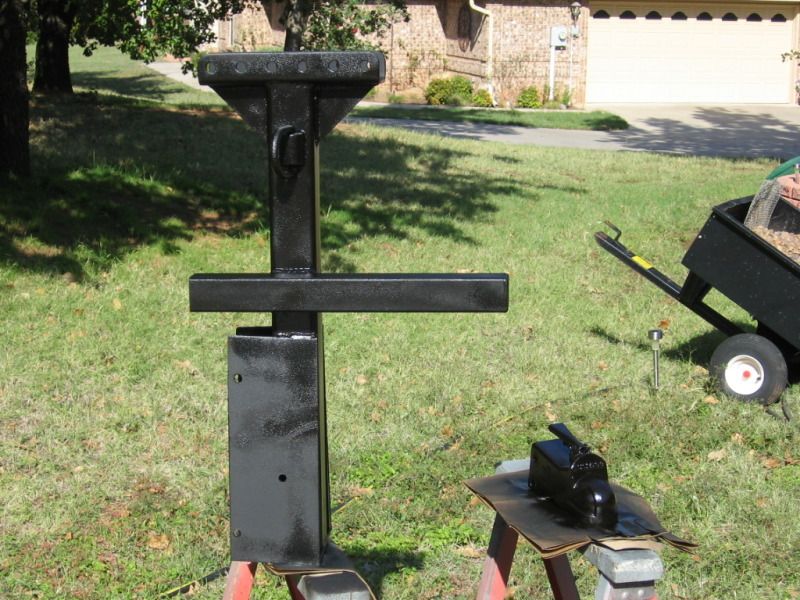
The new Bulldog coupler
the old tongue
The new one drying with a few coats of undercoating for protection.
The new Bulldog coupler
11-04-2011, 07:41 PM
#38
Registered
Thread Starter
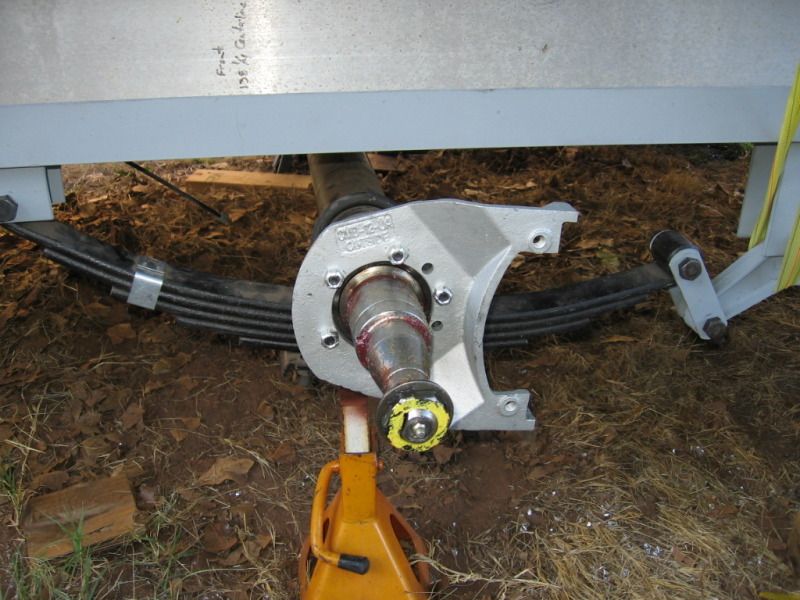
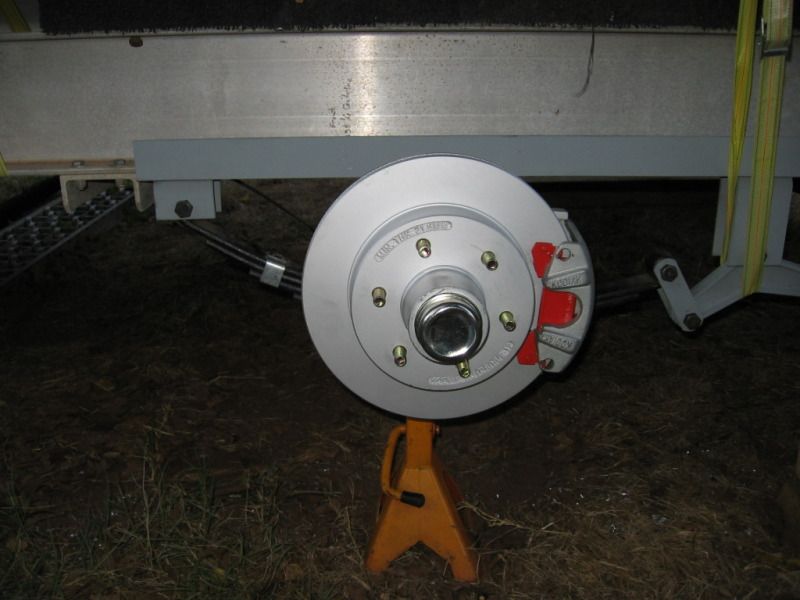
I had some help today so it was time to install the new tongue and get the axles bolted to the frame. All the axle hanger bolts were tightened and seated then we took measurements from the front and rear axle centerline to the centerline of the new tongue and bolted down the hanger brackets. It started getting late but I wanted to get at least one Kodiak installed to make sure it was correct for the axles. Fit like a glove...now I will pack all the bearings and prepare the spindles for installation tomorrow.
The new tongue installed

Installing the Kodiaks
The new tongue installed
Installing the Kodiaks
11-04-2011, 09:19 PM
#39
Registered
Thread Starter
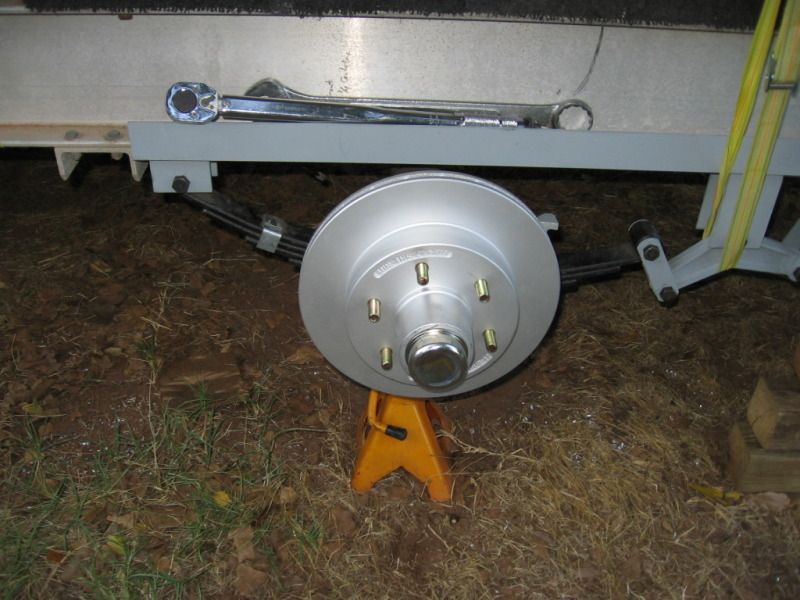
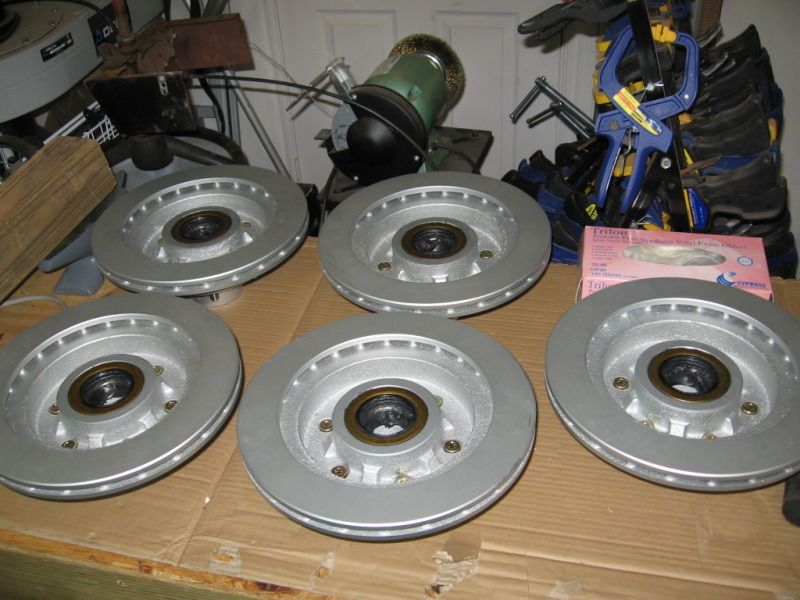
I want tomorrows installation to go a bit quicker, so I packed the rear bearings and installed the rear seals on the rotor hubs. Pretty easy, I did have to cut open a cartridge of synthetic bearing lube since I could not find a tub...
Better on the benchtop than on the garage floor
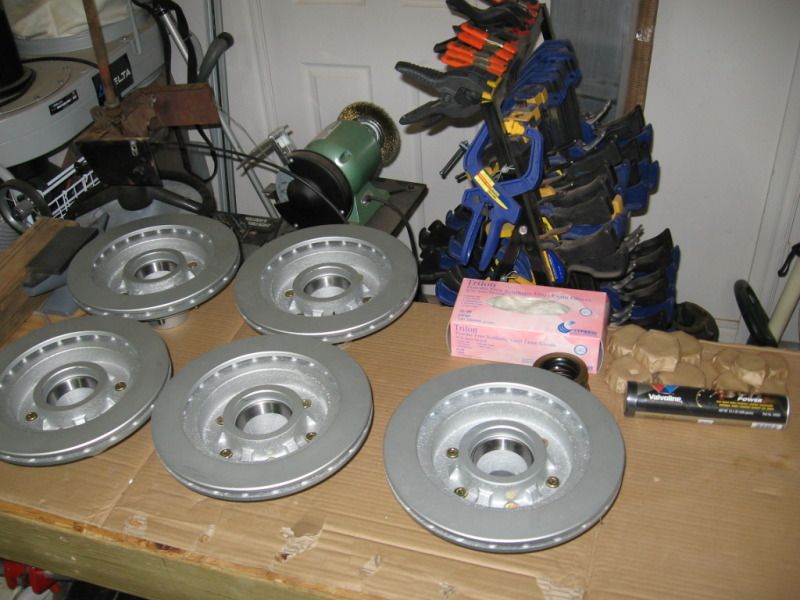
ready to go
Better on the benchtop than on the garage floor
ready to go


