


My new project - 86 - 272 LS
 03-14-2012, 09:10 PM
#41
Registered
Brian...I gotta say..you are the guy I want to have my back when the chips are down. You are a hard headed SOB!!!
I started thinking about all of this and ended up with this question....
What the HELL is wrong with us...anyway?
I guess you just have to love it!!!
I started thinking about all of this and ended up with this question....
What the HELL is wrong with us...anyway?
I guess you just have to love it!!!
 03-15-2012, 09:10 AM
#42
If I hit the lotto I would probably be doing the same thing. Well, on a bit larger boat and spending more money anyways. Oh, and probably down south somewhere during the winter. Oh-well.
03-21-2012, 10:48 AM
#43
Well 5 days later and hit a delay on a motor. Went to put the crank in and a bearing cap is broke! This is the motor that had spun a bearing and I had it magnafluxed, line bored and honed - looked beautiful. The machine shop replaced the two caps that had spun, guess they did not magnaflux those as one of them cracked.
So, now cart the block and caps back to the machine shop and let them fix it again. At least it is on there dime this time. And at least we caught it during assembly!
The crank plastigauged at 0.0015" on all the mains.
Brian the dock watcher......
So, now cart the block and caps back to the machine shop and let them fix it again. At least it is on there dime this time. And at least we caught it during assembly!
The crank plastigauged at 0.0015" on all the mains.
Brian the dock watcher......
03-21-2012, 08:35 PM
#44
Registered
Brian, your doing a great job time and patience will pay off when your on the water this summer. What paint are you using in the bilge.
03-21-2012, 09:19 PM
#45
Registered
Well 5 days later and hit a delay on a motor. Went to put the crank in and a bearing cap is broke! This is the motor that had spun a bearing and I had it magnafluxed, line bored and honed - looked beautiful. The machine shop replaced the two caps that had spun, guess they did not magnaflux those as one of them cracked.
So, now cart the block and caps back to the machine shop and let them fix it again. At least it is on there dime this time. And at least we caught it during assembly!
The crank plastigauged at 0.0015" on all the mains.
Brian the dock watcher......
So, now cart the block and caps back to the machine shop and let them fix it again. At least it is on there dime this time. And at least we caught it during assembly!
The crank plastigauged at 0.0015" on all the mains.
Brian the dock watcher......
Last edited by sprink58; 03-21-2012 at 09:24 PM.
03-22-2012, 10:15 AM
#46
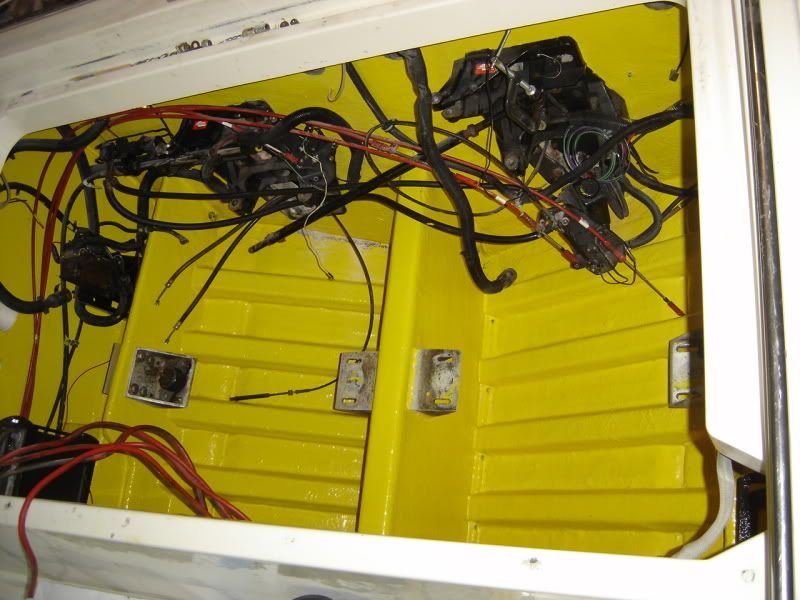
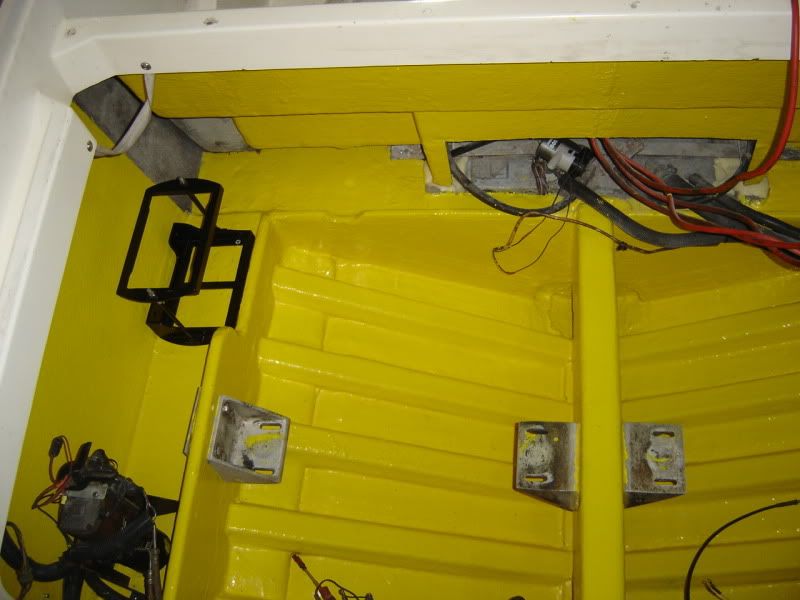
Masi242, I am using a oil based enamel with the valspar hardener mixed in. I am using the Ace brand as it is what was available locally. The yellow does not cover as well as the other colors I have used in the past at work, especially once the thin hardener is added. But after 3 coats it is very nice. Oh, and slippery!
yeah, I am taking my time. 87 degrees yesterday but it is getting cold again next week. Next week I should be done in the bilge. Completely cleaned and painted, rewire the new bilge pump and install it, fix a broken wire on the port trim pump and replace the starboard transom assembly with the newer one I purchased.
then I can turn it back over to the mechanic to install the motors which should be done soon after that. I then get to start on the cabin at that point and start making some major changes. It is gutted now and the bulk head below the door is removed ready for a new one to be glassed in.
03-23-2012, 11:50 AM
#47
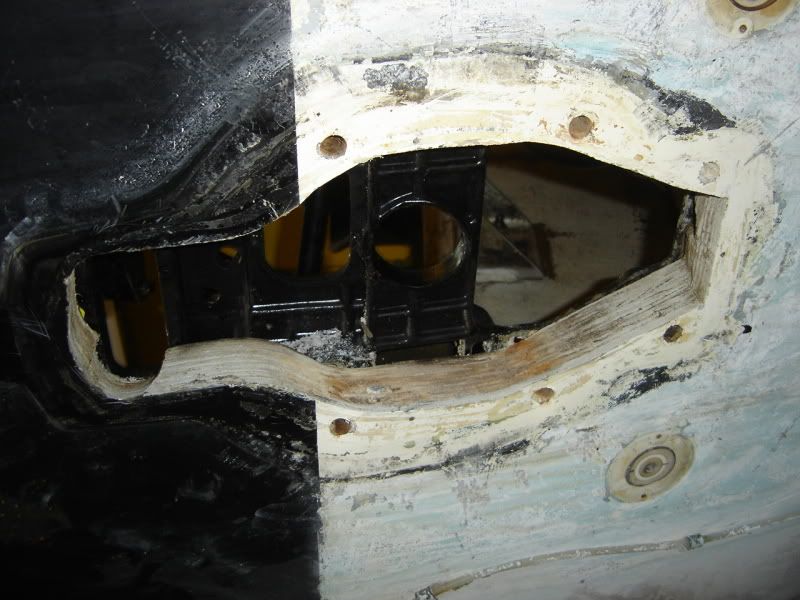
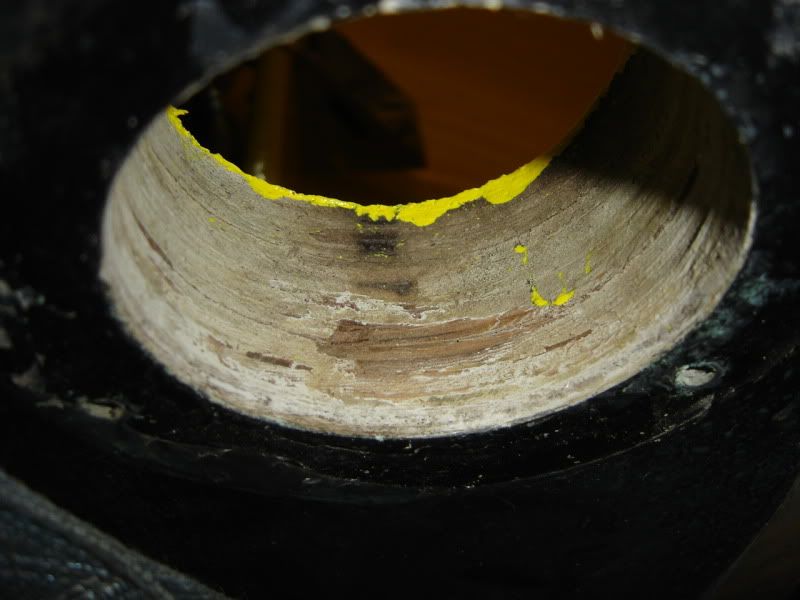
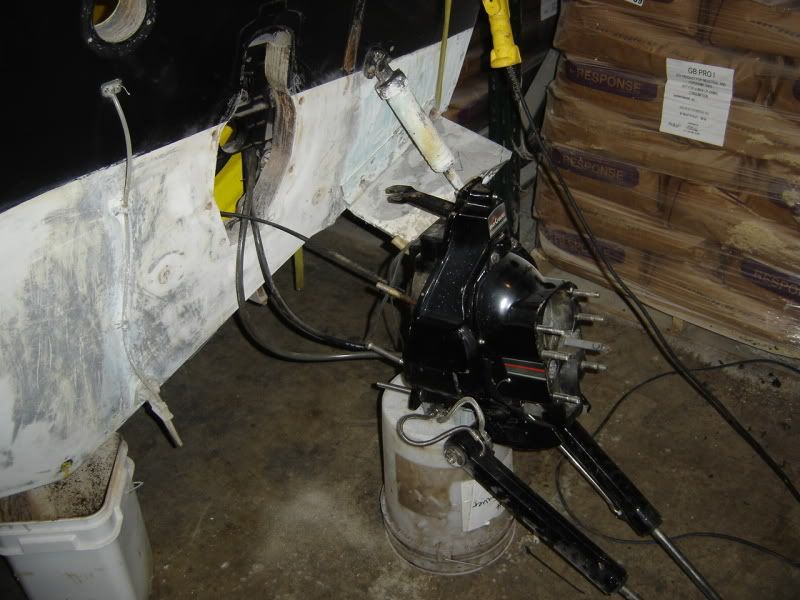
Finished pulling the last thru hull and the Starboard transom assembly for the newer one. The transom looks good to me, nice and solid, no rot. While I had it open, I sealed the starboard drive hole and the four through hulls with a new coat of resin as the old paint was looking a bit thin.
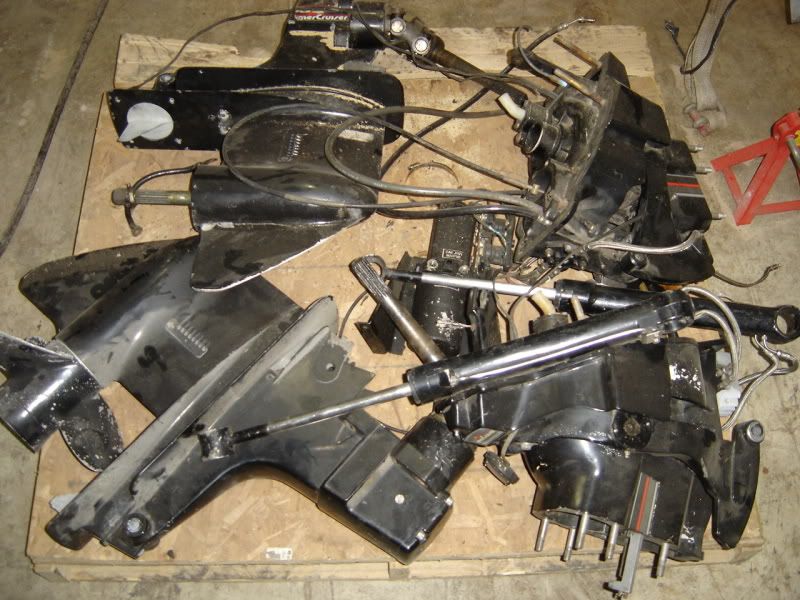
Also is a skid with the parts that I bought for $800. The gen I transom assembly is really nice with the trim hoses and cylinders. Both drives are in good shape and he included an extra trim pump, exactly the same type as I have now so a spare. The second transome assembly he threw in as I thought I needed a gimble ring. But it is a gen II transom assembly, not sure what the heck I will do with that but it will probably end up on ebay I guess. Oh, I already removed the quicksilver stainless 19p prop that was on the one drive, going to sell that. the other prop is aluminum and scrap, pretty chewed up!
Got some more painting in the bilge done today and started stripping the bottom paint off of the transom before I put the new transom assembly on next week.
 03-30-2012, 07:59 PM
#49

Anybody looking for a great machine shop with class and ethic in Fort Wayne, drop me a note.
On other boat news, still making progress. Rewired the port trim pump, need to put a new trim limit switch on the transom assembly as the wires to the old one were bad. fixed some connections, put the refinished battery holders back in and finished painting the bilge. Nice and yellow now, kinda overkill but once the black motors are in there it will help.
Next week hopefully we finish up the starboard side. Need to put in a new bilge pump so running some new wires there, going to check the light circuits, add a grounding block for accessories and probably some LED lights. Also need to get the starboard transom assembly installed, then the bilge should be done and waiting for the motors.
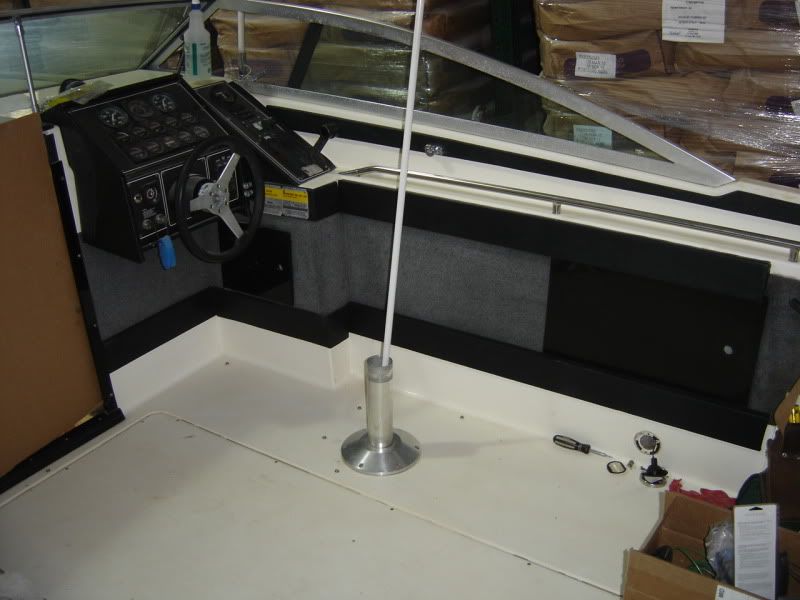
Started to put the cockpit back together a little bit. Put the new side trim pieces I made on, looks pretty good. anxious to do the seats and rear bench, but not until the motor work is done. Also made some progress in the cabin, but not much.
Will post pics Monday or so.
Also bought a standard stereo and speakers off Amazon.
Total cost has broke the $11,000 mark with trailer tires and brakes that I need....
Brian
04-02-2012, 06:32 PM
#50
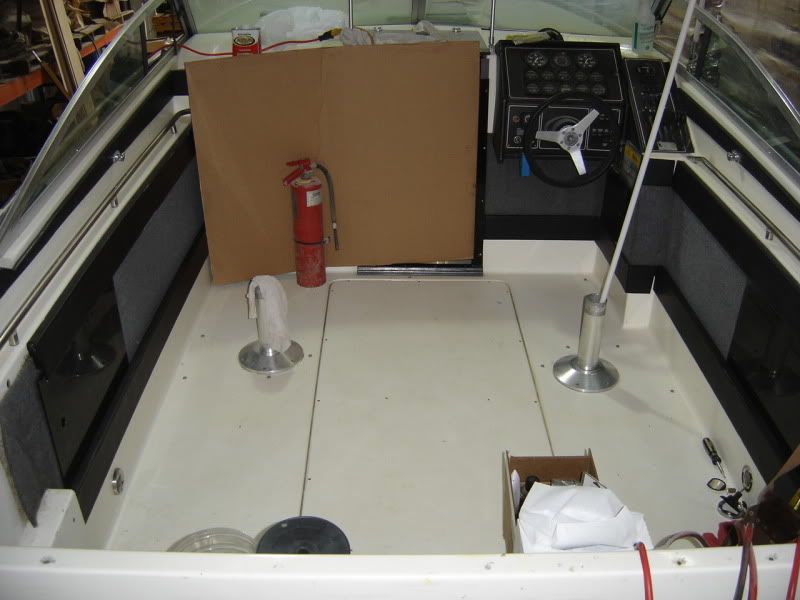
Well, here are the pics. the white dust along the transom is where I cleaned out the bolt holes in the transom, still need to vacuum it up. Also a shot of the cockpit area with the new side trim pieces I made reinstalled. Cardboard up front is just to block off the cabin as I have the door removed.
Looking at installing the new transom assembly tomorrow, big day for me! Woo Hoo! Ugh, bottom paint makes it look like crap! I will deal with that next winter after using it for a season.......
shiny and looks nice!
Looking at installing the new transom assembly tomorrow, big day for me! Woo Hoo! Ugh, bottom paint makes it look like crap! I will deal with that next winter after using it for a season.......
shiny and looks nice!

