

1978 Sleekcraft Aristocrat Budget Build Thread
 07-14-2010 | 01:24 AM
#1
Thread Starter
Registered

Joined: Jul 2010
Posts: 328
Likes: 7
From: Madison, WI
Greetings! This is my first post, but I'm basically going to copy my thread from scream and fly so you guys can see where I'm at. I realized that those guys are generally into outboards, so I was hoping to get more help and information for my project here. Here goes:
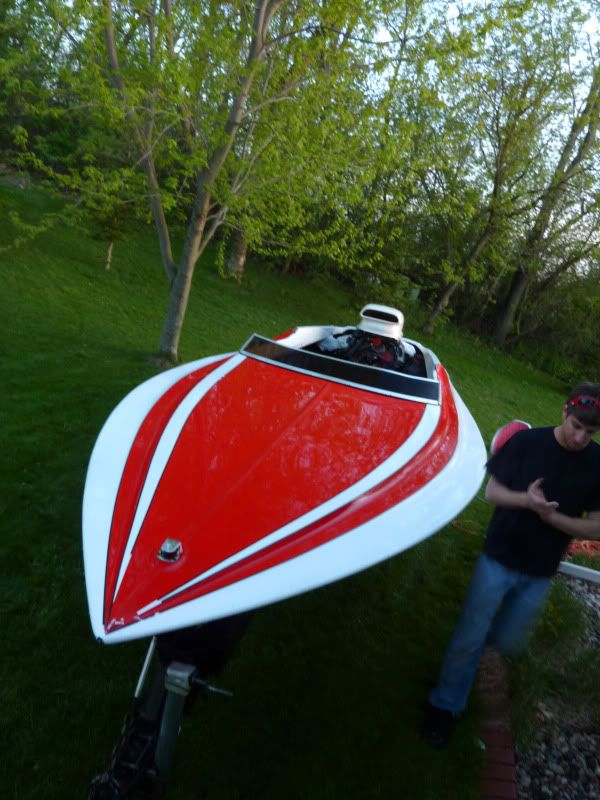
I originally posted this thread about the sleekcraft, and after getting answers from owners of other sleeks, I decided to pull the trigger. Yeah, some of you said it would be a bad idea, but whatever. I have definitely fallen in love with the lines of this boat, so I think it's worth it. Anyway, here is the story so far.
April 27th, 2010- I drove to the PO's house at 6pm, armed with new trailer lights, and the PO said he'd tow it for me. Well, after 2 hours of troubleshooting the wiring, the ENTIRE TRAILER was rewired, and we had functional trailer lights. It was at this point that we noticed one of the wheel bearings was bad. 1.5 hours later, and we were good to go. The drive was about an hour and 15 minutes away, and halfway through madison, the port side fender mount cracked in half, dragging the fender on the rear tire. I ripped it off and threw it in the boat, and carried on. Parked it at 11:30pm, went to sleep.
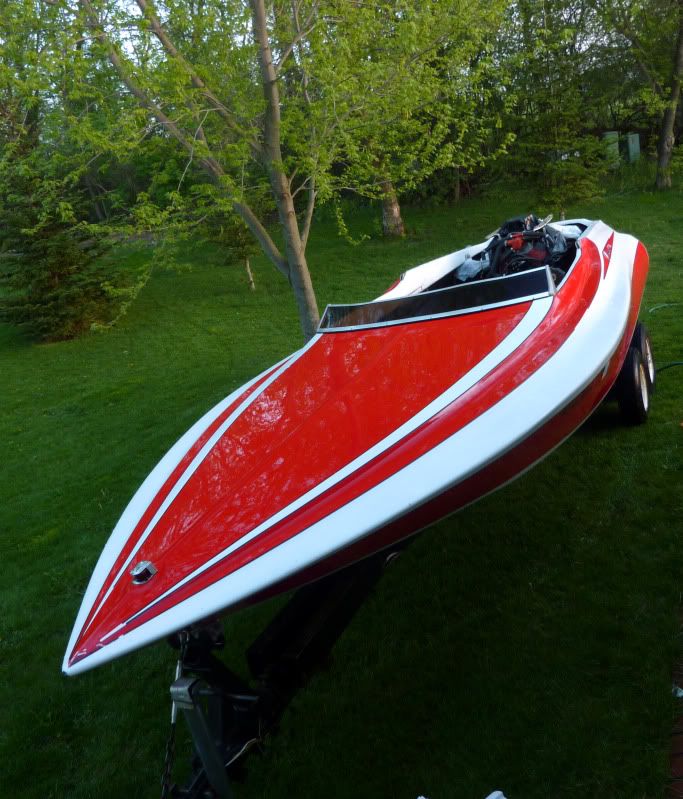
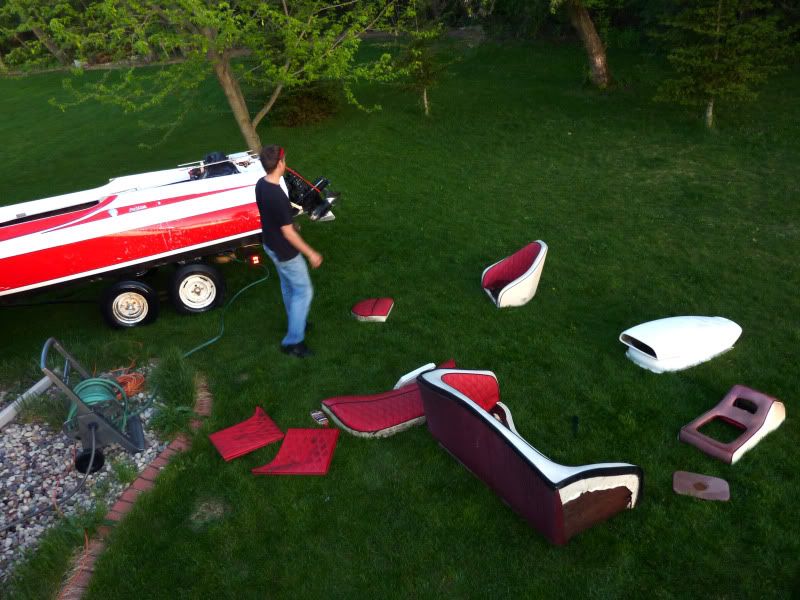
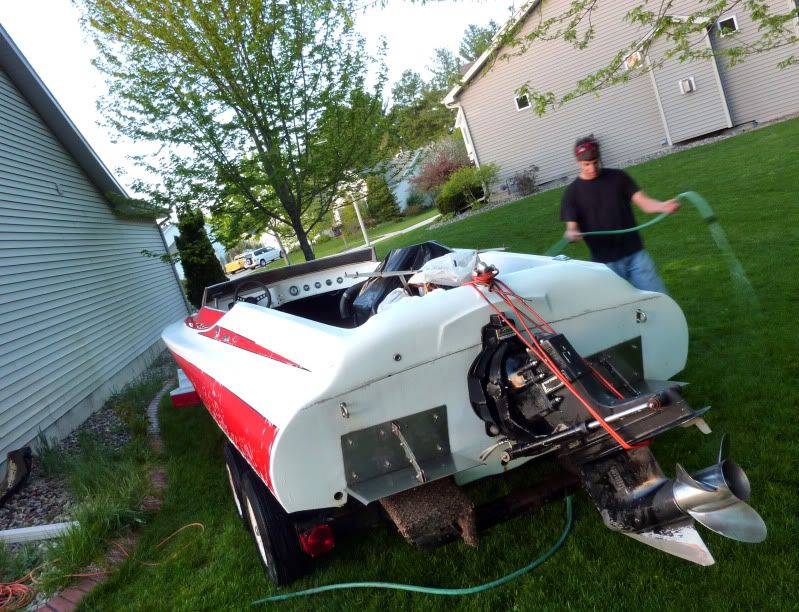
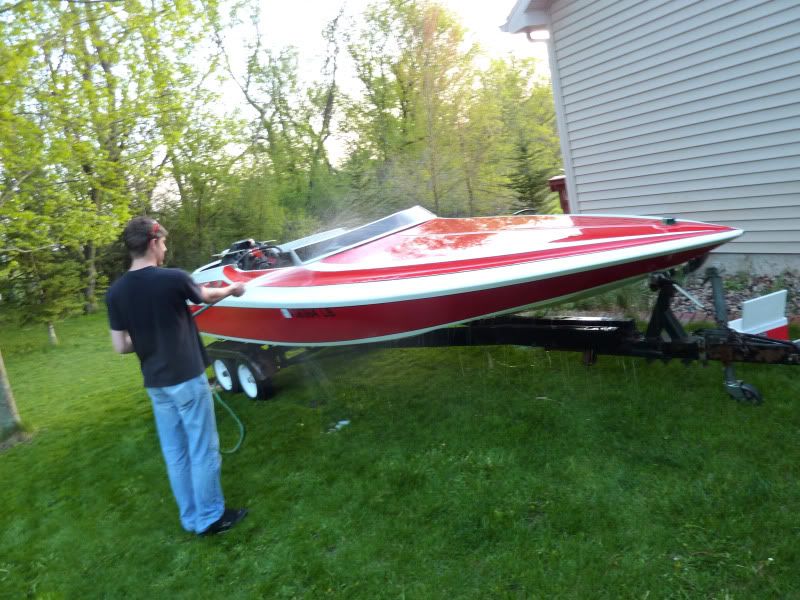
April 28th, 2010- Boat was FILTHY. Removed the seating, carpeting, and anything else that was rolling around inside. Purchased some new gaskets for the exhaust manifolds, and set them in the garage. Have two sets, need to make one GOOD set. The seats might be salvageable... the vinyl is okay, but the wood is rotten, so we'll see what I can do. Also, the seams are coming apart in SOME places, but overall they are decent. The gauges will need to be replaced, as well as the floor between the tunnels. Need to reinforce the cap, as the side area flexes due to rotten supports, as well as reinforce the tow hook. Pretty pumped about this thing, washed it with my roommate and we were both impressed with how good the cap/hull look. Pretty amazing how well it has cleaned up so far. All of the black tape will need to be replaced.
Here she is after a quick wash:
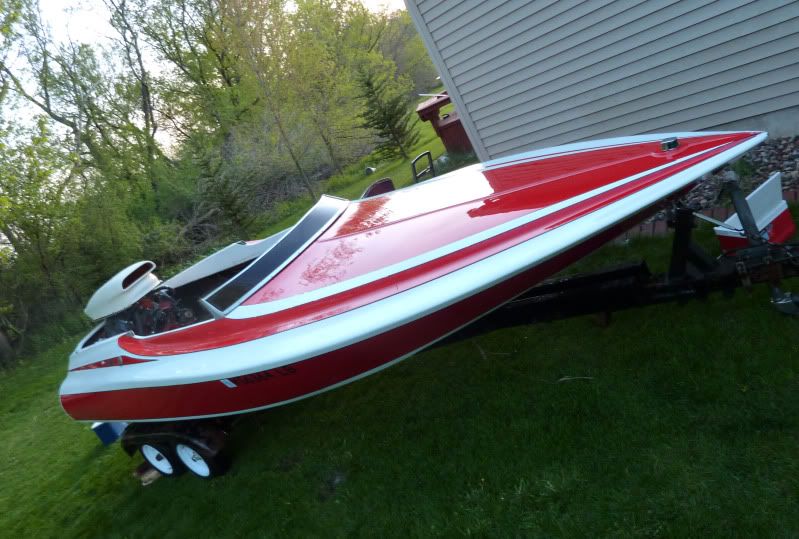
And the beginning of 4 weeks of ridiculousness:
Total cost so far: $1200, initial purchase price. $180, shop towels, manifold gaskets, hand goop, and waterPROOF heavy duty top of the line boat cover. $1380.00
I originally posted this thread about the sleekcraft, and after getting answers from owners of other sleeks, I decided to pull the trigger. Yeah, some of you said it would be a bad idea, but whatever. I have definitely fallen in love with the lines of this boat, so I think it's worth it. Anyway, here is the story so far.
April 27th, 2010- I drove to the PO's house at 6pm, armed with new trailer lights, and the PO said he'd tow it for me. Well, after 2 hours of troubleshooting the wiring, the ENTIRE TRAILER was rewired, and we had functional trailer lights. It was at this point that we noticed one of the wheel bearings was bad. 1.5 hours later, and we were good to go. The drive was about an hour and 15 minutes away, and halfway through madison, the port side fender mount cracked in half, dragging the fender on the rear tire. I ripped it off and threw it in the boat, and carried on. Parked it at 11:30pm, went to sleep.
April 28th, 2010- Boat was FILTHY. Removed the seating, carpeting, and anything else that was rolling around inside. Purchased some new gaskets for the exhaust manifolds, and set them in the garage. Have two sets, need to make one GOOD set. The seats might be salvageable... the vinyl is okay, but the wood is rotten, so we'll see what I can do. Also, the seams are coming apart in SOME places, but overall they are decent. The gauges will need to be replaced, as well as the floor between the tunnels. Need to reinforce the cap, as the side area flexes due to rotten supports, as well as reinforce the tow hook. Pretty pumped about this thing, washed it with my roommate and we were both impressed with how good the cap/hull look. Pretty amazing how well it has cleaned up so far. All of the black tape will need to be replaced.
Here she is after a quick wash:
And the beginning of 4 weeks of ridiculousness:
Total cost so far: $1200, initial purchase price. $180, shop towels, manifold gaskets, hand goop, and waterPROOF heavy duty top of the line boat cover. $1380.00
 07-14-2010 | 01:24 AM
#2
Thread Starter
Registered
Joined: Jul 2010
Posts: 328
Likes: 7
From: Madison, WI
April 27th, 2010
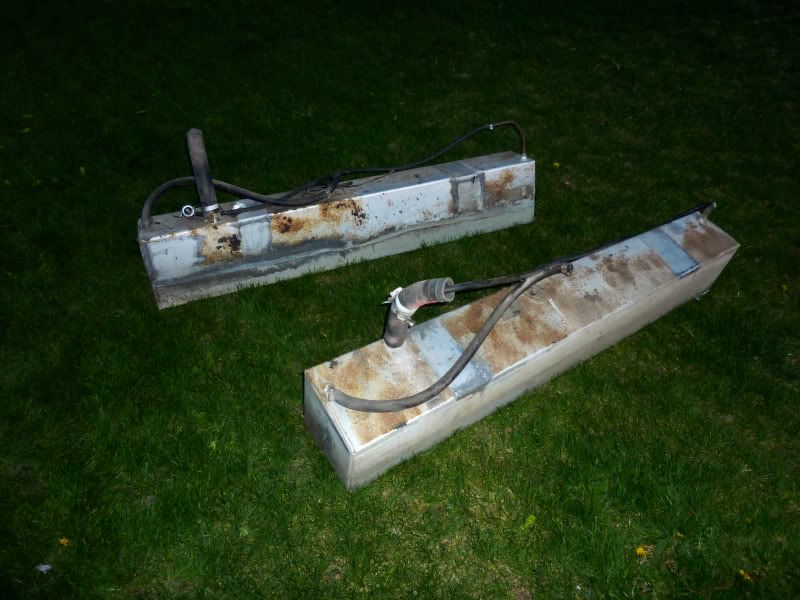
Removed fuel tanks; they were glassed in. Welded aluminum everything! Nice! Removed filler hardware, getting stainless ones instead.
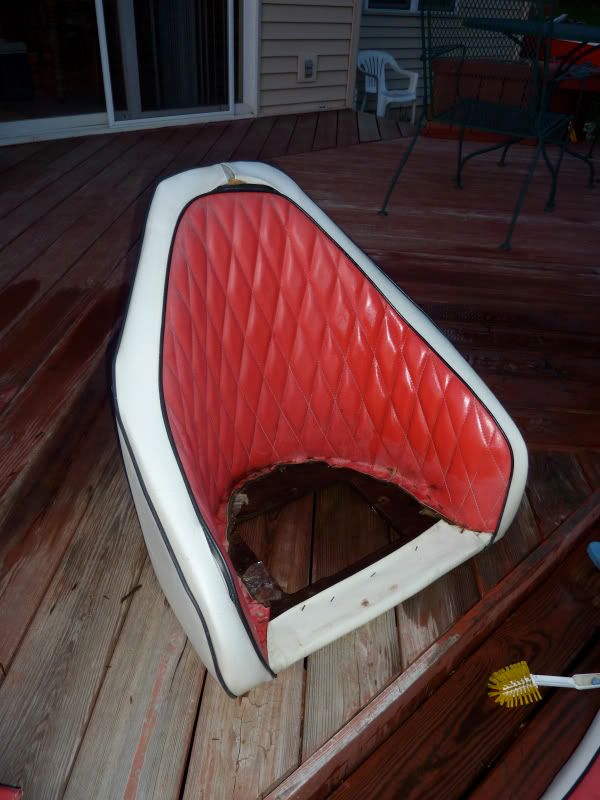
Spent a few hours scrubbing the seats with 409 and a huge scrub brush. DISGUSTING. There was stuff growing in the seats, with roots. The seat bottom will need to be replaced with fresh ply, so I'll make templates in the future. The real problem was mildew. It was IN the vinyl. No scrubbing would remove it. Ordered chrome dress up kit $45, gasket kit $45, and stainless bolt kit $45. Also purchased some red silicone 3" to 4" reducers for $11 each on ebay; the mercruiser versions were $55 a pair. Plus, silicone is sweet.
Removed fuel tanks; they were glassed in. Welded aluminum everything! Nice! Removed filler hardware, getting stainless ones instead.
Spent a few hours scrubbing the seats with 409 and a huge scrub brush. DISGUSTING. There was stuff growing in the seats, with roots. The seat bottom will need to be replaced with fresh ply, so I'll make templates in the future. The real problem was mildew. It was IN the vinyl. No scrubbing would remove it. Ordered chrome dress up kit $45, gasket kit $45, and stainless bolt kit $45. Also purchased some red silicone 3" to 4" reducers for $11 each on ebay; the mercruiser versions were $55 a pair. Plus, silicone is sweet.
07-14-2010 | 01:26 AM
#3
Thread Starter
Registered
Joined: Jul 2010
Posts: 328
Likes: 7
From: Madison, WI
April 28th, 2010:
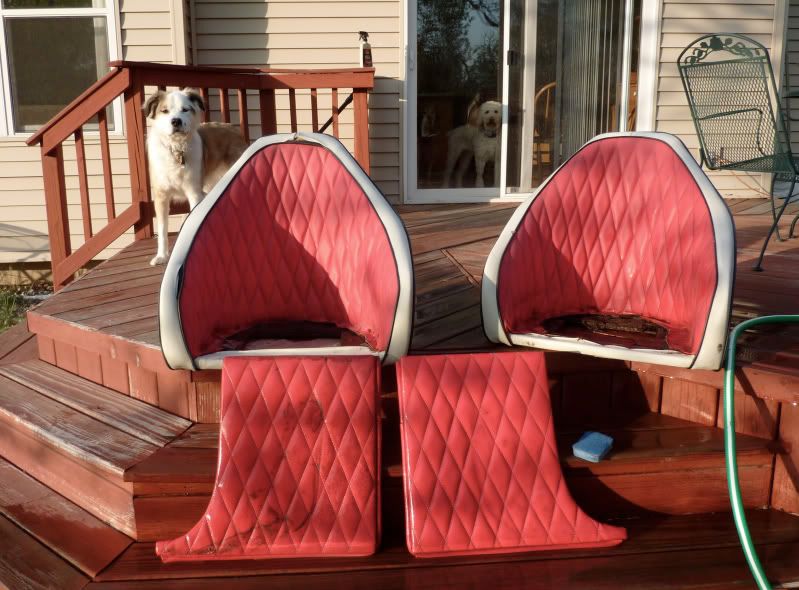
To remove the mildew from the seats, I sprayed them with Tilex and let them soak for 15 minutes, then scrubbed them with more tilex. This removed all the mildew, as well as brightened all the stitching.
After the Tilex Soak
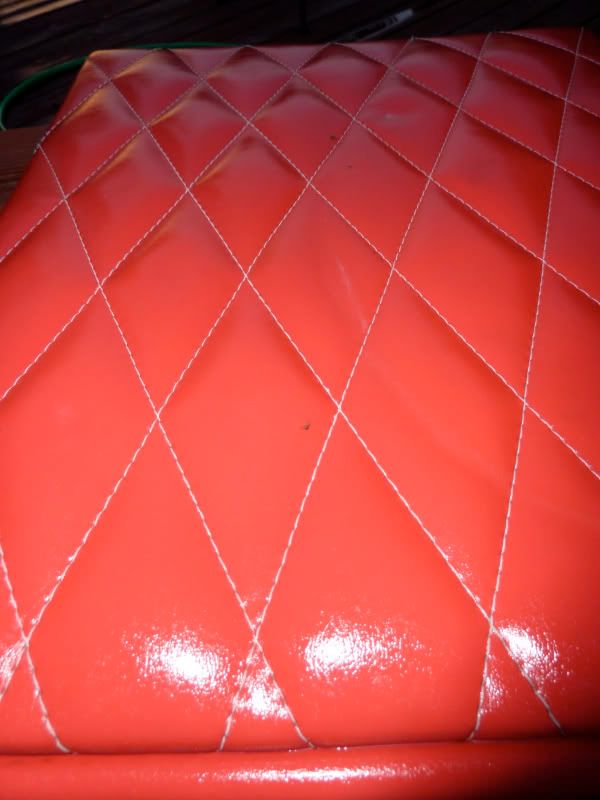
I then sprayed them with Mequirs Vinyl/Rubber Renewal product... had a lot of plasticizers, and WOW. The seats got instantly softer, and brighter!
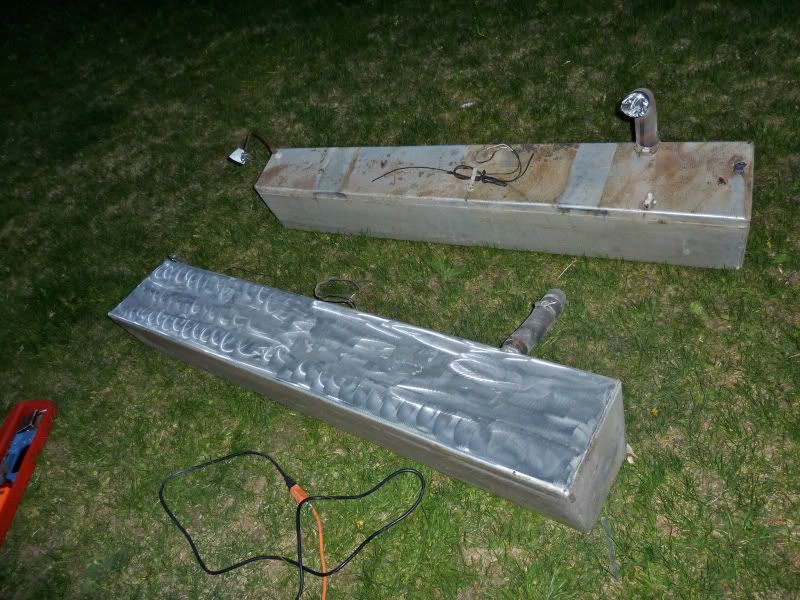
Also started grinding down the tanks, not sure what pattern to put on them yet:
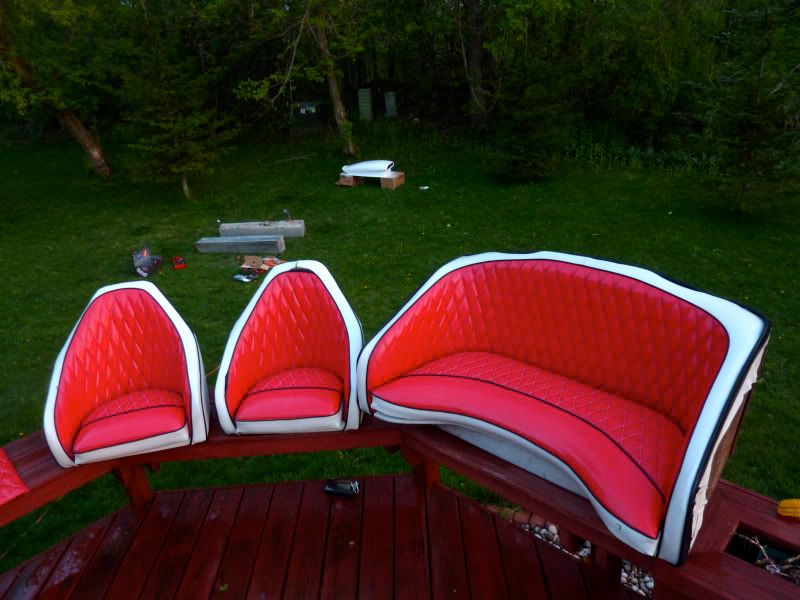
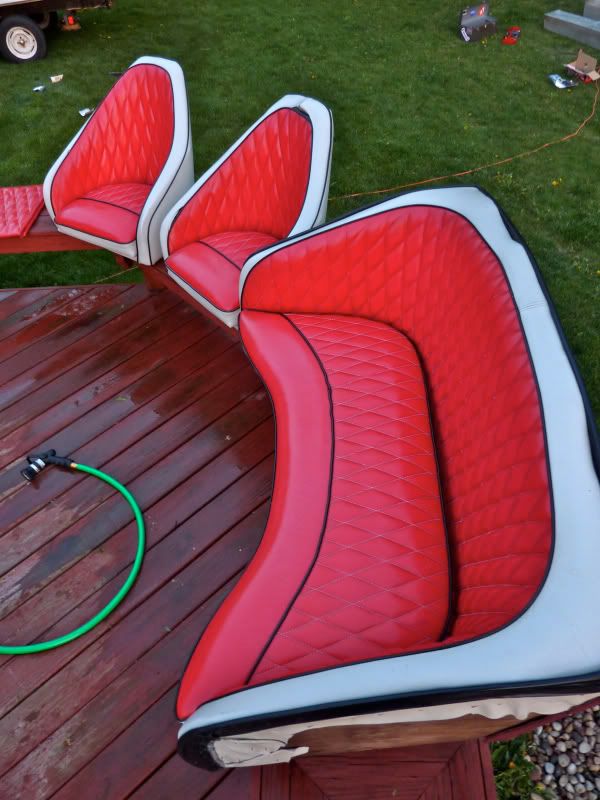
Anyway, here is the finished product, before I stitch up the sections coming apart:
To remove the mildew from the seats, I sprayed them with Tilex and let them soak for 15 minutes, then scrubbed them with more tilex. This removed all the mildew, as well as brightened all the stitching.
After the Tilex Soak
I then sprayed them with Mequirs Vinyl/Rubber Renewal product... had a lot of plasticizers, and WOW. The seats got instantly softer, and brighter!
Also started grinding down the tanks, not sure what pattern to put on them yet:
Anyway, here is the finished product, before I stitch up the sections coming apart:
07-14-2010 | 01:31 AM
#4
Thread Starter
Registered
Joined: Jul 2010
Posts: 328
Likes: 7
From: Madison, WI
5/3/10: Finished buzzing the gas tanks. Going to get some clear tomorrow to seal them in their shiny state. Removed some of the rotten wood from the seat cushions, cut new ones out. Need to sand them tomorrow at work, then restaple them. No pictures, sorry guys. Good news is I got a TON of goodies in the mail today. 
5/19/10: Been raining for weeks. Unable to work on it til now. Decoded the engine this morning.
*0508TKT is the block stamping number. I can't make out the first digit which shows the location. This decodes to 1978 350 SBC, which makes sense since the boat is a 78. It was a truck engine long, built on May 8th rated at 165hp in stock truck form. 4" bore, 3.48" stroke, with a 5.7" rod.
The heads are stamped 333882, which means the the intake valves are 1.94s, and the exhausts are 1.5s with a 76cc chamber. This is good news, since they aren't anemic truck heads.
I have no idea about the cam, but it does have an Weiand X-Celerator aluminum intake manifold, and a holley 650 carb, both in great shape. I purchased a dress up kit, and a stainless hardware kit so every bolt will be stainless. I'm hoping it makes around 250ish; anything more than that from what other have told me it'll be likely to grenade the lower unit.
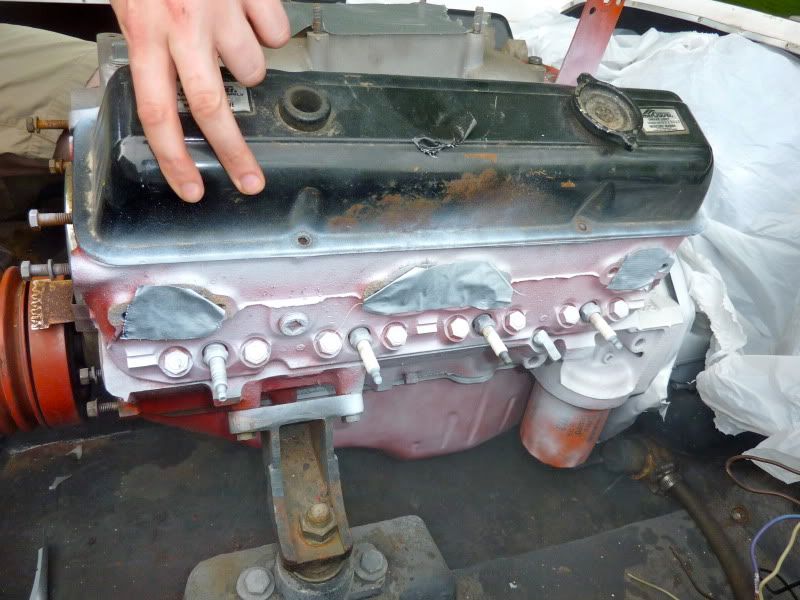
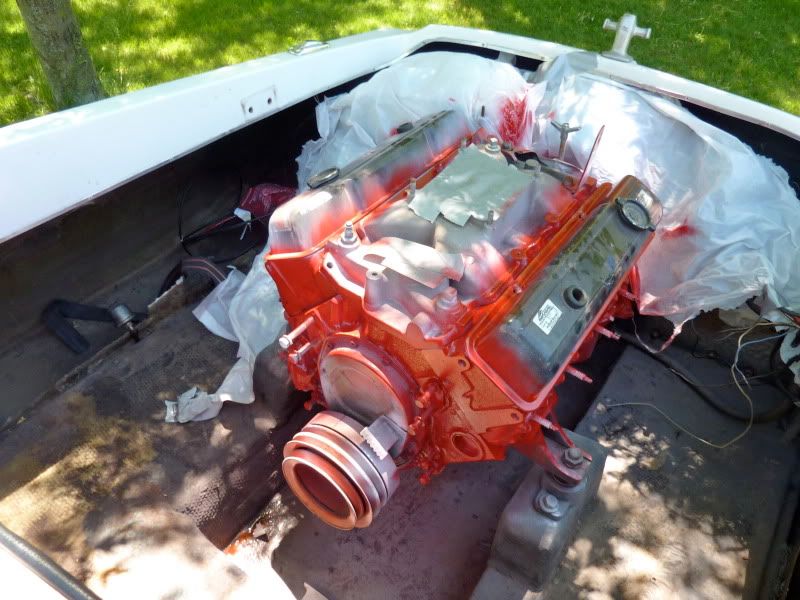
Took off all accessories; powersteering, alternator, manifolds, waterpump, etc... degreased, ready for paint. Here's some process shots:

Crusty, but took pics of the firing order for reference

Assembly lube still inside the engine; hasn't been run much at all.

Intake just sitting on there while removing the rest of the accessories.

That's a beer in the intake.
5/19/10: Been raining for weeks. Unable to work on it til now. Decoded the engine this morning.
*0508TKT is the block stamping number. I can't make out the first digit which shows the location. This decodes to 1978 350 SBC, which makes sense since the boat is a 78. It was a truck engine long, built on May 8th rated at 165hp in stock truck form. 4" bore, 3.48" stroke, with a 5.7" rod.
The heads are stamped 333882, which means the the intake valves are 1.94s, and the exhausts are 1.5s with a 76cc chamber. This is good news, since they aren't anemic truck heads.
I have no idea about the cam, but it does have an Weiand X-Celerator aluminum intake manifold, and a holley 650 carb, both in great shape. I purchased a dress up kit, and a stainless hardware kit so every bolt will be stainless. I'm hoping it makes around 250ish; anything more than that from what other have told me it'll be likely to grenade the lower unit.
Took off all accessories; powersteering, alternator, manifolds, waterpump, etc... degreased, ready for paint. Here's some process shots:
Crusty, but took pics of the firing order for reference
Assembly lube still inside the engine; hasn't been run much at all.
Intake just sitting on there while removing the rest of the accessories.
That's a beer in the intake.
07-14-2010 | 01:32 AM
#5
Thread Starter
Registered
Joined: Jul 2010
Posts: 328
Likes: 7
From: Madison, WI
Yeah, it's pretty fresh inside. When I bought it, the previous previous previous owner had it rebuilt, installed the engine, and could never get it running. The next guy did nothing. The guy I bought it from had it running for 20 minutes or so, then turned it off. So... basically it's new inside. The valve covers were from a swap meet, and are correct to the engine, so they have some information on the timing and distributor advance and stuff. The dressup kit has chrome ones, so they'll go away once I paint the block.
The hoses would probably be fairly ridiculous to replace, since it has so many (twice as much as a car engine), so they'll probably stay the same, but the plug wires will be organized with a bunch of stainless clips. It'll look a lot better once things start going together next week.
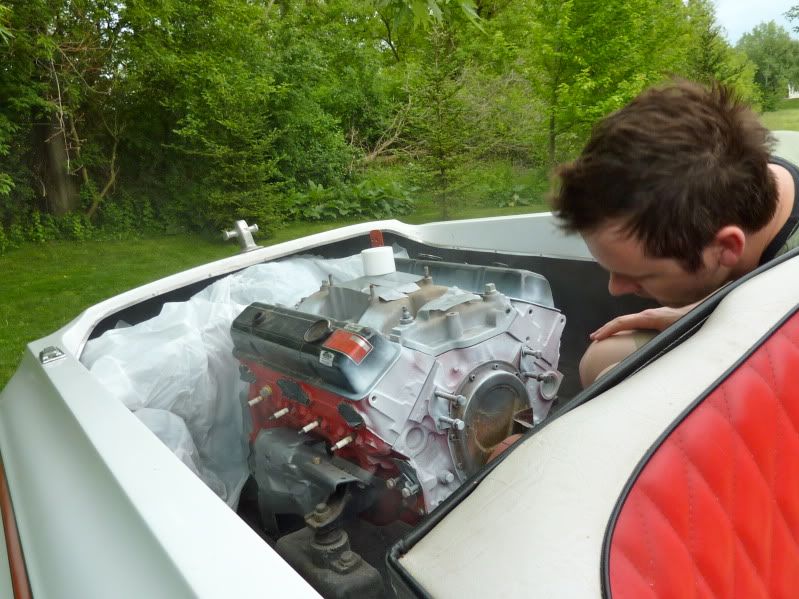
Masked Engine:

Sprayed really light coat of white engine paint... really light sets up, then gives the "grit" for the a heavier coat to stick to, without runs. Light coat, allow to almost dry, then heavier. This is the best way for an easy finish.
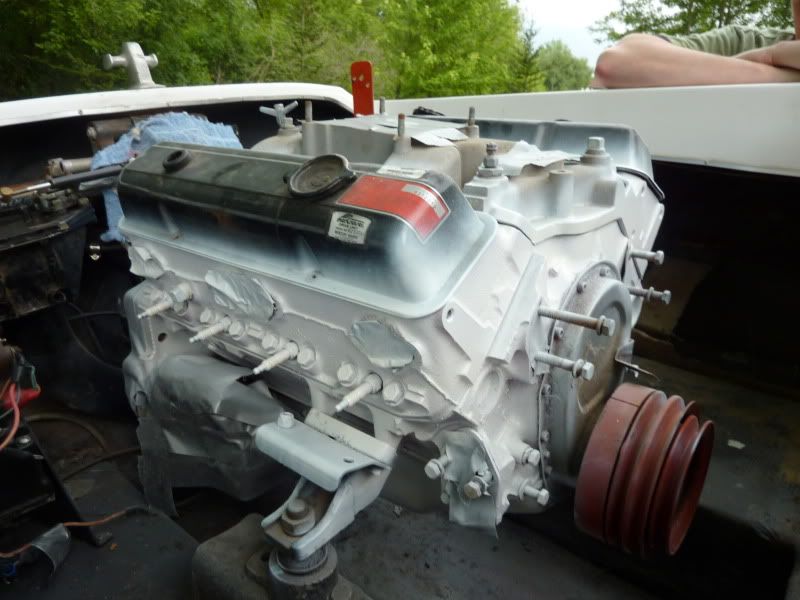
Tonight I'm going to spray it red. I sprayed it white first, to give the red more "pop". Everytime I use red paint on a darker surface it always looks dead.... hence the white basecoat.
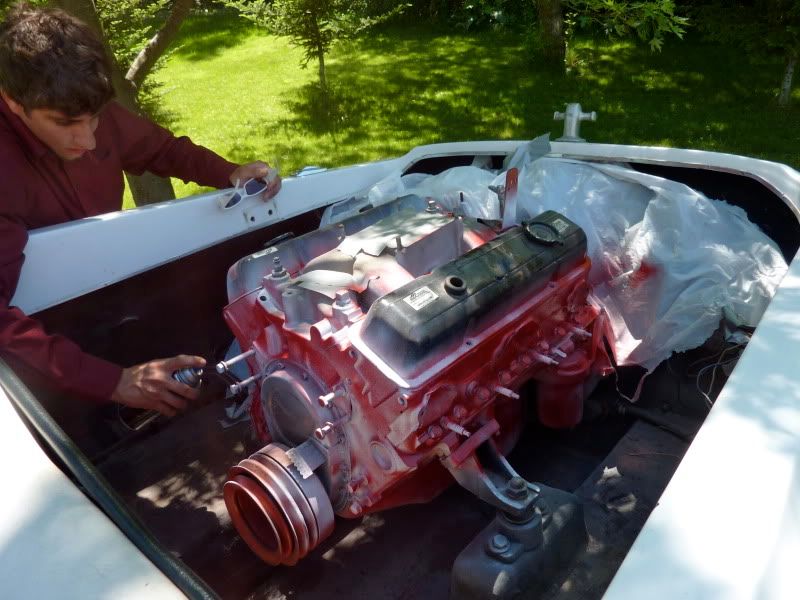
Sprayed the engine red at lunch yesterday:
The hoses would probably be fairly ridiculous to replace, since it has so many (twice as much as a car engine), so they'll probably stay the same, but the plug wires will be organized with a bunch of stainless clips. It'll look a lot better once things start going together next week.
Masked Engine:
Sprayed really light coat of white engine paint... really light sets up, then gives the "grit" for the a heavier coat to stick to, without runs. Light coat, allow to almost dry, then heavier. This is the best way for an easy finish.
Tonight I'm going to spray it red. I sprayed it white first, to give the red more "pop". Everytime I use red paint on a darker surface it always looks dead.... hence the white basecoat.
Sprayed the engine red at lunch yesterday:
07-14-2010 | 01:33 AM
#6
Thread Starter
Registered
Joined: Jul 2010
Posts: 328
Likes: 7
From: Madison, WI
Exhaust manifolds were awful, took them apart and found this:
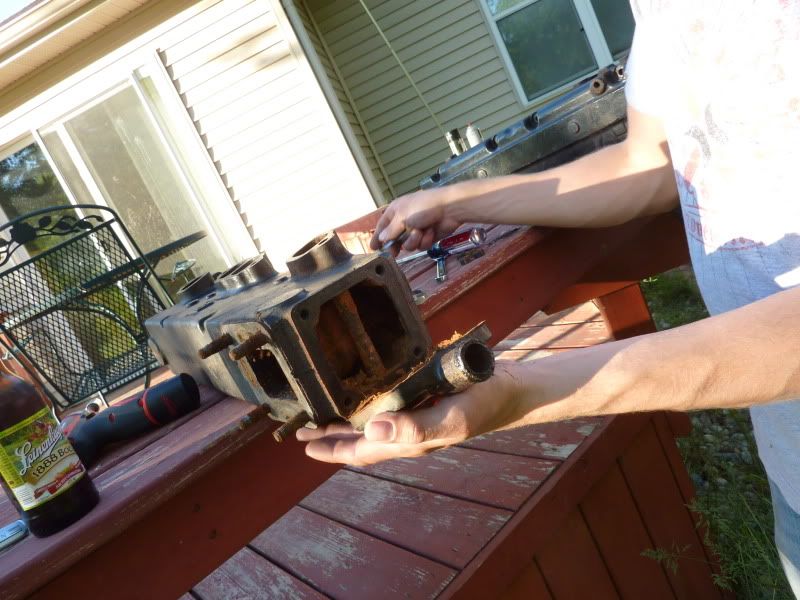
Ordered new gasket, going to get these blasted and respray satin black, hi temp.
[IMG]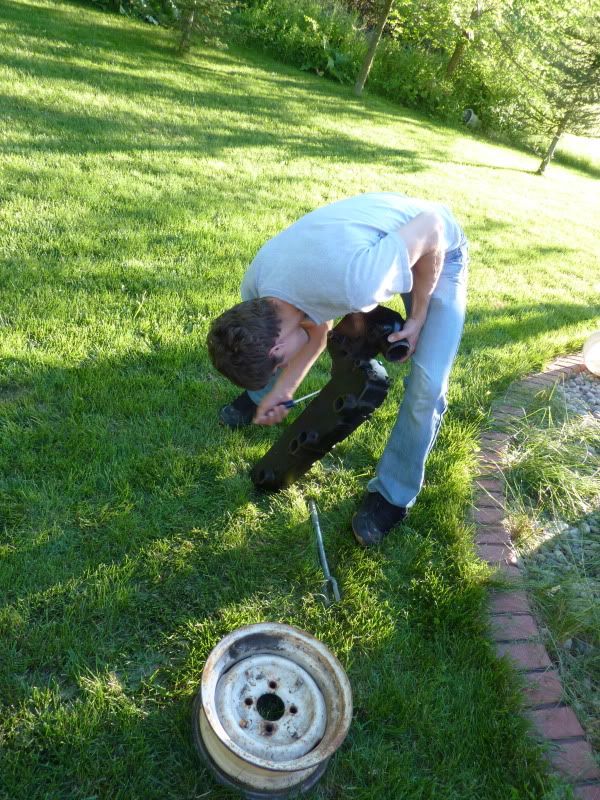 [/IMG]
Smashing them into a wheel to get the elbow to separate from the log. Thing was rusted solid. Yuck.
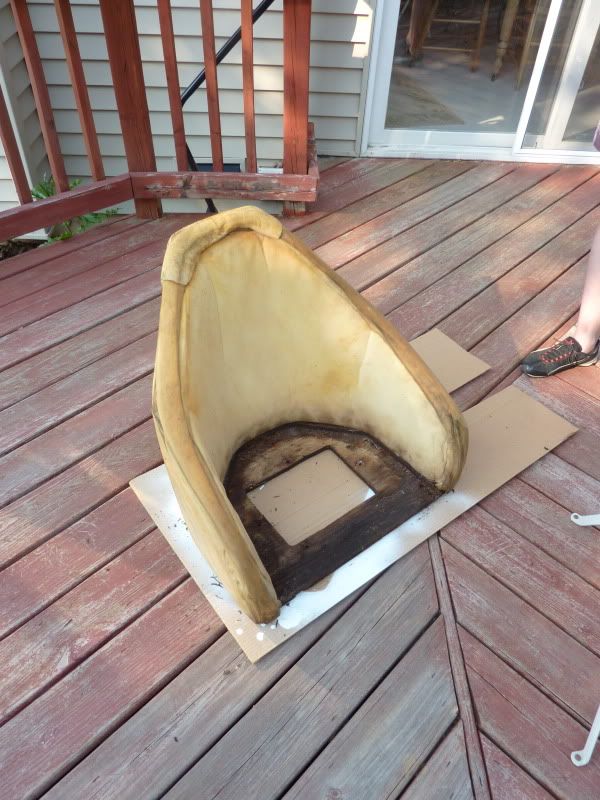
Stripped the seats to replace the rotten floors. Traced them on cardboard, cut new ones out.
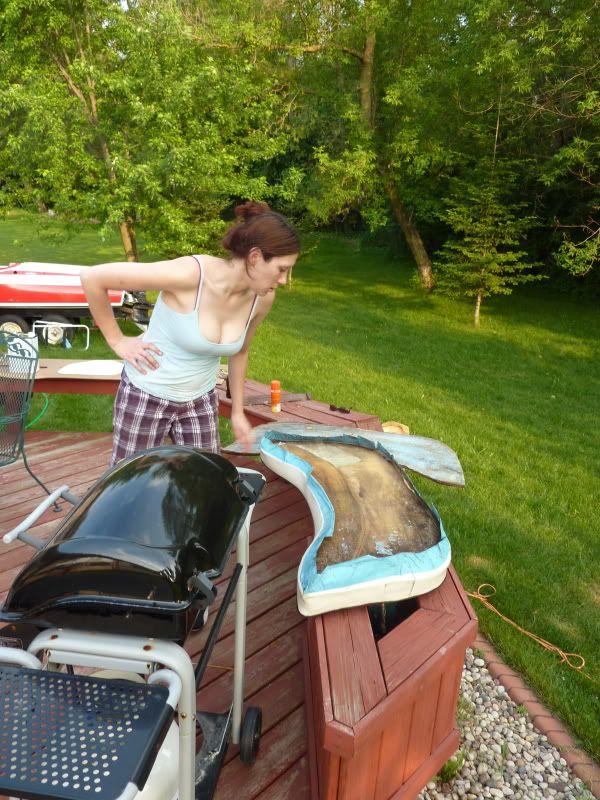
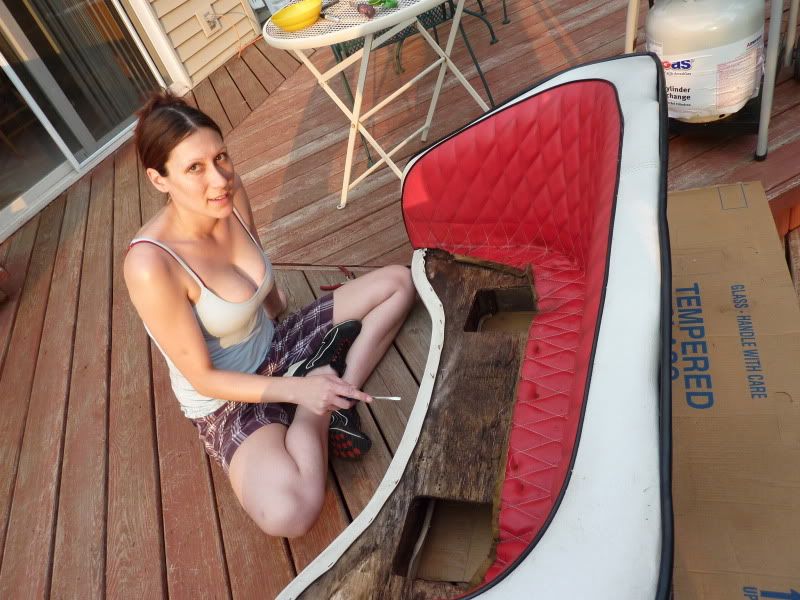
Put my lovely assistant to work on the rear seat. She took out the staples, then traced the rotten wood again.
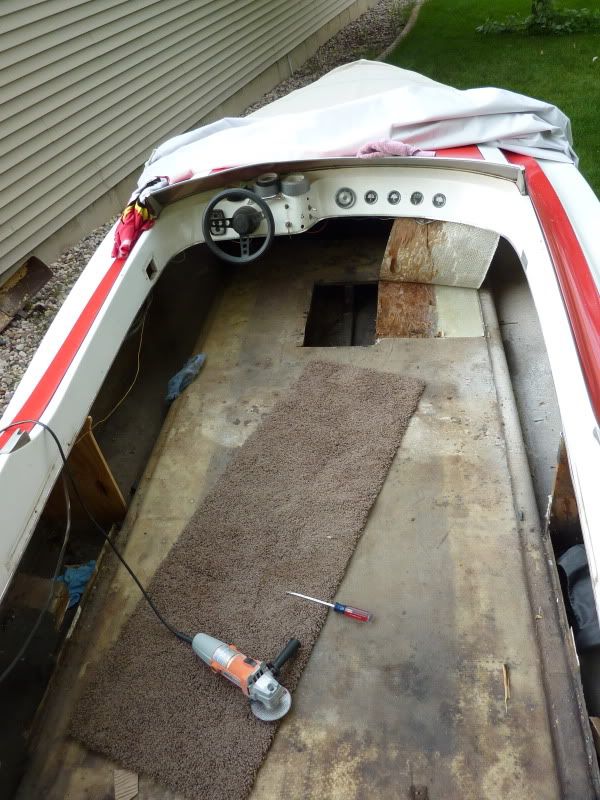
Started tearing up the floor. It was a lot of work under the dash. Extra fiberglass and less rot under there, so it was a PITA.
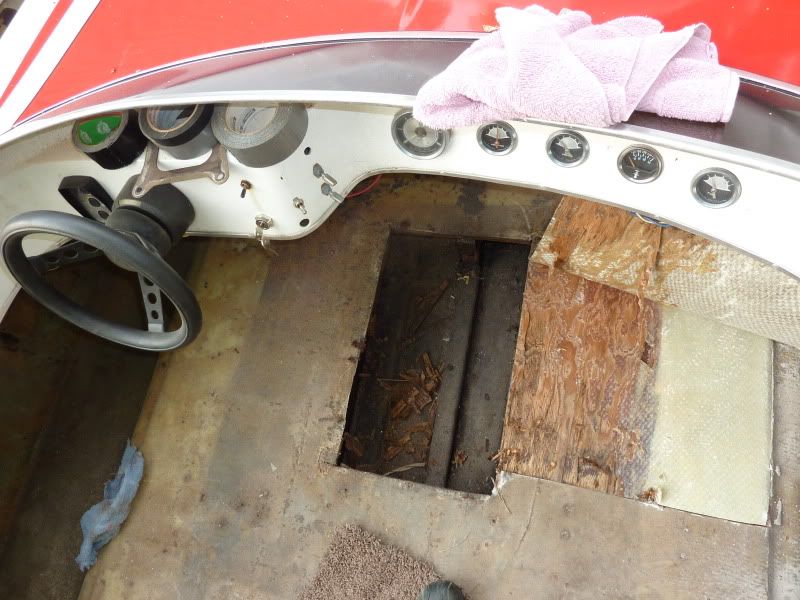
Here's where someone cut a hole for a cooler. This compromised the floor, which then rotted, as well as the main stringer.
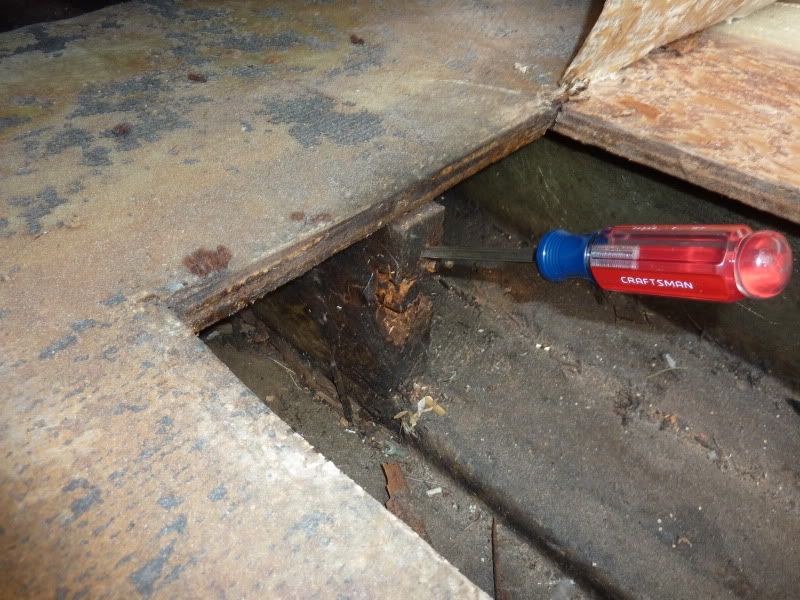
This just slid in, with minimal pressure. Yuck.
Ordered new gasket, going to get these blasted and respray satin black, hi temp.
[IMG]
[/IMG]Smashing them into a wheel to get the elbow to separate from the log. Thing was rusted solid. Yuck.
Stripped the seats to replace the rotten floors. Traced them on cardboard, cut new ones out.
Put my lovely assistant to work on the rear seat. She took out the staples, then traced the rotten wood again.
Started tearing up the floor. It was a lot of work under the dash. Extra fiberglass and less rot under there, so it was a PITA.
Here's where someone cut a hole for a cooler. This compromised the floor, which then rotted, as well as the main stringer.
This just slid in, with minimal pressure. Yuck.
07-14-2010 | 01:35 AM
#7
Thread Starter
Registered
Joined: Jul 2010
Posts: 328
Likes: 7
From: Madison, WI
[IMG]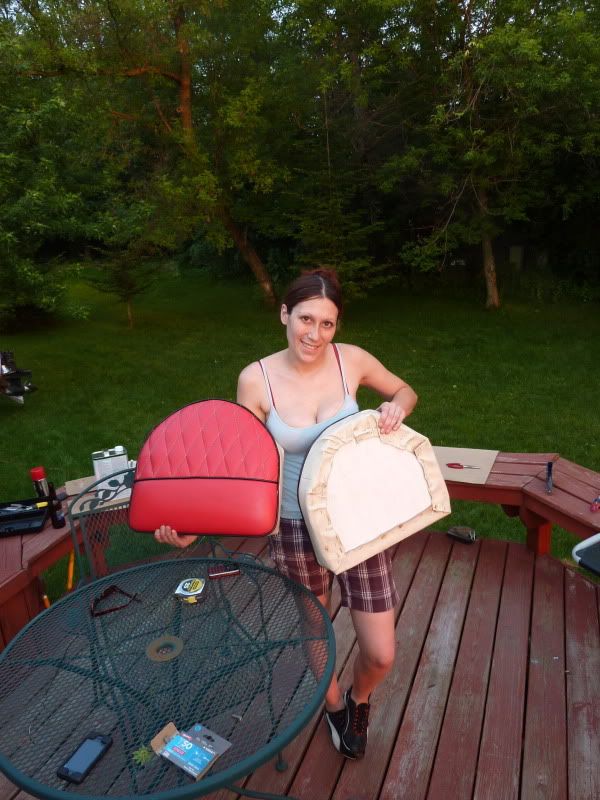 [/IMG]
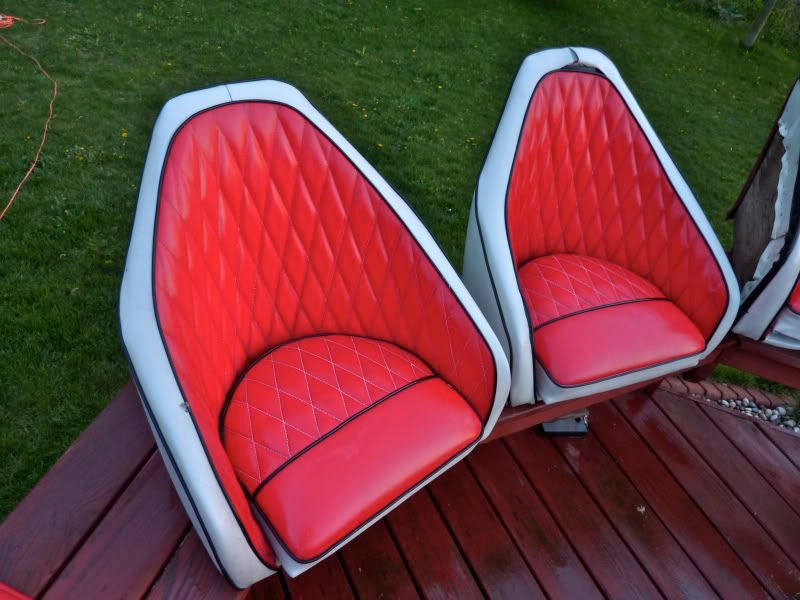
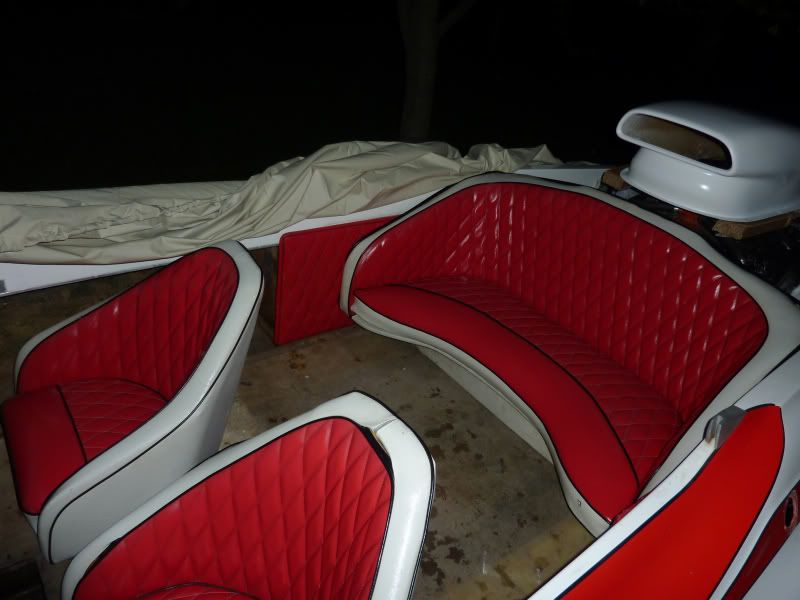
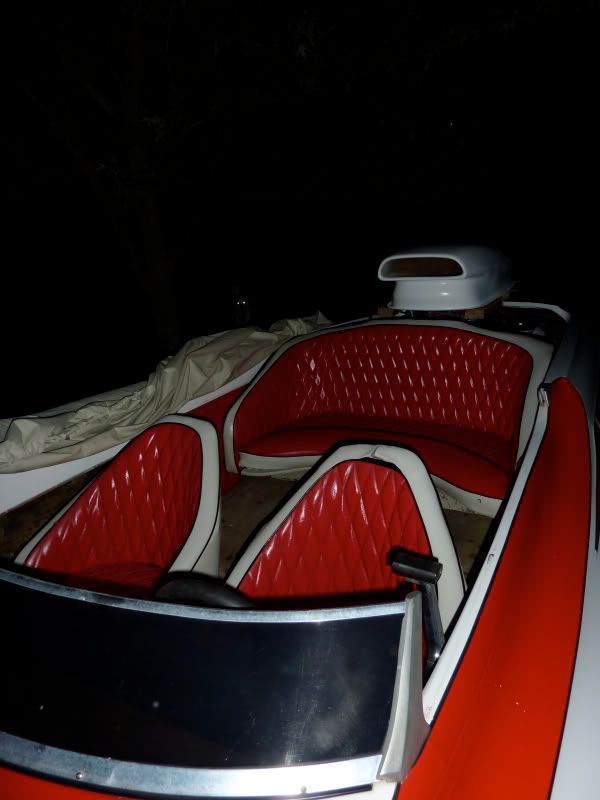
Front cushions done!

All the new staples are stainless steel, unlike the originals. The vinyl is treated with meguires, and got really stretchy in the sun. You can also see the new wood in the base.

Rear seat, DONE!!!!

Front seats have replacement floors sealed, then screwed in through the fiberglass sides, then filled all the gaps, and coated with FG resin. Totally sealed from the elements.

Yikes. It's only uphill from here. I think.

She was saying something, I wasn't paying attention.

My roommate tearing up some wood. It was pretty far gone.

Floor is out. Next up on the hitlist: Main stringer.

And again the lovely assistant using her suturing skills to repair the small tears in the vinyl.

I can just see her being like "ahhhh, someone is taking care of me again". I can't wait.
[/IMG]Front cushions done!
All the new staples are stainless steel, unlike the originals. The vinyl is treated with meguires, and got really stretchy in the sun. You can also see the new wood in the base.
Rear seat, DONE!!!!
Front seats have replacement floors sealed, then screwed in through the fiberglass sides, then filled all the gaps, and coated with FG resin. Totally sealed from the elements.
Yikes. It's only uphill from here. I think.
She was saying something, I wasn't paying attention.
My roommate tearing up some wood. It was pretty far gone.
Floor is out. Next up on the hitlist: Main stringer.
And again the lovely assistant using her suturing skills to repair the small tears in the vinyl.
I can just see her being like "ahhhh, someone is taking care of me again". I can't wait.
07-14-2010 | 01:35 AM
#8
Thread Starter
Registered
Joined: Jul 2010
Posts: 328
Likes: 7
From: Madison, WI
Updates. It's been a while, and I've been really busy so I haven't had time to post much.

Removed rotten stringer.

Test fitting the new stringer. She's a beautiful 2x8 hand picked from about 40 of them at a lumber yard. Straight as an arrow, barely any knots. Upon test fitting, I discovered that ORIGINAL stringer did not touch the hull at all for about four feet in the center. Basically, the styling of this boat was great, but the build quality was awful. I think everyone was just too coked out in 78 to care much. SOO...
I bought a 2x4, 6' long, and cut it with a sabre saw to make it 1" in the middle, and taper to nothing on the ends. Then used big stainless screws to screw that into the bottom of the stringer. This allowed the stringer full contact with the hull of the boat.

Picked up a belt sander at harbor freight for $30. Used that to round the top edges of the stringer so the glass will wrap around it easier.

Here she is, all ready to be put in. Course.... I was drinking so...

Boobs. And here you can clearly see the addition to the stringer, due to reasons above.

My roommate throwing the stringer in. Well, about to anyway.

The stringer installed with $75 worth of marine structural fiberglass filler. Nasty stuff.

Heh.

Sanding the hull so it will accept new glass, and get a nice strong bond.

This is the first coat of glass. You can barely even tell it's glassed in. Sorry, no process shots, hands were full of resin and fiberglass fuzz.

I had some help! My girlfriend and my roommate glassing the front of the stringer in. I was busy hitting it from the rear.

Crack on the outside fiberglass, where the cap and hull join. This is due to a poorly reinforced tow hook. To fix it....

Hog it out with an angle grinder....

Then fill with resin, and a thin strip of FG mat. I'll build up the layers eventually to fill it in.

The pencil is taped in to help hold the FG strip into the carved area.
Today I bought the 4x8 plywood, as well as even more resin. Yay.
Removed rotten stringer.
Test fitting the new stringer. She's a beautiful 2x8 hand picked from about 40 of them at a lumber yard. Straight as an arrow, barely any knots. Upon test fitting, I discovered that ORIGINAL stringer did not touch the hull at all for about four feet in the center. Basically, the styling of this boat was great, but the build quality was awful. I think everyone was just too coked out in 78 to care much. SOO...
I bought a 2x4, 6' long, and cut it with a sabre saw to make it 1" in the middle, and taper to nothing on the ends. Then used big stainless screws to screw that into the bottom of the stringer. This allowed the stringer full contact with the hull of the boat.
Picked up a belt sander at harbor freight for $30. Used that to round the top edges of the stringer so the glass will wrap around it easier.
Here she is, all ready to be put in. Course.... I was drinking so...
Boobs. And here you can clearly see the addition to the stringer, due to reasons above.
My roommate throwing the stringer in. Well, about to anyway.
The stringer installed with $75 worth of marine structural fiberglass filler. Nasty stuff.
Heh.
Sanding the hull so it will accept new glass, and get a nice strong bond.
This is the first coat of glass. You can barely even tell it's glassed in. Sorry, no process shots, hands were full of resin and fiberglass fuzz.
I had some help! My girlfriend and my roommate glassing the front of the stringer in. I was busy hitting it from the rear.
Crack on the outside fiberglass, where the cap and hull join. This is due to a poorly reinforced tow hook. To fix it....
Hog it out with an angle grinder....
Then fill with resin, and a thin strip of FG mat. I'll build up the layers eventually to fill it in.
The pencil is taped in to help hold the FG strip into the carved area.
Today I bought the 4x8 plywood, as well as even more resin. Yay.
07-14-2010 | 01:37 AM
#9
Thread Starter
Registered
Joined: Jul 2010
Posts: 328
Likes: 7
From: Madison, WI
Budget: $1200, initial purchase price. $140 waterproof boat cover, $13 exhaust manifold gaskets, $60 SBC dress up kit. $8 distributor dress up kit. $40 stainless bolt kit for SBC. $25 exhaust manifold rebuild kit. $35 red LED light strips. $30 SBC gasket kit. $30 ~25 disposable brushes. $75 fiberglass mat, $75 fiberglass cloth, $250 5 gallons of fiberglass resin. $75 two cans fiberglass structural filler. $18 2"x8" 12 ft long. $3 2"x4" 6 ft long. $23 4'x8' 5/8" plywood. $20 vinyl renewal products. $15 silicone hose reducers. $115 steering cable. $45 throttle cable. $45 shift cable.
Total cost so far: $2340 and counting. Will need at least another $500 to be decent, but still going to be one ****ing cool boat for under 3 g.
Total cost so far: $2340 and counting. Will need at least another $500 to be decent, but still going to be one ****ing cool boat for under 3 g.
07-14-2010 | 01:38 AM
#10
Thread Starter
Registered
Joined: Jul 2010
Posts: 328
Likes: 7
From: Madison, WI
Updates:
I sandblasted the intake manifold. It's a weiand X-celerator, which is pretty sweet. Then just for fun I did this on the bottom of the intake:


Intake installed. Fresh gaskets and high temp RTV.

Floor mockup. This is 5/8" plywood. Not marine ply, because that was uber $, and also I read that resin didn't stick to it very well. The boat will be stored indoors so whatever, it'll last a while. This was tricky, as I had to make a lot of decisions on where the seats would go. I also wanted to make cutouts in the floor, so I could use the main hull to store waterskis, towels, and whatever else I want. Originally the stringer area was unaccessable, but I like having storage. I also brought the rear seat forward a little bit. Having it so close to the engine made me a bit nervous about having girls with long hair in the boat. I would hate to see their hair get caught in the pulleys/belts on the V8, so I moved it forward about 6". There is still plenty of room, and it also makes a nice storage area behind the seat.

After making cardboard templates, time to cut out the floor. My roommate and I were tag teaming it since it was a large piece of wood. After that, I used an angle grinder to radius the edges, then hit it with 80 grit sandpaper.

One extremely thick coat of resin on the underside to moisture from getting in it.

While the floor was curing, I sanded the main stringer and surrounding areas, then hit it with a gray enamel. I wanted some value so you could sell well when objects were in it.
I sandblasted the intake manifold. It's a weiand X-celerator, which is pretty sweet. Then just for fun I did this on the bottom of the intake:
Intake installed. Fresh gaskets and high temp RTV.
Floor mockup. This is 5/8" plywood. Not marine ply, because that was uber $, and also I read that resin didn't stick to it very well. The boat will be stored indoors so whatever, it'll last a while. This was tricky, as I had to make a lot of decisions on where the seats would go. I also wanted to make cutouts in the floor, so I could use the main hull to store waterskis, towels, and whatever else I want. Originally the stringer area was unaccessable, but I like having storage. I also brought the rear seat forward a little bit. Having it so close to the engine made me a bit nervous about having girls with long hair in the boat. I would hate to see their hair get caught in the pulleys/belts on the V8, so I moved it forward about 6". There is still plenty of room, and it also makes a nice storage area behind the seat.
After making cardboard templates, time to cut out the floor. My roommate and I were tag teaming it since it was a large piece of wood. After that, I used an angle grinder to radius the edges, then hit it with 80 grit sandpaper.
One extremely thick coat of resin on the underside to moisture from getting in it.
While the floor was curing, I sanded the main stringer and surrounding areas, then hit it with a gray enamel. I wanted some value so you could sell well when objects were in it.

