

35 zfc adding new fuel tanks project
 04-26-2026 | 01:15 PM
#1
Thread Starter
Registered
Joined: Jun 2025
Posts: 17
Likes: 8
From: Shelton, CT
Just some info on an increase to my fuel capacity with the addition of three vinyl ester tanks I’m
constructing. I picked up a CoPart special awhile back and have been going through it. It had twin 275 Verados and now has trip 350 Verados L6’s, 0 hours on rebuilds. I plan on taking the boat offshore and wanted the third motor mostly for redundancy, this boat won’t plane with a single motor and a load. Standard fuel capacity was 261 gallons, 186 main and 75 auxiliary transfer. Not enough even running on 2 for the range I’d like.
So I located 3 areas where I could fit custom sized tanks.

Starboard side seat
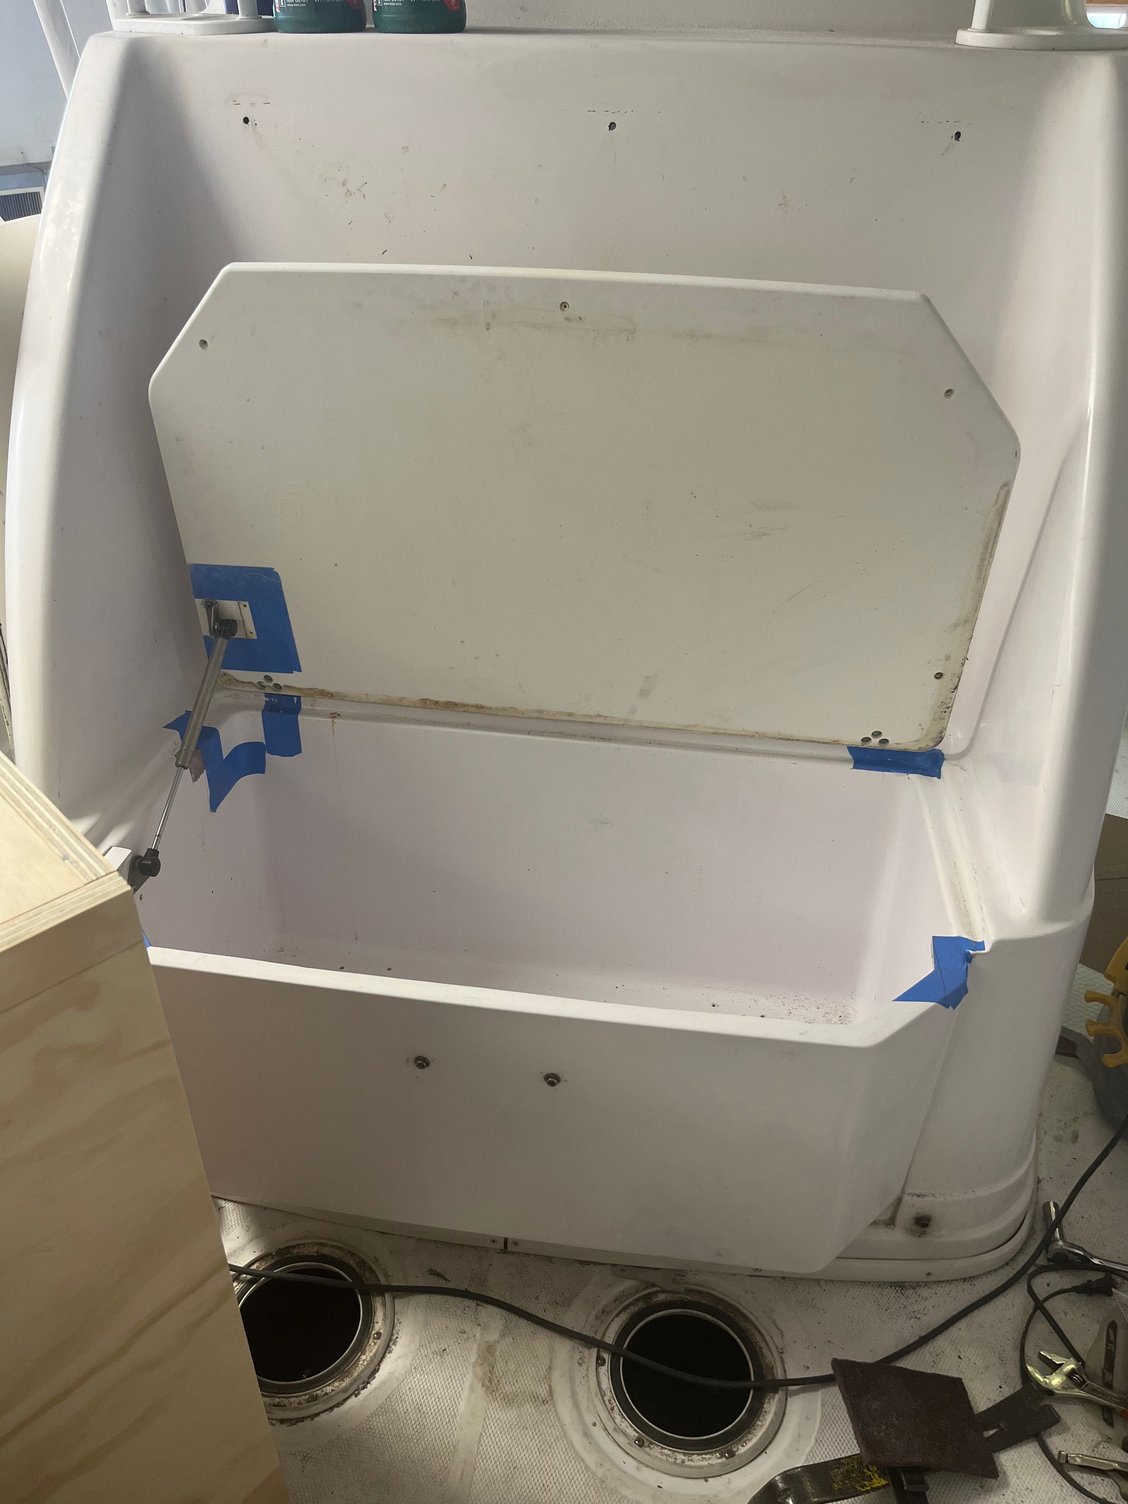
Cooler area under seat front of console
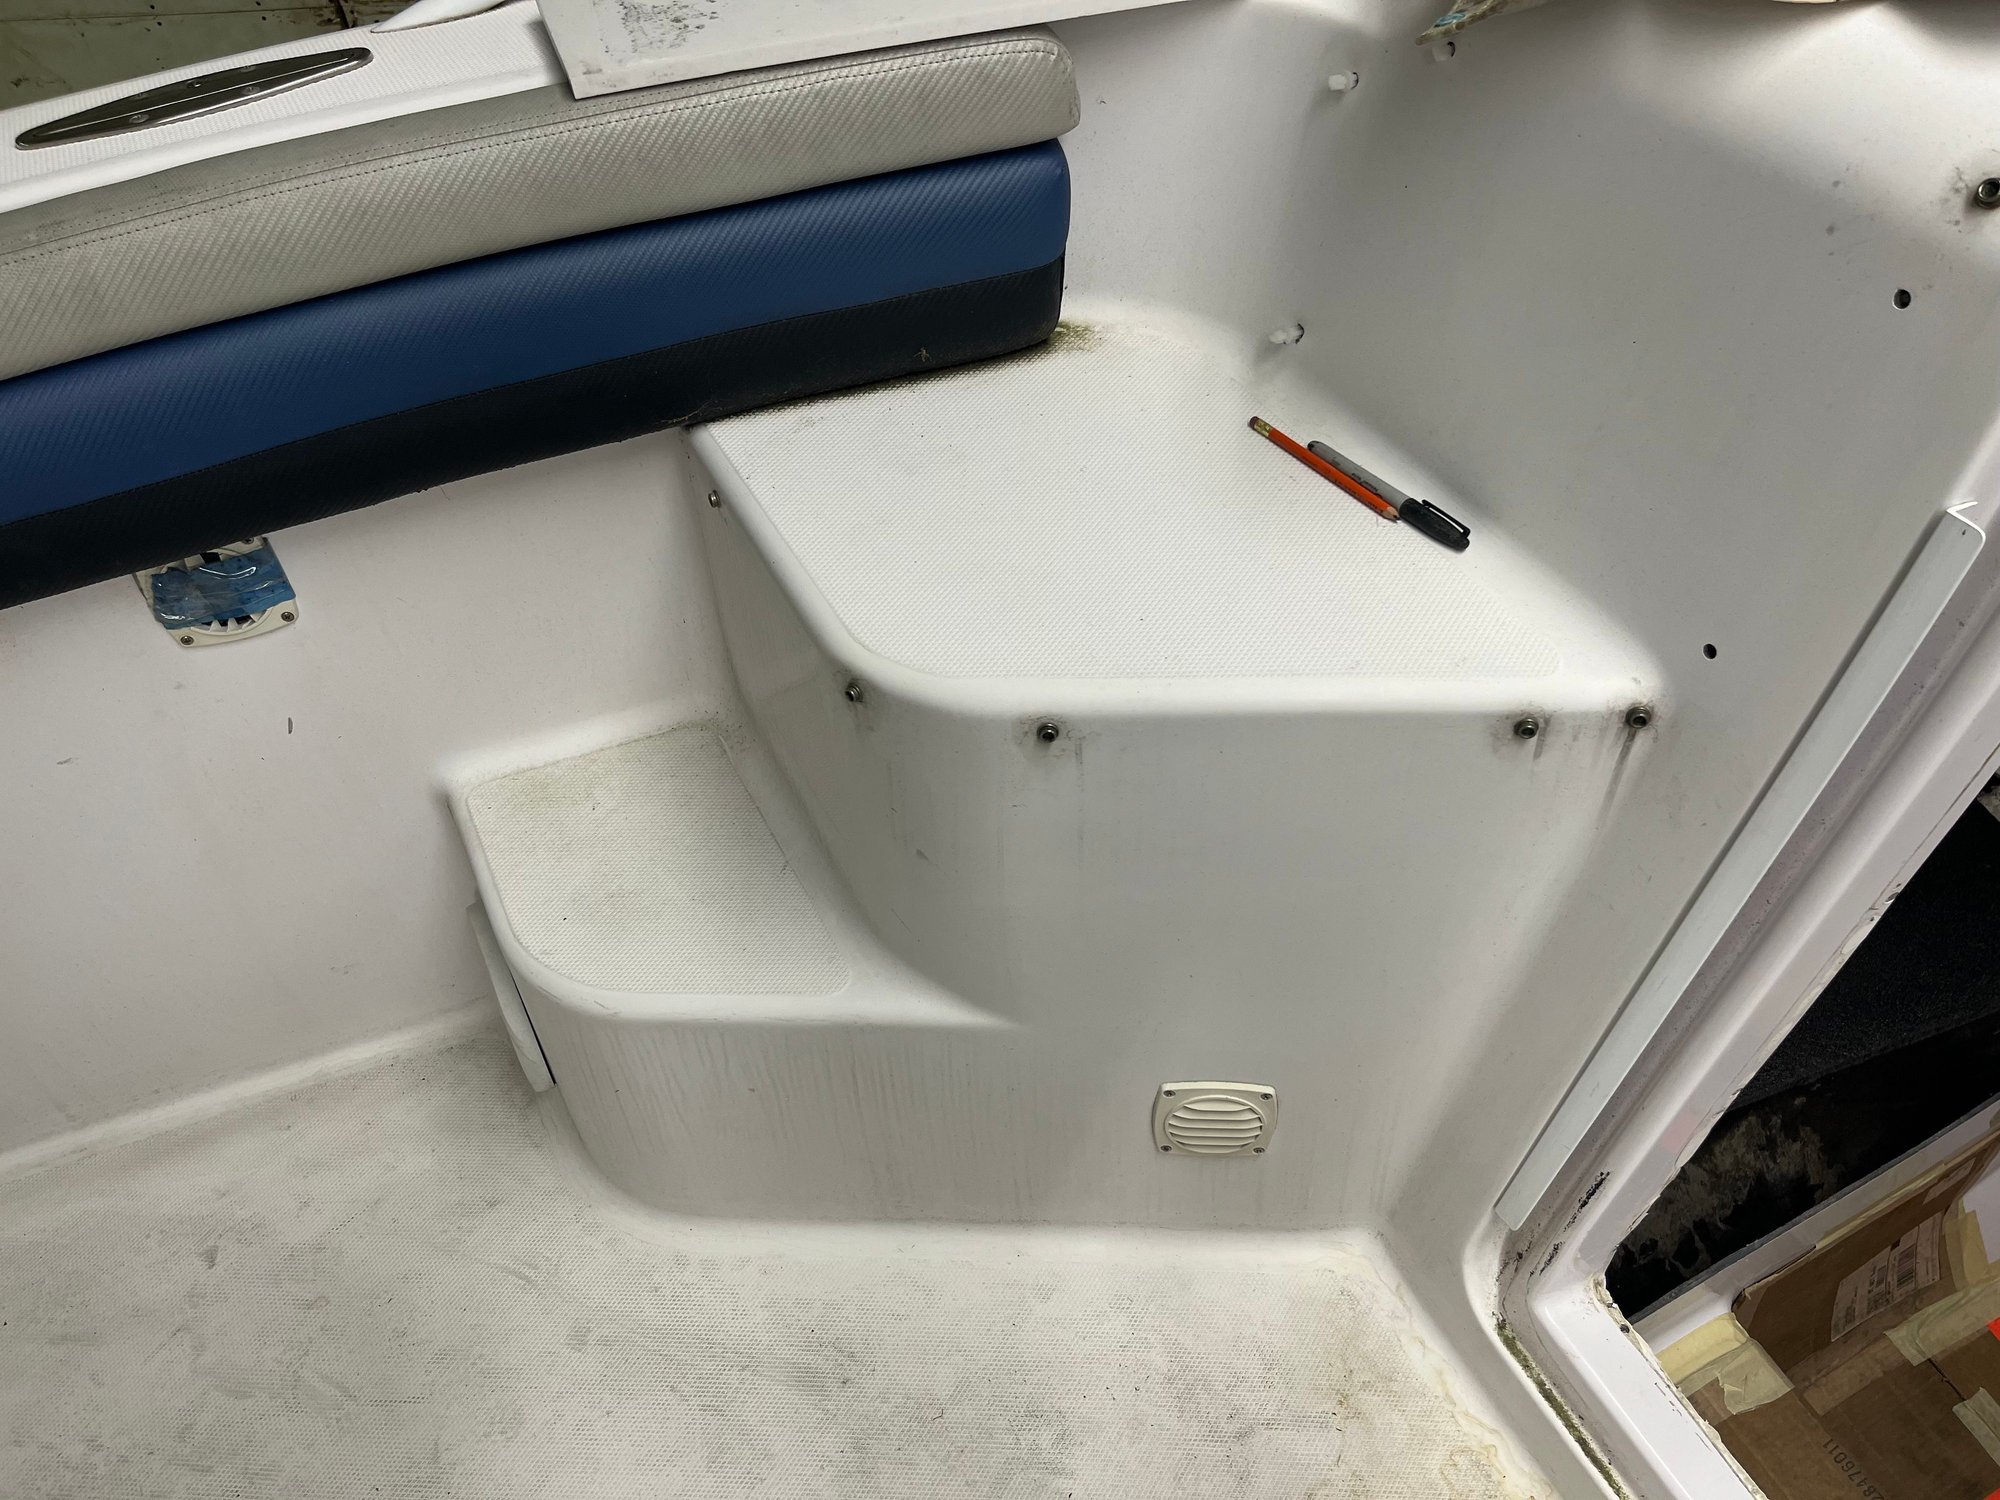
Port 2 step to fwd deck
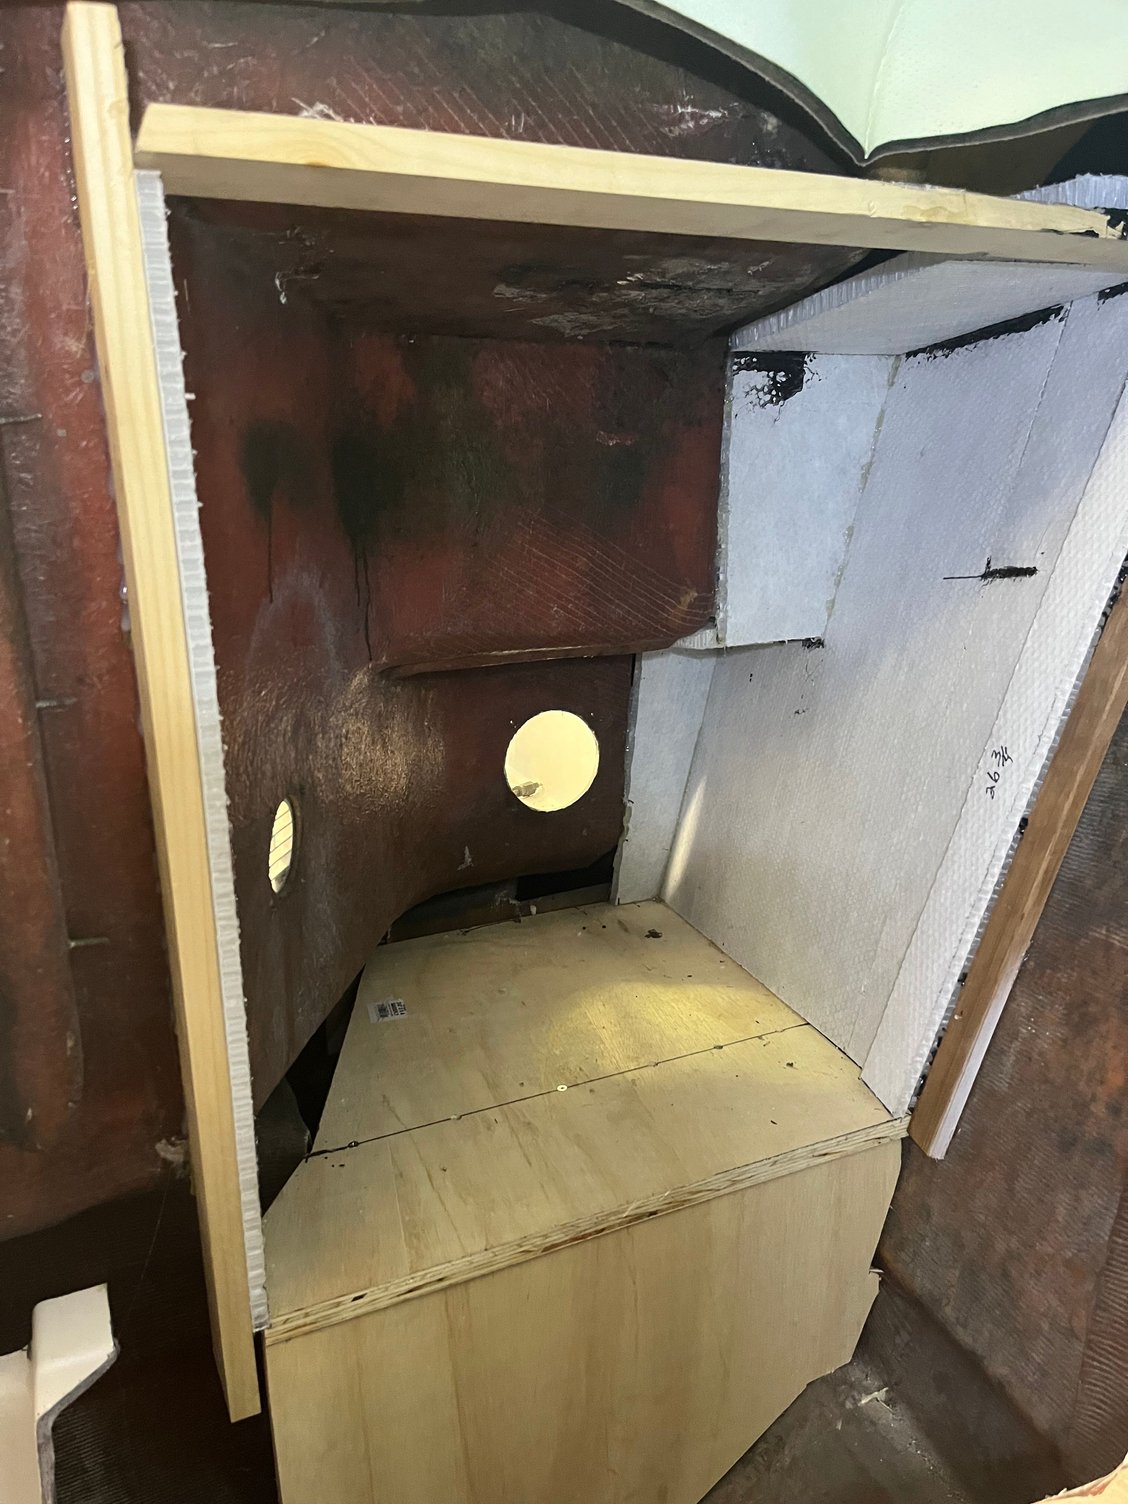
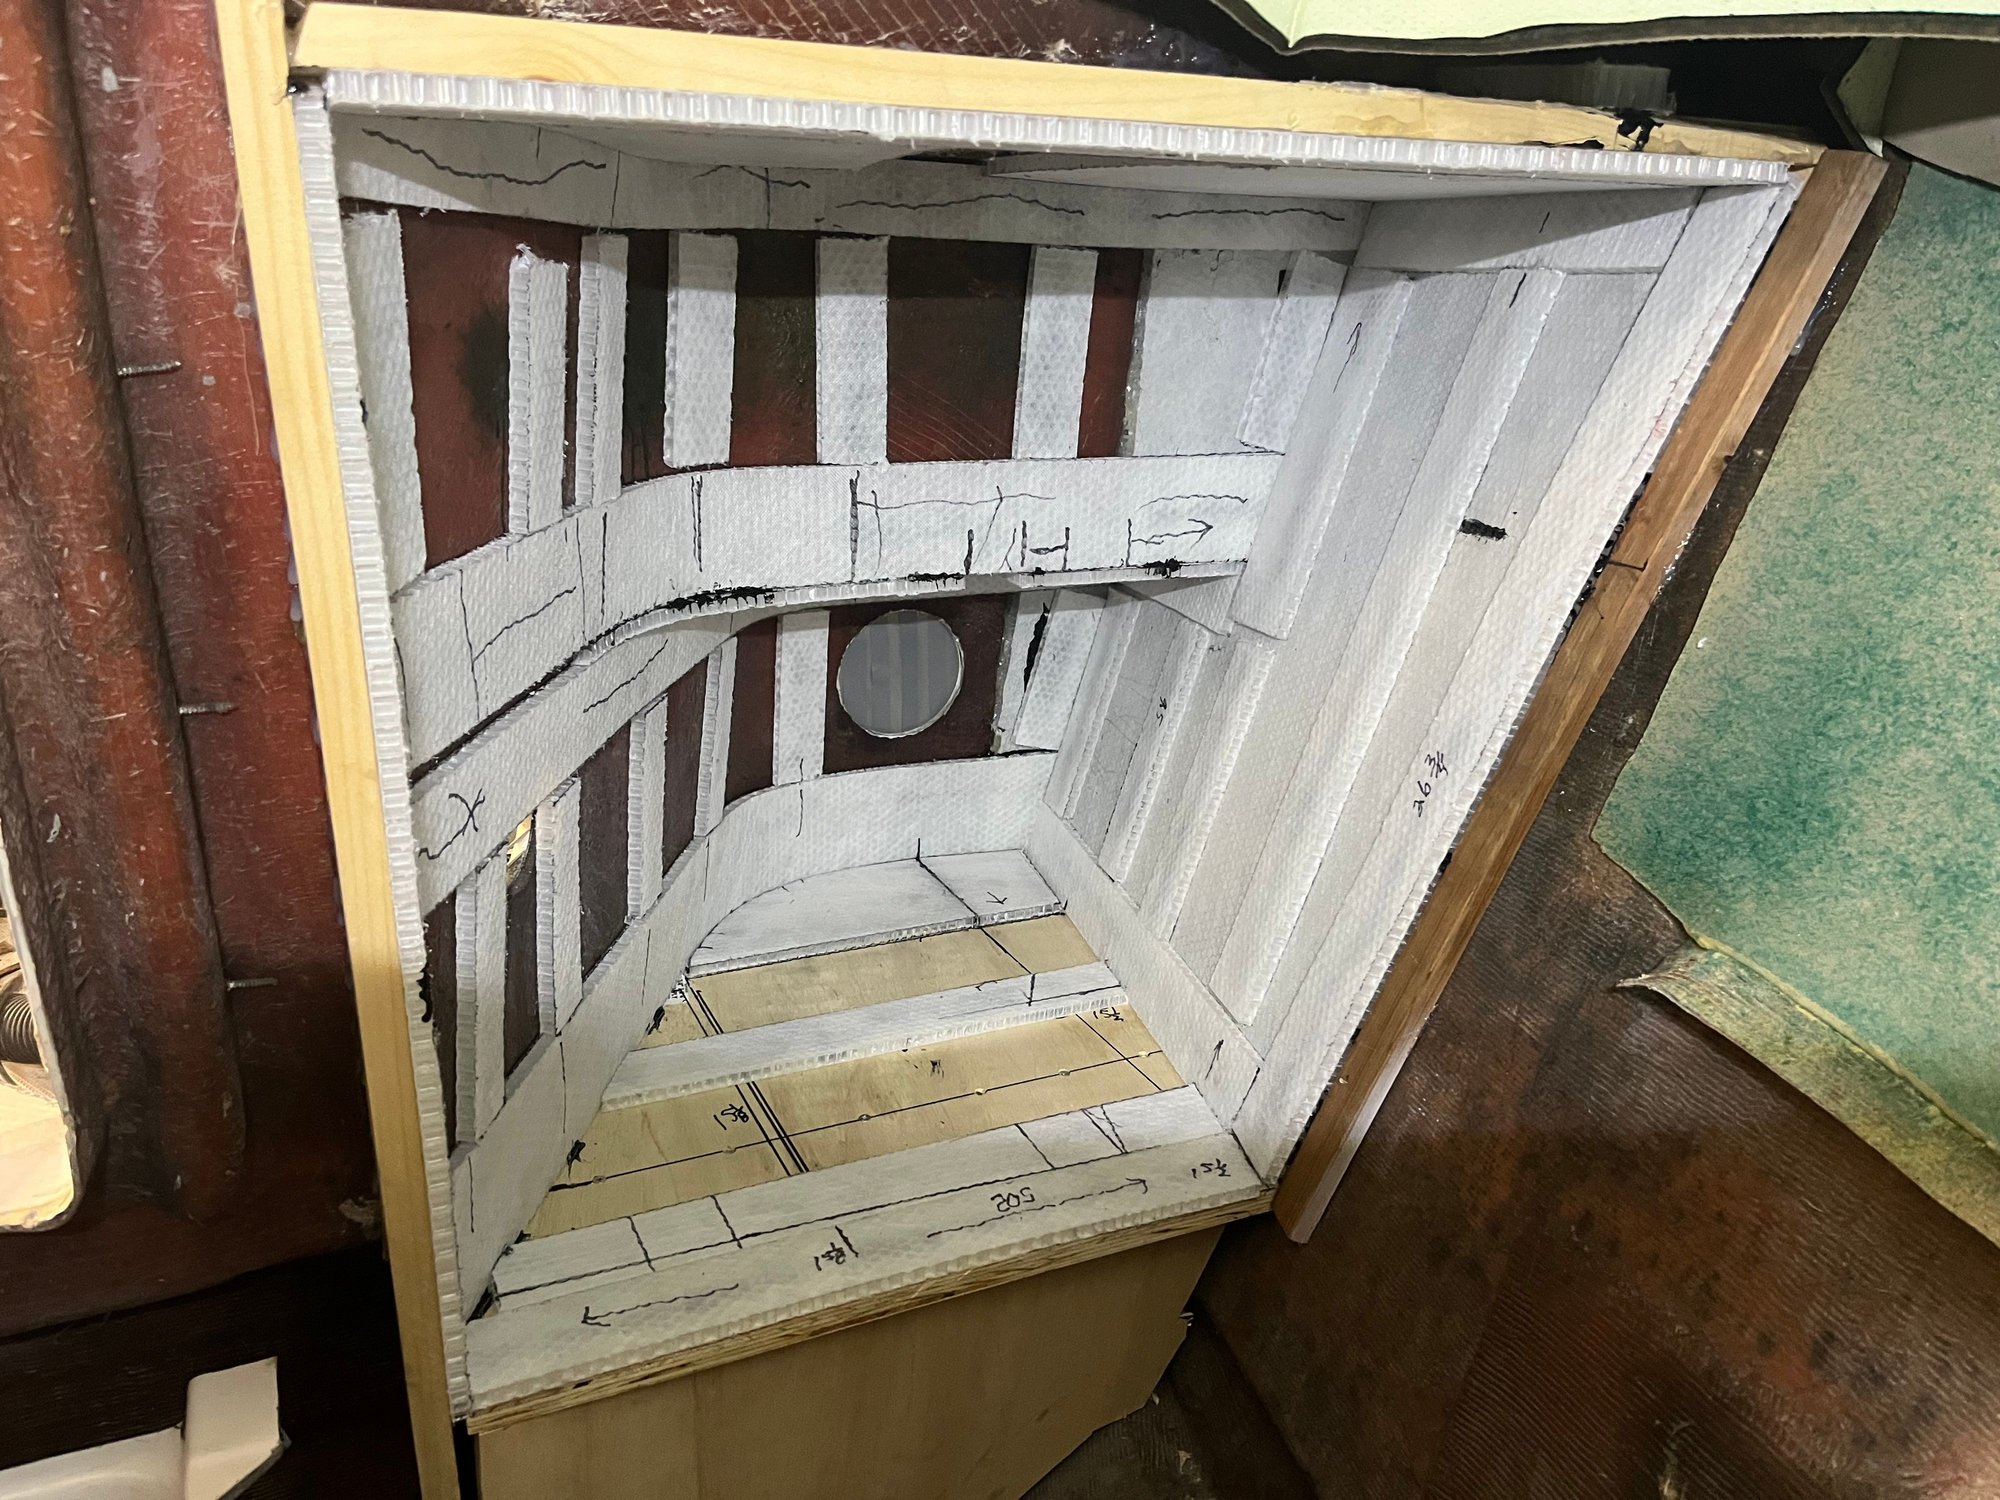
The step and seat areas were hollow and accessible by removing interior cuddy trim panels.
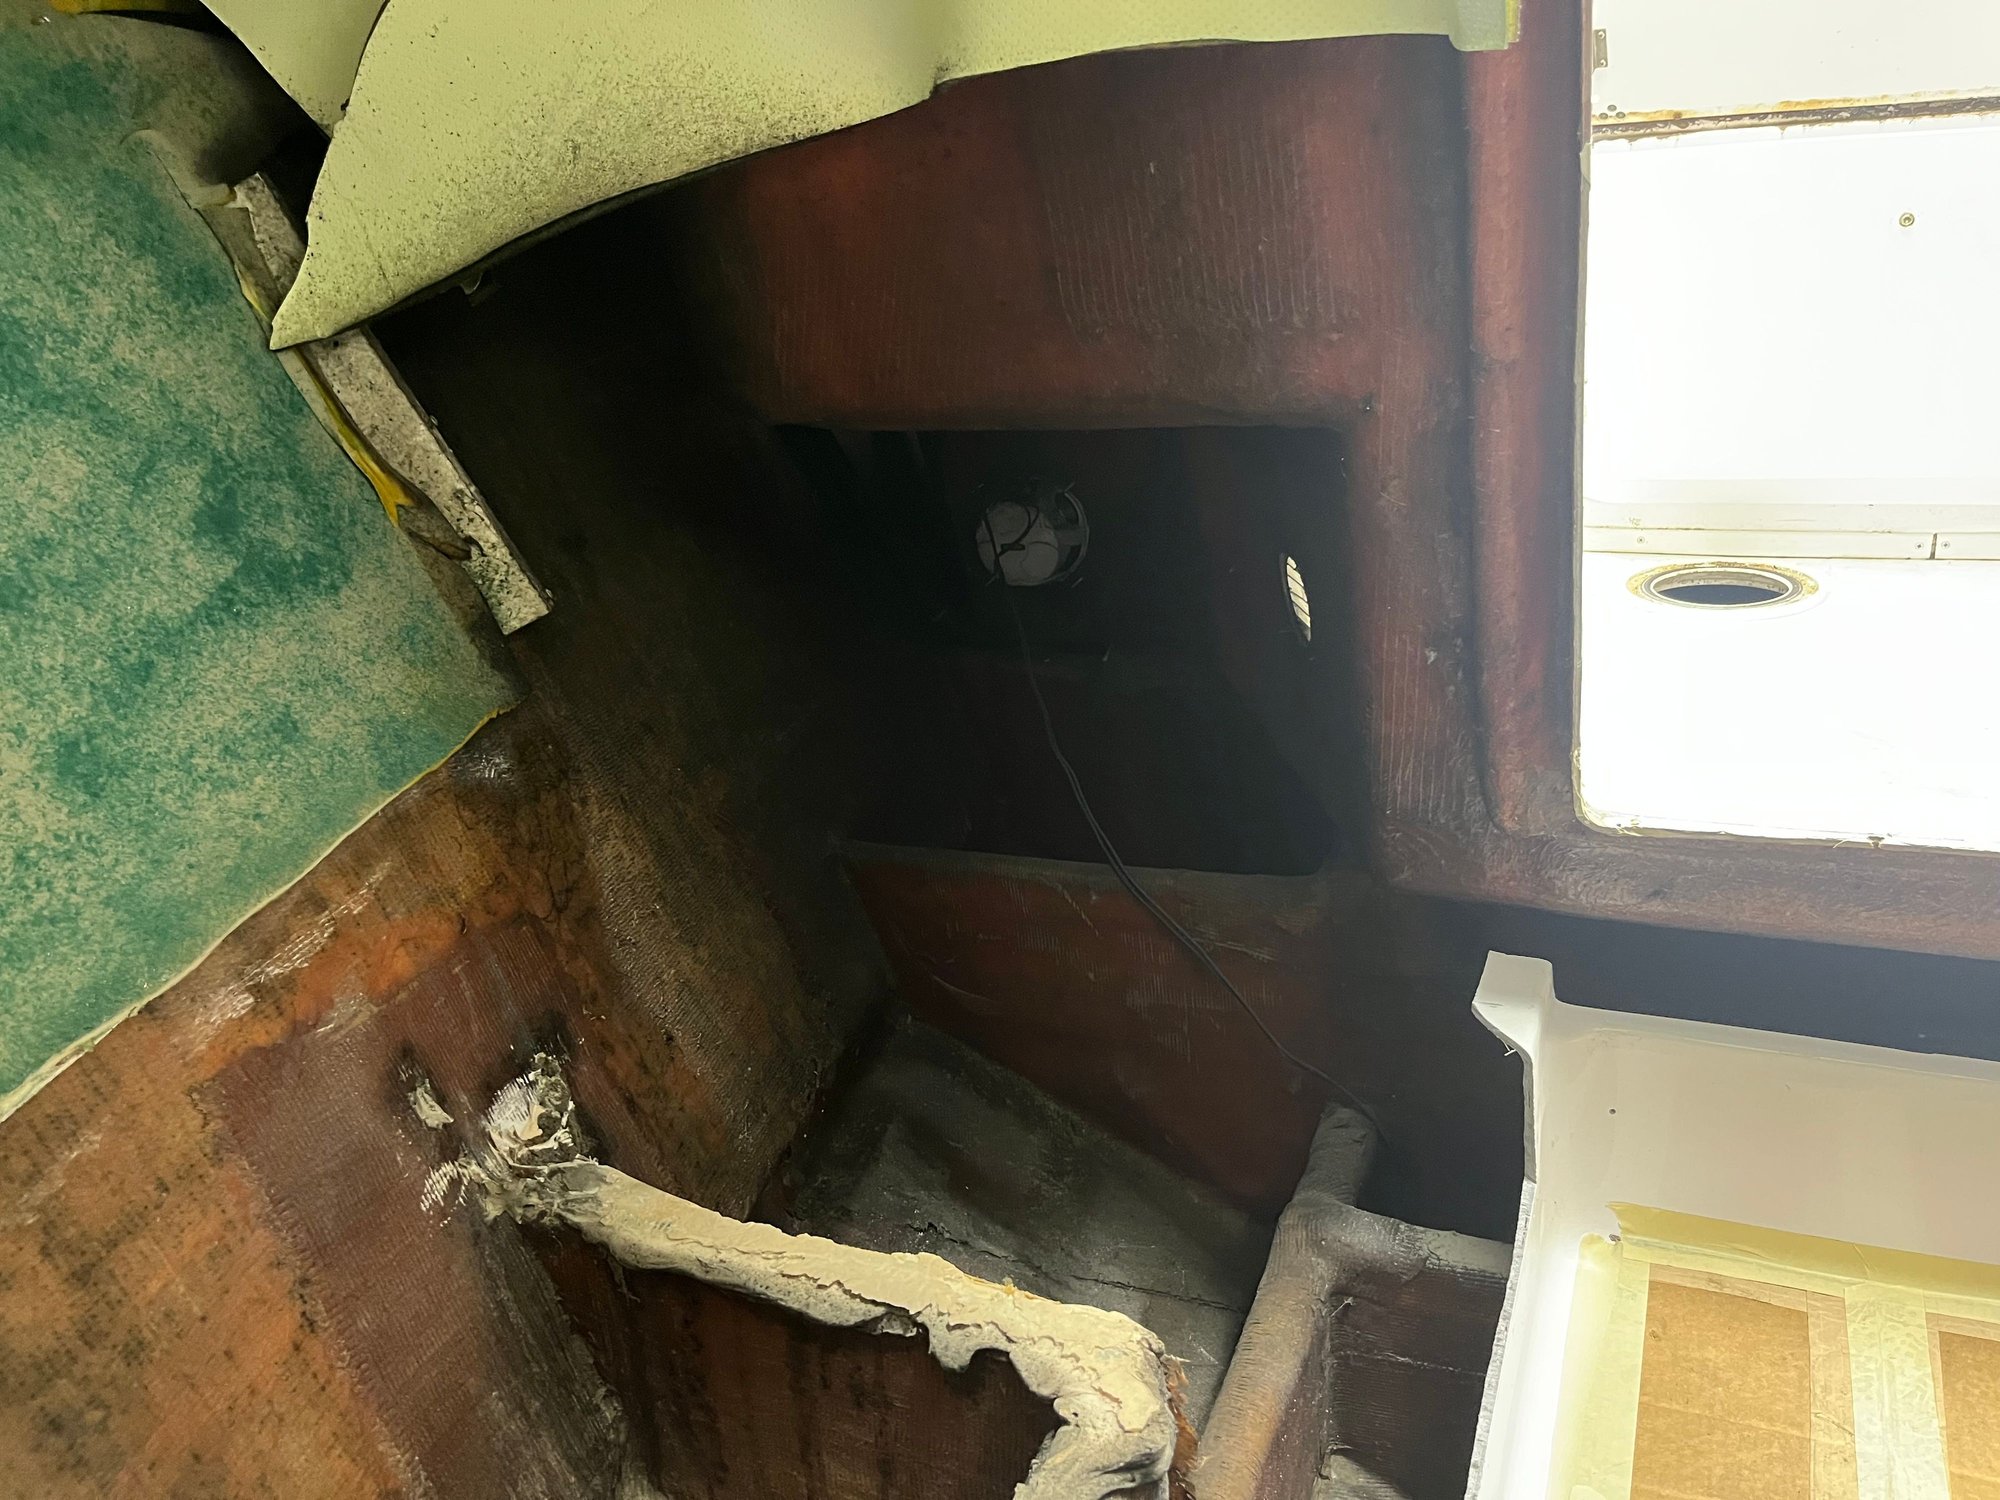
Starboard side
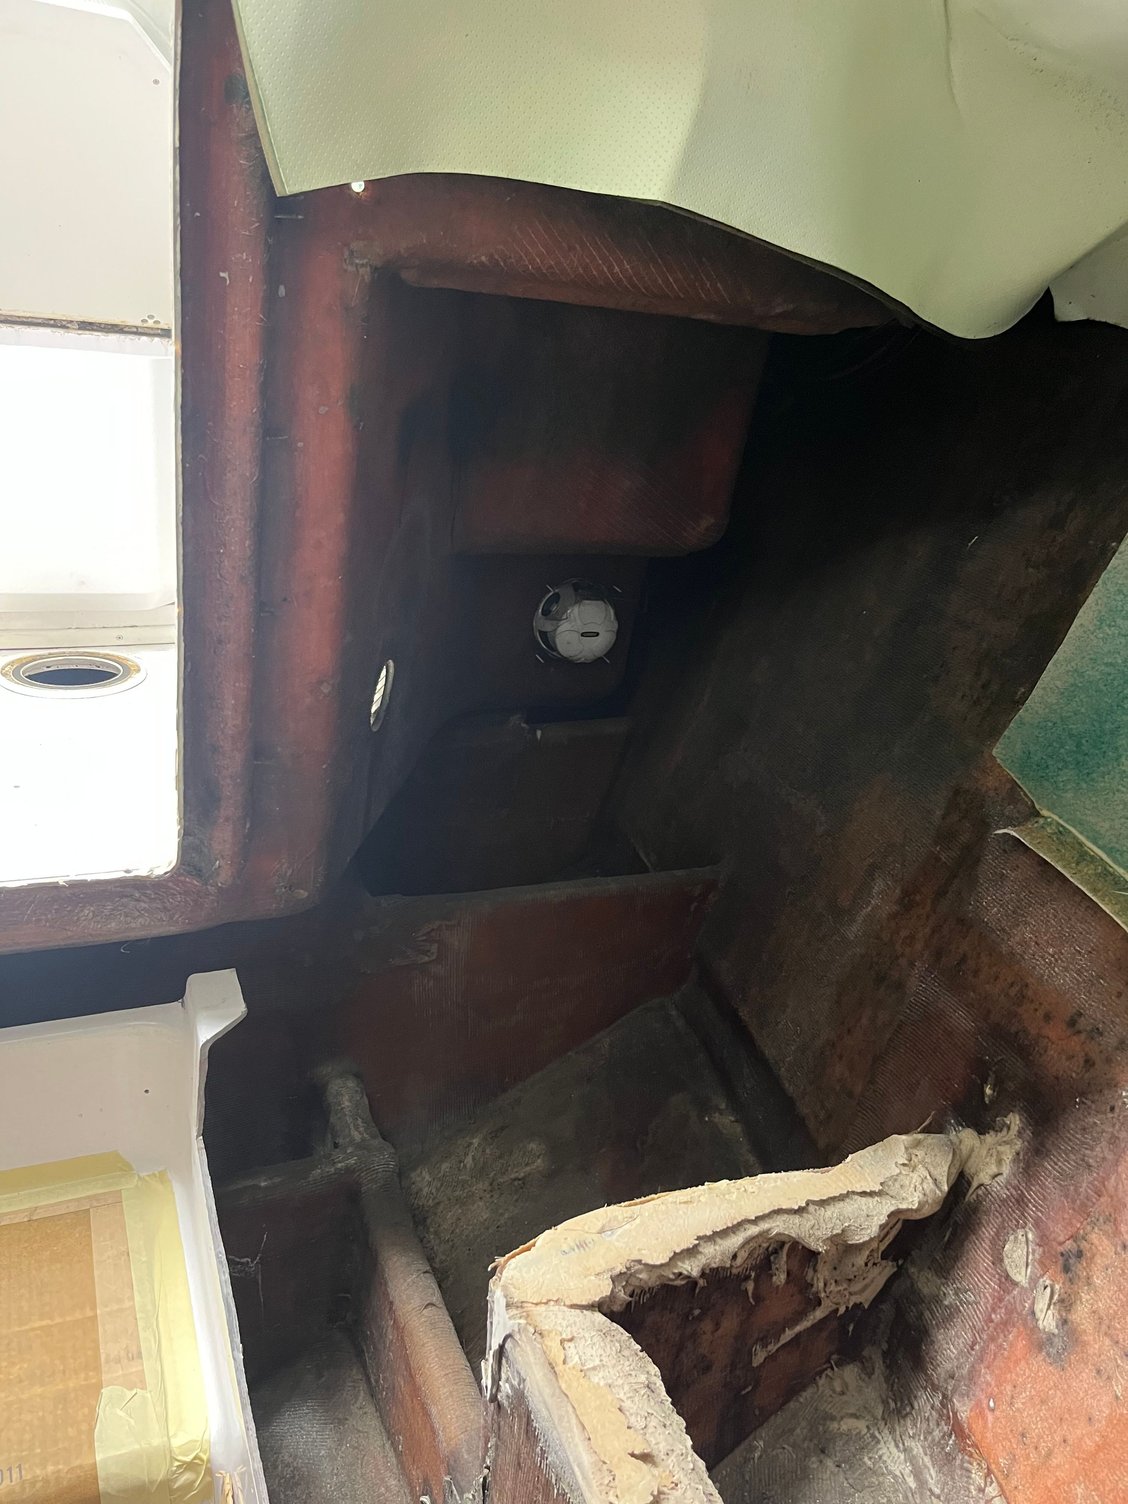
Port side
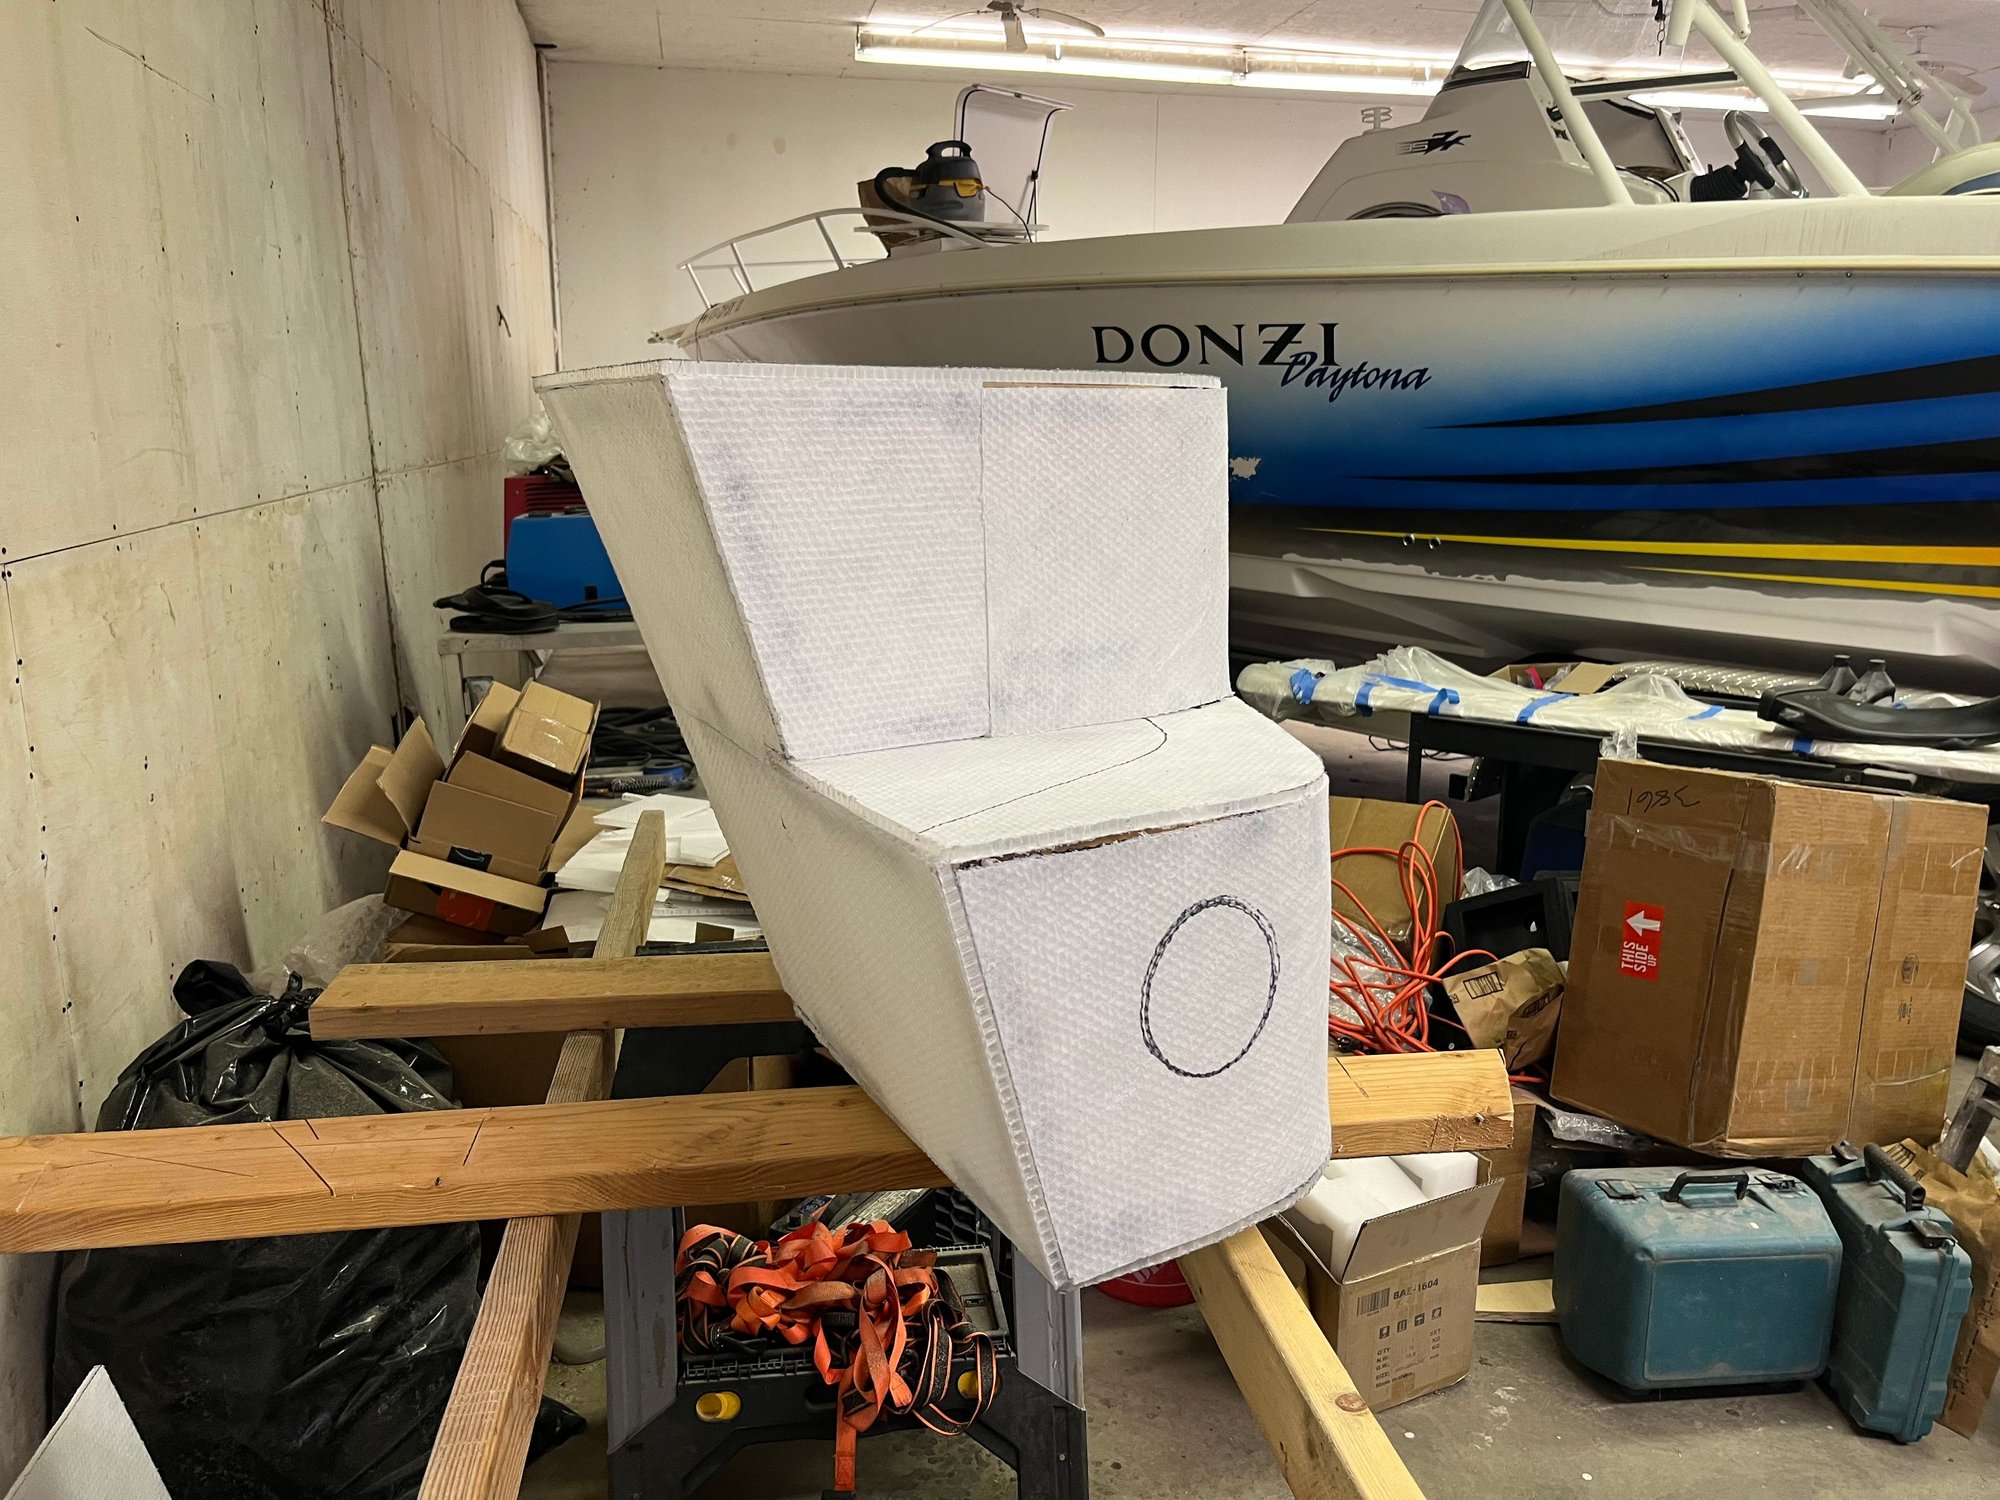
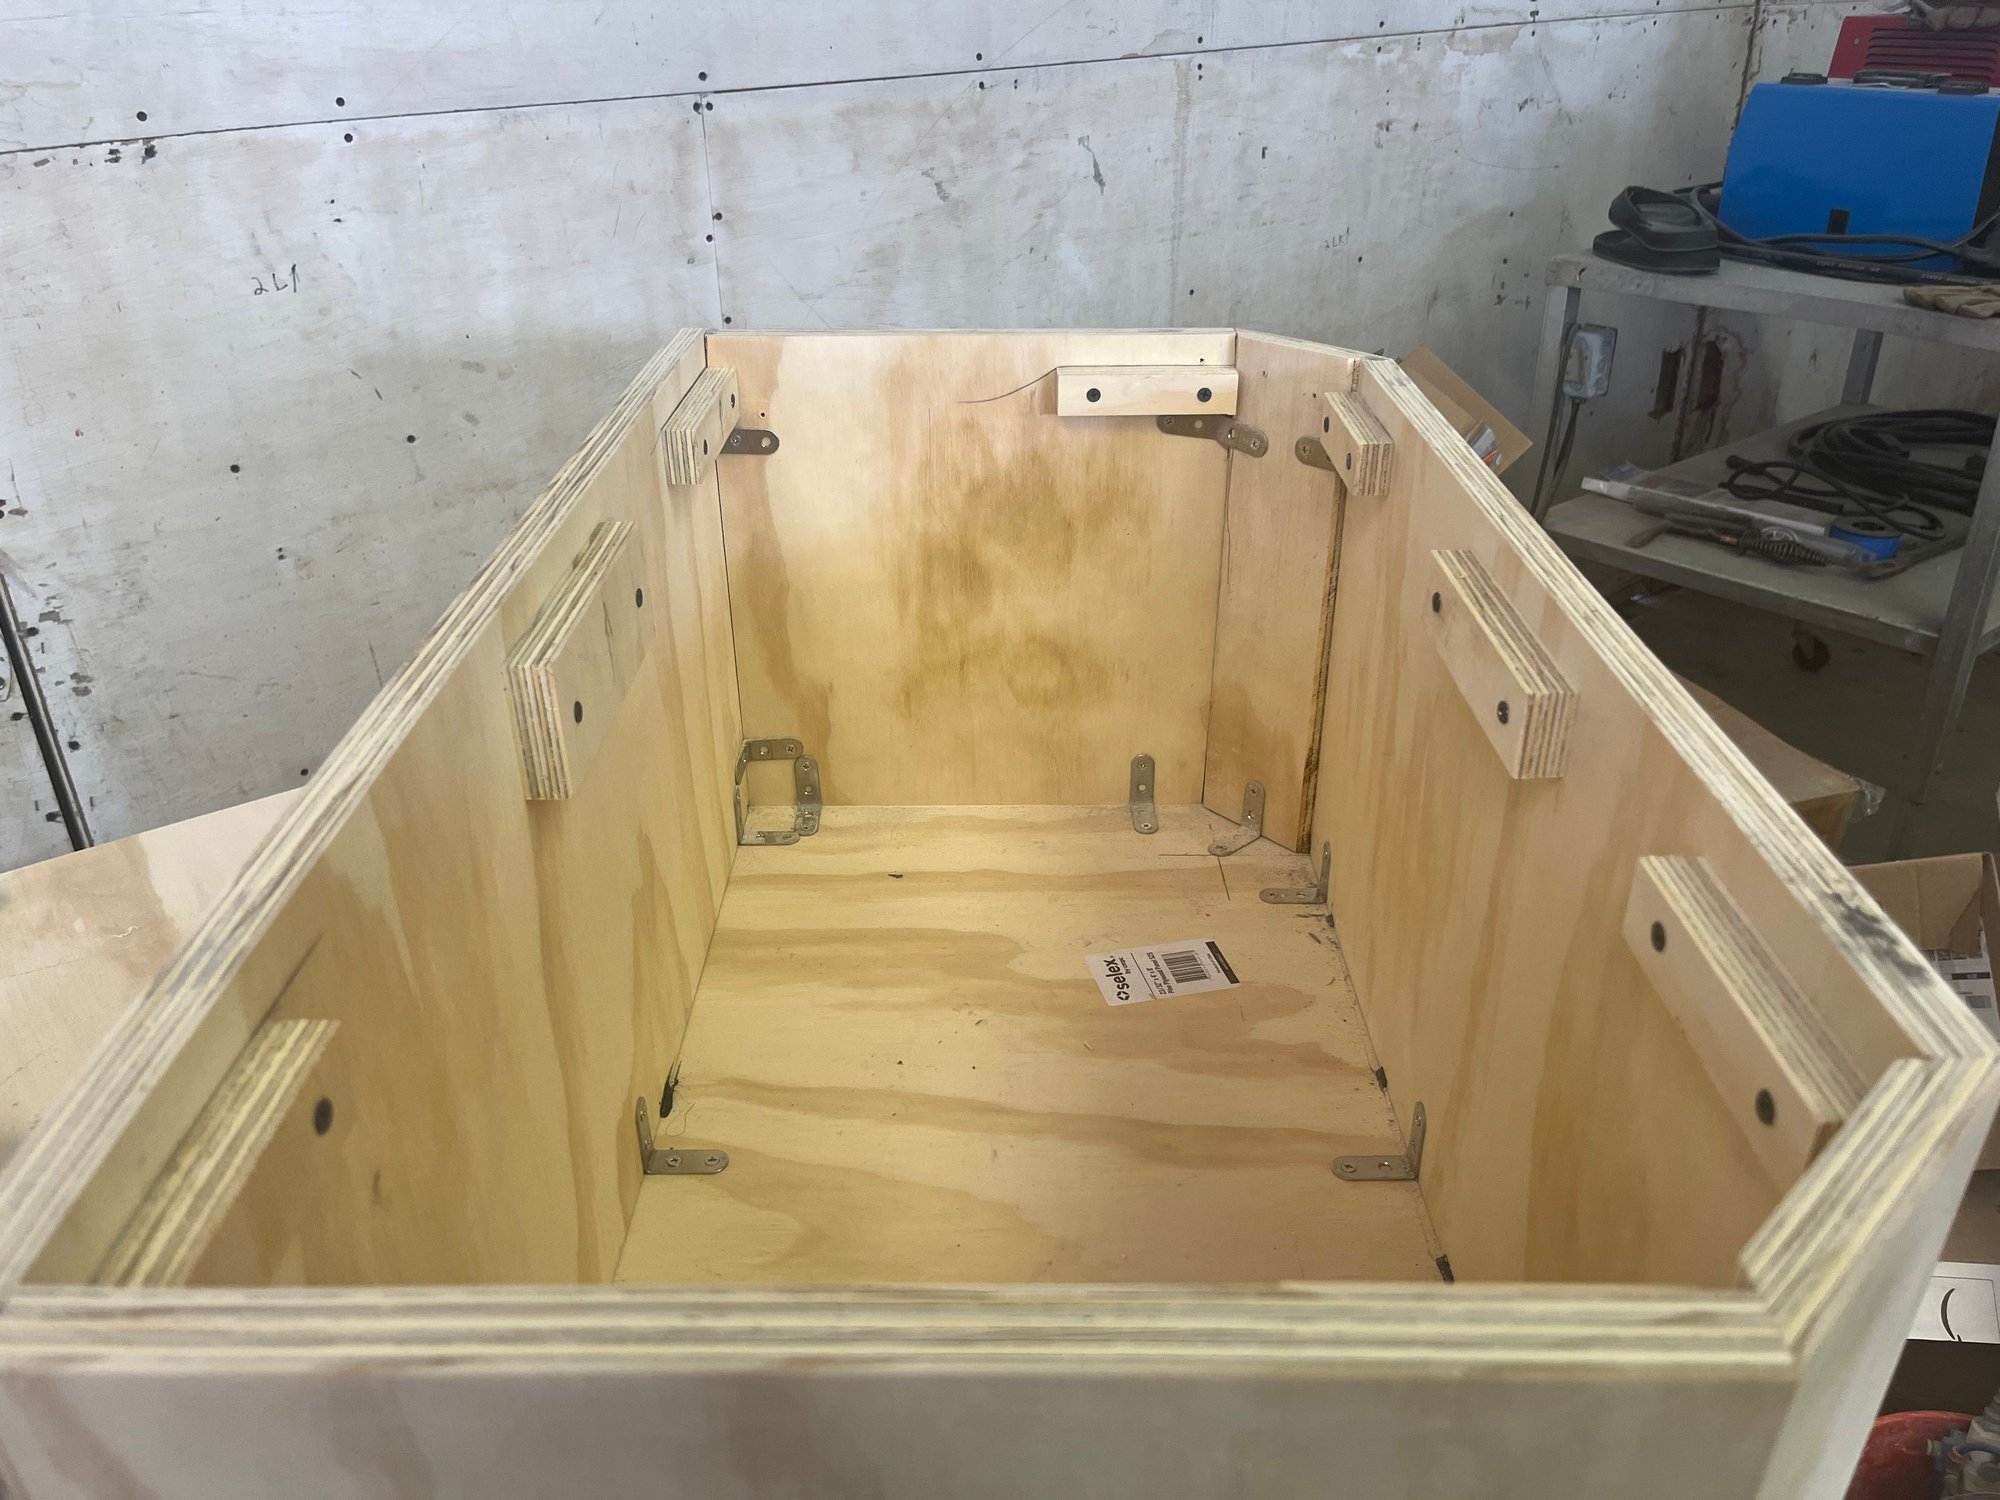
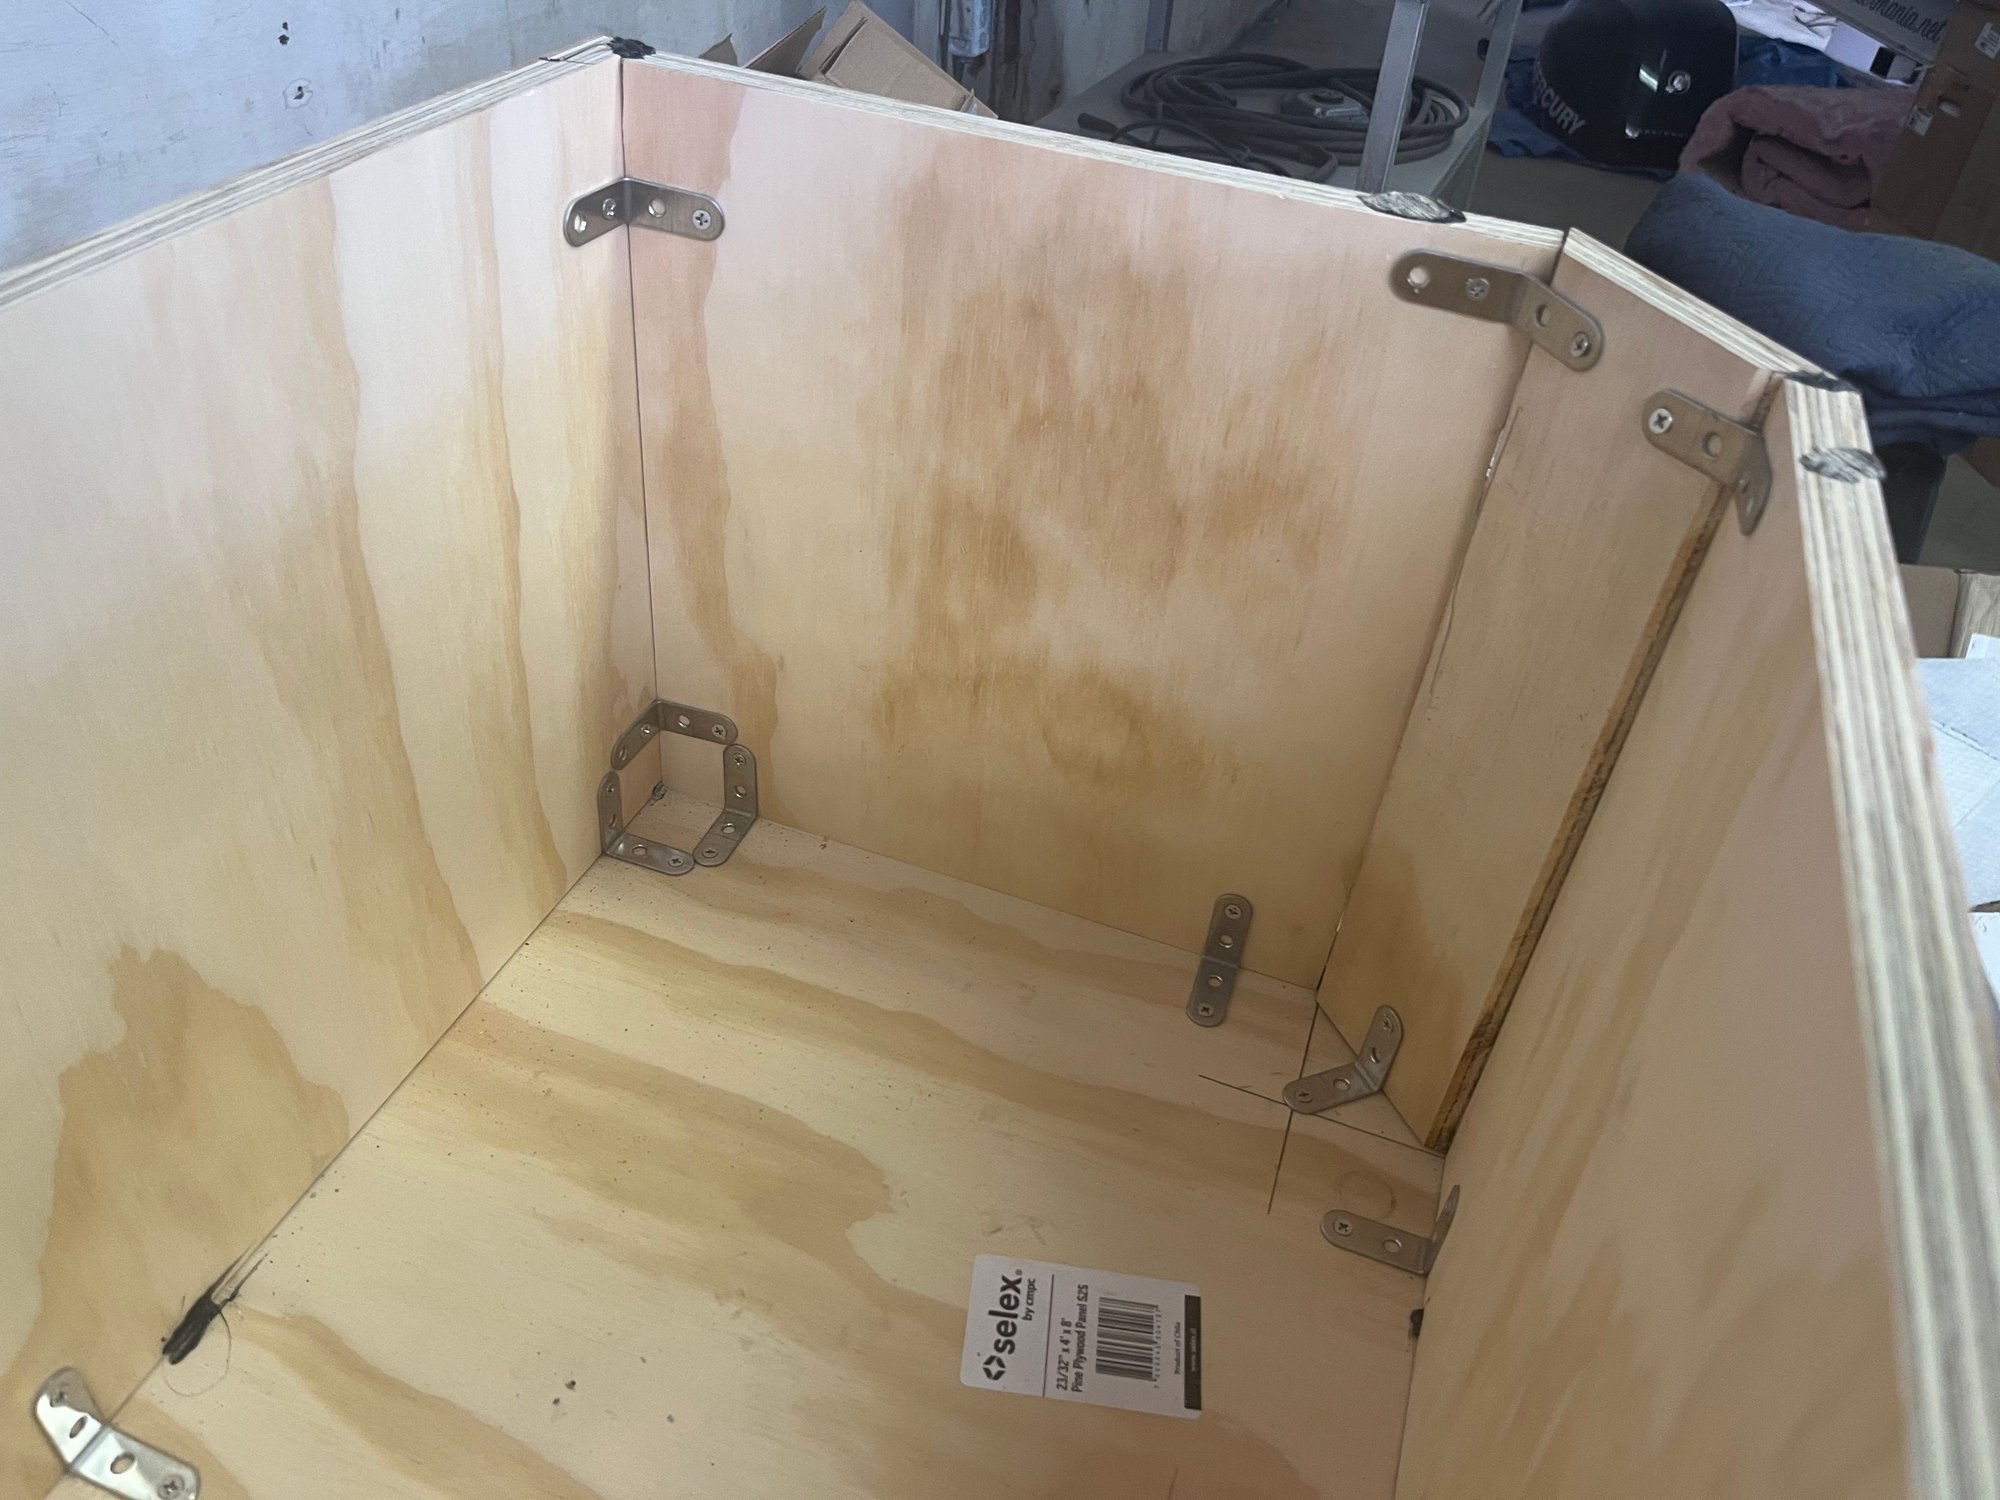
I foolishly thought initially I would be able to lay up in these areas, impossible for me. So then I figured out that I needed to make plugs. I used 3/8 Nidacore to make the plugs. The 3/8 was flexible enough to conform to the curvature and angles. It was also the maximum thickness the tank walls would be. I expect less than 3/8. The areas were then furred out with 3/8 Nidacore strips and hot glued in. The 3/8 strips would approximate the tank thickness after laying up on the plug. I used some 1” Nidacore on the hull side for a little wiggle room. A temporary floor and bulkhead were added.
Initial
Furred out
Initial plug
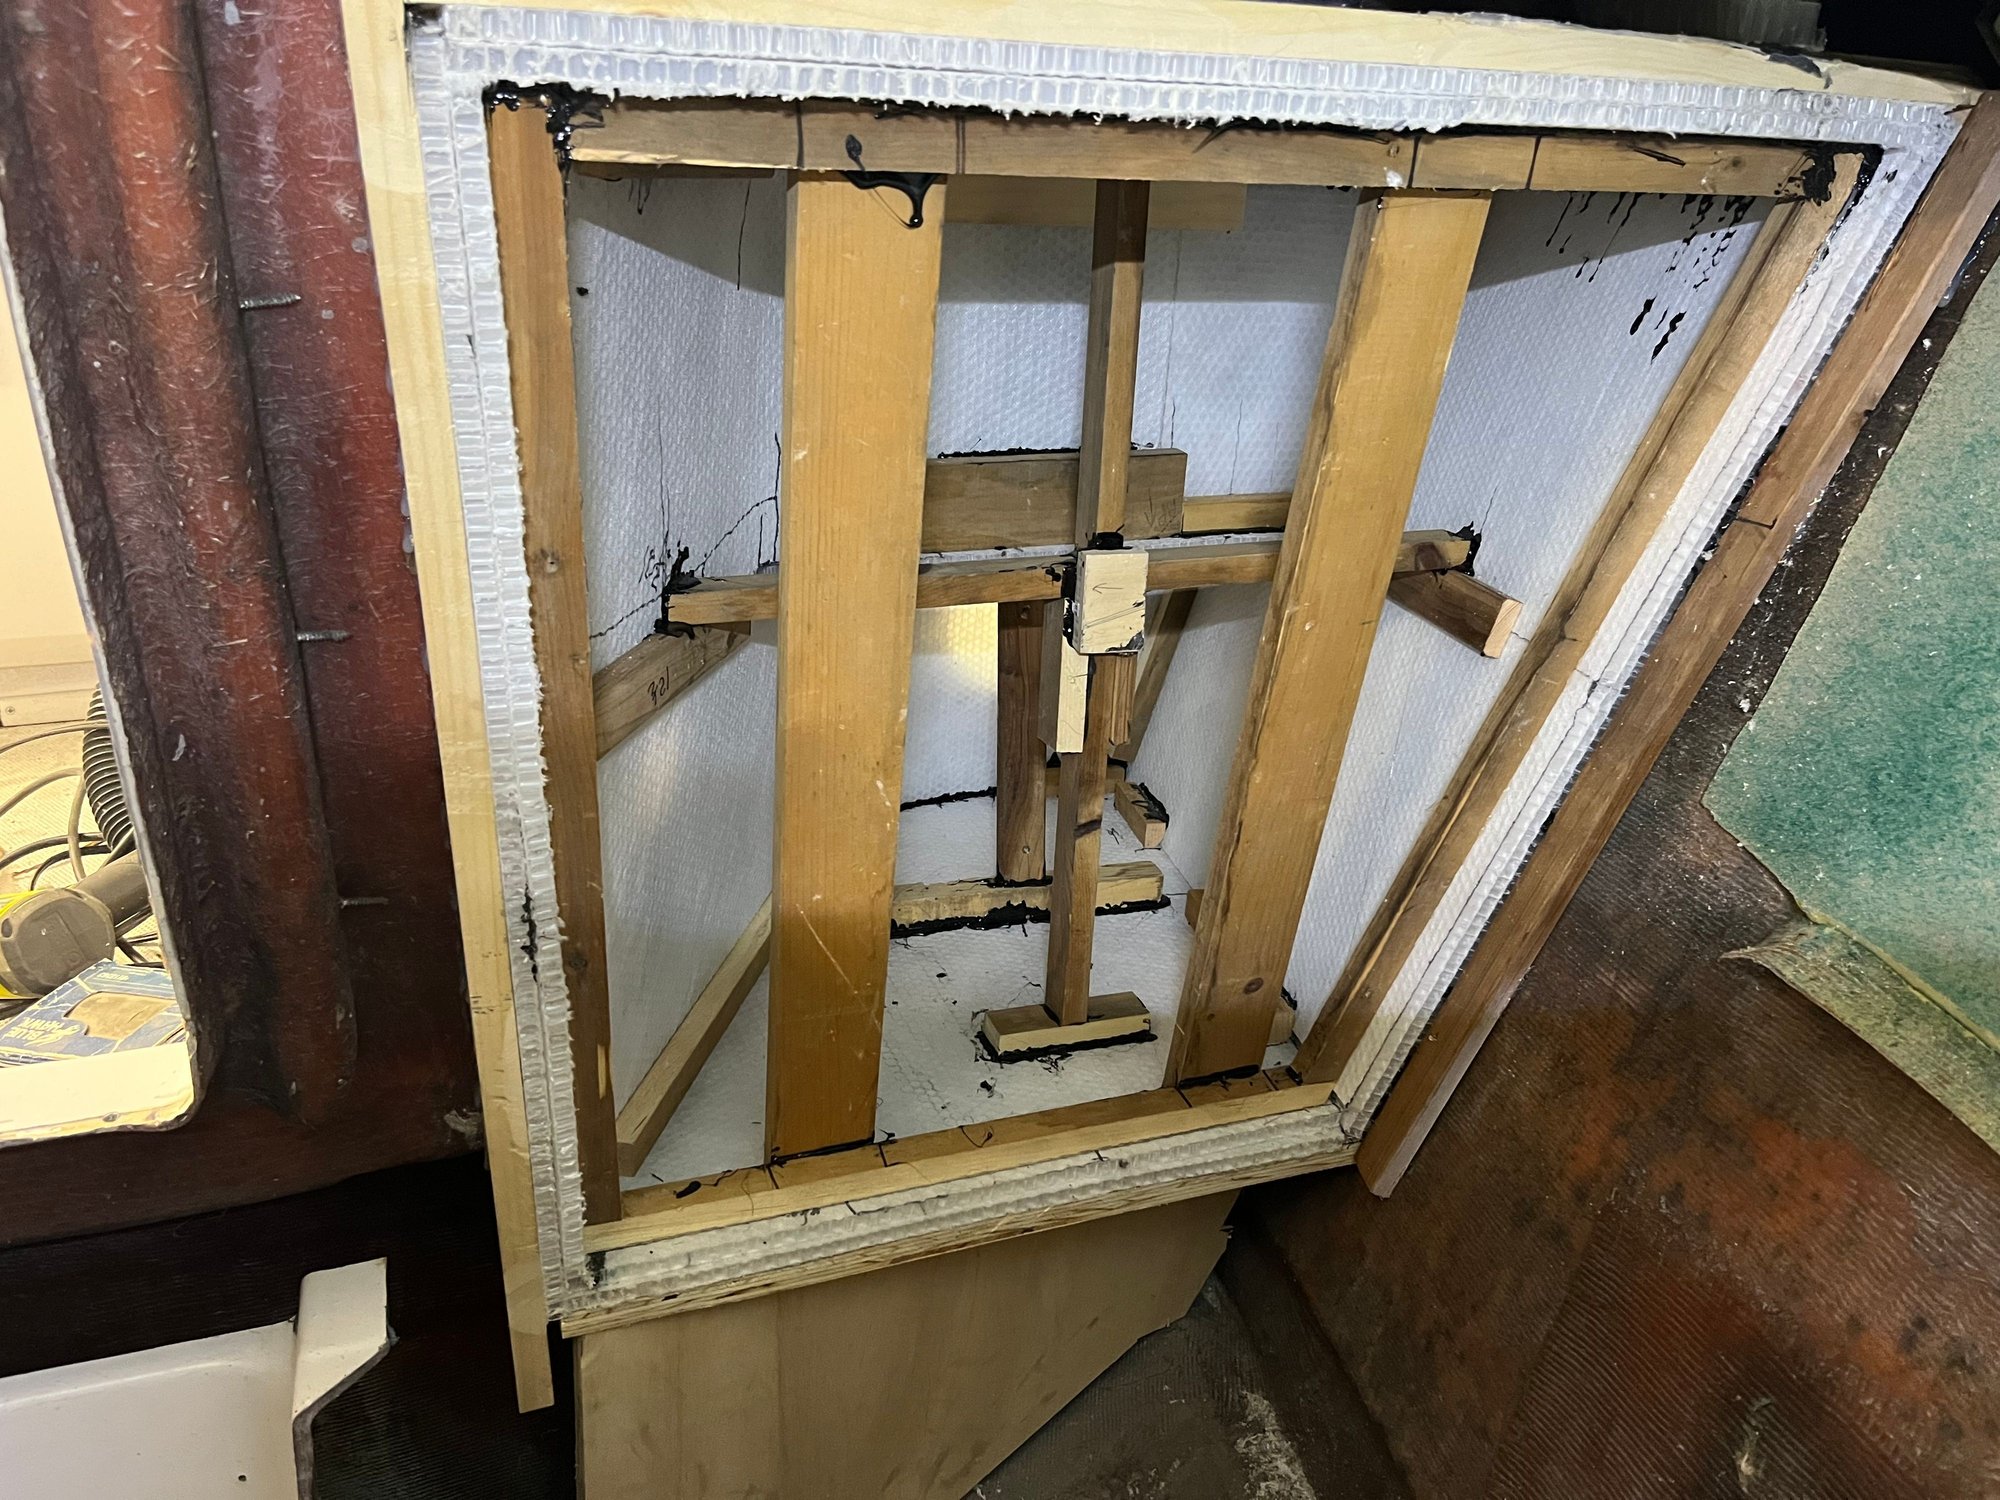
The plug was formed using pieces of Nidacore hot glued to themselves with wood blocks, obviously, and not the furred out pieces. It was cross braced for stability.
Removed
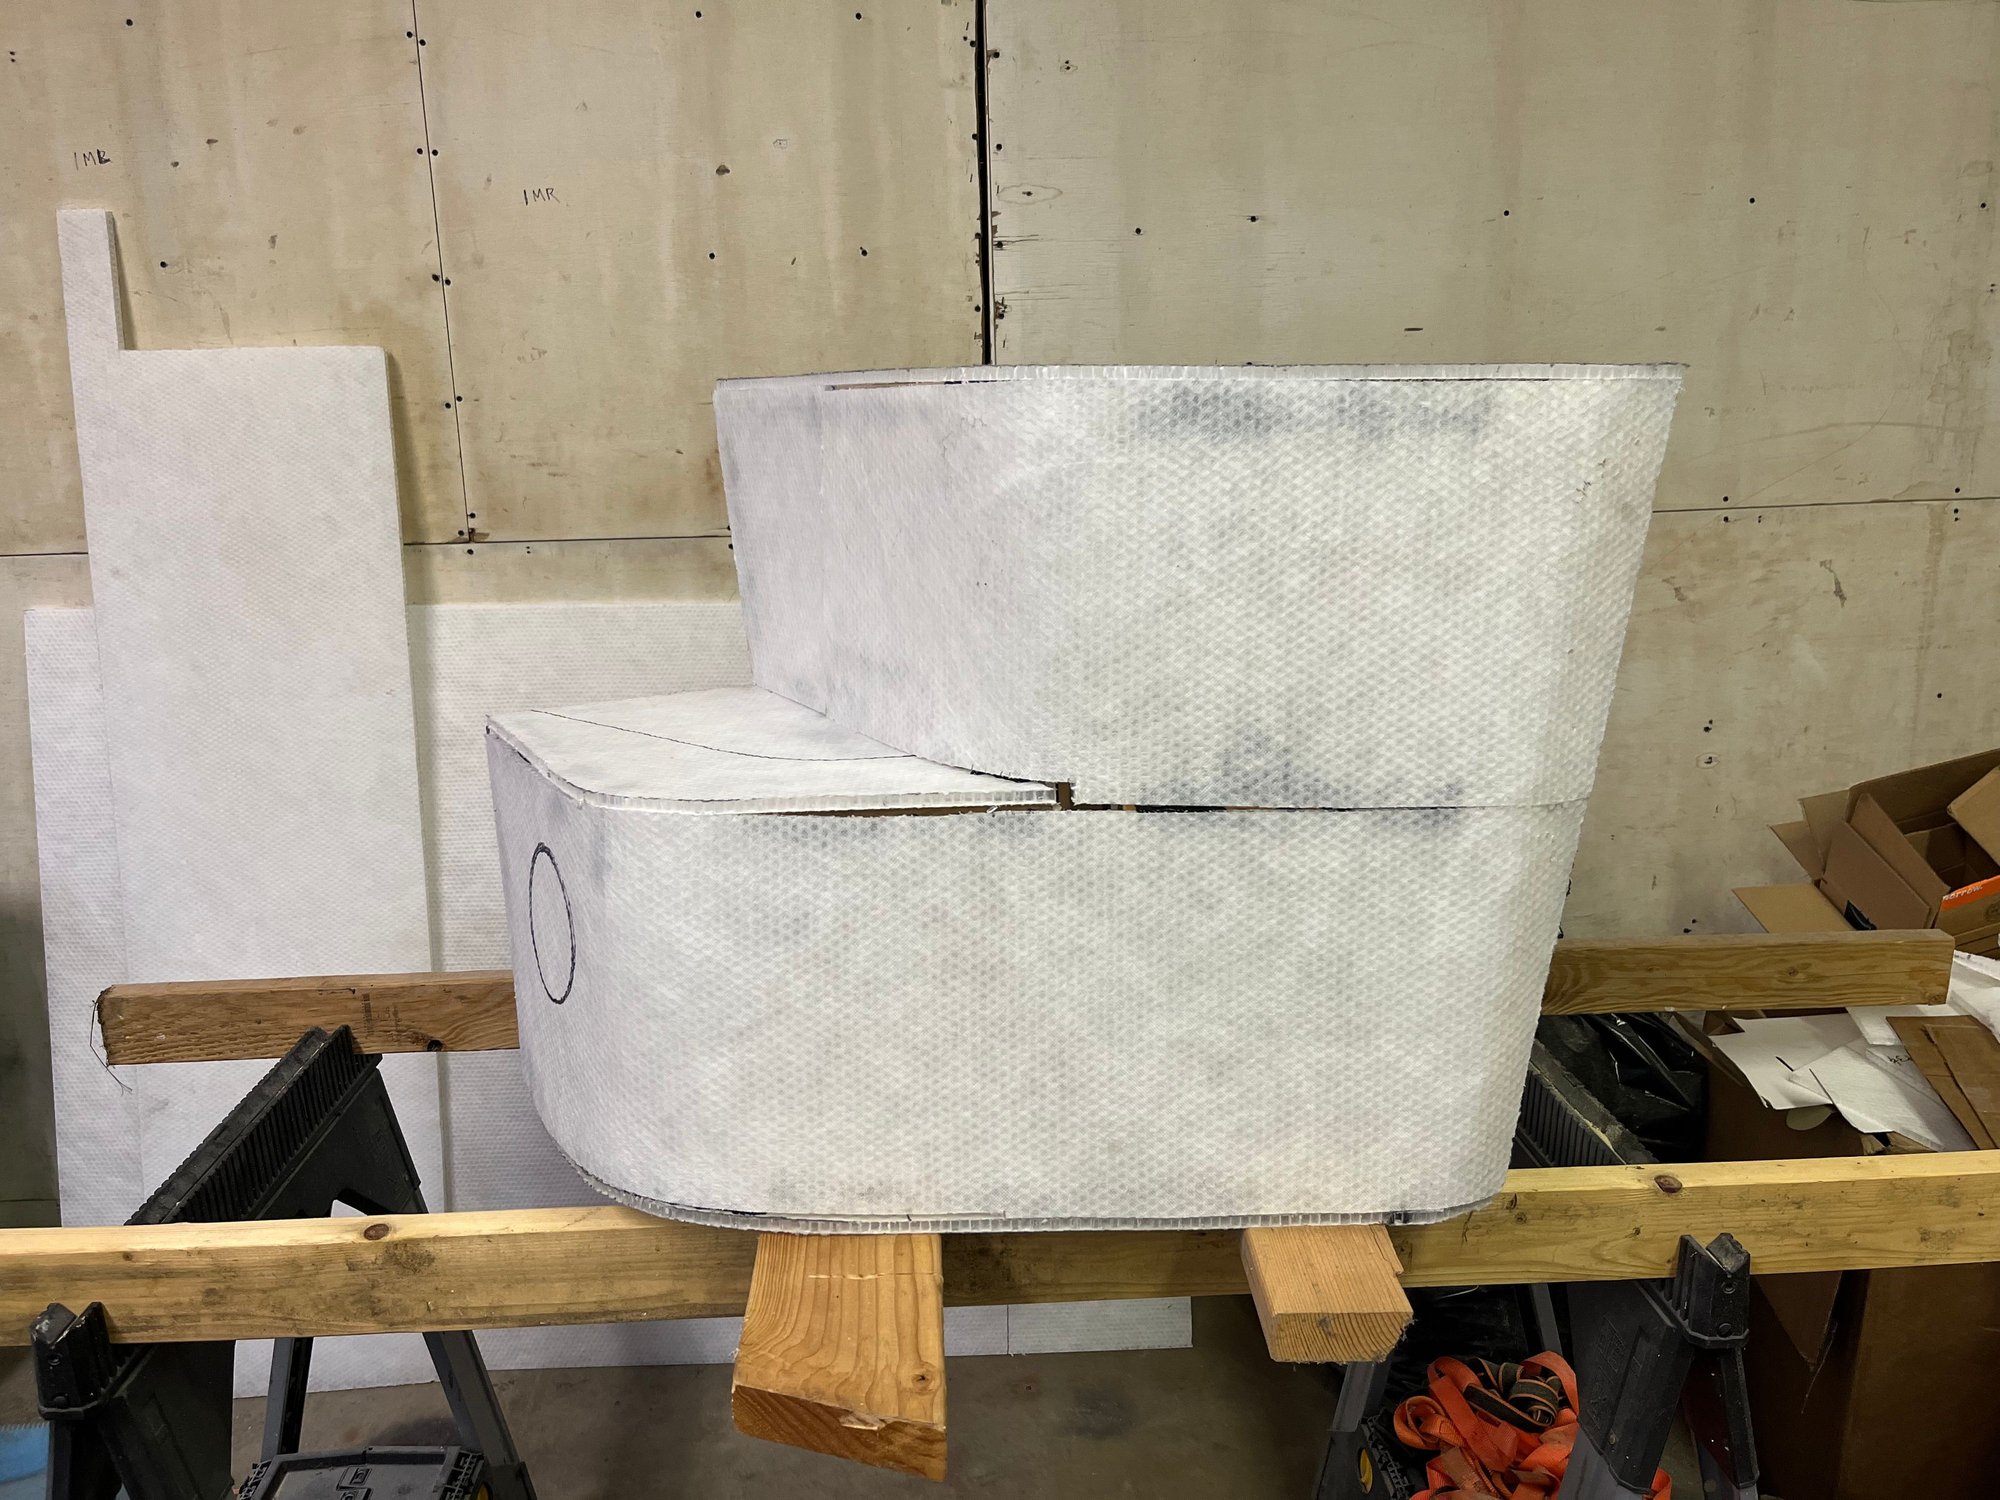
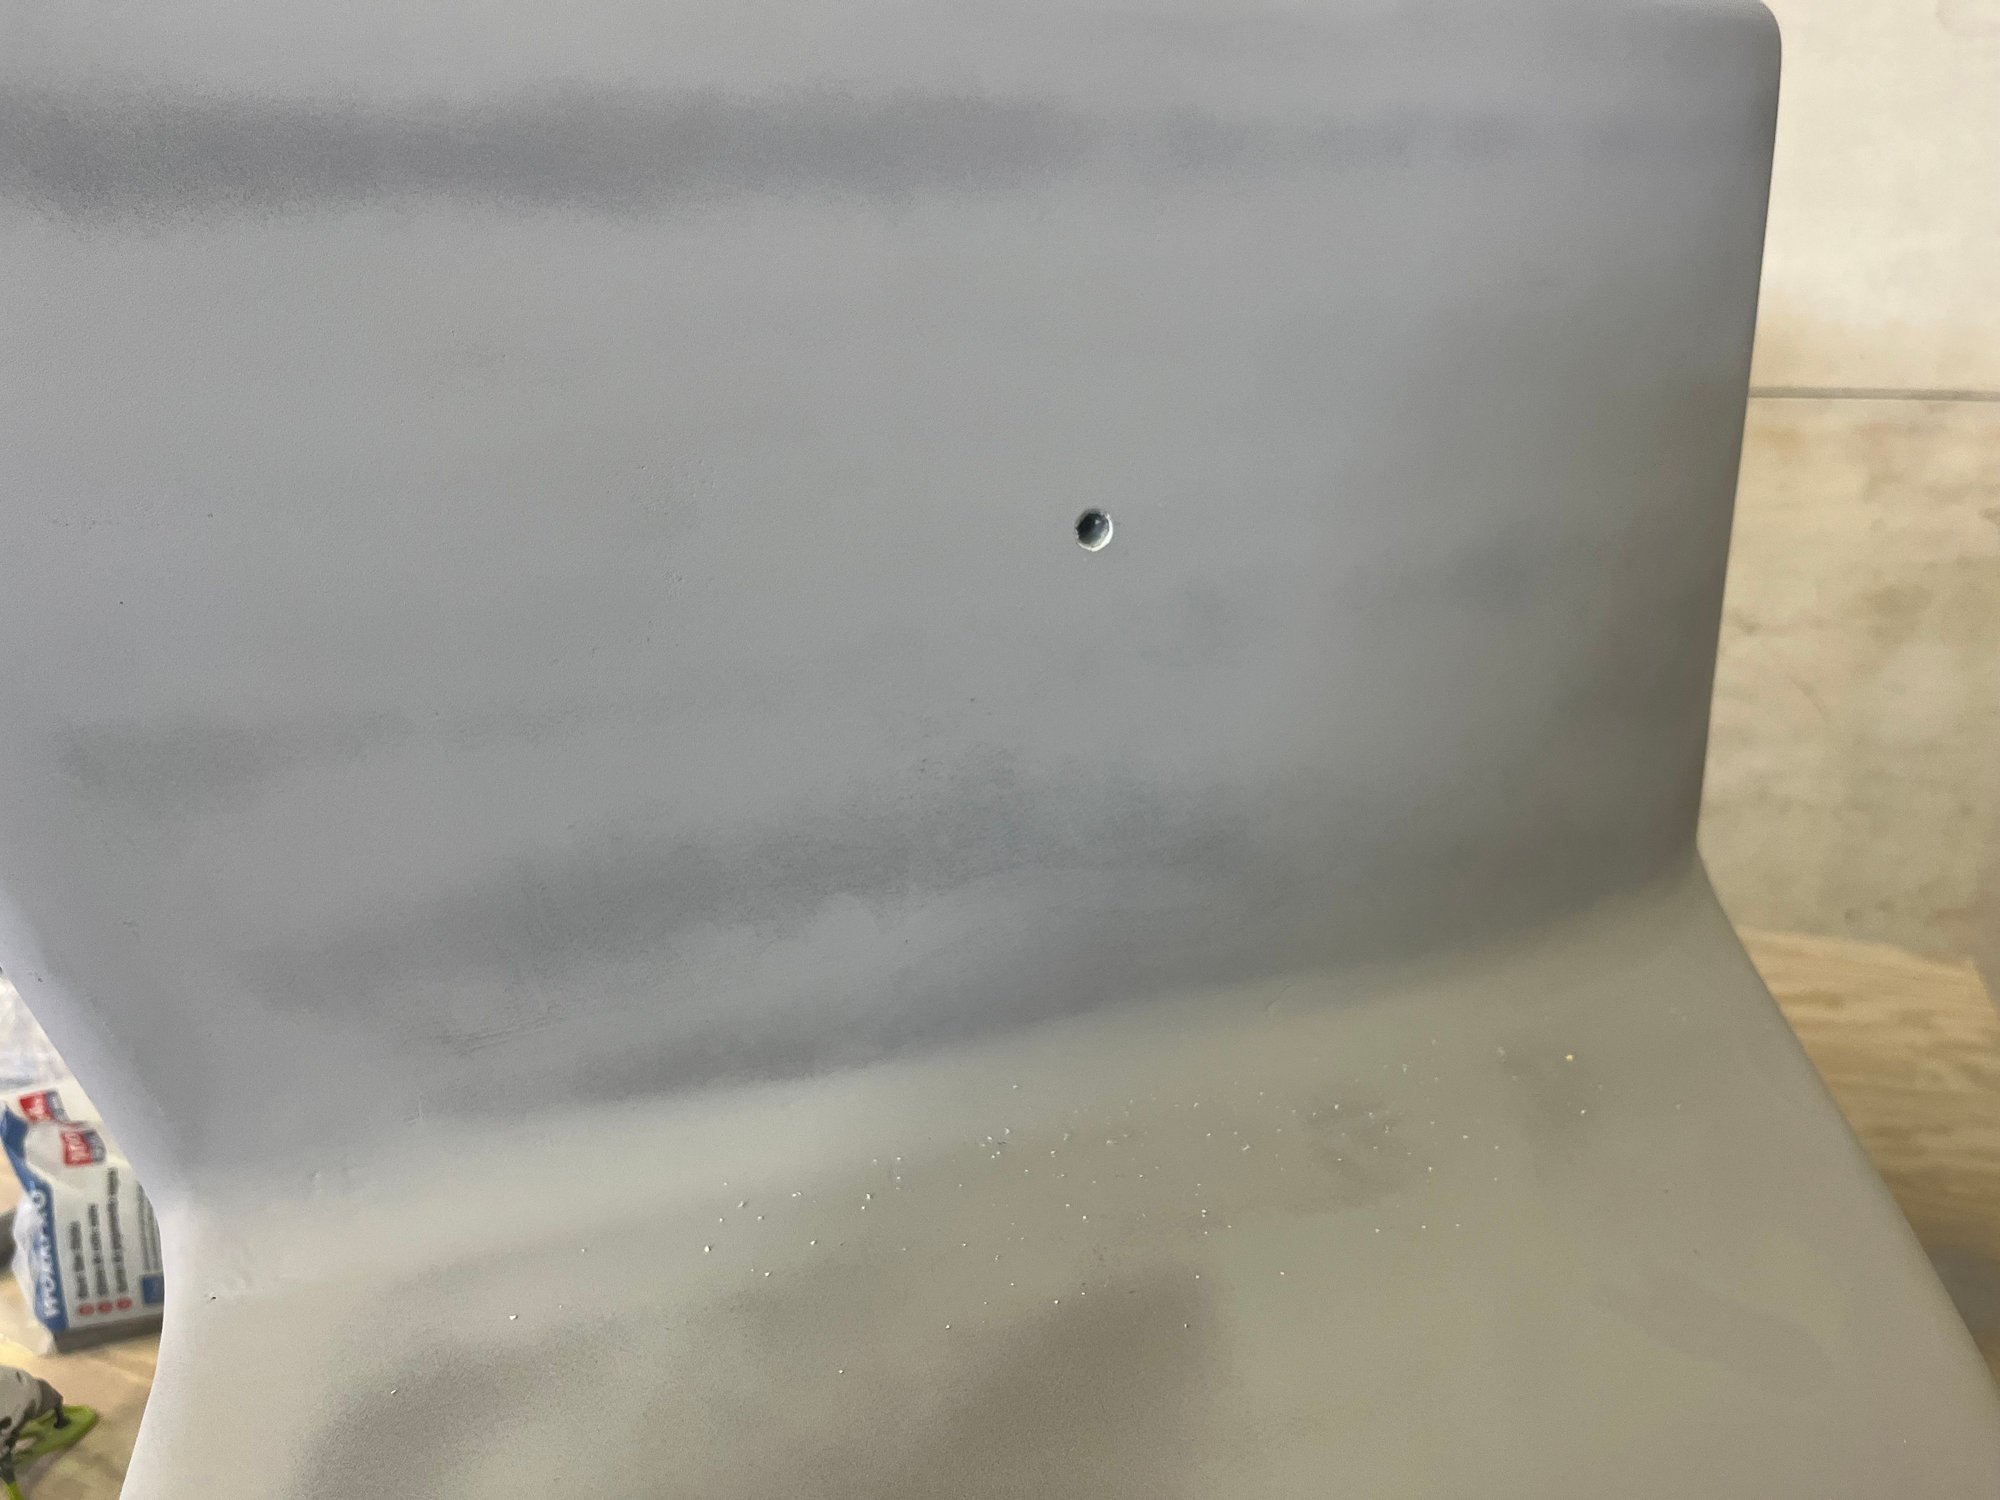
All of the plug cornea were cut back 3/4” to allow for fiber strand bondo squared off
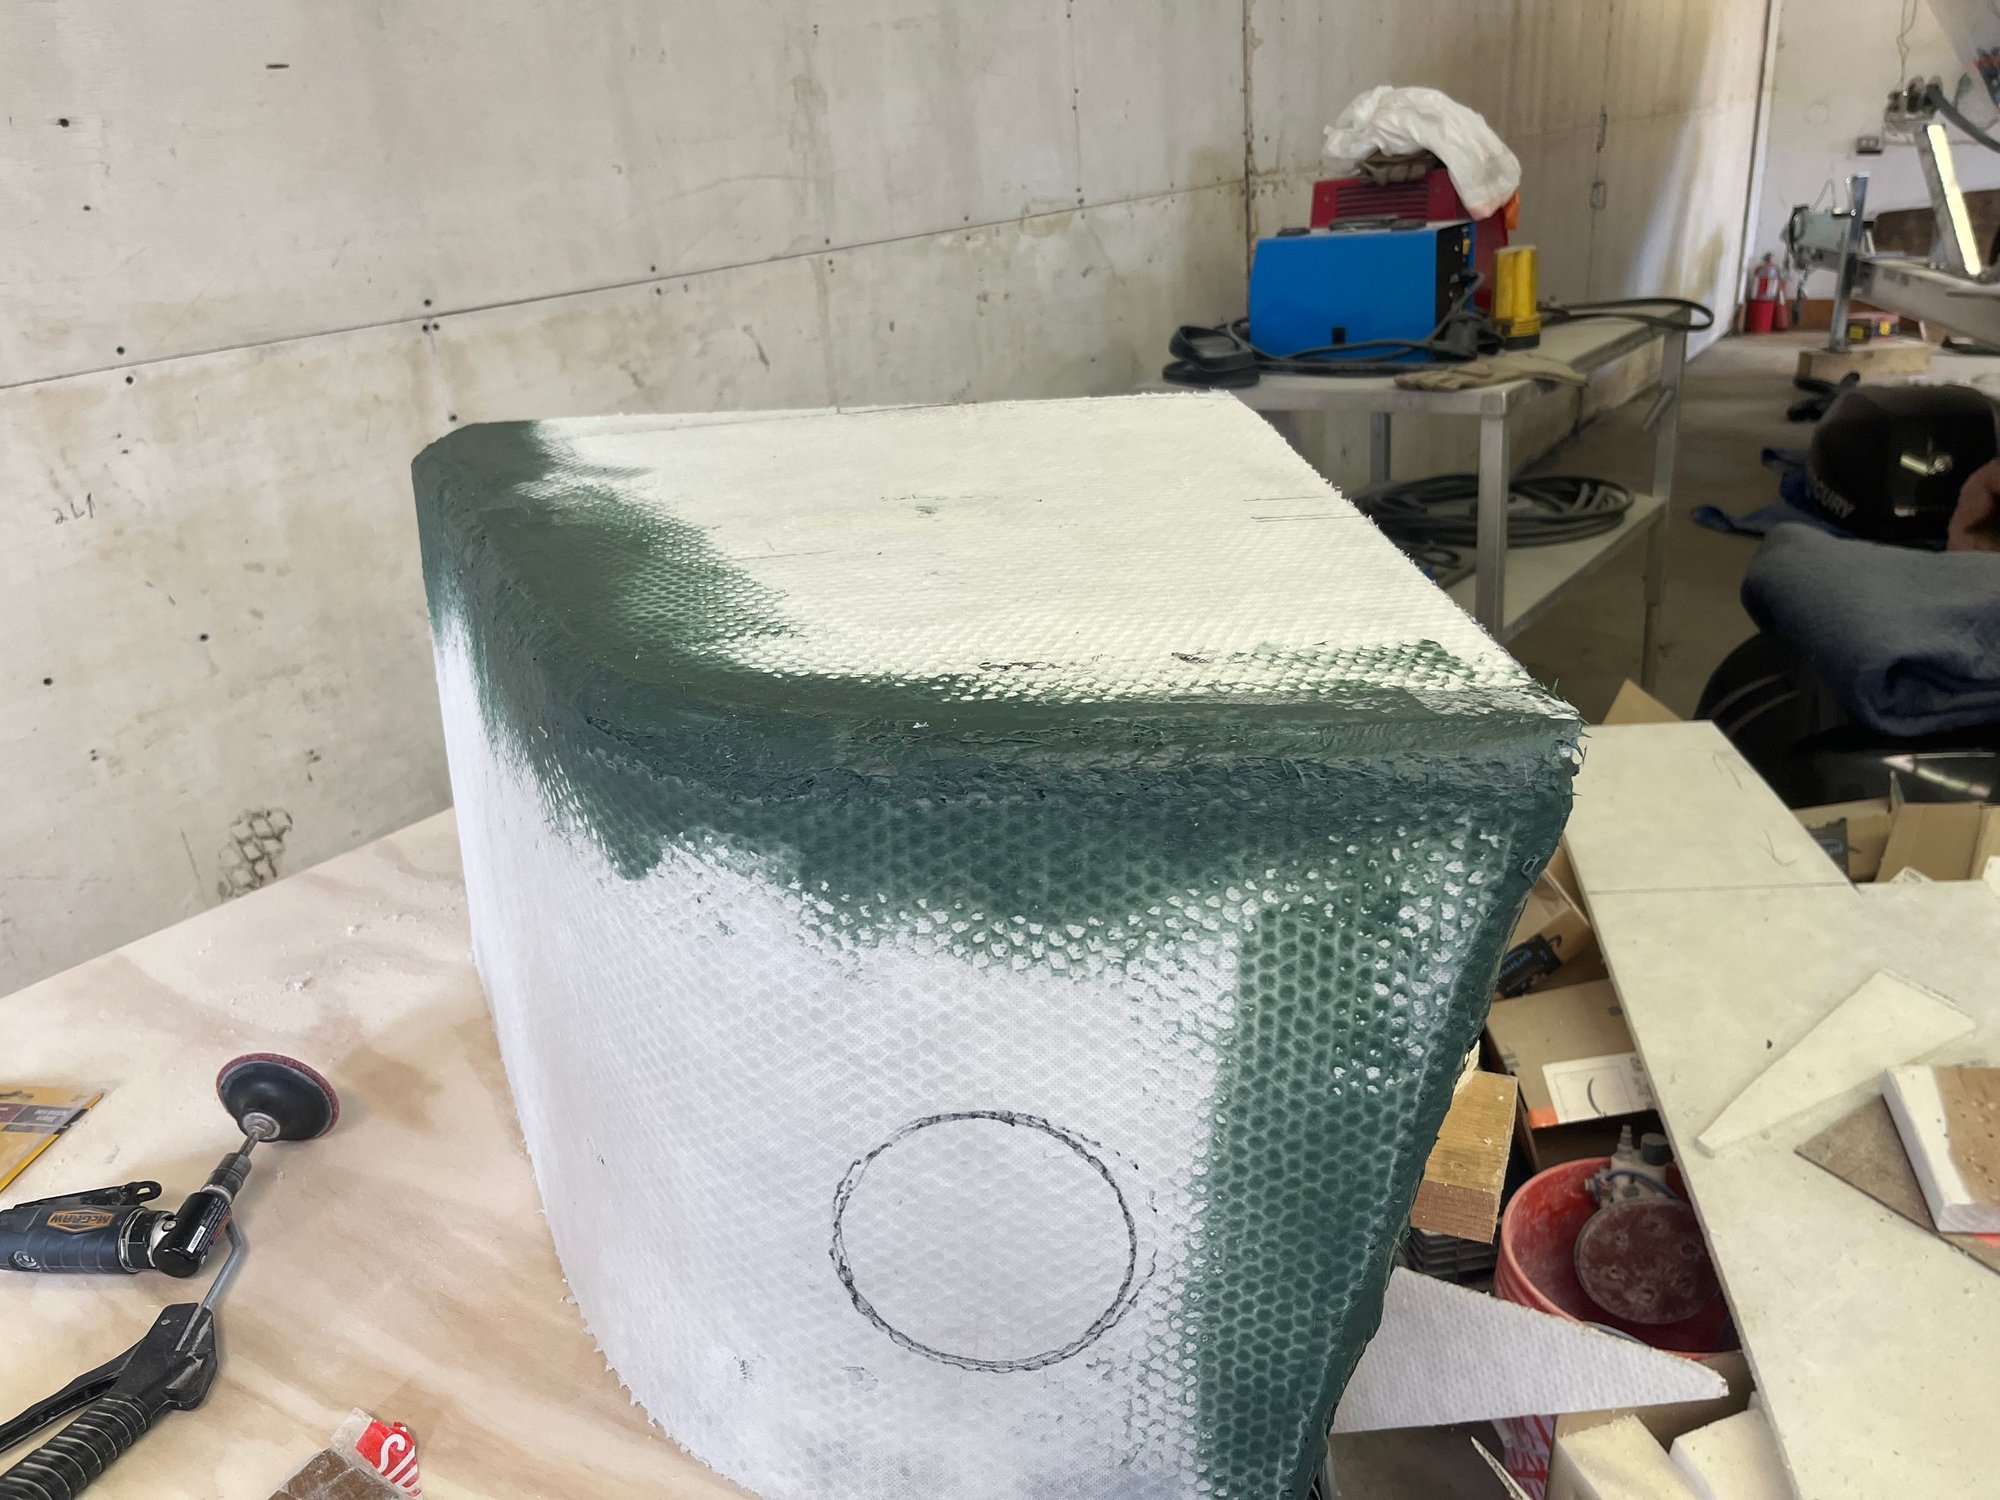
I was now able to radius those corners 3/4”
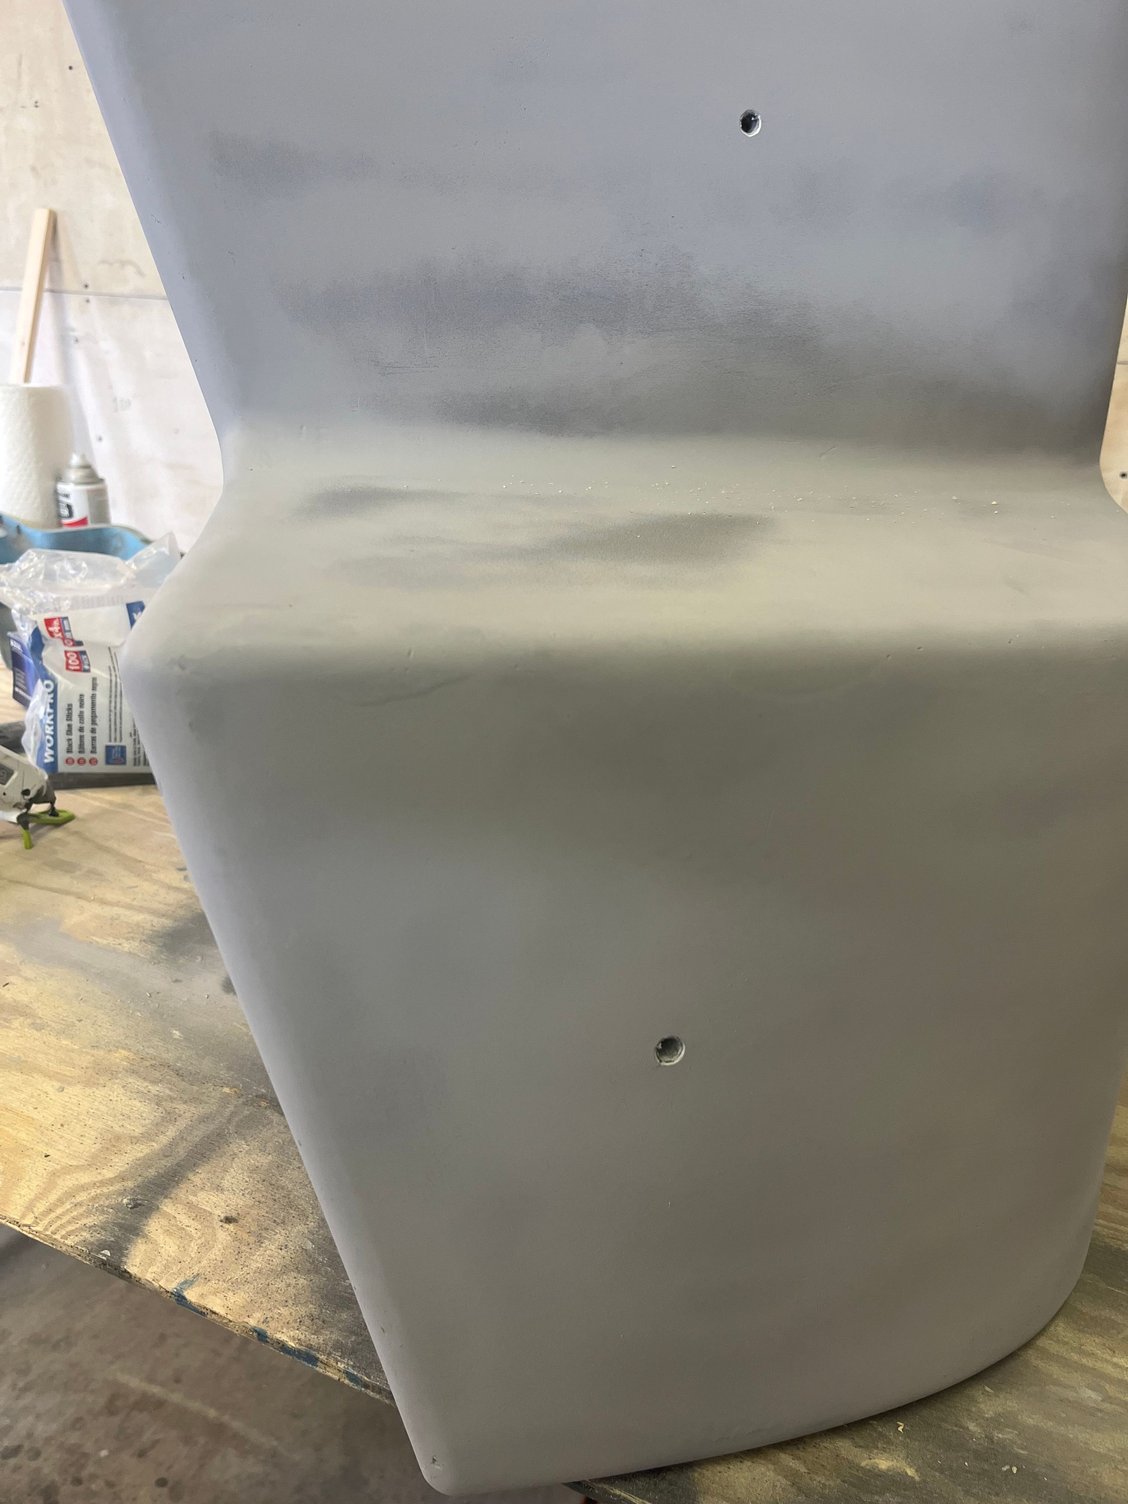
Holes are for air assist when removing part as needed
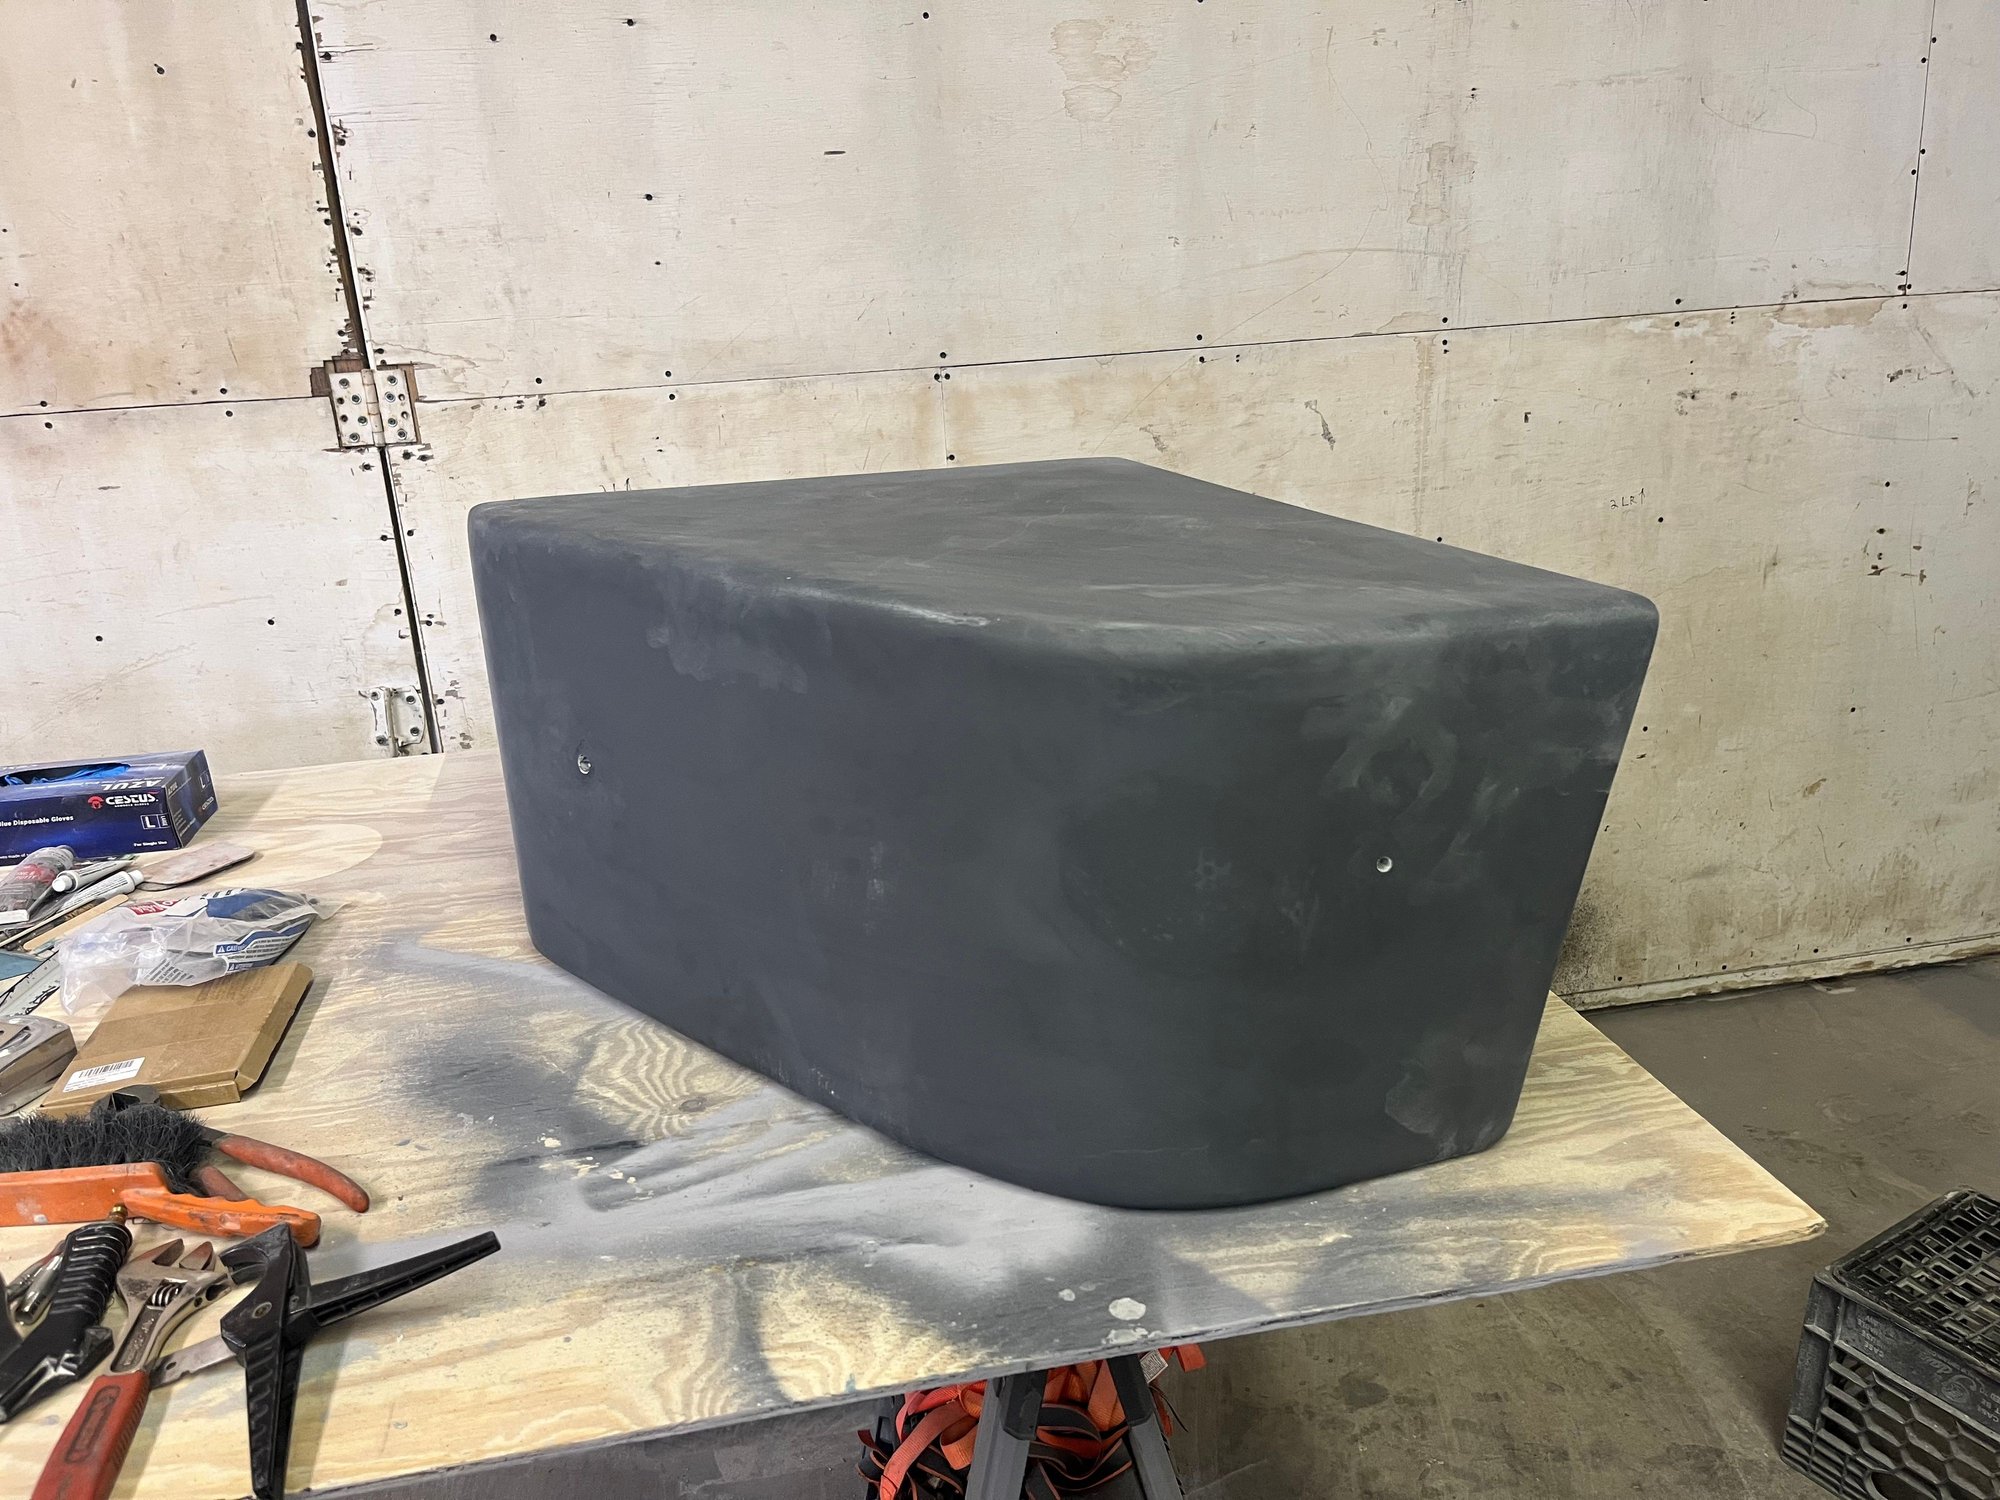
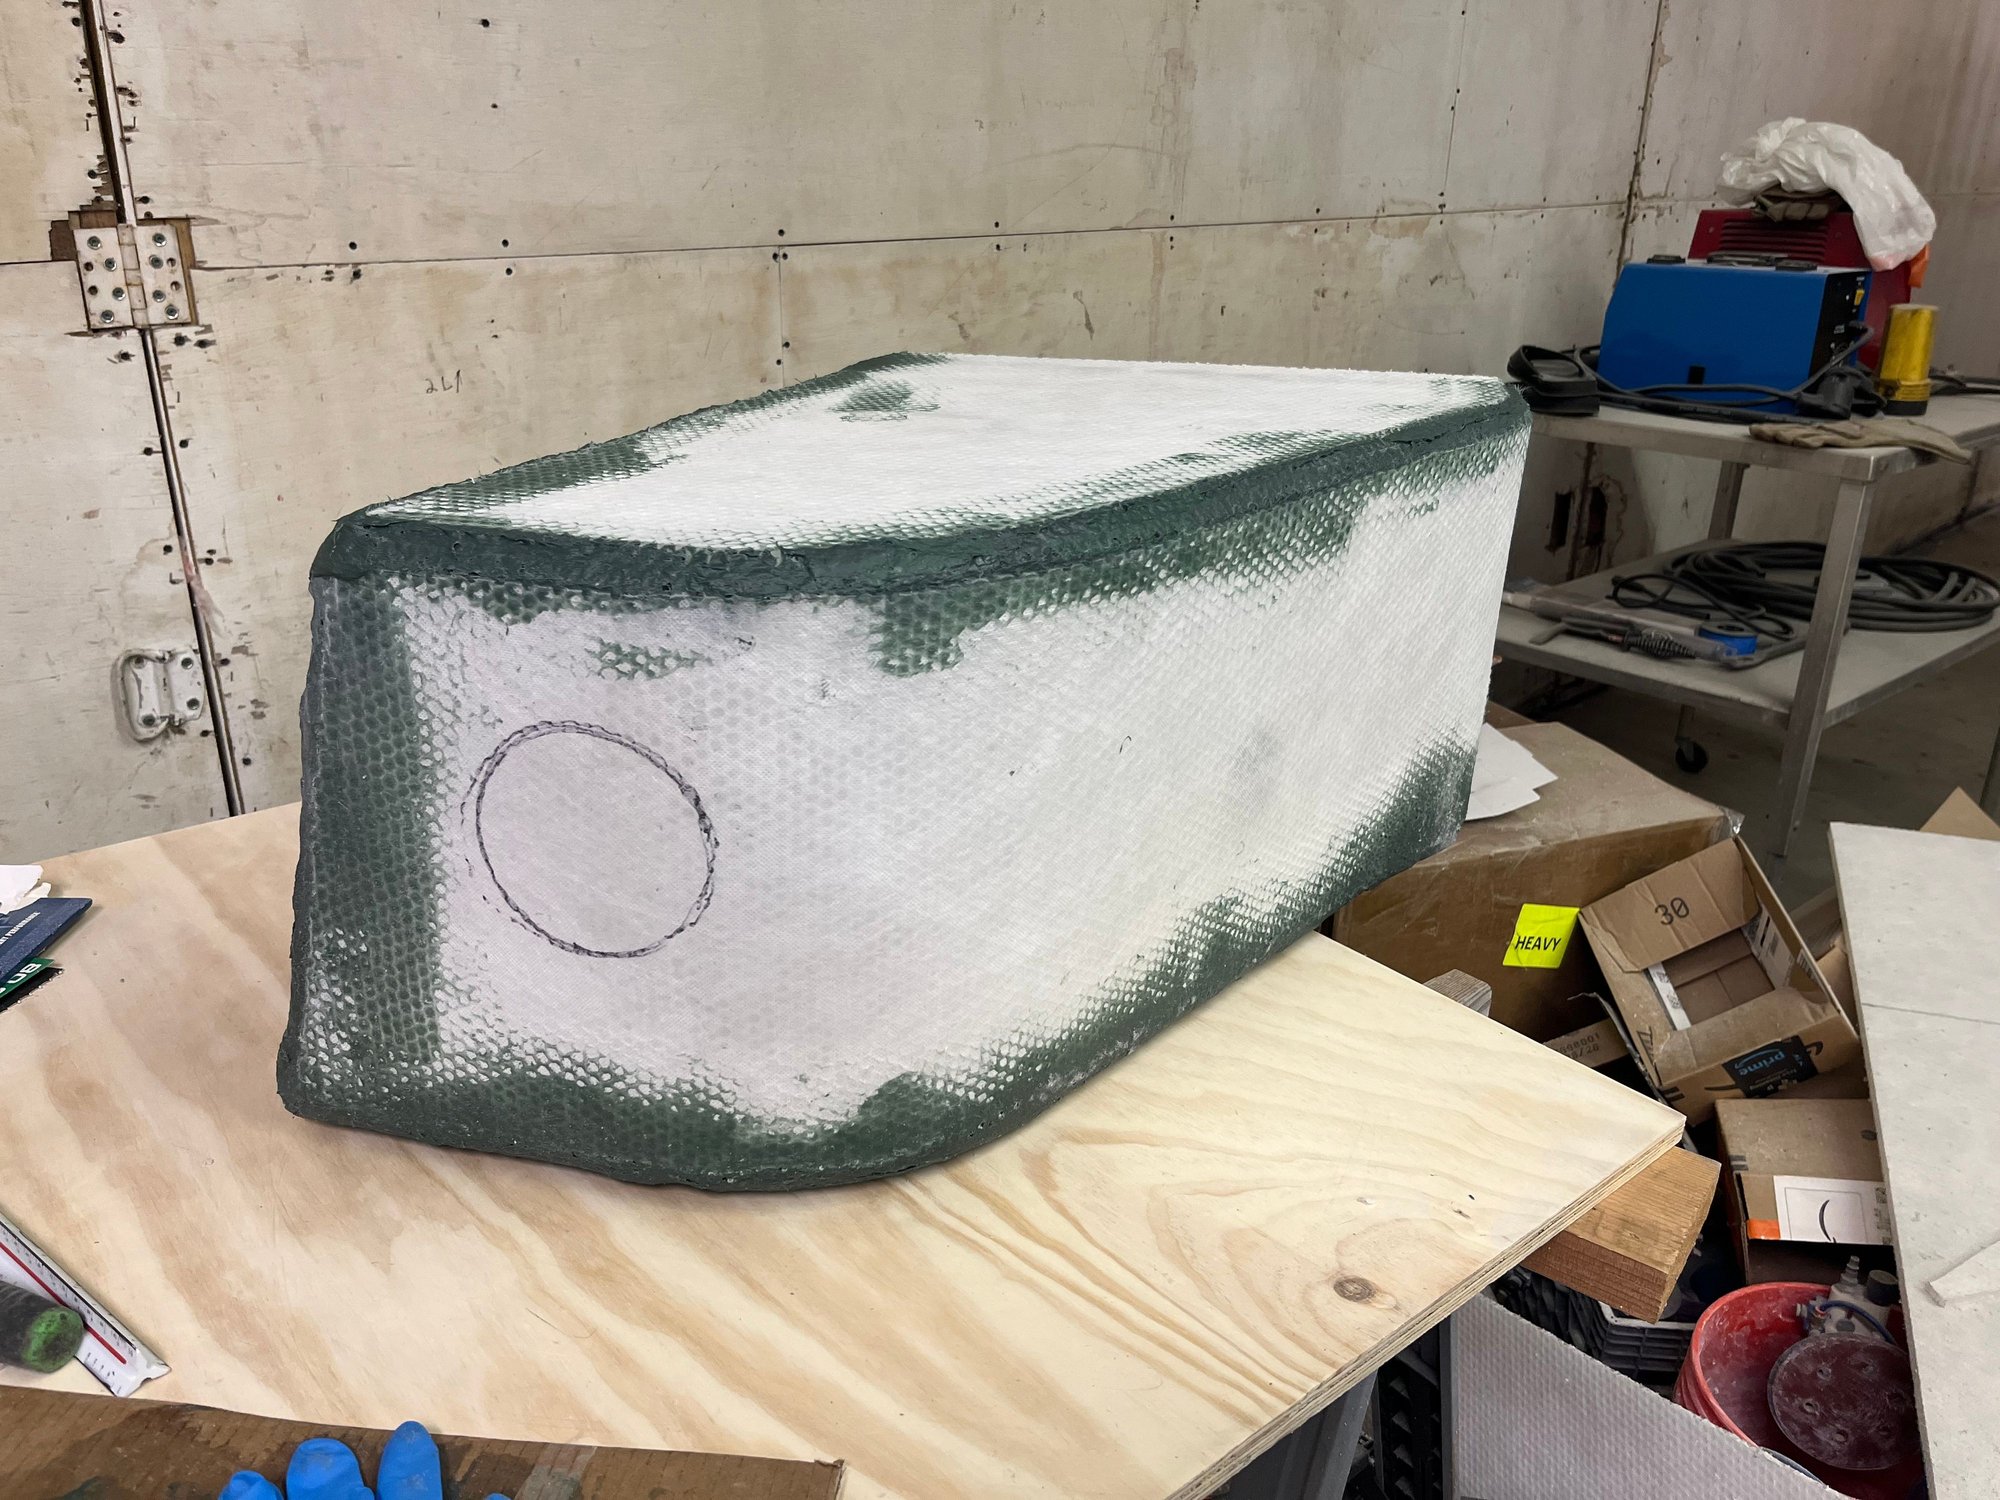
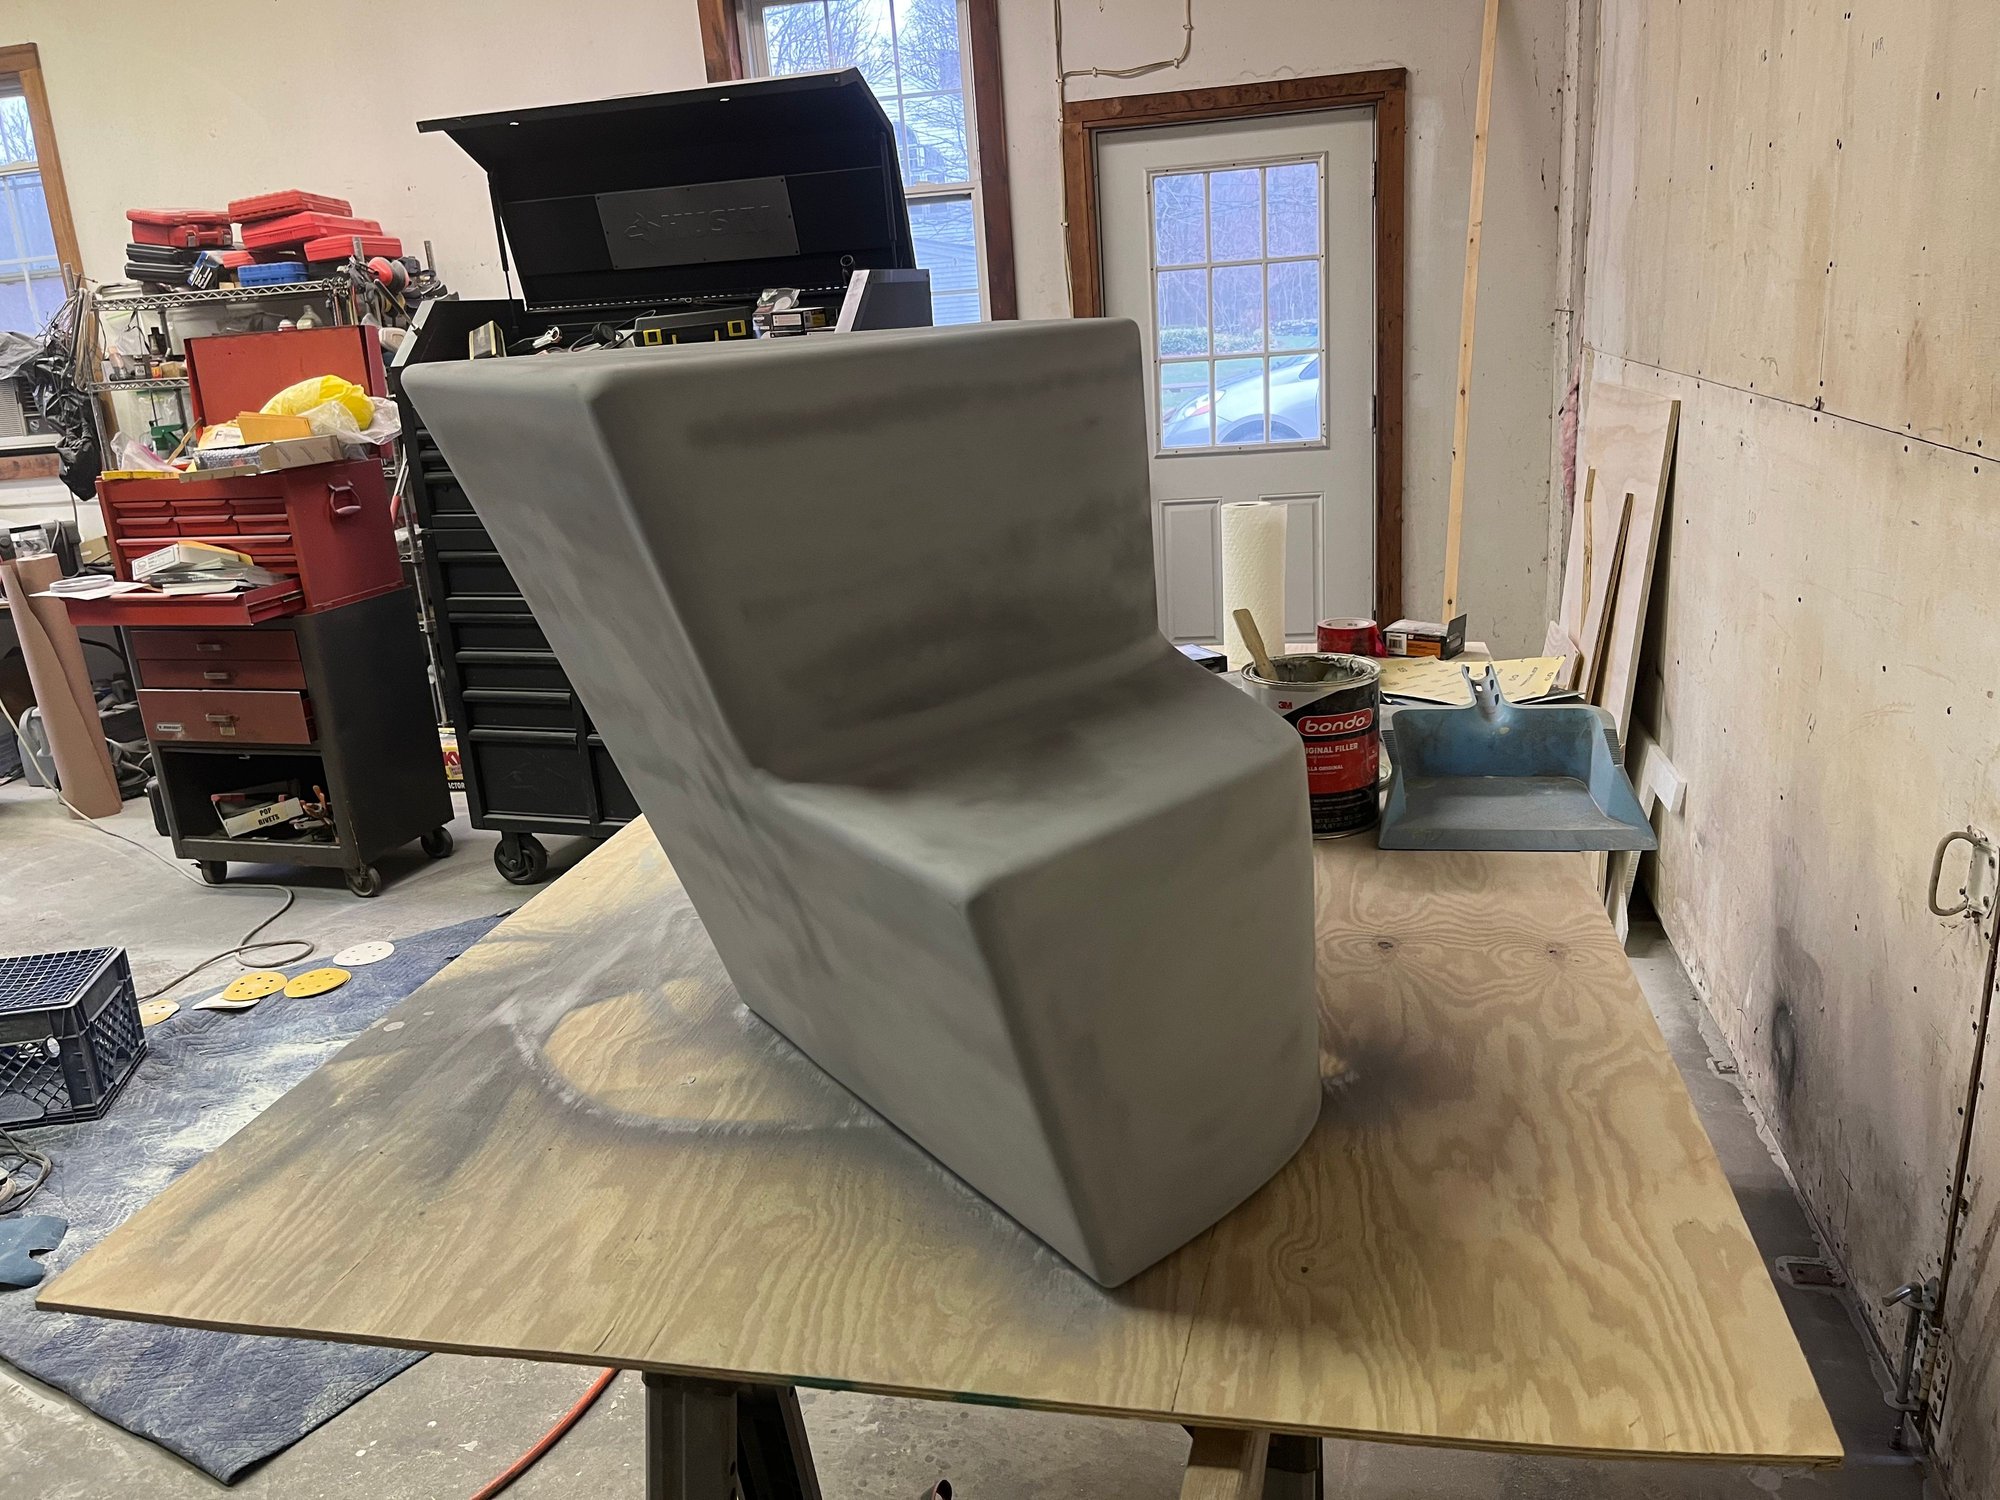
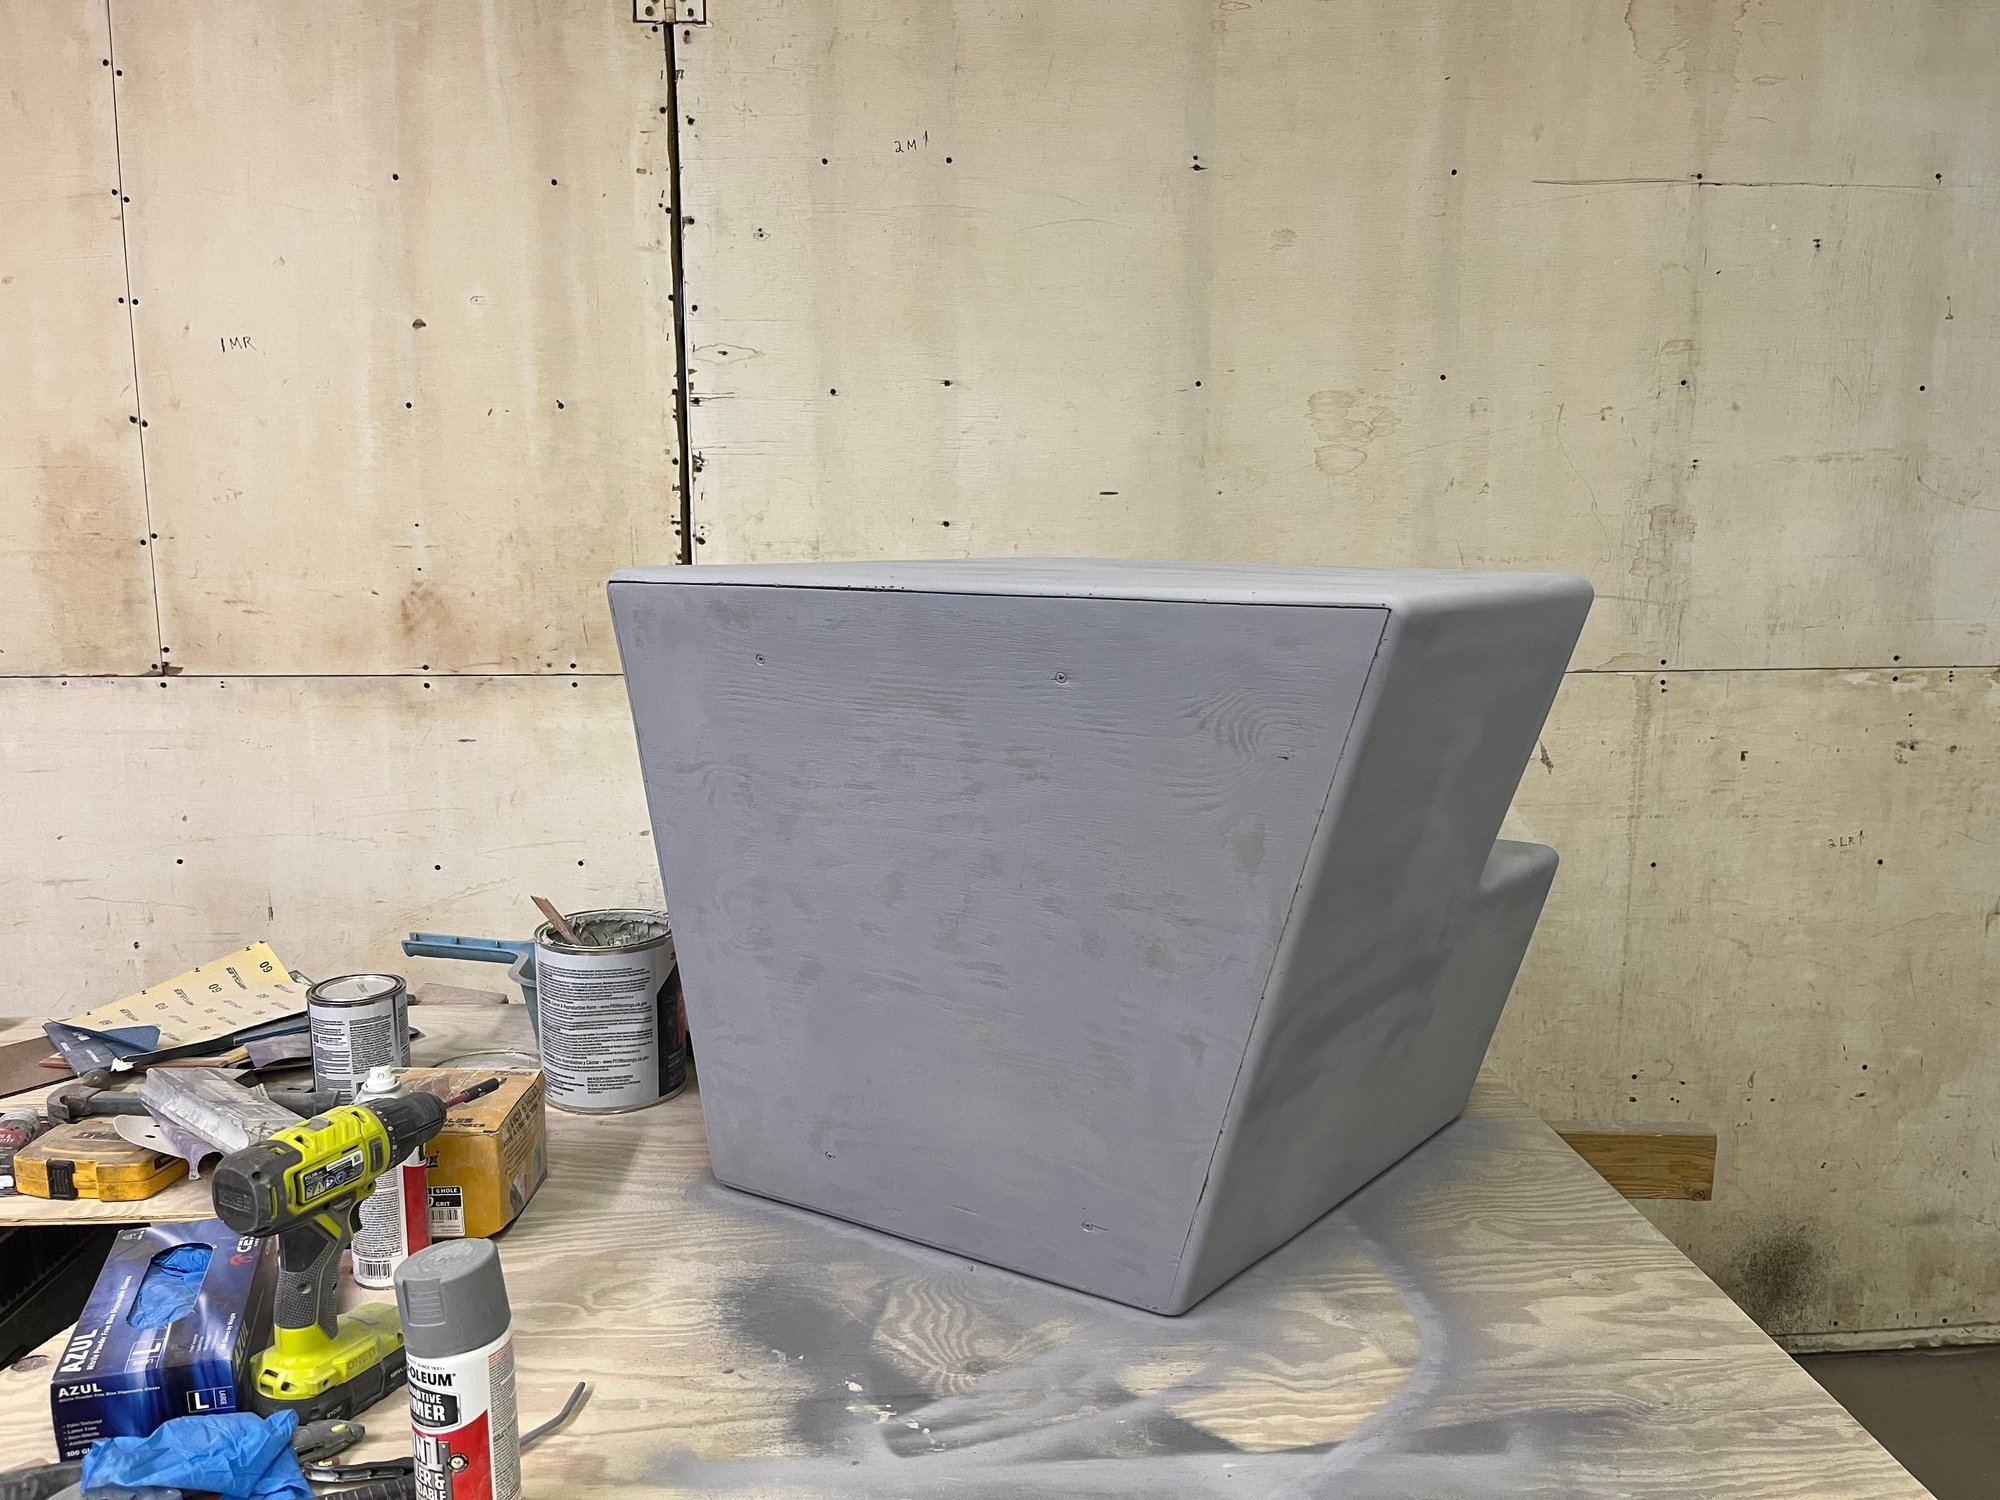
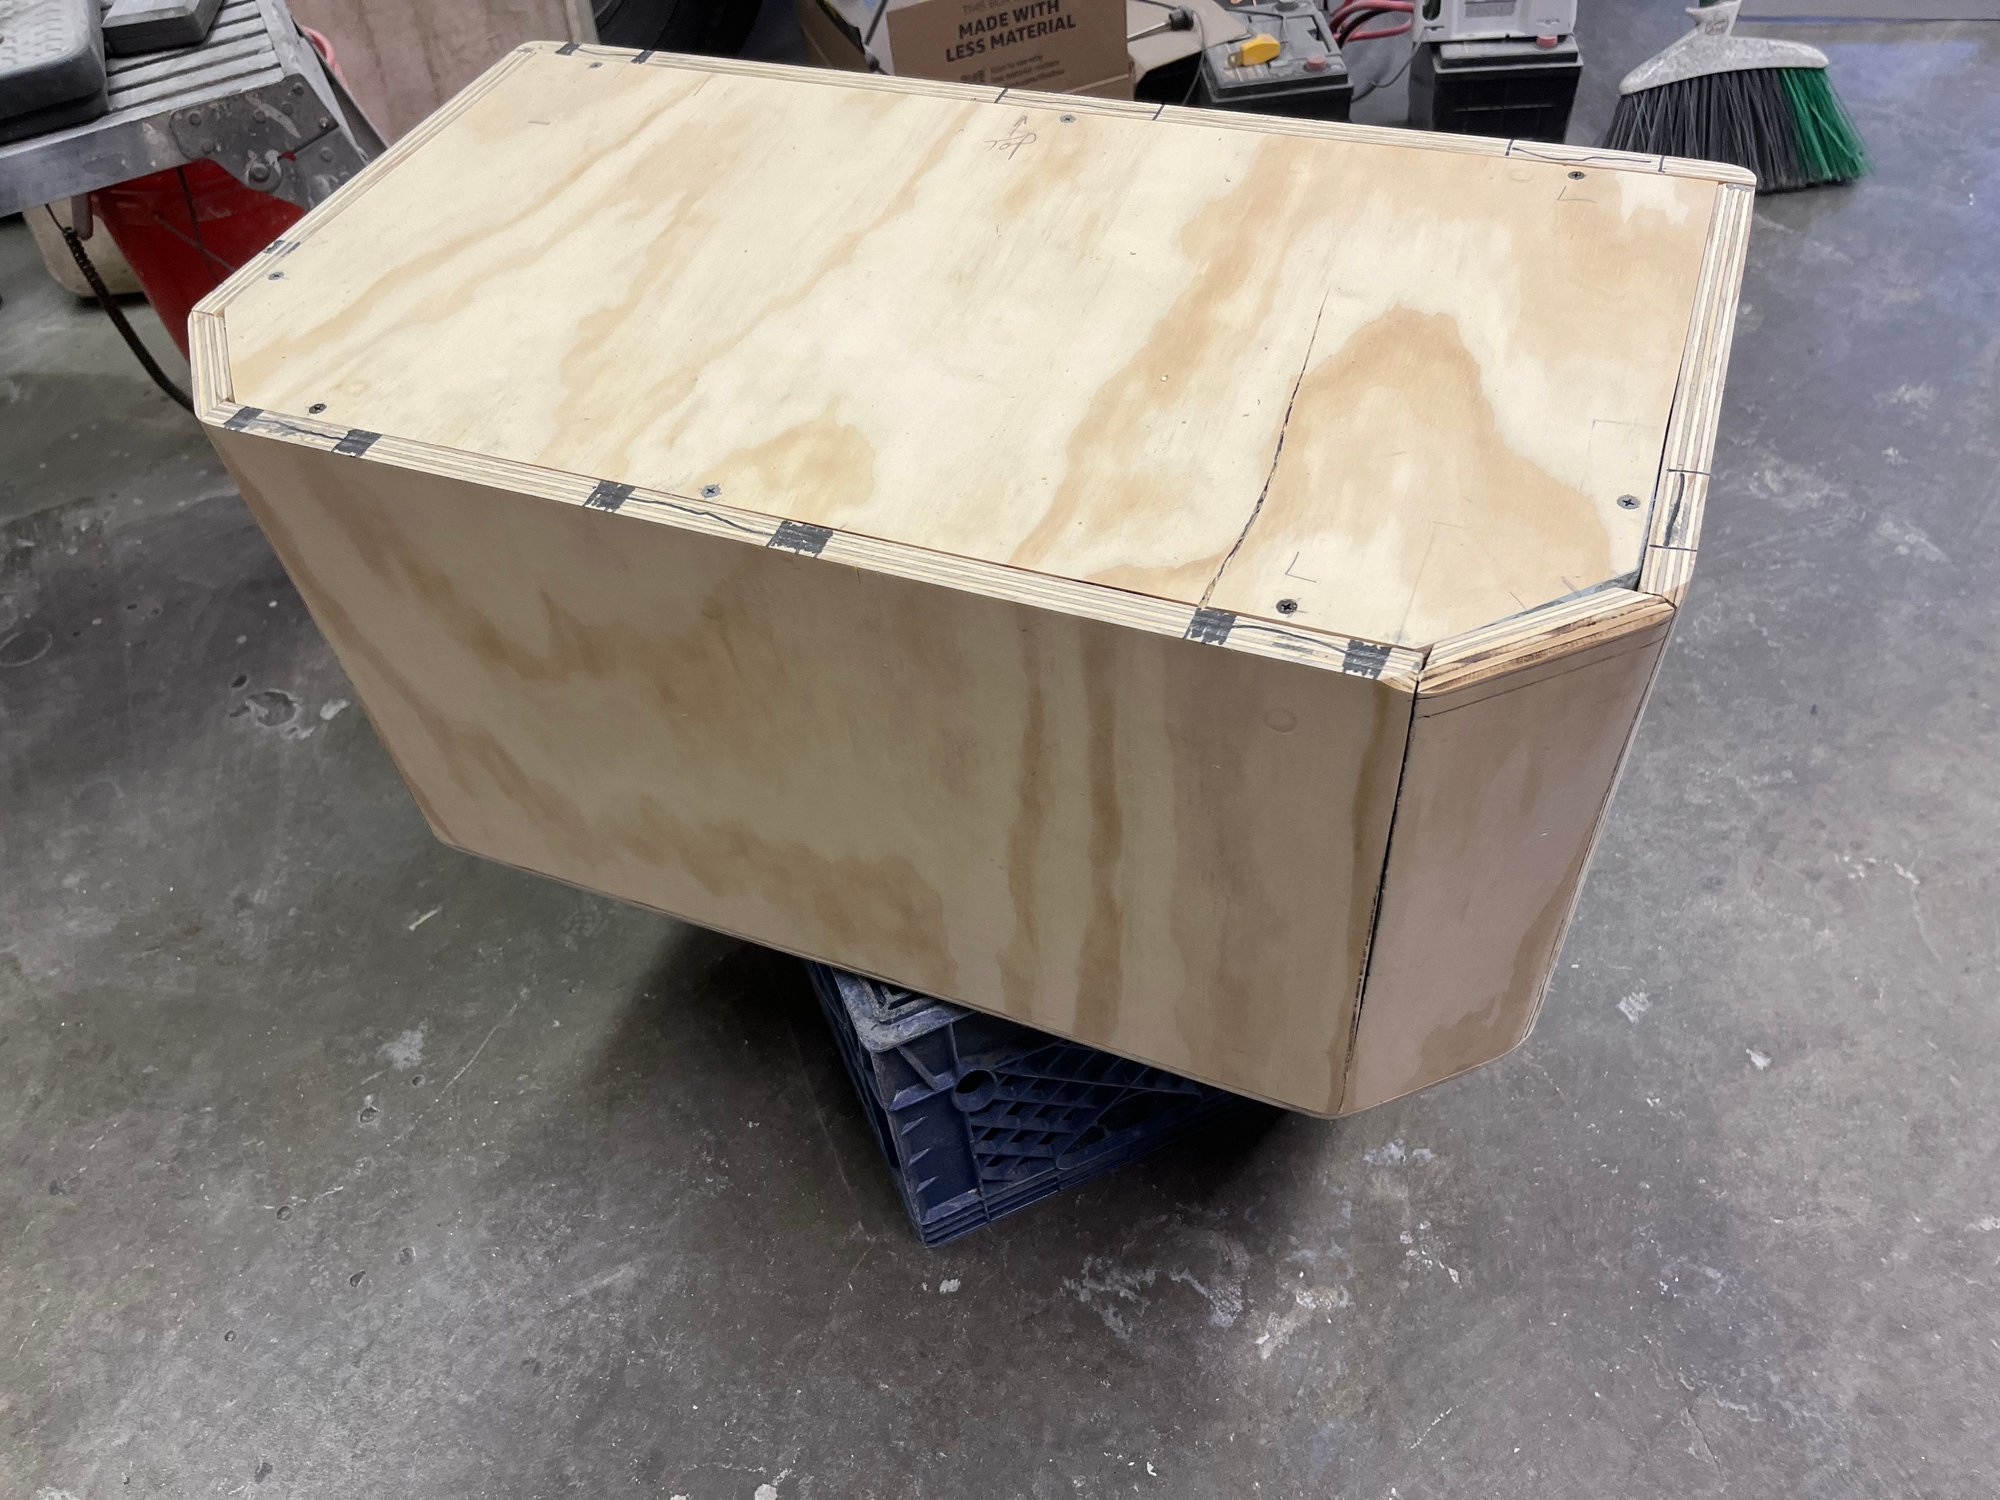
The Nidacore plugs were skim coated with bondo and primed.
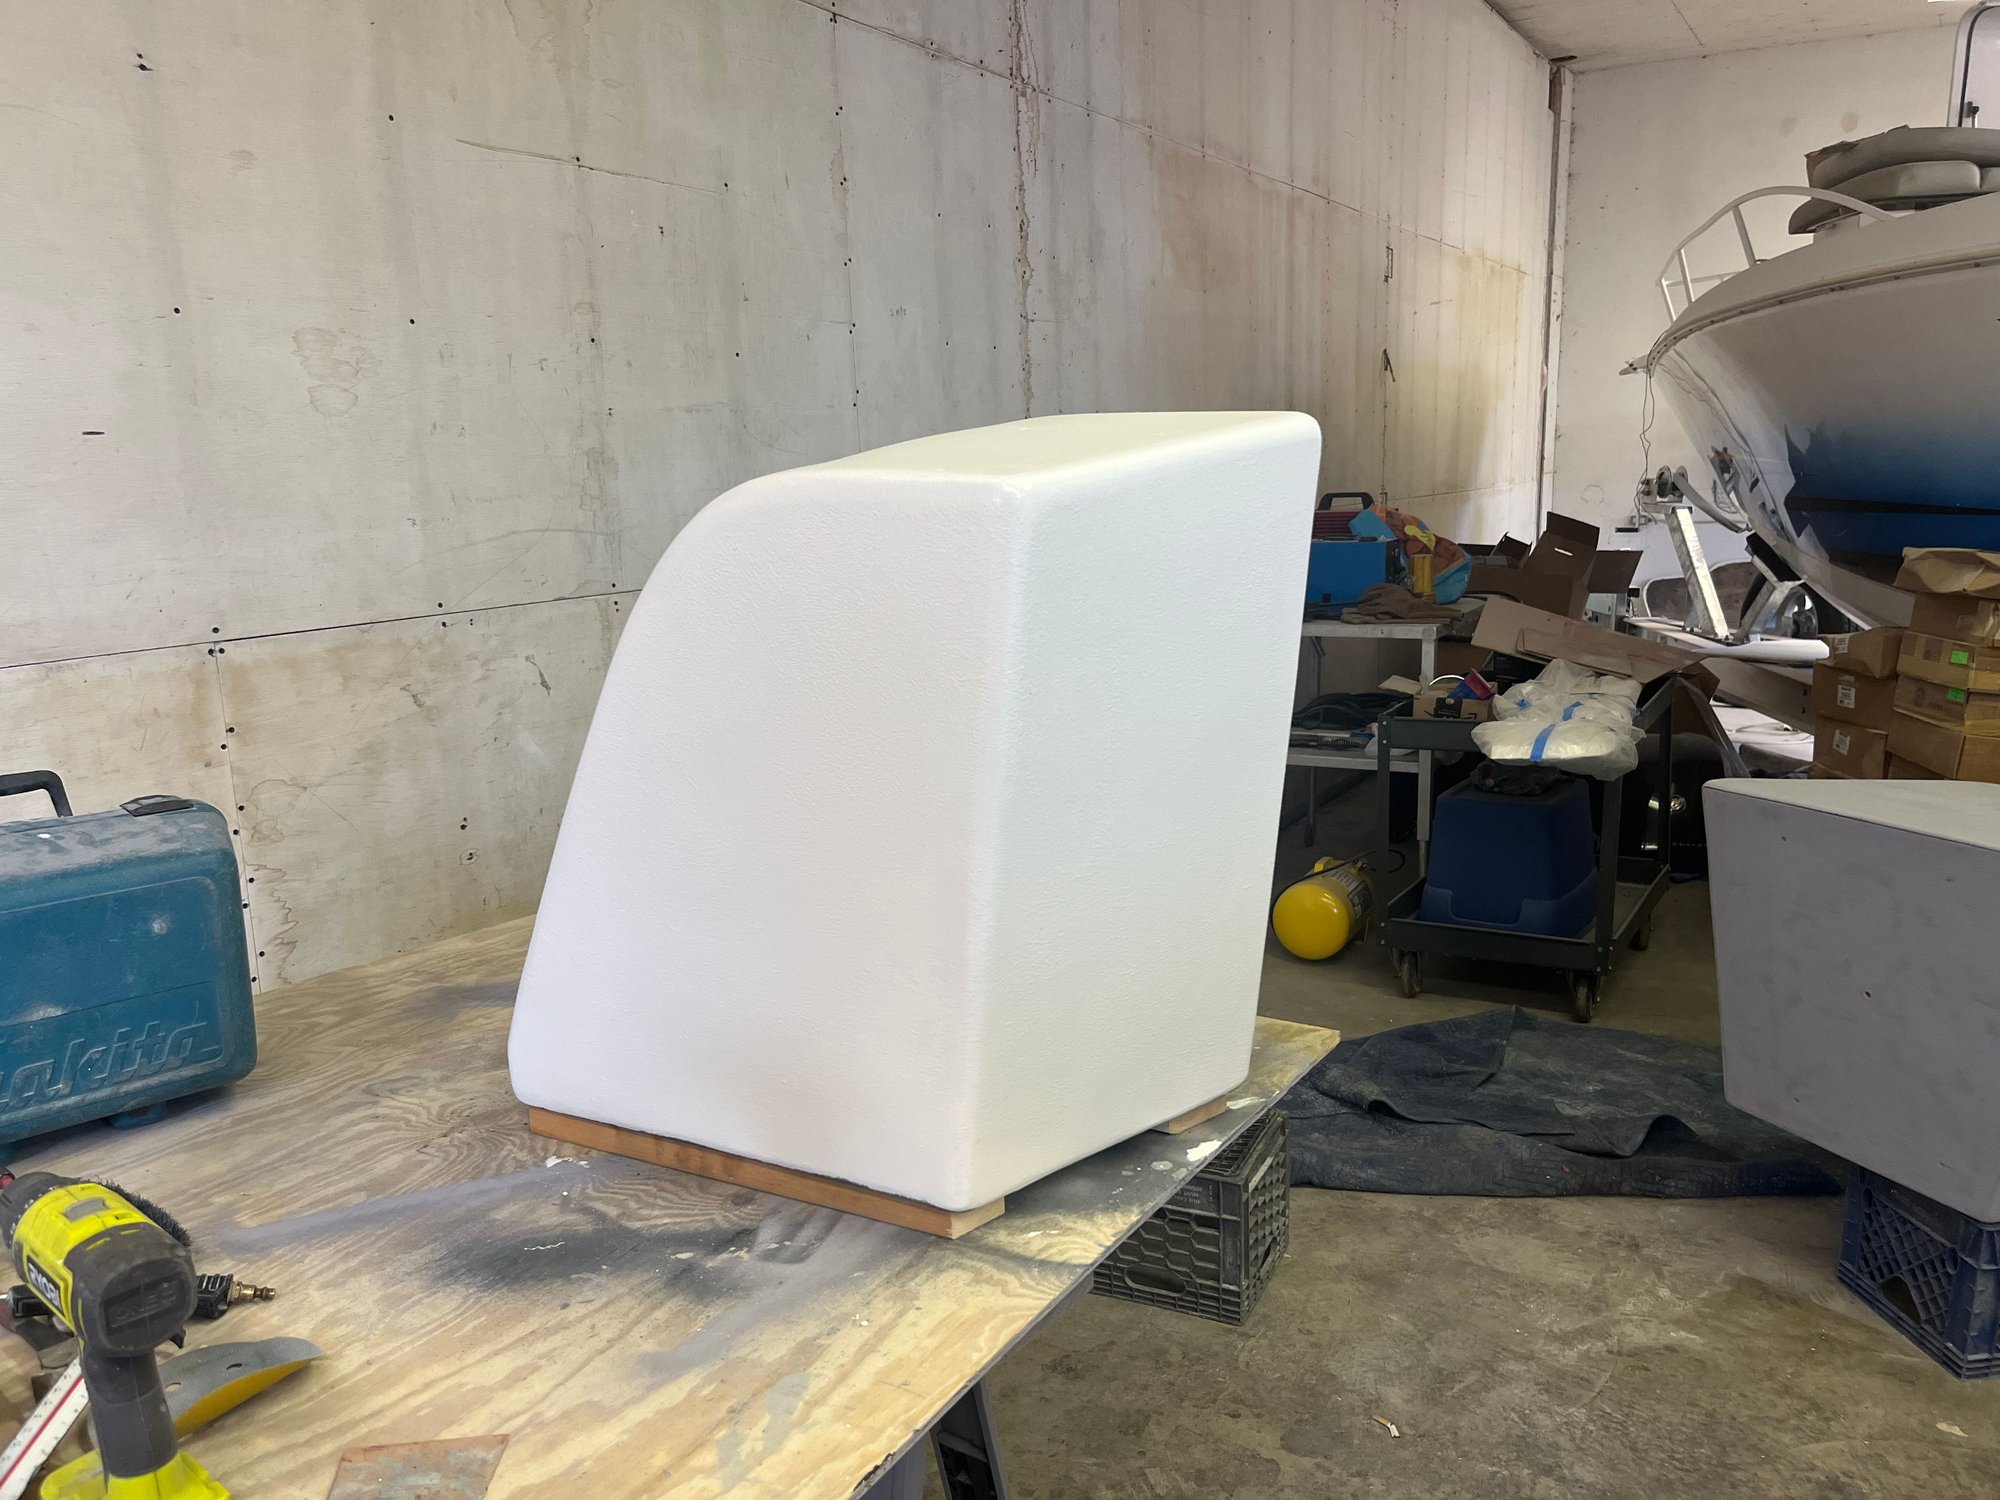
The plugs were gel coated for a hard surface
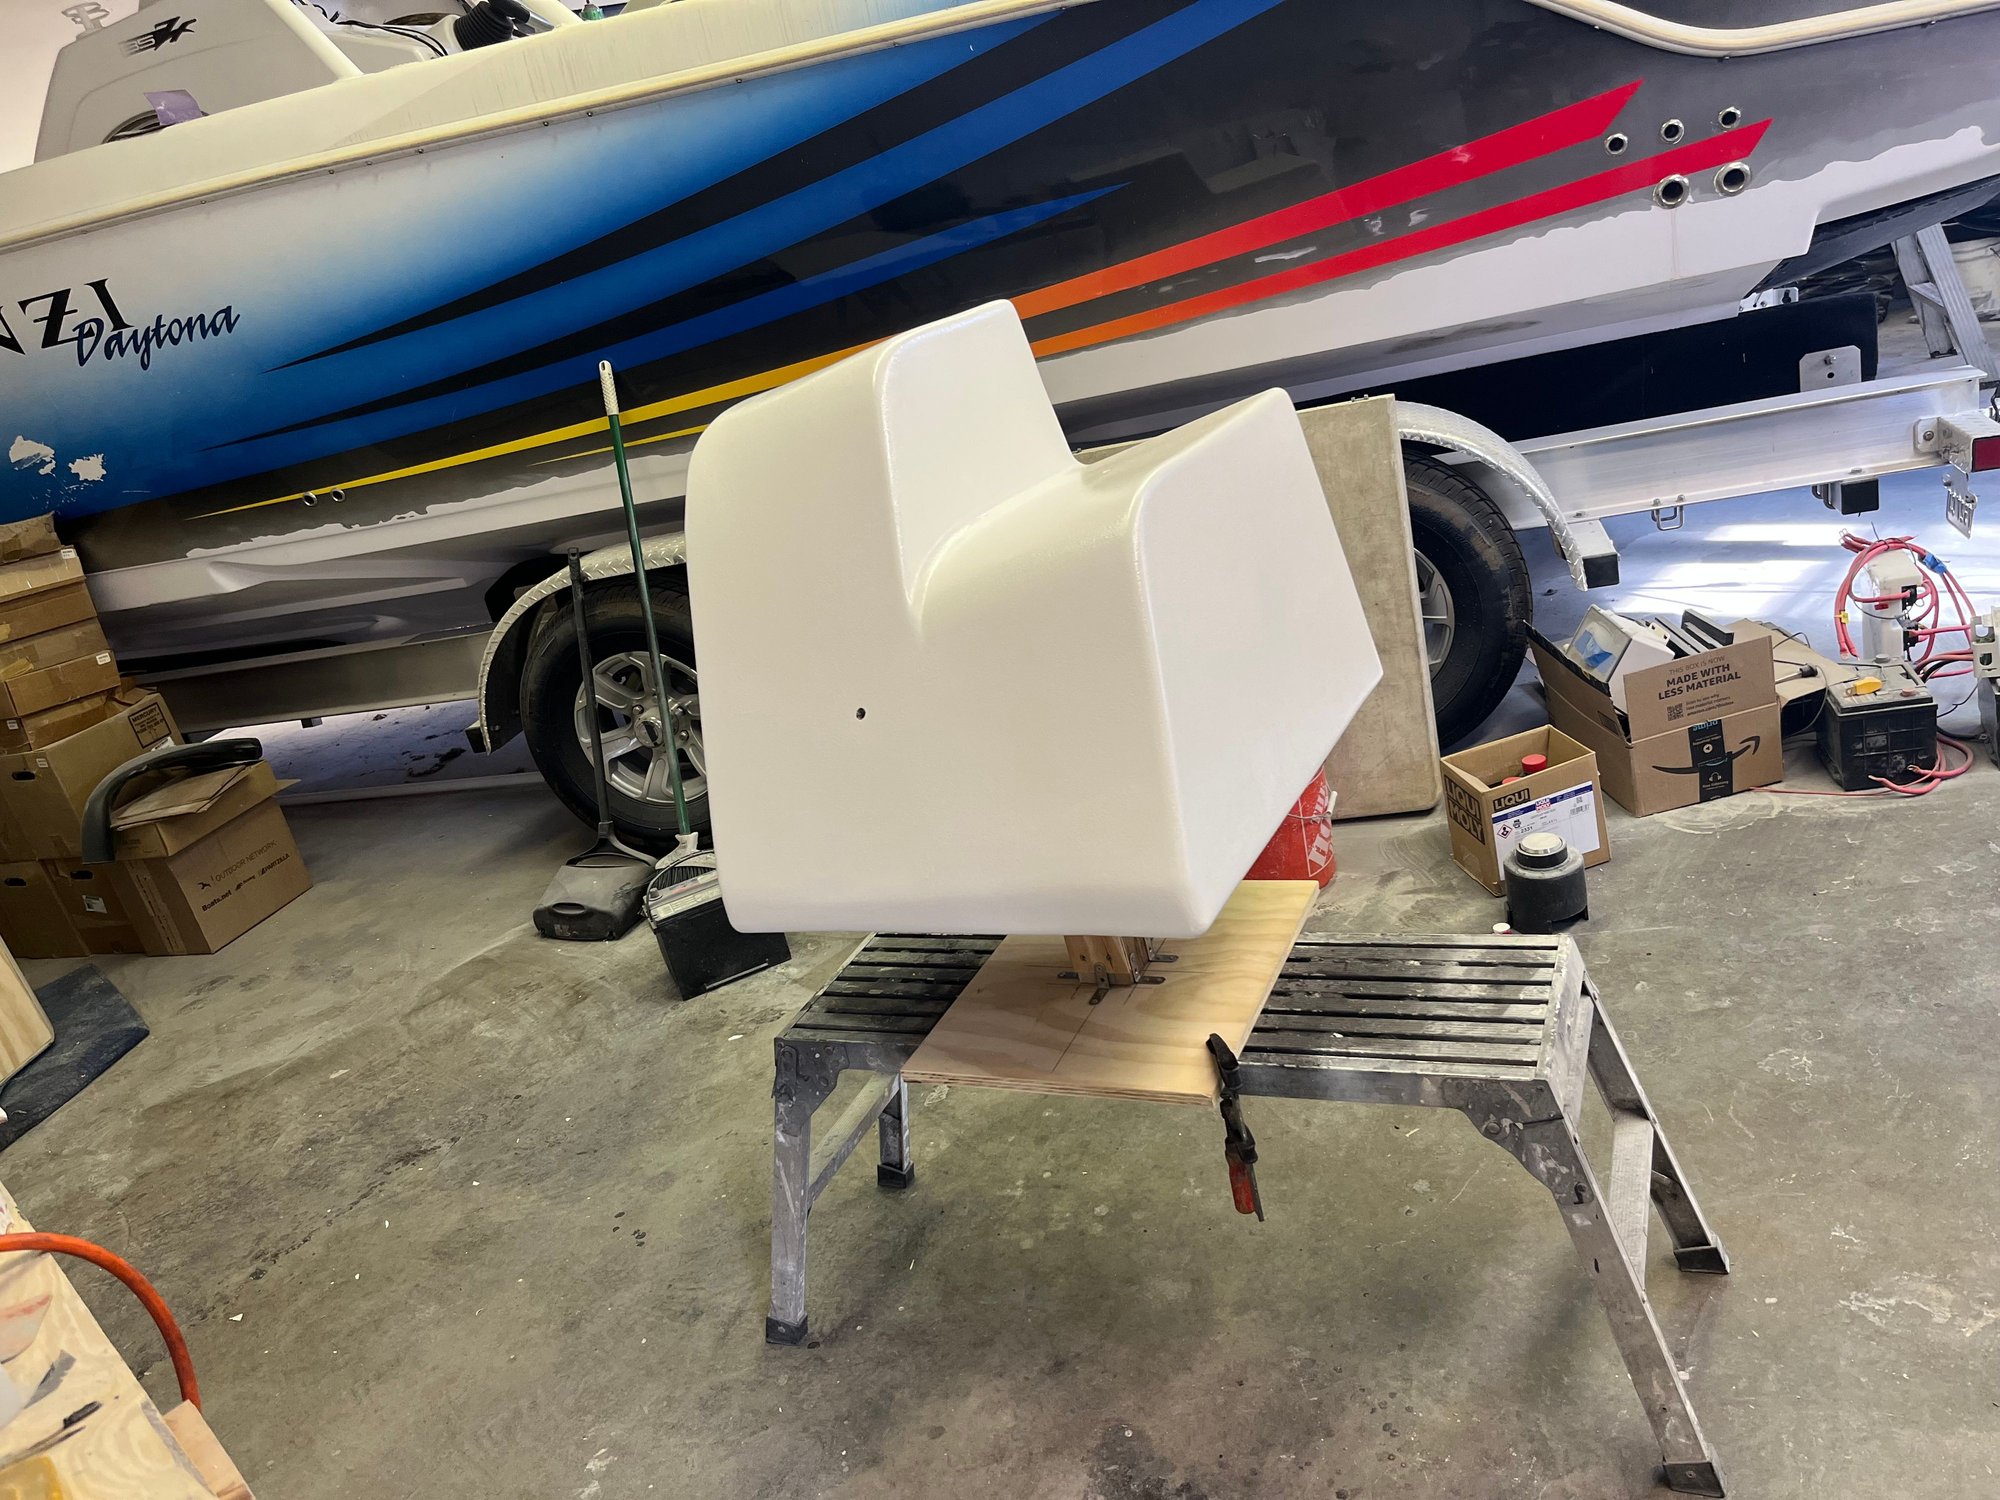
Cooler tank plug
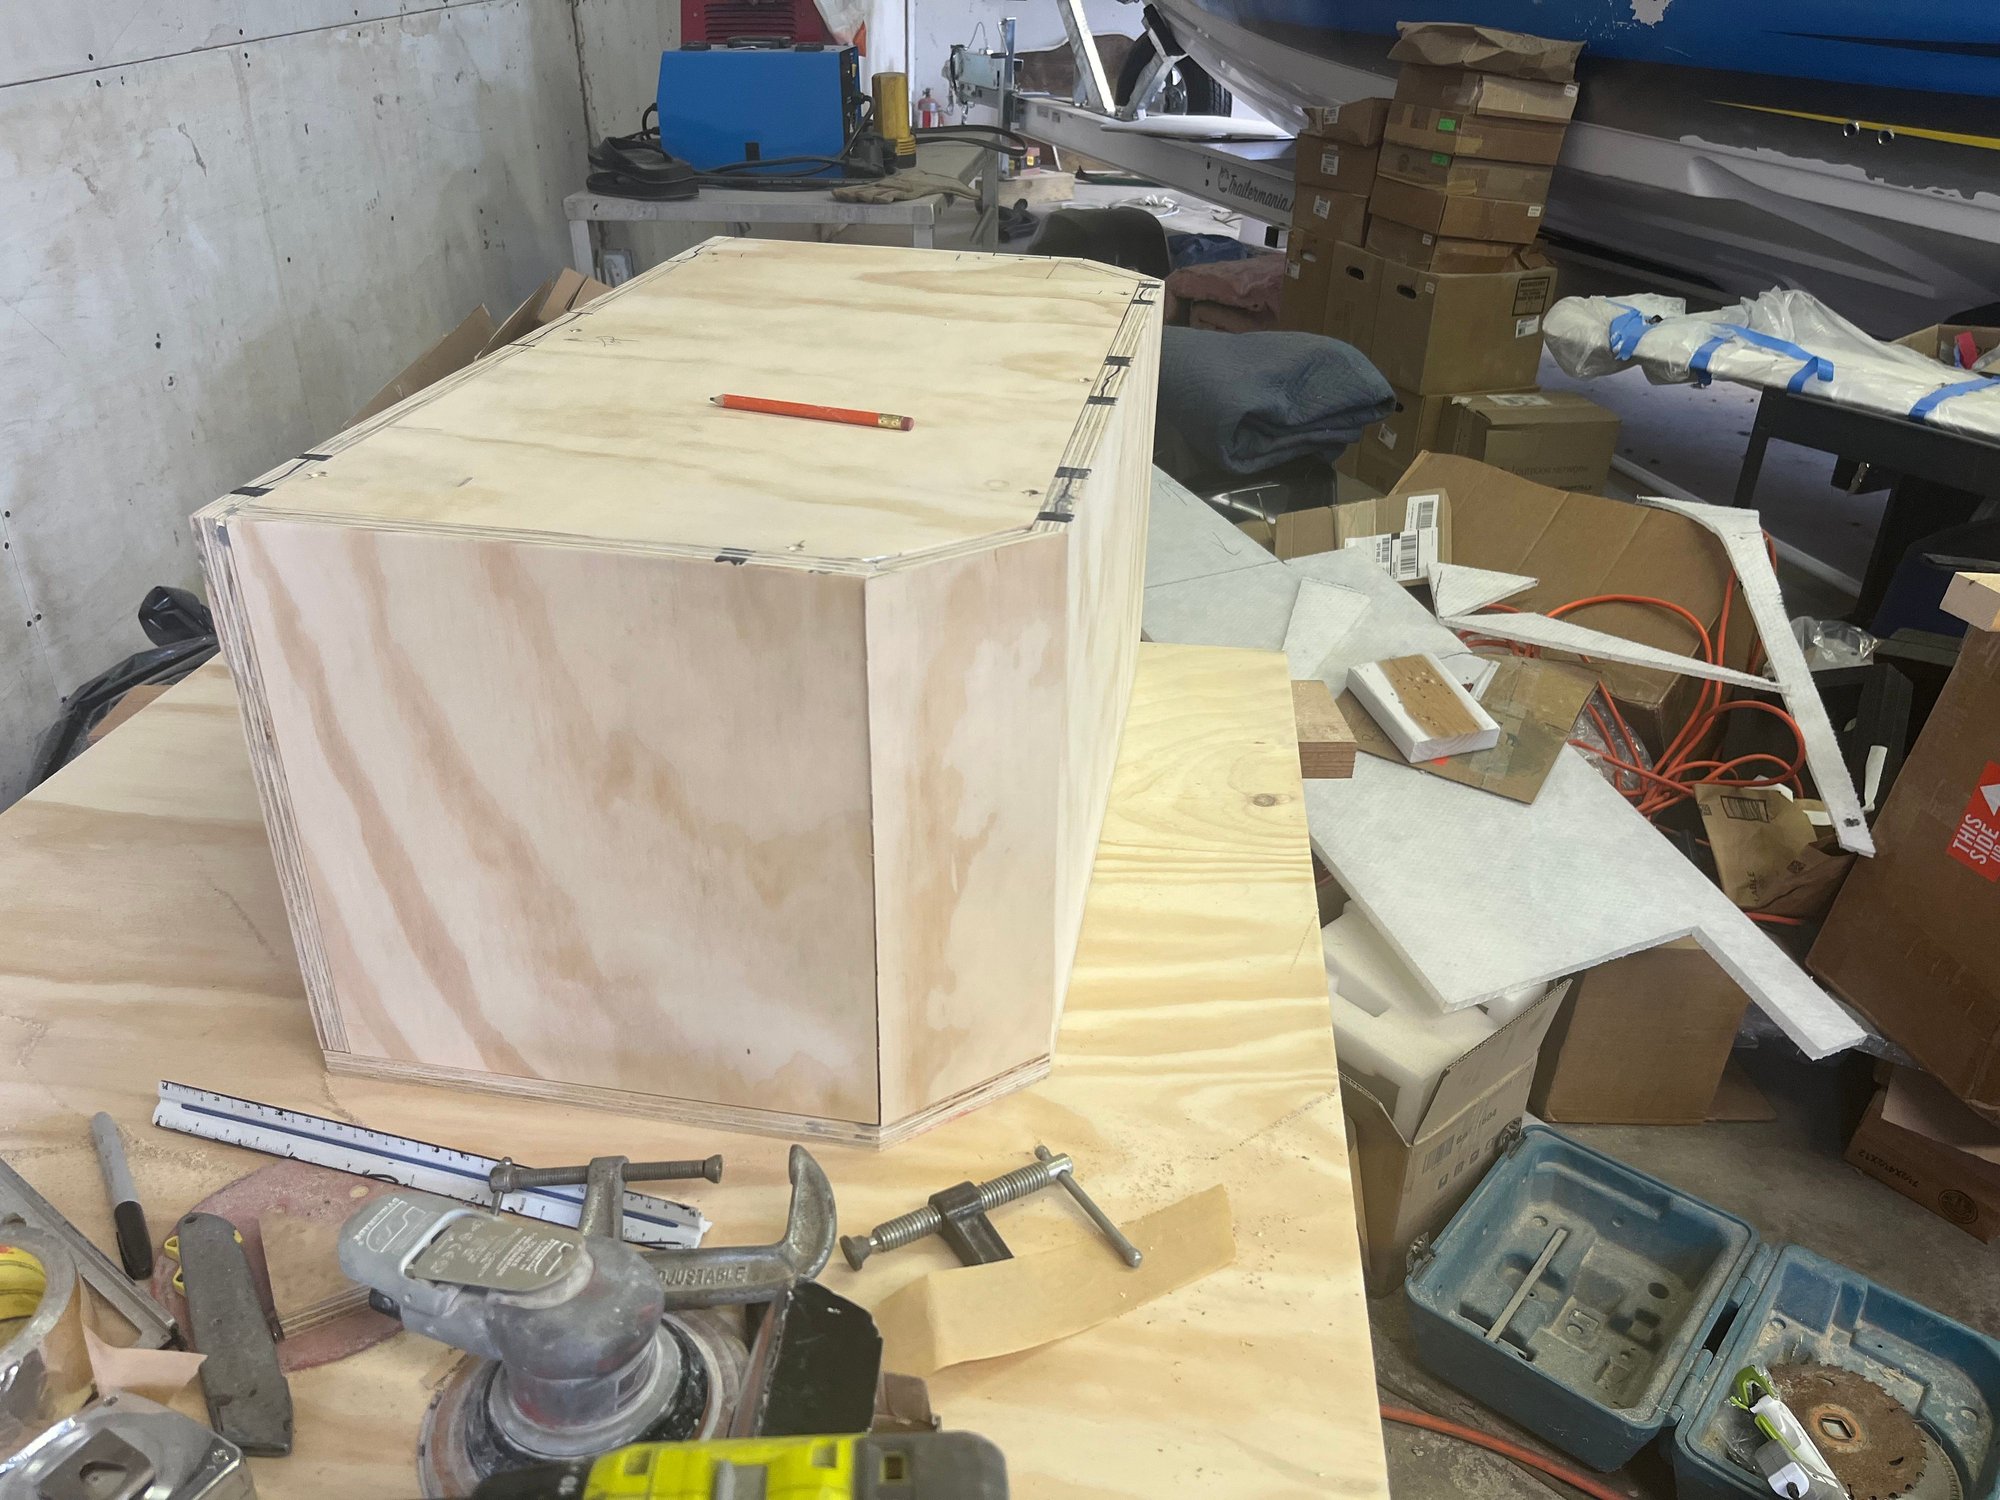
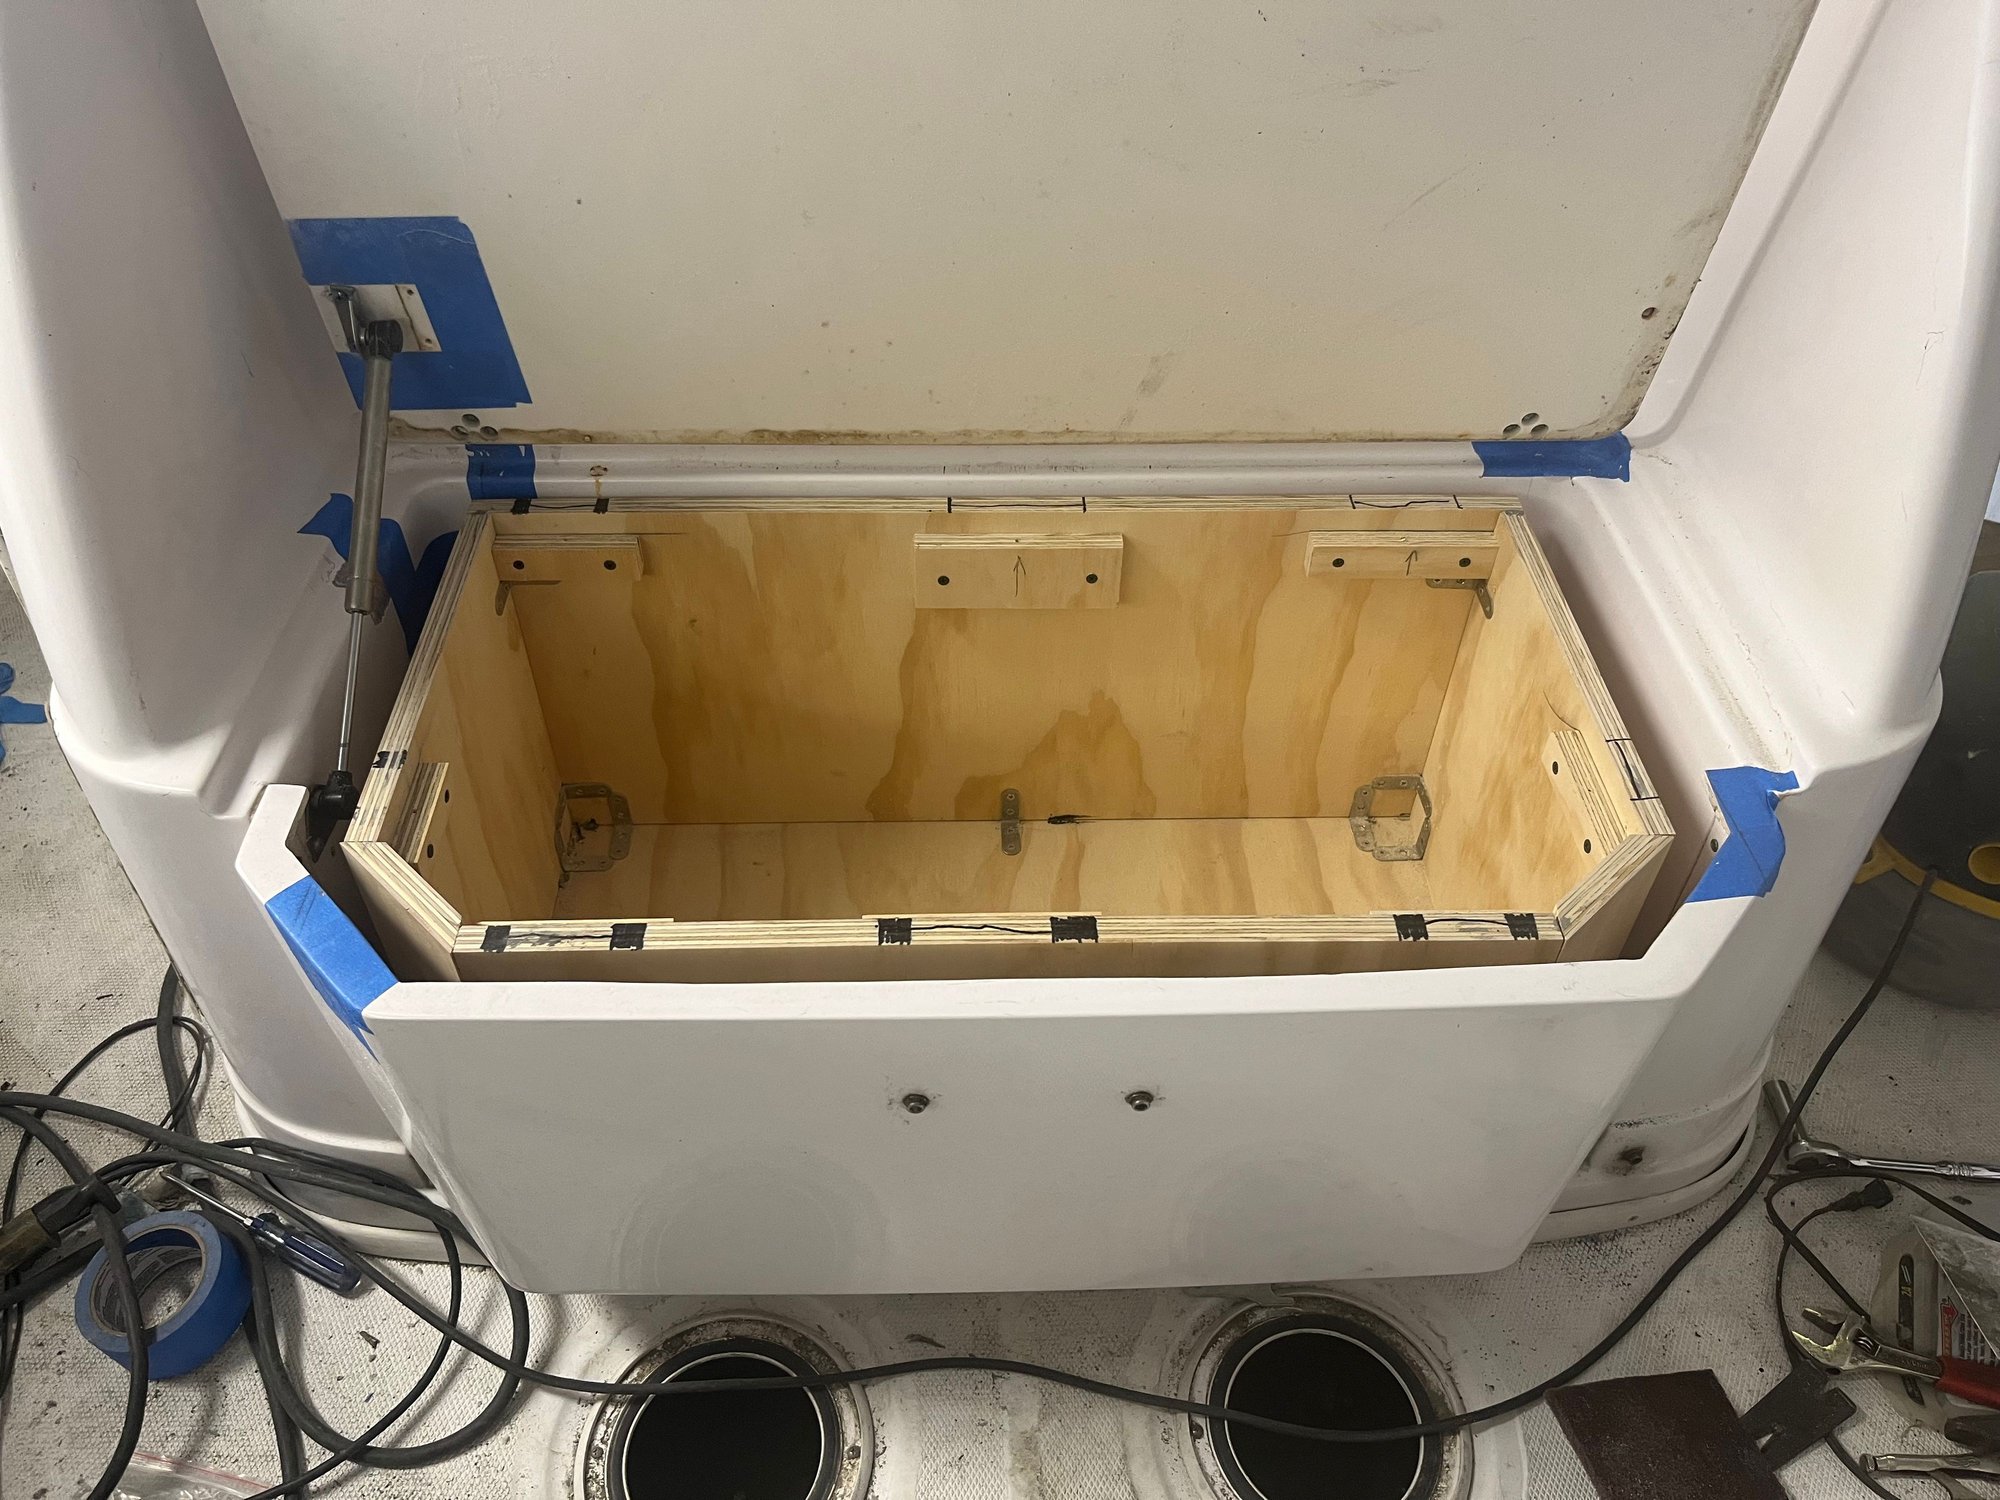
By now I was sick of Nidacore and bondo so I used some 3/4” plywood for the cooler plug. I had some angle brackets kicking around so I used them so I could knock down the plug from the inside if needed.

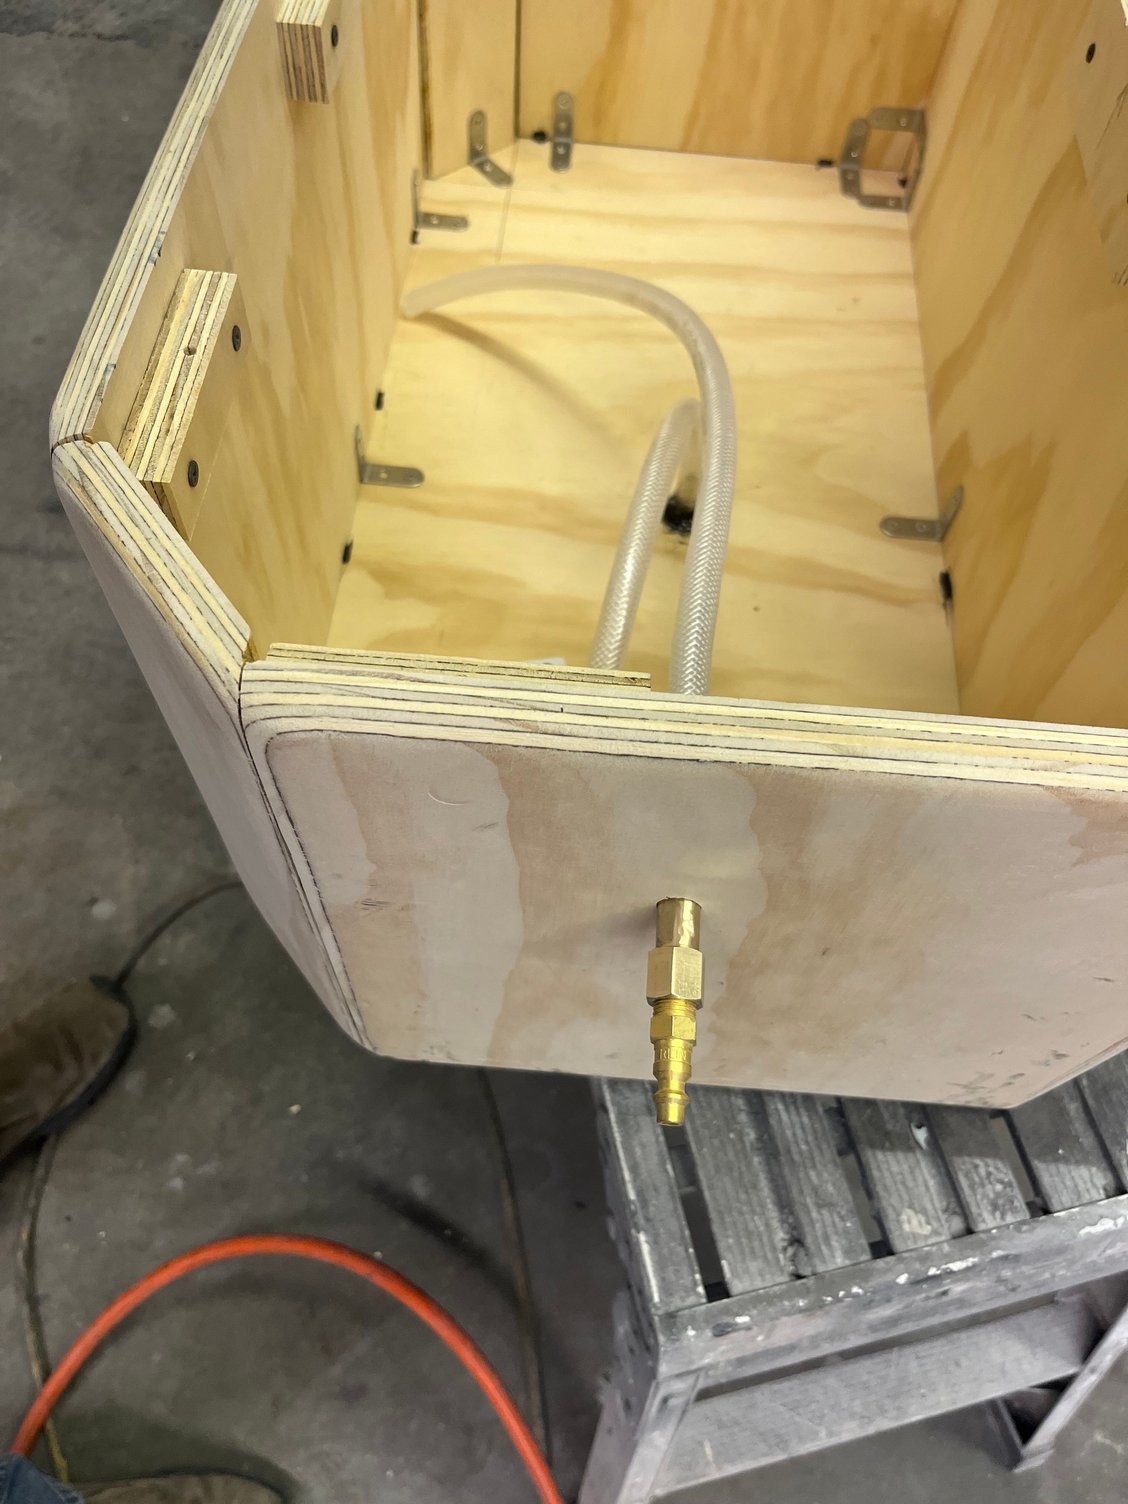
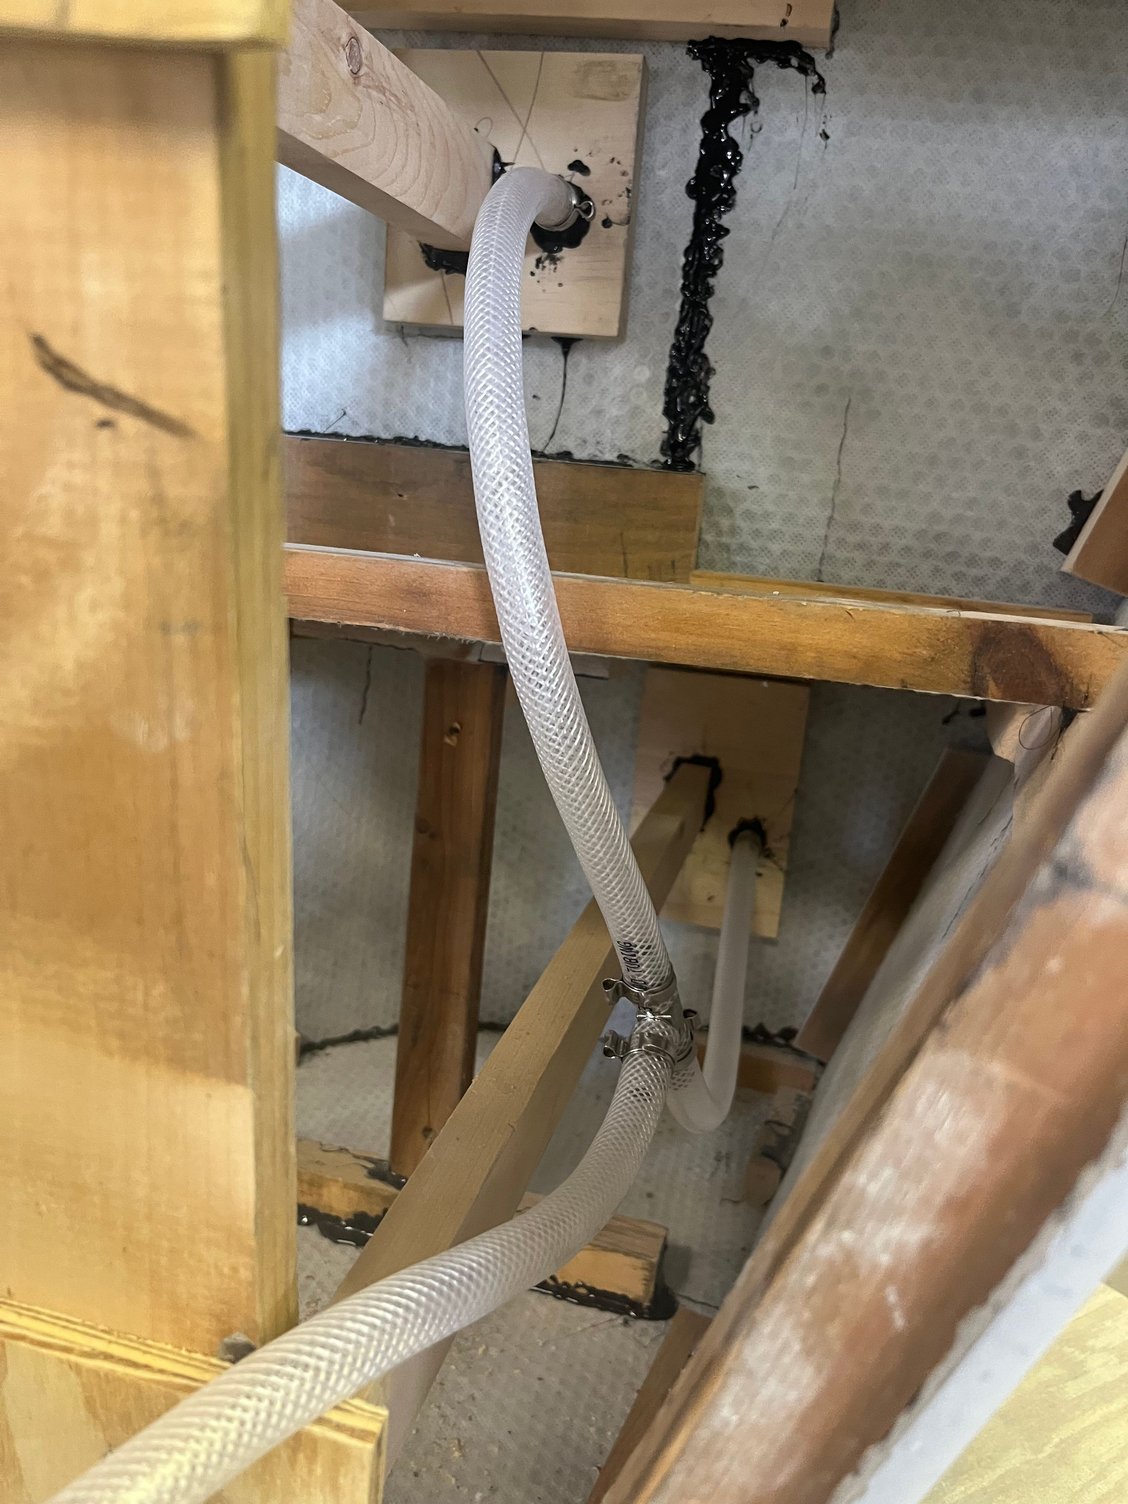
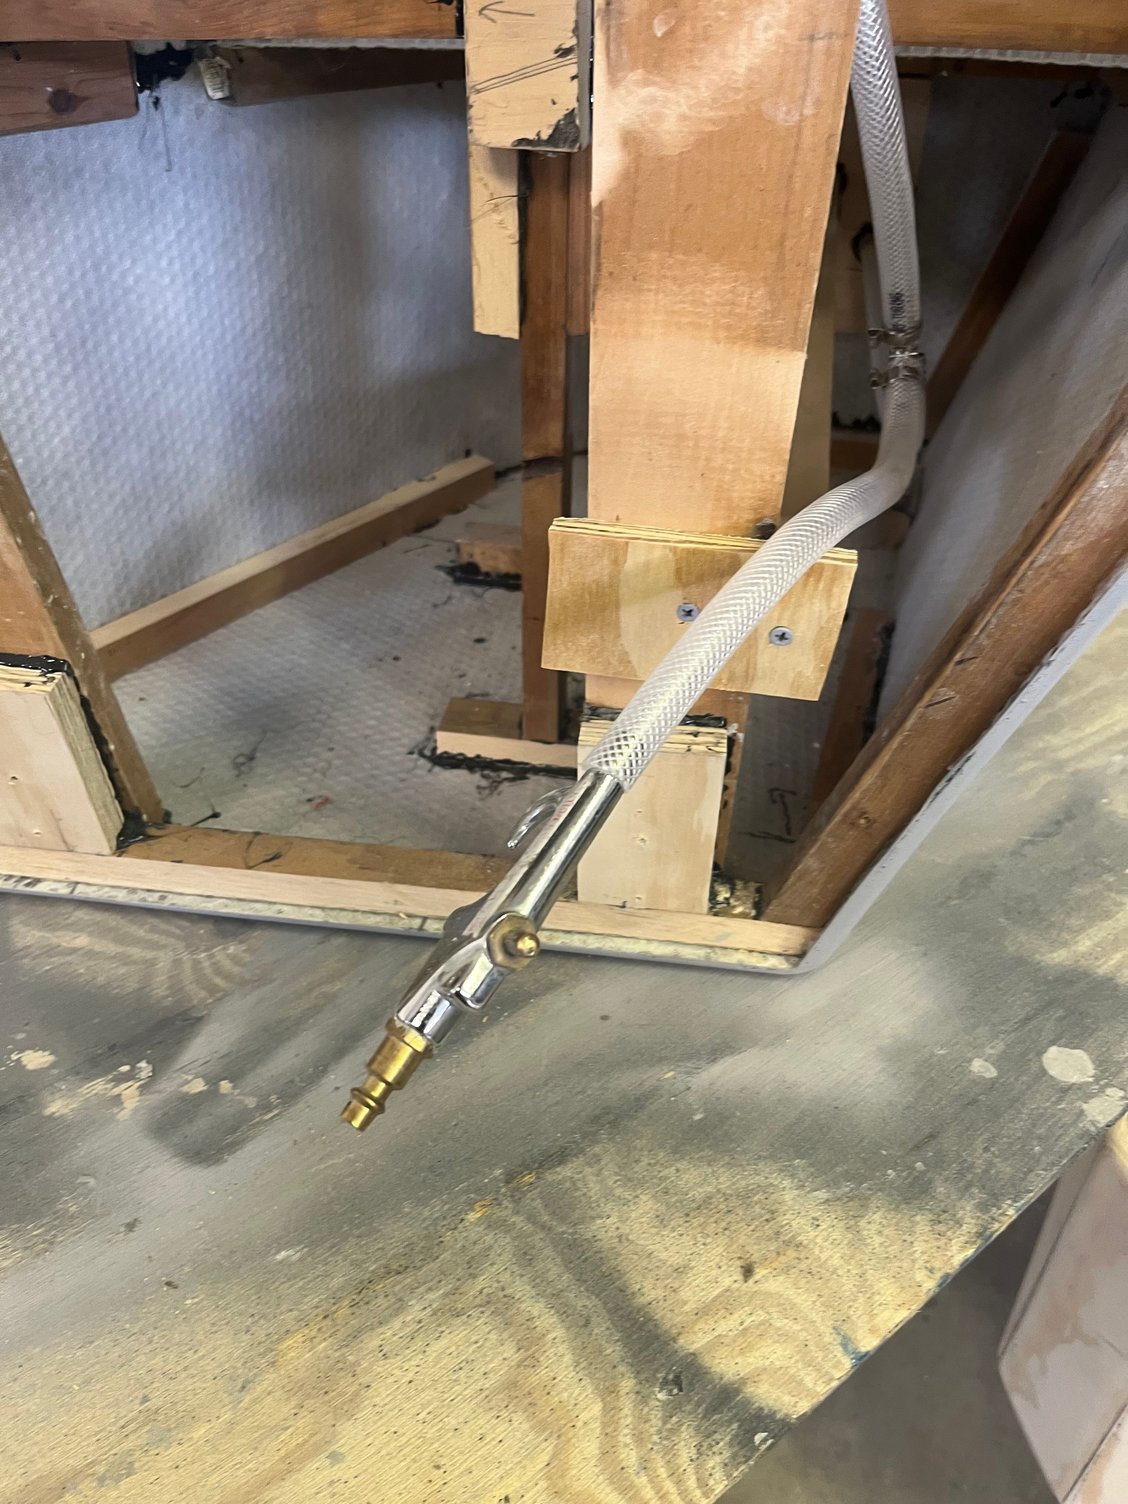
some additional photos of the air lines I installed to aid in part removal. The attached fitting is only used to assist with the plug covers when removing if required. The holes will be taped over when laying up the tank, not the covers which will be a separate layup. Since this is my first endeavor of this scope I wanted to give myself the best chance of having minimal problems. I don’t know what the cost would be if I had someone make them for me.
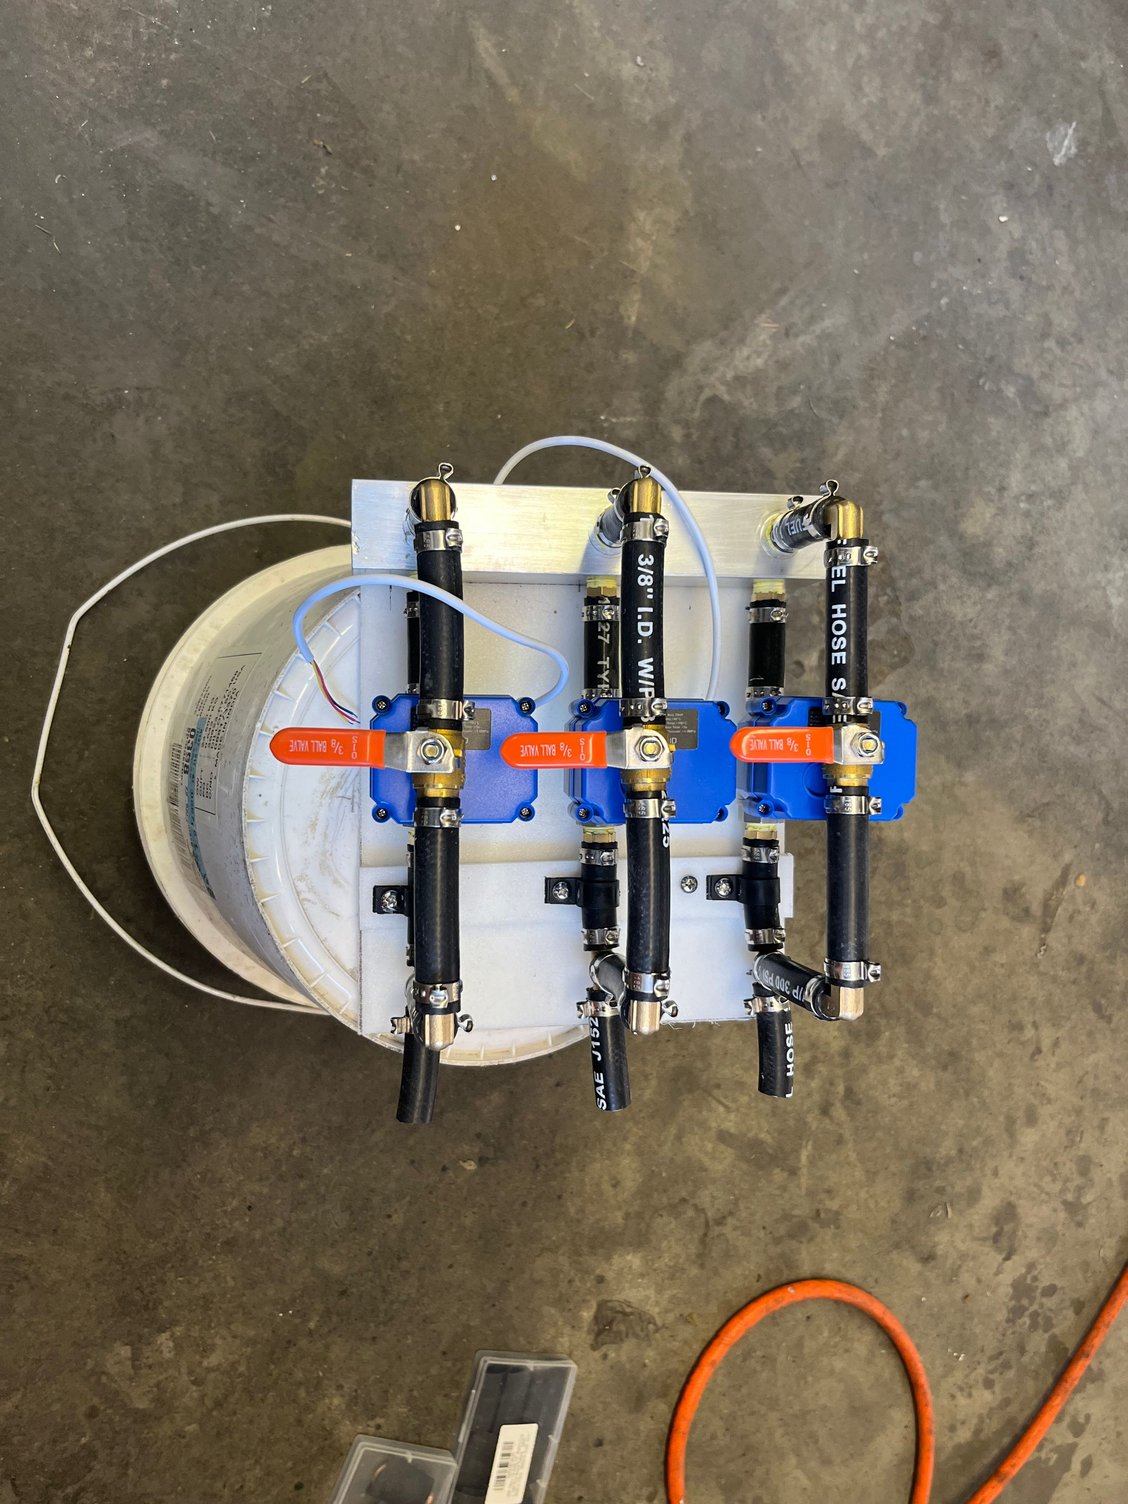
Fuel manifold
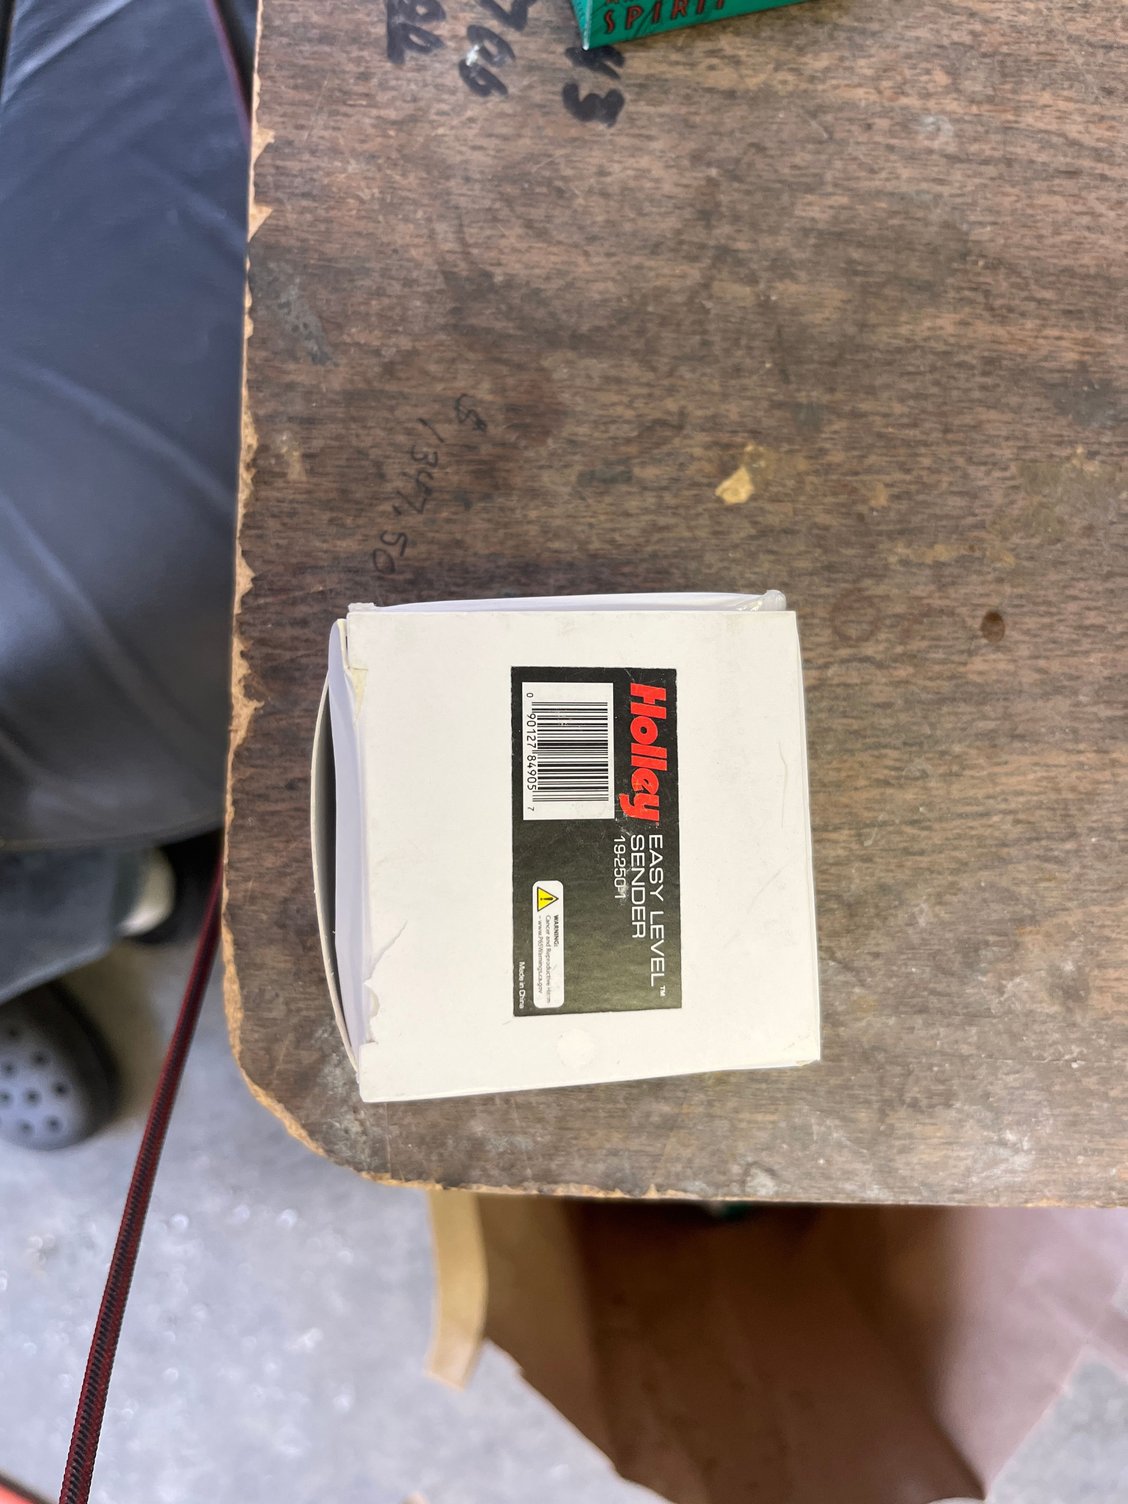
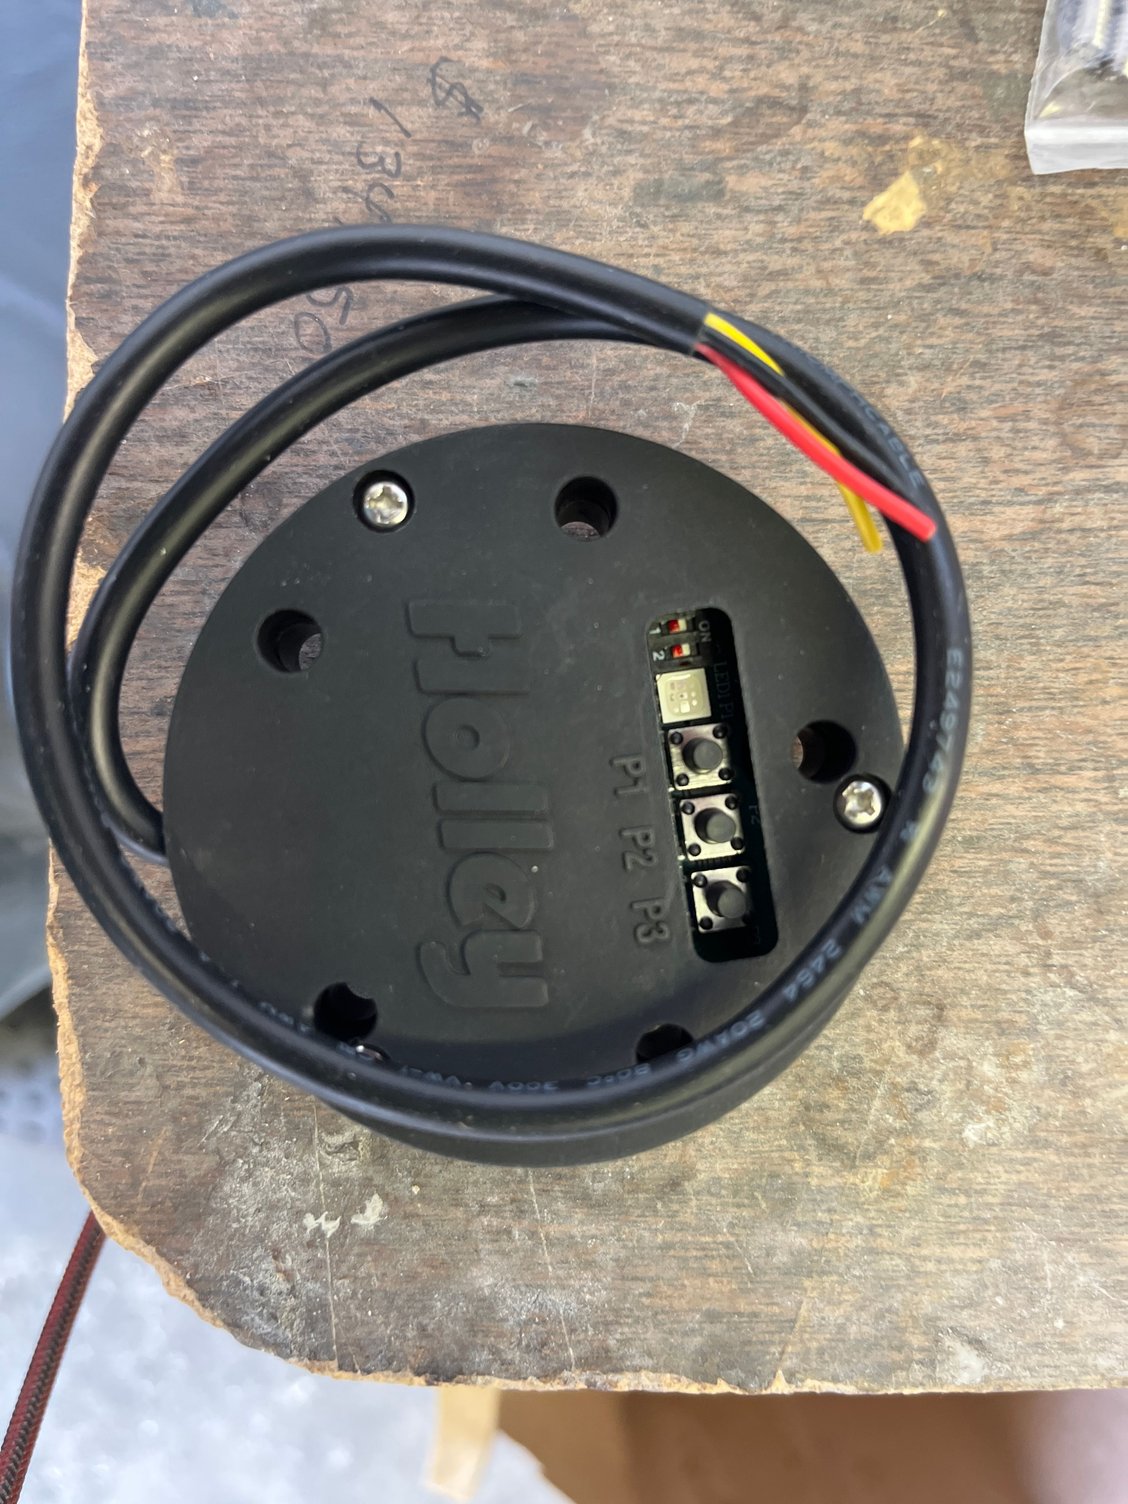
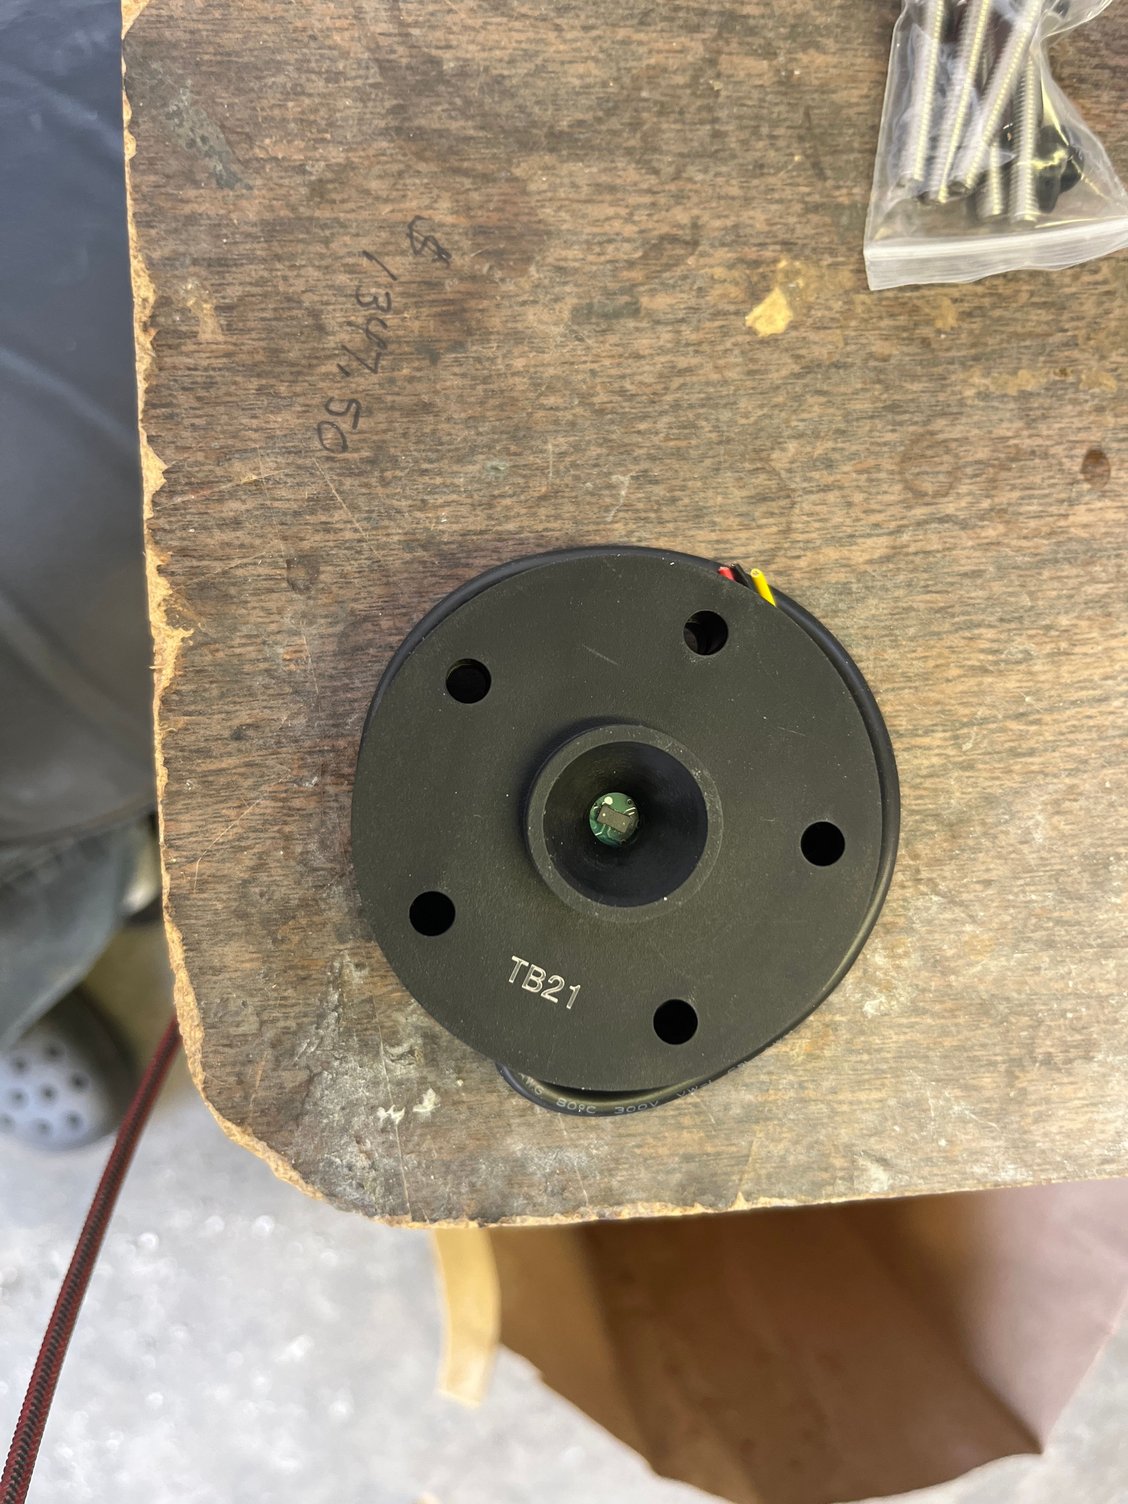
I elected to make a fuel manifold using motorized ball valves to control distribution. These are equipped with manual bypass, easily accessible, in the event of failure. I am installing a second fuel pump for these tanks with crossfeed capabilities between all tanks and both fuel pumps. Since I’ve gone this far I am adding fuel sending units. The geometry of the seat and 2 step tanks do not lend themselves to standard resistance sending units. So I am going to use the Holley lidar easy level.
I calculate an additional 125-120 gallons giving me between 386 and 391 gallons total. The tanks are being constructed to Coast Guard regs relating to fitting placement, baffles, etc.
Hopefully making the tanks in a week or two. Need to make a material list. Anyone need plugs or tanks?
Thanks
constructing. I picked up a CoPart special awhile back and have been going through it. It had twin 275 Verados and now has trip 350 Verados L6’s, 0 hours on rebuilds. I plan on taking the boat offshore and wanted the third motor mostly for redundancy, this boat won’t plane with a single motor and a load. Standard fuel capacity was 261 gallons, 186 main and 75 auxiliary transfer. Not enough even running on 2 for the range I’d like.
So I located 3 areas where I could fit custom sized tanks.
Starboard side seat
Cooler area under seat front of console
Port 2 step to fwd deck
The step and seat areas were hollow and accessible by removing interior cuddy trim panels.
Starboard side
Port side
I foolishly thought initially I would be able to lay up in these areas, impossible for me. So then I figured out that I needed to make plugs. I used 3/8 Nidacore to make the plugs. The 3/8 was flexible enough to conform to the curvature and angles. It was also the maximum thickness the tank walls would be. I expect less than 3/8. The areas were then furred out with 3/8 Nidacore strips and hot glued in. The 3/8 strips would approximate the tank thickness after laying up on the plug. I used some 1” Nidacore on the hull side for a little wiggle room. A temporary floor and bulkhead were added.
Initial
Furred out
Initial plug
The plug was formed using pieces of Nidacore hot glued to themselves with wood blocks, obviously, and not the furred out pieces. It was cross braced for stability.
Removed
All of the plug cornea were cut back 3/4” to allow for fiber strand bondo squared off
I was now able to radius those corners 3/4”
Holes are for air assist when removing part as needed
The Nidacore plugs were skim coated with bondo and primed.
The plugs were gel coated for a hard surface
Cooler tank plug
By now I was sick of Nidacore and bondo so I used some 3/4” plywood for the cooler plug. I had some angle brackets kicking around so I used them so I could knock down the plug from the inside if needed.
some additional photos of the air lines I installed to aid in part removal. The attached fitting is only used to assist with the plug covers when removing if required. The holes will be taped over when laying up the tank, not the covers which will be a separate layup. Since this is my first endeavor of this scope I wanted to give myself the best chance of having minimal problems. I don’t know what the cost would be if I had someone make them for me.
Fuel manifold
I elected to make a fuel manifold using motorized ball valves to control distribution. These are equipped with manual bypass, easily accessible, in the event of failure. I am installing a second fuel pump for these tanks with crossfeed capabilities between all tanks and both fuel pumps. Since I’ve gone this far I am adding fuel sending units. The geometry of the seat and 2 step tanks do not lend themselves to standard resistance sending units. So I am going to use the Holley lidar easy level.
I calculate an additional 125-120 gallons giving me between 386 and 391 gallons total. The tanks are being constructed to Coast Guard regs relating to fitting placement, baffles, etc.
Hopefully making the tanks in a week or two. Need to make a material list. Anyone need plugs or tanks?
Thanks


