

XR Drive Upper Shims & Backlash
 09-01-2021 | 03:01 PM
#1
Thread Starter
Registered

Joined: Mar 2002
Posts: 225
Likes: 23
Hi all,
I'm just rebuilding my new style XR upper due to some water getting in and damaging the bearings, however I'm waiting on the new service manual or supplement #28 to arrive (on order). (I've only got the older pre-2000 service manual at the moment)
I've got most of the tools either already here or on order, but I'm not sure what tools I need to correctly shim it - it doesn't have the stamped shim sizes on it, it's newer than that.
I've measured the existing shims which I'll replace - but I'm sure it's good practice to check/adjust the clearances while I'm rebuilding.
Would someone be kindly able to:
1. Give me a quick summary of how you set the clearances/backlash on an XR upper just for my understanding until the book arrives.
2. Let me know what additional tools are required to do this.
Thank you
Matt
 09-01-2021 | 10:20 PM
#2
VIP Member
Joined: Nov 2002
Posts: 4,181
Likes: 334
From: ankeny,ia.
I’ll try to make this quick
1. Set the pinion depth with the pinion height tool, use the 16/19 position
you’re aiming for .025. They recommend starting with a .035 shim
2. You’ll need a dial indicator and the shaft/tool that goes through the pinion
gear, the flag( hose clamp with a tab attached to it) that goes on the shaft
and the tool the goes through the upper case stud holes which you’ll attach the dial
indicator to and the tool to clamp to the driven gear.
assemble and install the driven gear assy and thrust races and bearings,
install the pinion, set up the dial indicator on the middle stud hole,
install the flag on the shaft, move the shift cone so it’s on the upper
gear, take the clamp tool, clamp it to the cup on the bottom driven gear,
rotate it over til it makes contact with the inside edge of the case,
set the flag at the 12 o’clock position, set up the dial indicator to
contact the flag, hold the clamp tool so that it’s against the case, and don’t let it move,
rotate the pinion shaft and note the amount of movement on the dial indicator
spec is .009-.015
Thicker shims reduce clearance, thinner increases it
Shift the cone to the bottom gear and do the same procedure to the top gear
Last edited by JaayTeee; 09-02-2021 at 06:02 AM.
09-02-2021 | 08:38 AM
#5
Gold Member

Joined: Jul 2008
Posts: 3,748
Likes: 869
From: Delray Beach, FL
Good luck MadMat, JayTee and I have many years of spirited conversations on the affinity we have for the Bravo platform... He knows what the fk he is talking about.
This is what comes to mind when you speak of a shim in a Bravo as I shake my head in misery and exhaustion:
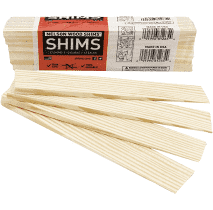
This is what comes to mind when you speak of a shim in a Bravo as I shake my head in misery and exhaustion:
09-02-2021 | 08:49 AM
#6
Thread Starter
Registered
Joined: Mar 2002
Posts: 225
Likes: 23
OSO is still the go to place to find the real gurus. I appreciate the assistance.
Since my original post, have managed to find a supplement 28 that has the shimming instructions & tools list in.
Just giving it another 48 hours to see if I can find a brand new or nearly new upper for a good price - and if nothing comes up, I'll pull the trigger on the parts..
Does Mercury have stock of the XR upper gears & bearings at the moment or are they waiting for manufacturers to catch up as so many companies are?
Last edited by MadMat; 09-02-2021 at 08:53 AM.


