well it has begun (transom replacement)
#21
Registered
Thread Starter
Join Date: May 2010
Location: Hernando, Fl
Posts: 129
Likes: 0
Received 0 Likes
on
0 Posts
c deezy i was using screwdrivers and prybars on the foam at first... i am telling you, wire wheel is the way to go. i kid you not, i pried and prodded on one side for 15 minutes and got about 1 /2 the foam out, then got the wire wheel out for the rest. on the other side i had ALL the foam out in less than 5 minutes. its amazing how fast it eats the foam!!
jeff-got the pm and will check it out, thanks!!
jeff-got the pm and will check it out, thanks!!
#23
Registered
Thread Starter
Join Date: May 2010
Location: Hernando, Fl
Posts: 129
Likes: 0
Received 0 Likes
on
0 Posts
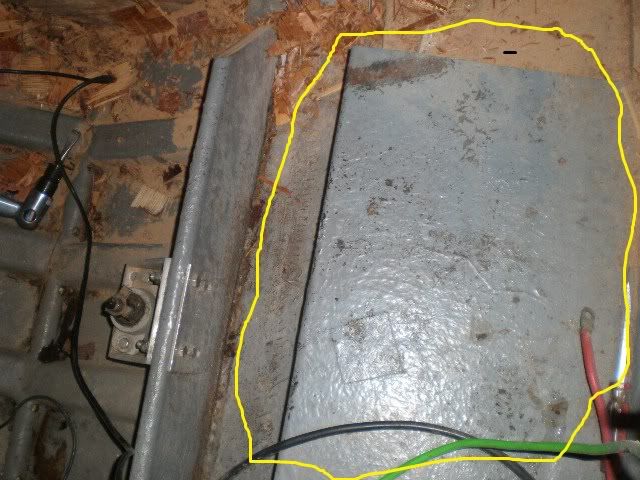
this is the area that i am calling the "box". I am sure that isnt its technical name but thats what it is!!! a box!! its where the batts, pumps, etc. mount. inside of them is foam and what appears to be a small (1" tall stringer)

well today was supposed to be 100% boat all day, but the dog needed to go to the vet. and had to deal with work off and on about a spontaneous trip to the oil affected areas the next few days (my trip for thurs -sat was bumped up to tomorrow).
Well i finished getting out all the precut squares with the air hammer. Only have abou 3/8" left until bare fiberglass. This is DEFFINATLY the most tedious part of the whole process!! I am completely avoiding the totally rotten areas because i want to save them for last (for some instant gratification)!!

now all i have to do is find the charger for the cordless circular saw (since i feel like i could go through the back wall too easy with a 110v circular saw. Then i will cut smaller squares 3/8" deep and repeat process. Sand it all down, throw the new transom in and be at the lake!!!

well today was supposed to be 100% boat all day, but the dog needed to go to the vet. and had to deal with work off and on about a spontaneous trip to the oil affected areas the next few days (my trip for thurs -sat was bumped up to tomorrow).
Well i finished getting out all the precut squares with the air hammer. Only have abou 3/8" left until bare fiberglass. This is DEFFINATLY the most tedious part of the whole process!! I am completely avoiding the totally rotten areas because i want to save them for last (for some instant gratification)!!

now all i have to do is find the charger for the cordless circular saw (since i feel like i could go through the back wall too easy with a 110v circular saw. Then i will cut smaller squares 3/8" deep and repeat process. Sand it all down, throw the new transom in and be at the lake!!!
#27
Registered
Thread Starter
Join Date: May 2010
Location: Hernando, Fl
Posts: 129
Likes: 0
Received 0 Likes
on
0 Posts
i know its more than i was planning!! lets see...
fiberglass/resin/brushes/buckets/shipping = 350
ext grade ply (2 sheets) = 80
new transom seal and anodic bolt kit/ shipping = 58
shift cable/ outdrive seals = 50
respirator = 30
misc sandpaper / grinding discs = 25ish
alignment tool = 40
so it looks like around 600. i was hoping to get out for about 400, but it is what it is!!!
#28
Registered
Thread Starter
Join Date: May 2010
Location: Hernando, Fl
Posts: 129
Likes: 0
Received 0 Likes
on
0 Posts
HOLY COW!! this last 3/8" of wood is a total PITA!! I think after this project is over I am going to look into creating some kind of rot inhibitor that you can apply to the wood in there that would make it rot in a few days or something. The rotten wood is a piece of cake to remove, the good wood is.....not. I have about 50/50.
#30
Registered
Thread Starter
Join Date: May 2010
Location: Hernando, Fl
Posts: 129
Likes: 0
Received 0 Likes
on
0 Posts
unfortunatly most fabrication i do is metal working so I dont have any wood working tools. I have heard that those work well but dont think i can justify the $$ since this is likely the only time i would use it.
I have about 10-15% of the good wood completely removed now, the best method seems to be a 36grit flap wheel on a side grinder. i also tried a cordless circular saw (for more control over depth due to weight) to cut more squares. Then I chiseled those out with the air hammer. That worked well but the quality of the saw shined through when the battery was dead after several cuts
I have about 10-15% of the good wood completely removed now, the best method seems to be a 36grit flap wheel on a side grinder. i also tried a cordless circular saw (for more control over depth due to weight) to cut more squares. Then I chiseled those out with the air hammer. That worked well but the quality of the saw shined through when the battery was dead after several cuts


