

Widebands and sensor location
 07-03-2018 | 07:57 PM
#31
Thread Starter
Registered

Joined: Aug 2013
Posts: 24
Likes: 0
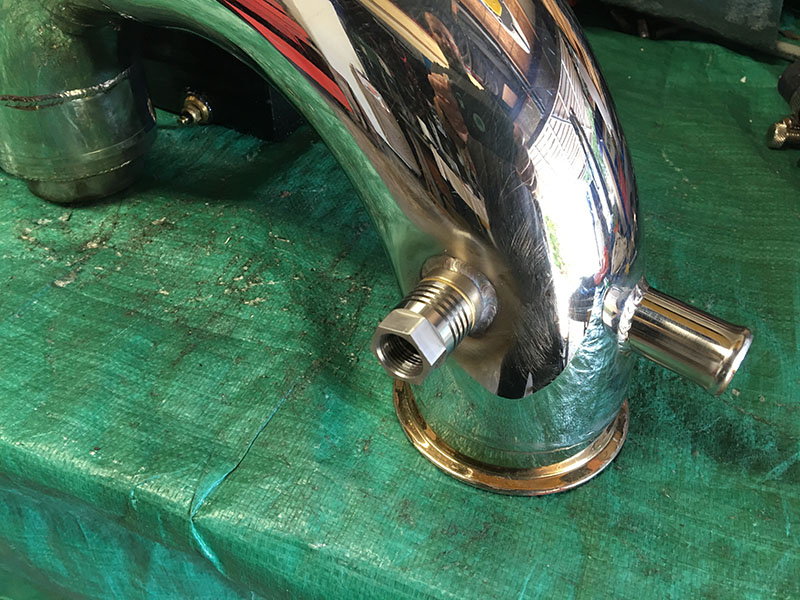
Well I finished the bung mod. I thought I'd share some images of the process, which could help others down the line.
I did a similar technique as was suggested here.
How to install oxygen sensor bungs.
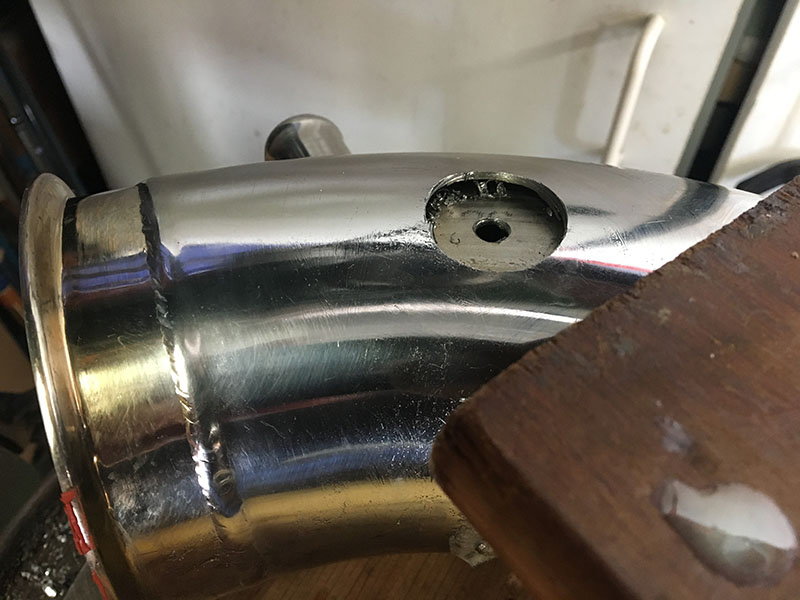
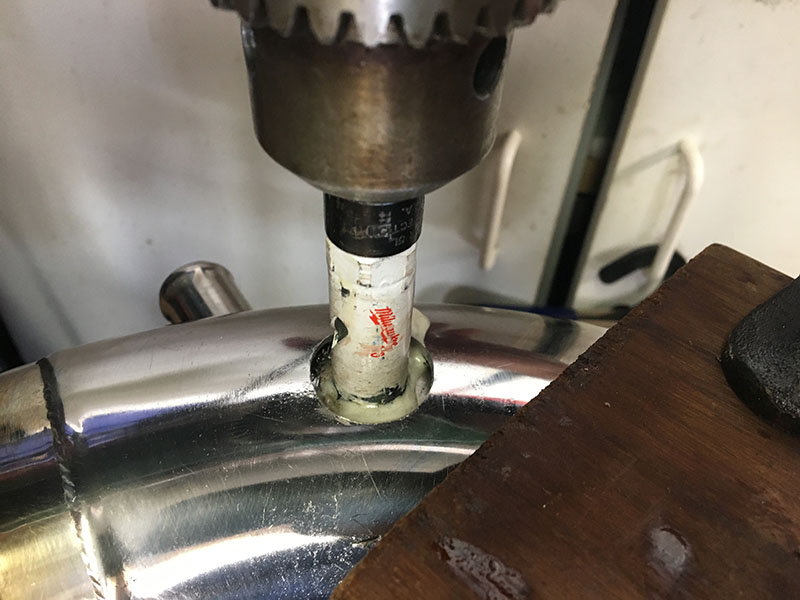
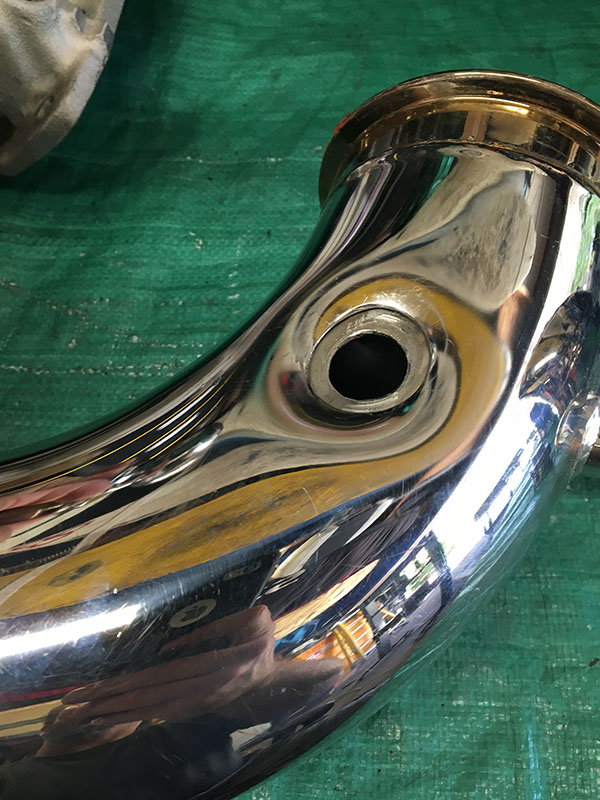
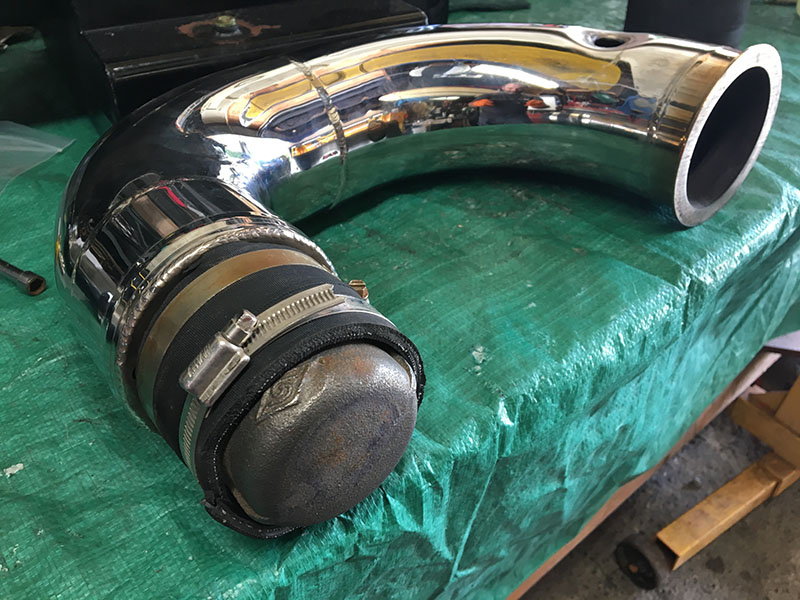
I first marked where the sensors would sit so they would clear the valve covers, then drilled an 1 1/4" hole through the outer pipe, then a 3/4" hole through the inner pipe. I drilled two different holes to allow easier welding of the two walls. And the holes drill like butter with standard bi-metal hole saws, cutting fluid, low rpm drill press and lots of pressure. Each hole took about 15 sec.
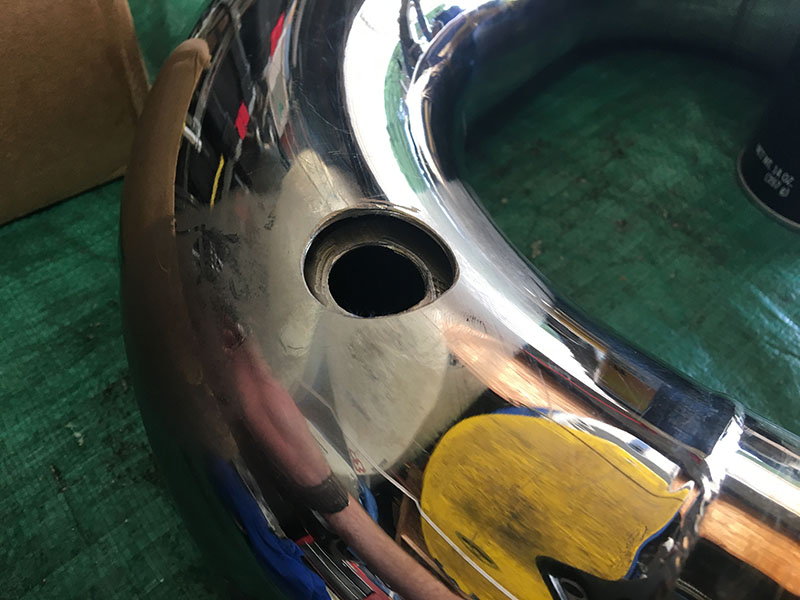
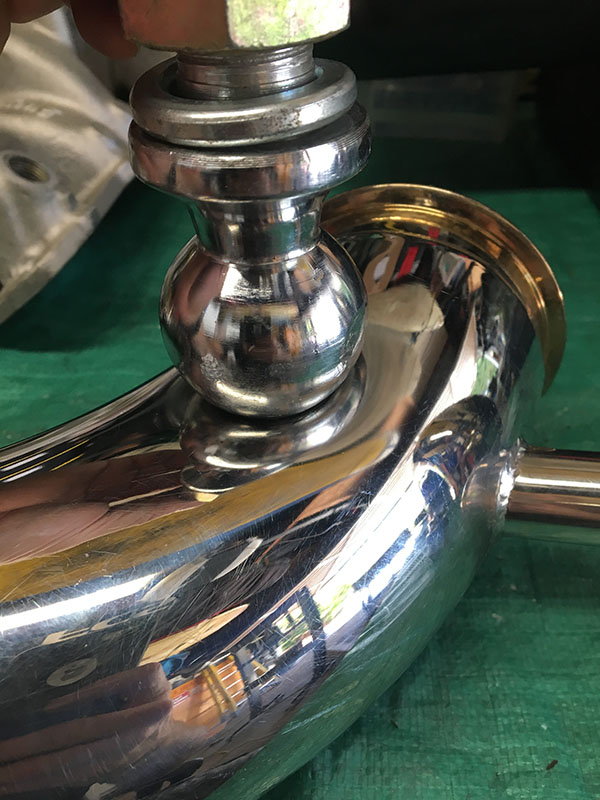
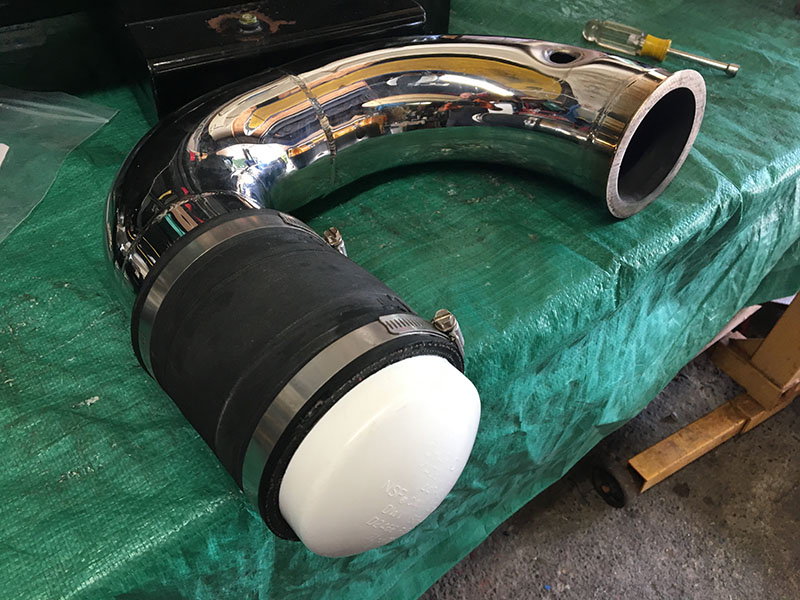
Next step was to "dimple" the outer pipe. There was about a 1/4"+ between the outer and inner pipe so I had a ways to bend the outer pipe in. Given the size of the 1 1/4" hole, I used a 2" trailer ball and my hydraulic press, much easier then trying to beat it in with a sledge.
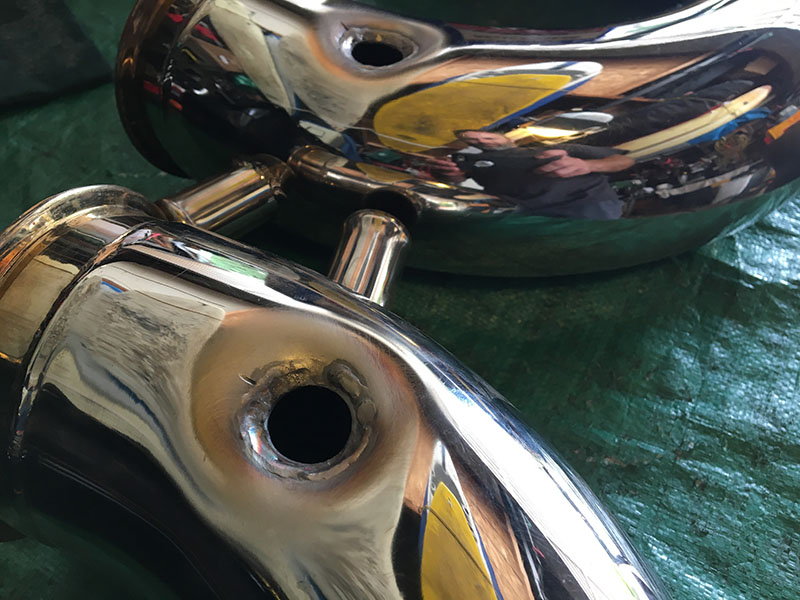
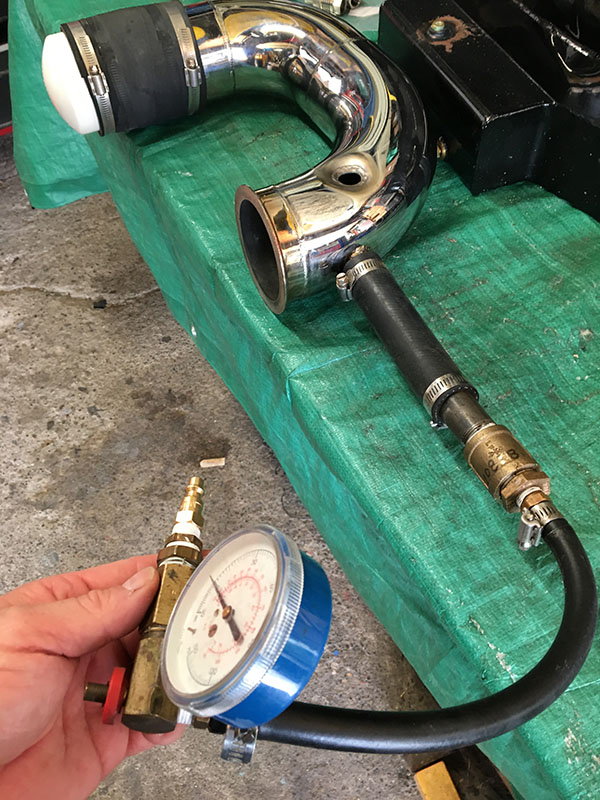
Once both risers were "dimpled" I took them to a welder friend which took him 15 min to weld the inner and outer pipes. Then took them home and pressure tested, all good. But I had to get creative to seal off the inner and outer pipes, but it worked.
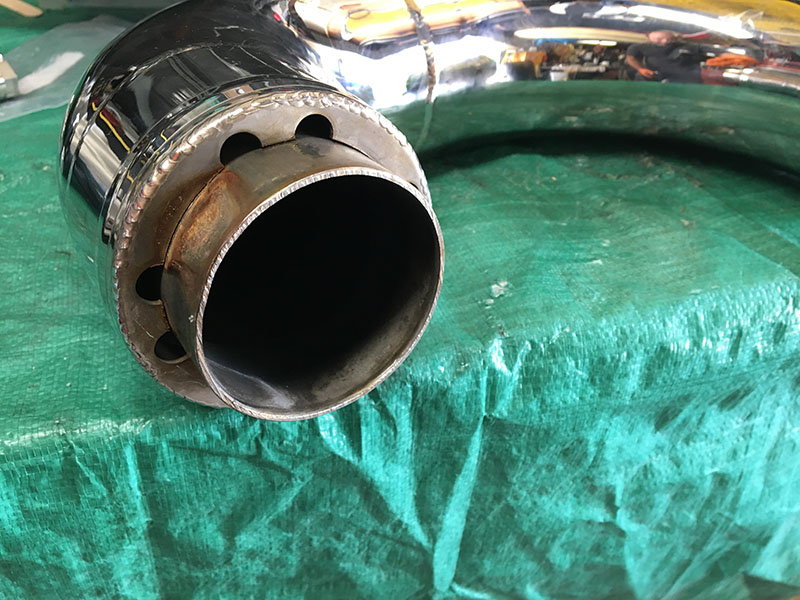
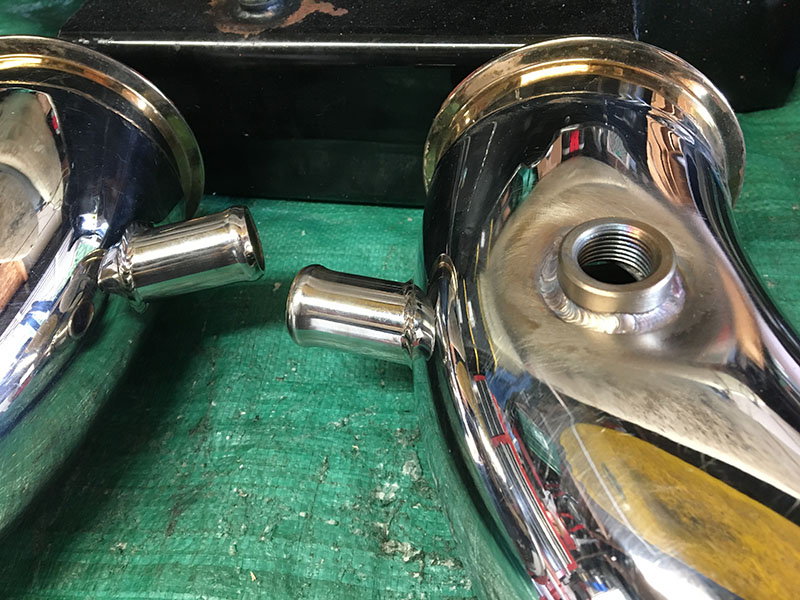
Next I prepped the bungs. I decided to use the Innovate heat sinks, so I installed the heat sinks in the bungs, tight, and then placed them on each riser so the heat sink holes were facing the right direction (into the exhaust flow). Marked the placement of each one and then beveled the bungs accordingly to fit over the welds so the bungs sits square and also so the heat sink hole protrudes far enough into the exhaust.
Then took the the risers and bungs back to the welder and 20 min later voila!
See images below of the process. Hope this helps someone like the advise I was given by other posts/posters help me, and gave me direction.
Jim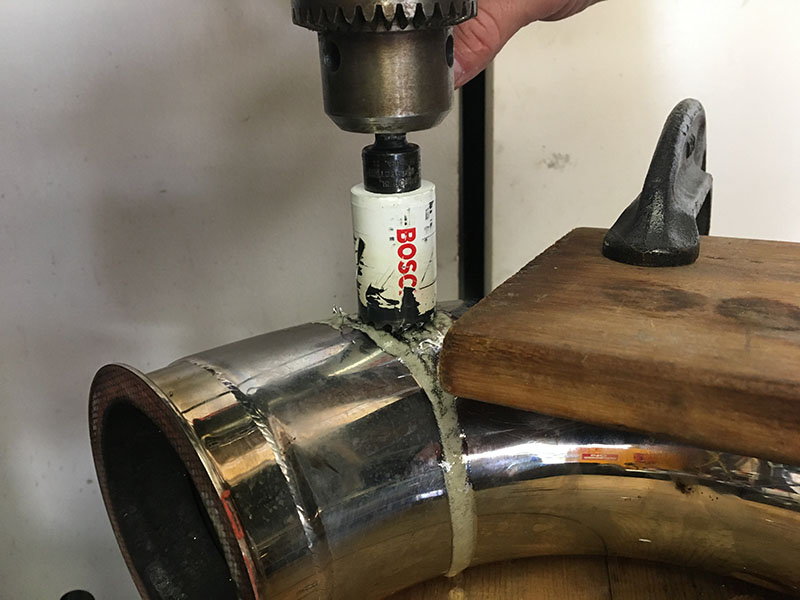
I did a similar technique as was suggested here.
How to install oxygen sensor bungs.
I first marked where the sensors would sit so they would clear the valve covers, then drilled an 1 1/4" hole through the outer pipe, then a 3/4" hole through the inner pipe. I drilled two different holes to allow easier welding of the two walls. And the holes drill like butter with standard bi-metal hole saws, cutting fluid, low rpm drill press and lots of pressure. Each hole took about 15 sec.
Next step was to "dimple" the outer pipe. There was about a 1/4"+ between the outer and inner pipe so I had a ways to bend the outer pipe in. Given the size of the 1 1/4" hole, I used a 2" trailer ball and my hydraulic press, much easier then trying to beat it in with a sledge.
Once both risers were "dimpled" I took them to a welder friend which took him 15 min to weld the inner and outer pipes. Then took them home and pressure tested, all good. But I had to get creative to seal off the inner and outer pipes, but it worked.
Next I prepped the bungs. I decided to use the Innovate heat sinks, so I installed the heat sinks in the bungs, tight, and then placed them on each riser so the heat sink holes were facing the right direction (into the exhaust flow). Marked the placement of each one and then beveled the bungs accordingly to fit over the welds so the bungs sits square and also so the heat sink hole protrudes far enough into the exhaust.
Then took the the risers and bungs back to the welder and 20 min later voila!
See images below of the process. Hope this helps someone like the advise I was given by other posts/posters help me, and gave me direction.
Jim


