

1977 24-7 pantera restoration
 06-10-2013 | 11:24 AM
#81
Thread Starter
Gold Member

Joined: Sep 2011
Posts: 2,643
Likes: 18
From: cleveland ohio
When the deck was originally installed there was no deck/floor to stringer/hull bonding. After I cut the floor out I decided I wanted to bond the hull/stringers to the re-installed floor. To this end I decided to install two small stringers near the hard chime and directly under the floor seam I made when I cut the floor out.
The new stringers were bonded to the hull then the deck was glassed to the stringer and then the floor was bonded and glassed in.
Also, I glassed in another layer of 3/4 plywood on the bottom side of the floor where the pedestal seats get mounted. There was no issue with the bases being compromised but I figured 2" of substrate was better than 1" to lag screw the seat bases back to.
Here are some pics of the new stringers and the additional floor "meat".
 06-30-2013 | 07:30 PM
#82
Thread Starter
Gold Member
Joined: Sep 2011
Posts: 2,643
Likes: 18
From: cleveland ohio
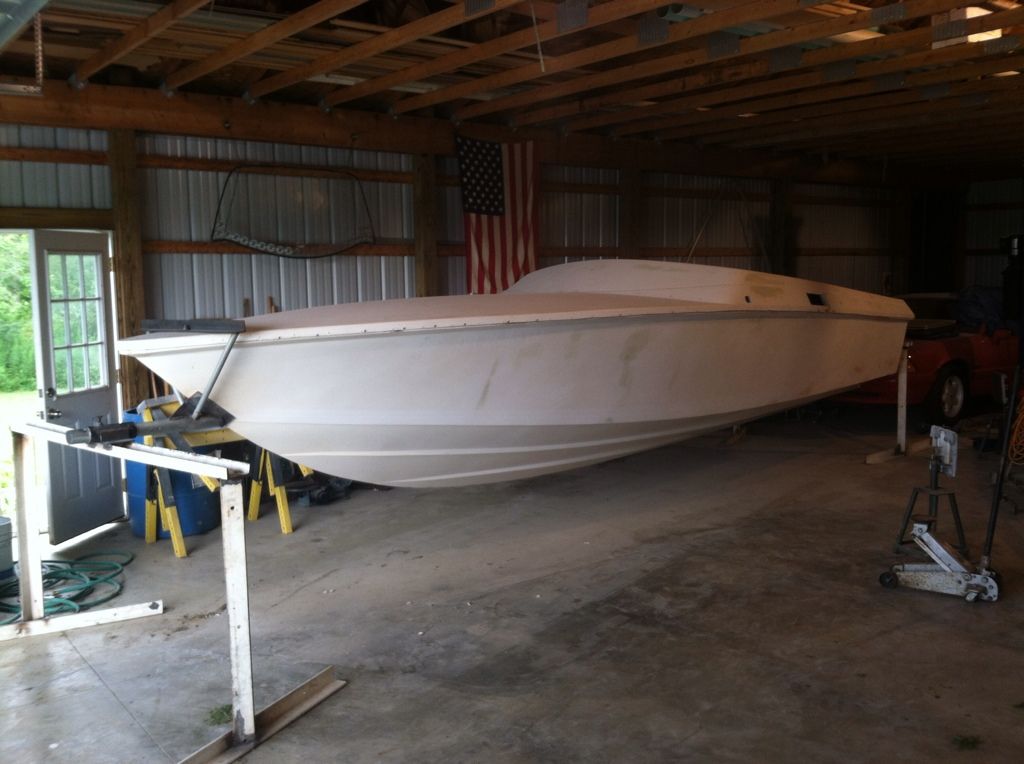
Got the floor back in and started the gelcoat process in the bilge. I'm going for a smooth finish in the bilge so it requires a ton of sanding and blending. This is the waxed gel that I used a "dump" gun to blow in. It was tricky to get the hang of but it will be worth it in the end.
Here's a pic:
Here's a pic:
07-03-2013 | 05:34 AM
#83
Registered
Joined: May 2006
Posts: 420
Likes: 0
From: Cape Cod
When the deck was originally installed there was no deck/floor to stringer/hull bonding. After I cut the floor out I decided I wanted to bond the hull/stringers to the re-installed floor. To this end I decided to install two small stringers near the hard chime and directly under the floor seam I made when I cut the floor out.
The new stringers were bonded to the hull then the deck was glassed to the stringer and then the floor was bonded and glassed in.
Also, I glassed in another layer of 3/4 plywood on the bottom side of the floor where the pedestal seats get mounted. There was no issue with the bases being compromised but I figured 2" of substrate was better than 1" to lag screw the seat bases back to.
Here are some pics of the new stringers and the additional floor "meat".
The new stringers were bonded to the hull then the deck was glassed to the stringer and then the floor was bonded and glassed in.
Also, I glassed in another layer of 3/4 plywood on the bottom side of the floor where the pedestal seats get mounted. There was no issue with the bases being compromised but I figured 2" of substrate was better than 1" to lag screw the seat bases back to.
Here are some pics of the new stringers and the additional floor "meat".
Great job, by the way. I'll be interested to see how this turns out when you're done.


 08-02-2013 | 04:38 PM
#85
Thread Starter
Gold Member
Joined: Sep 2011
Posts: 2,643
Likes: 18
From: cleveland ohio
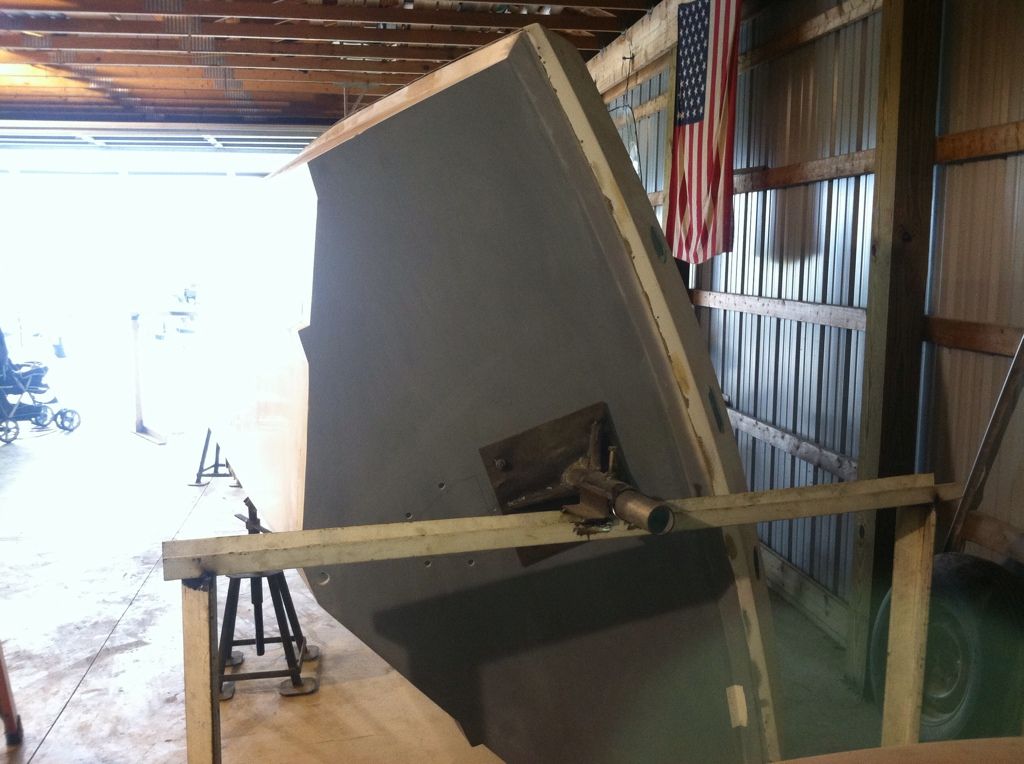
On the rotisserie. This thing is as stiff as a wedding dick. I have the pivot a tiny bit too high so I can only swing it 90 degrees by myself. With a helping hand it should flip right over.

 08-03-2013 | 12:26 AM
#88
Platinum Member

Joined: Jan 2007
Posts: 2,242
Likes: 264
From: Jackson, n.j. ~ Brooklyn, n.y.
Vintage Chromoly........I've seen alot of methods to rotate a boat from a stationary position, but that's ingenuous!..........what gauge steel is that?
If I didn'e see it already half rotated I would have thought you would need bracing at the corners of the rotisserie frame so she won't pitch.
If I didn'e see it already half rotated I would have thought you would need bracing at the corners of the rotisserie frame so she won't pitch.
08-03-2013 | 06:09 AM
#89
Thread Starter
Gold Member
Joined: Sep 2011
Posts: 2,643
Likes: 18
From: cleveland ohio
Thanks Tim!
Scippy, the steel is 1/2 inch "c" channel. As I was building it I thought I would need angle braces as well but, the steel is so thick and stiff none were necessary. I can shake the boat with all my strength and it doesn't even flex.
The funny thing is that when I'm done with the rotisserie, I'll probably burn it apart and scrap the steel. I got all the steel from a demolition job at work so I have only welding wire and argon gas invested in the thing.
Maybe I'll try to give it away first. He back stand will fit any bravo drive boat but he front mount it custom for my hull. I'm sure someone could modify it to work on another boat so maybe I can pass it along to the next guy.
Thanks to all who are following this grand experiment I call a hobby.
08-03-2013 | 11:40 PM
#90
Platinum Member
Joined: Jan 2007
Posts: 2,242
Likes: 264
From: Jackson, n.j. ~ Brooklyn, n.y.
VC,
At some point I intend to blue-print the hull bottom on the 27' sport before she's rigged. I have the advantage right now (like you I think) of a bare hull.
I can't see myself on my back on a creeper undertaking a task like that. I'm sure it's down all the time, but not for me. I have the room and the shop to
this in I just gotta believe...........Don't know how much your boat weighs, but mine seems like stone henge!

