

93 Mirage 232 Trovare build
 05-10-2014 | 08:44 PM
#91
Thread Starter
Banned
Joined: Jun 2013
Posts: 1,014
Likes: 0
From: AZ
Finally doing the fun stuff.

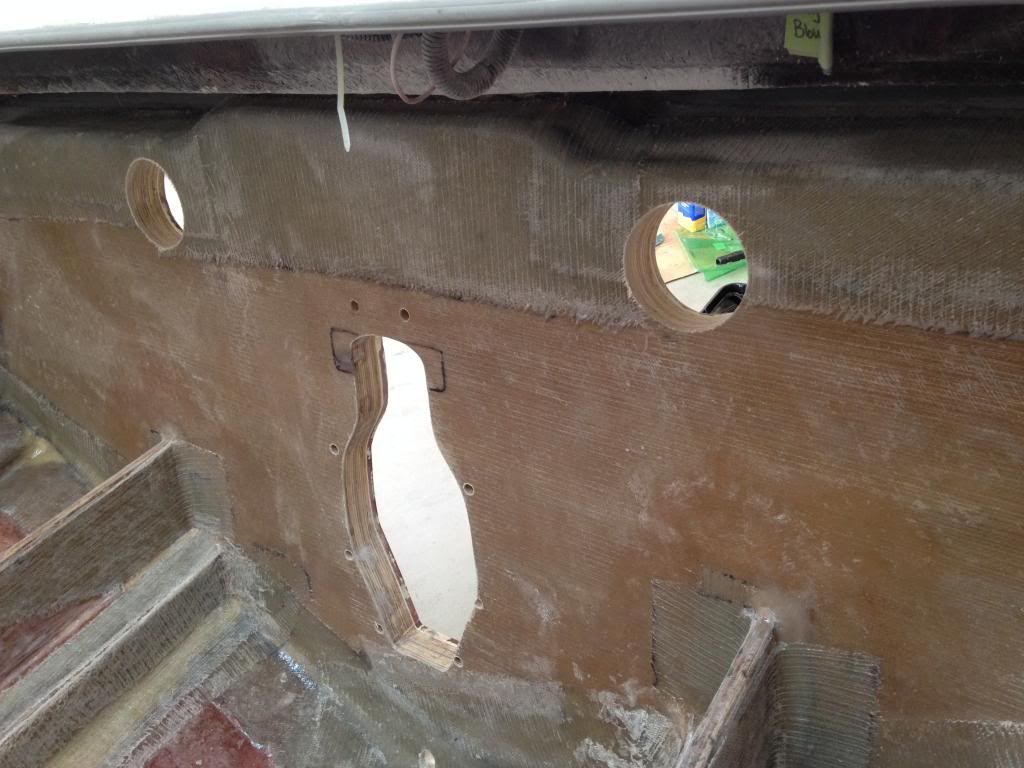

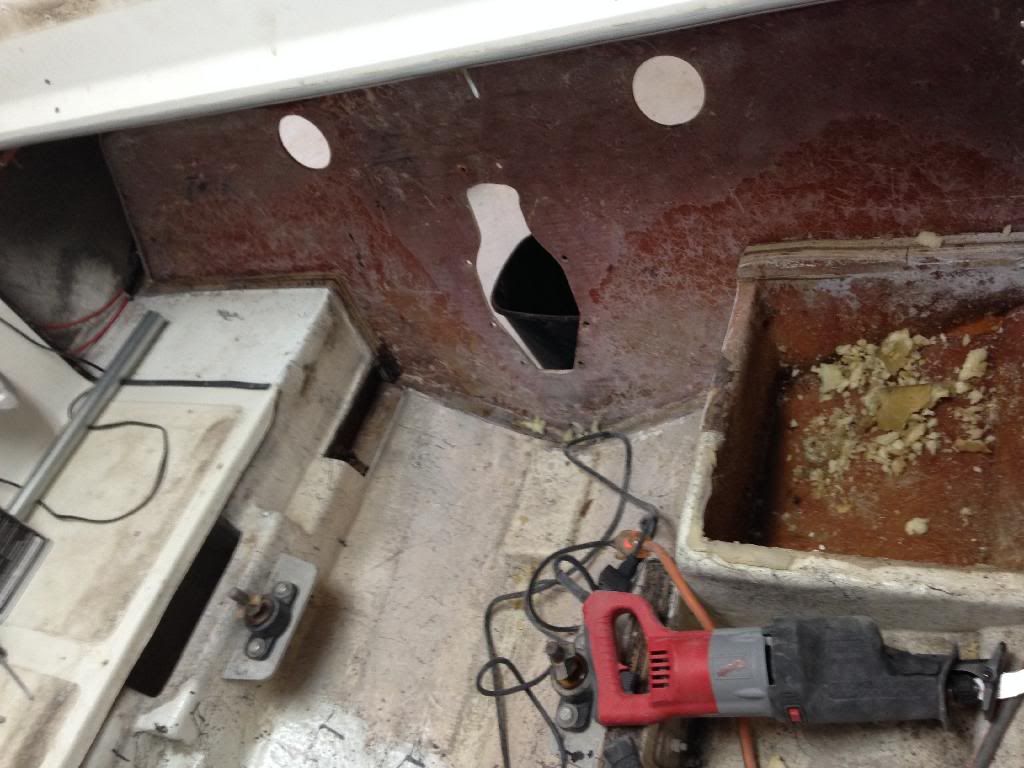
Cut the holes for exhaust and gimbal assembly and sealed with resin. Used 1708 on the outdrive cutout. I'm really loving 3M Corebond for making all my fillets. Did some wet layups and if timed right, is obviously the only way to roll.
You can see that wood is no longer surrounding the drain plug, instead pure corebond with PVC pipe bonded in. Going to seal the drain housing with 4200.
Put down one initial coat or VE prior to laying 1708. Very pleased with the way this transom turned out!

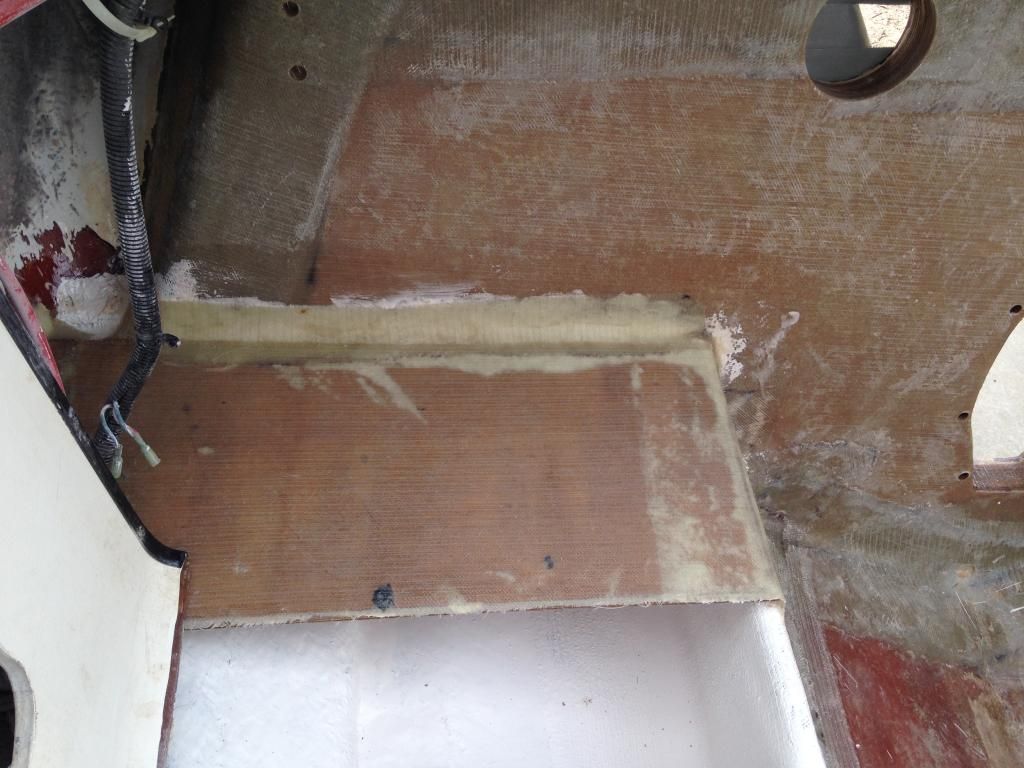
You can see the fillet work I rubbed by fingers raw sanding perfect. When you do longer sections all the fillet work is well worth it. You don't want air pockets! Note that this is the opposite side and just prior to placing full overlays of 1708.
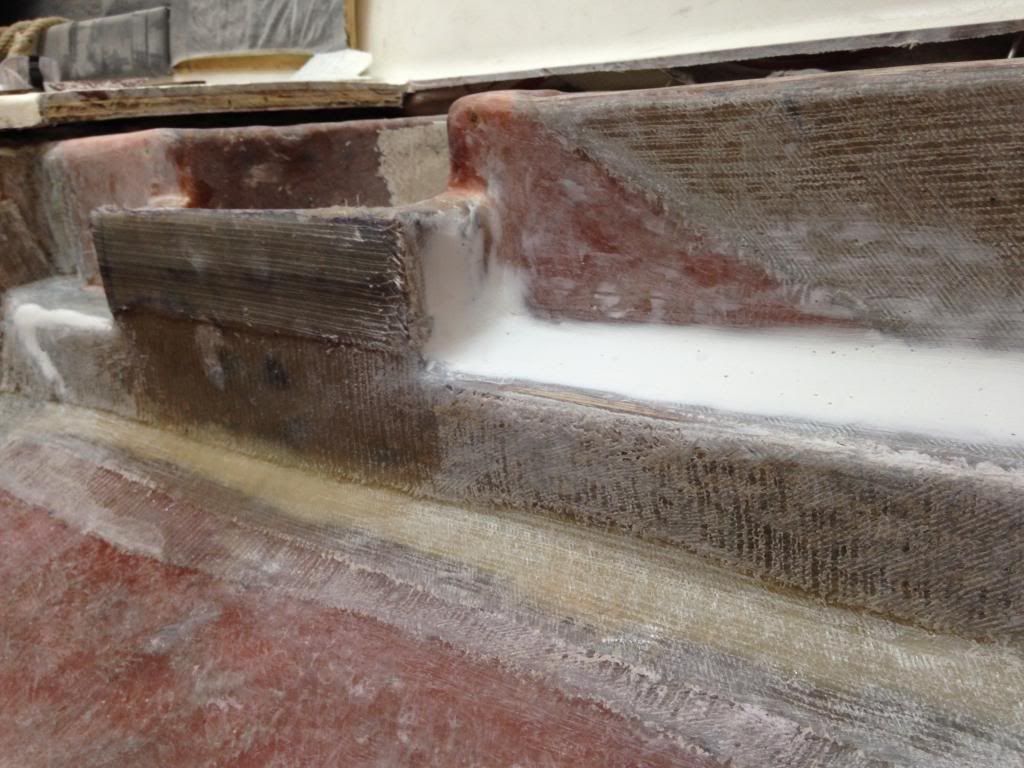
Here's the fillet prior to overlay with 1708.
This is the opposite side but you get the idea
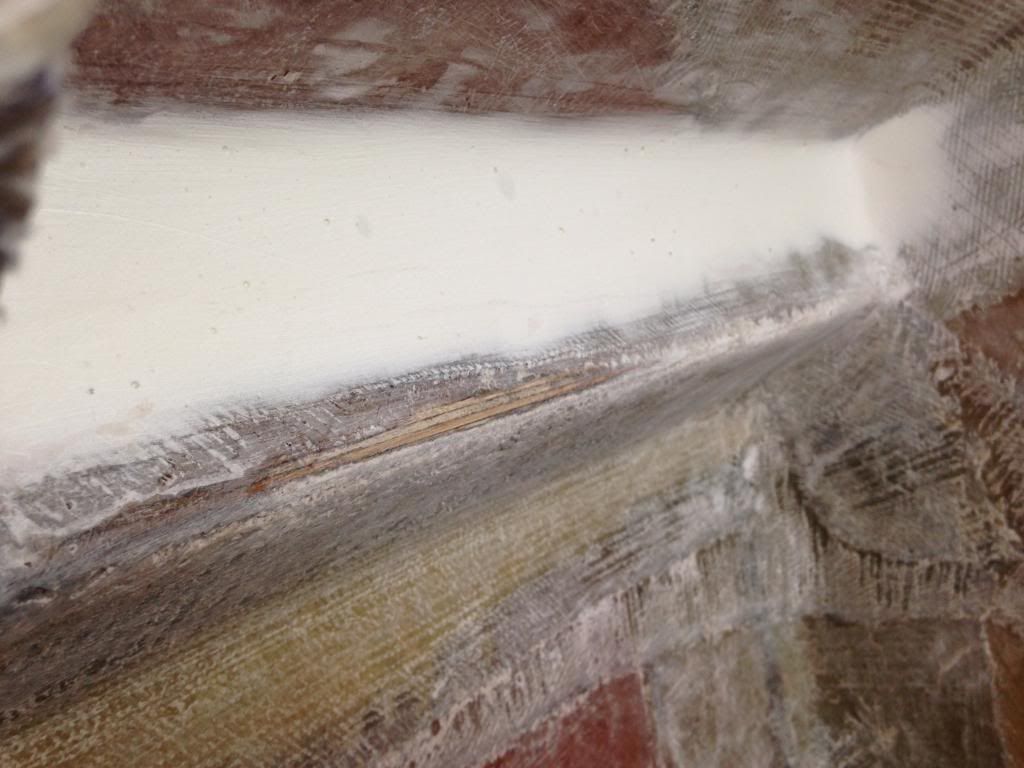
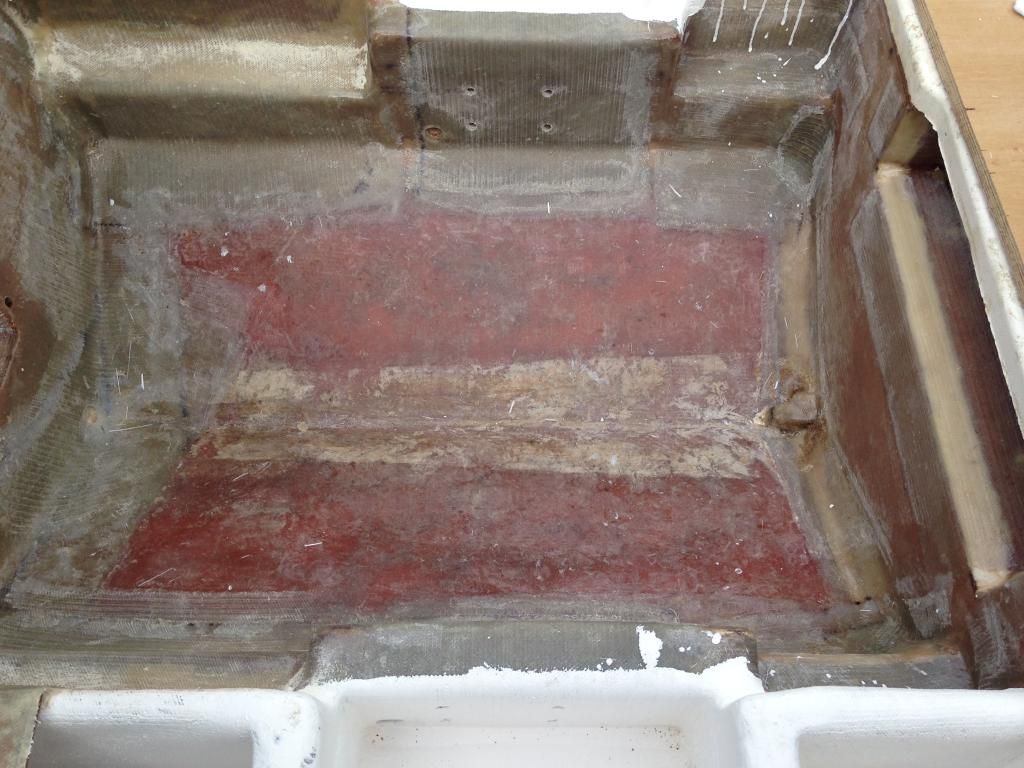
Wet on wet layup! All the pink underneath is corebond.

Planning to overlay the motor mounts with about 4 layers full length sheets of 1708.


Cut the holes for exhaust and gimbal assembly and sealed with resin. Used 1708 on the outdrive cutout. I'm really loving 3M Corebond for making all my fillets. Did some wet layups and if timed right, is obviously the only way to roll.
You can see that wood is no longer surrounding the drain plug, instead pure corebond with PVC pipe bonded in. Going to seal the drain housing with 4200.
Put down one initial coat or VE prior to laying 1708. Very pleased with the way this transom turned out!

You can see the fillet work I rubbed by fingers raw sanding perfect. When you do longer sections all the fillet work is well worth it. You don't want air pockets! Note that this is the opposite side and just prior to placing full overlays of 1708.

Here's the fillet prior to overlay with 1708.

This is the opposite side but you get the idea

Wet on wet layup! All the pink underneath is corebond.

Planning to overlay the motor mounts with about 4 layers full length sheets of 1708.
Last edited by Borgie; 05-10-2014 at 09:09 PM.
 05-11-2014 | 09:35 PM
#92
Thread Starter
Banned
Joined: Jun 2013
Posts: 1,014
Likes: 0
From: AZ
The new boat is beautiful! I almost hate to remove the 502 mag lol. And for those following, the Mirage will be for sale upon completion.
Last edited by Borgie; 05-13-2014 at 08:45 AM.

 11-21-2014 | 07:08 PM
#96
Thread Starter
Banned
Joined: Jun 2013
Posts: 1,014
Likes: 0
From: AZ
Been a while since I updated this thread so here it goes...
Doing final work this week including Fabbing the rear decking, and reinstalling the floor. Gel coat is 50% complete. Buyer has placed a deposit, and is taking delivery on the 1st of December. Pics to follow!
Doing final work this week including Fabbing the rear decking, and reinstalling the floor. Gel coat is 50% complete. Buyer has placed a deposit, and is taking delivery on the 1st of December. Pics to follow!
Last edited by Borgie; 11-22-2014 at 08:17 AM.
11-22-2014 | 01:04 PM
#98
Thread Starter
Banned
Joined: Jun 2013
Posts: 1,014
Likes: 0
From: AZ
It's going to be exactly as Mirage built it(split) except I utilized Marine 3/4 plywood glassed to the transom/rear compartment, and the large laminated ply/fiberglass decking that I cut out to access the the inner stringers. I glassed/screwed in 4 tabs to locate the flooring right where I need it. I will be using 1708 and VE to bond them back in. I will be sure to post a bunch of pictures along the way. Stay tuned this week for the completion of this project.
Here is what it looked like originally:
It's only the rear most compartment that isn't connected to the rest of the inner liner. All compartments feature drain holes now. Prior to the rebuild only the engine mount compartment had a drain....
Here is what it looked like originally:

It's only the rear most compartment that isn't connected to the rest of the inner liner. All compartments feature drain holes now. Prior to the rebuild only the engine mount compartment had a drain....
Last edited by Borgie; 11-22-2014 at 01:41 PM.
11-30-2014 | 10:44 PM
#99
Thread Starter
Banned
Joined: Jun 2013
Posts: 1,014
Likes: 0
From: AZ
Been busy the last couple days:
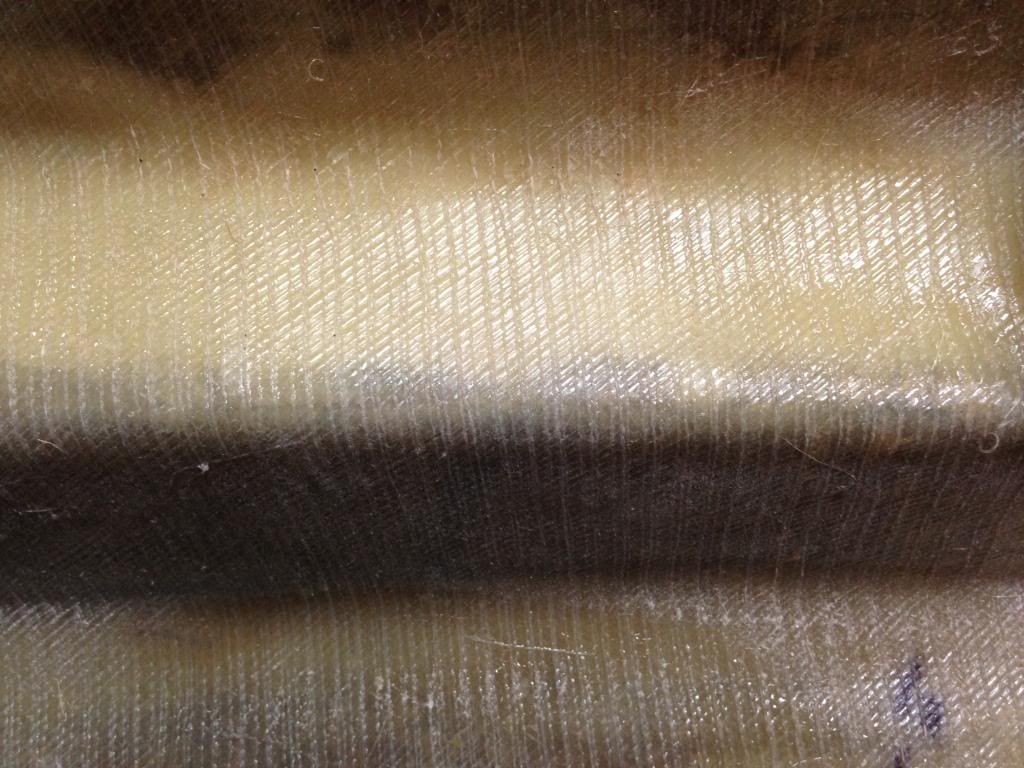
Mirage originally used 3/4 exterior plywood to make these rear top deck caps that joint up to the transom. I utilized 3/4 marine plywood(woodworkers source) 3M Corecond, and a couple layers of 1708. Note: the light color that's in blotches is the pink Corebond (MEKP is red tint) NOT air. I kept the laminate very balanced as with the other repairs that came before this. Love 1708, VE and Corebond! I truly believe these products made this not only much stronger, they are easy to work with. Oh and West System 404 mixed with VE for various bonding and filling needs!

Inner stringers after first round of Gelcoat. I used North American products,sourced from a local supplier (Sticky Stuff in Glendale Arizona). Used pure white V-Mod gel coat, added SS-10 wax additive, slow MEK(clear) and rolled it on after proper prep. Didn't have an appropriate environment to spray. Note: I used two wooden tabs that are glassed in and bolted with lock nuts to index and floor panels which I cut out to do this rebuild. Need to give my dad credit for this great idea! Worked out perfectly.
Final pre fit of the rear panels before glassing them into place. I beveled both sides, placed silicone on tabs and in between the floor and inner supports, then cut thin sections of 1708 and glasswd in the gap. Very happy with the results. Final product should show up in following pictures.


Mirage originally used 3/4 exterior plywood to make these rear top deck caps that joint up to the transom. I utilized 3/4 marine plywood(woodworkers source) 3M Corecond, and a couple layers of 1708. Note: the light color that's in blotches is the pink Corebond (MEKP is red tint) NOT air. I kept the laminate very balanced as with the other repairs that came before this. Love 1708, VE and Corebond! I truly believe these products made this not only much stronger, they are easy to work with. Oh and West System 404 mixed with VE for various bonding and filling needs!


Inner stringers after first round of Gelcoat. I used North American products,sourced from a local supplier (Sticky Stuff in Glendale Arizona). Used pure white V-Mod gel coat, added SS-10 wax additive, slow MEK(clear) and rolled it on after proper prep. Didn't have an appropriate environment to spray. Note: I used two wooden tabs that are glassed in and bolted with lock nuts to index and floor panels which I cut out to do this rebuild. Need to give my dad credit for this great idea! Worked out perfectly.
Final pre fit of the rear panels before glassing them into place. I beveled both sides, placed silicone on tabs and in between the floor and inner supports, then cut thin sections of 1708 and glasswd in the gap. Very happy with the results. Final product should show up in following pictures.


Last edited by Borgie; 12-01-2014 at 12:58 AM.
11-30-2014 | 10:47 PM
#100
Thread Starter
Banned
Joined: Jun 2013
Posts: 1,014
Likes: 0
From: AZ


I added several drain holes in the compartments that likely didn't help rotting matters regarding the stringers and transom. I opted to leave the foam out, not a fan. All holes that were bored recieved two coats of Vinyl Ester with 1% MEKP by weight.

All of the transom assembly holes were sealed after drilling with Vinyl Ester resin and the inside of the cutout was lined in 1708. Also sealed the steering arm reliefs with VE. No exposed wood or Corebond!

Last edited by Borgie; 12-01-2014 at 01:00 AM. Reason: Misstated product supplier. Fixed now

