

Mirage 217 -Bringing it back
 06-02-2024 | 12:27 PM
#41
Thread Starter
Registered
Joined: Sep 2020
Posts: 60
Likes: 23
The original intention was to make it lighter and stronger than the factory system and my version 2 stringer system. I think with the new materials available now, I can do both. Well I hope so anyway.
I didn't weigh everything that I took out, but there was a lot of water-logged foam. Then again honestly, there are a lot of layers of 1708 so the structural portion won't have any short-cuts taken for the sake of saving a few pounds. I also learned a lot about the previous water-infiltration, so I am taking lessons-learned and am going to seal up each structural section with gelcoat. Hoping that and sound construction will make it good for another 30-40 years lol.
 06-03-2024 | 12:07 PM
#42
Thread Starter
Registered
Joined: Sep 2020
Posts: 60
Likes: 23
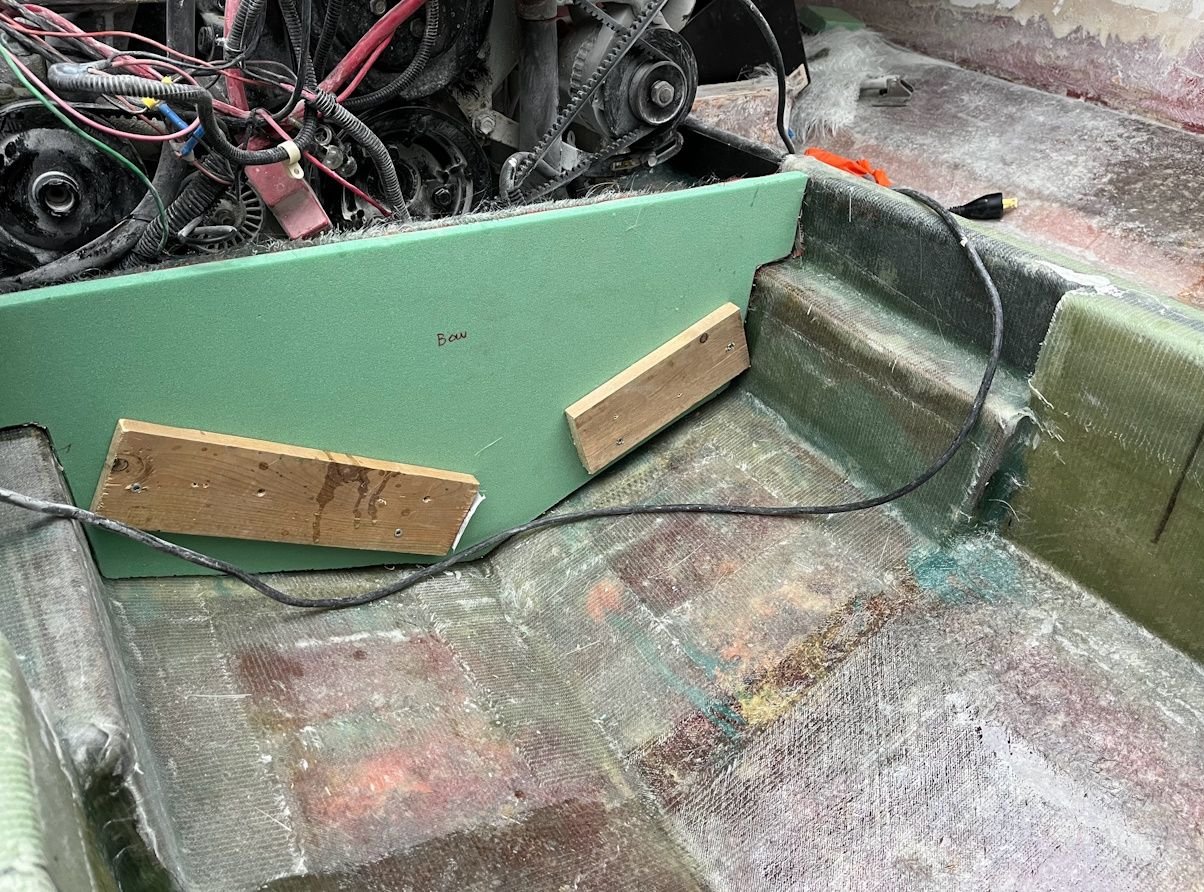
A bit more work on a rainy weekend here. Added in the two additional bulkheads near where the bolster seats go. Got my first layer of glass tabbing on them done. Completed the mount and gelled the pedestal for the bilge pump and float switch. Installed them (Carefully so not to strip the threads on the softer coosea board) Carbon core to thicken the bow side of the engine bulkhead and bring it up to stringer height along with a couple of layers of glass to start the sandwich.
I am surprised at how strong the bond is between the carbon core, glass and coosa. It's a nice product.
Glassed in a little added support for the fuel tank where the hull Vee's towards the bow.
I thought the other portion could use a bit more stiffening so added a layer of 1708 and tabbed that into the stringers, I'll see how that feels tonight. There is not enough room to add any structural ribbing without elevating the tank, and I did not want the support structure to be fully made up of foam and the gas tank.
Hoping that will be good, otherwise will stiffen it further.
Depending on energy and weather, possibly get the laser level out and level the supports that will hold up the floor before capping them with 'glass.
06-05-2024 | 11:09 PM
#43
Thread Starter
Registered
Joined: Sep 2020
Posts: 60
Likes: 23
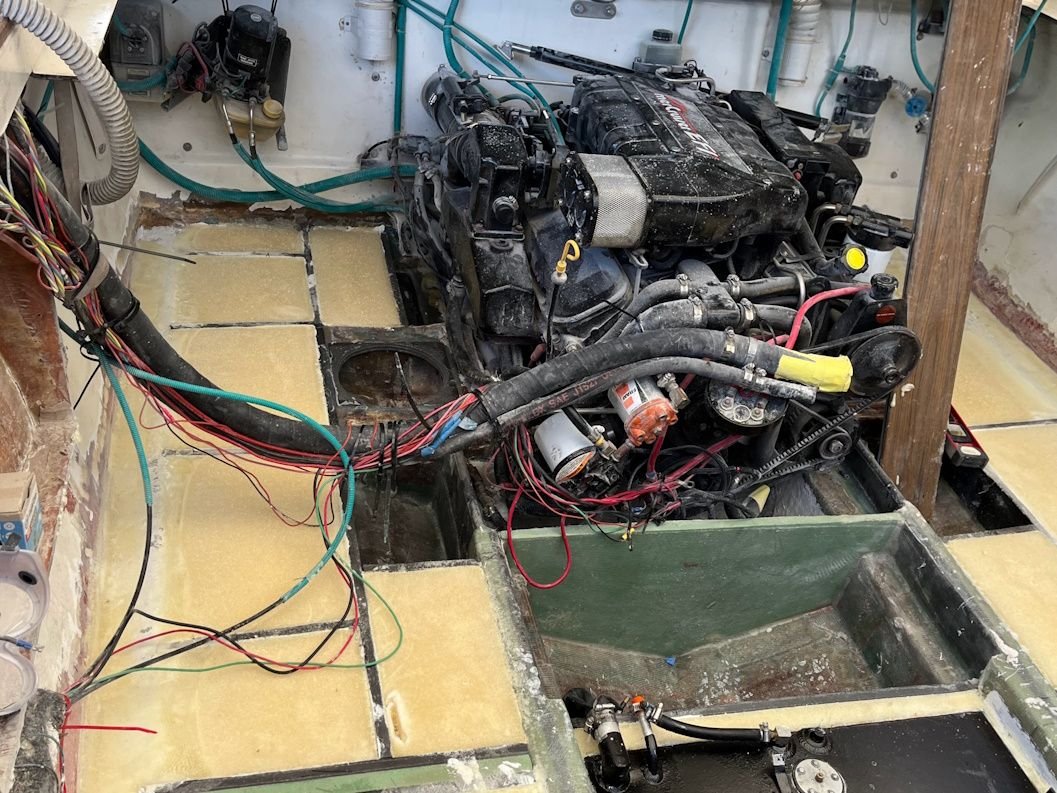
Tackling some challenging areas over the past three days. All around the stringers and brackets for the engine. I wanted to clean up and remove less than stellar previous glass work, adjust the stringer height so that the engine is easier to service (rather than reaching blindly and by feel)
I did the starter not too long ago and it was really difficult. So rectifying that.
I think, I finished the prep work tonight, and have cut all the glass I need to lay up tomorrow night.
I noticed that when I used air to blow the dust off of the engine, some areas need a paint touch up. Not certain what kind of gloss black to use. I can get tremclad or rustolum from the home centre, or VHT from the local auto supplier.
I am also planning on making a dock for a good cooler, for day-trips. Not sure what to get, Yeti or something like that.
Sorting out making a quick and easily accessible storage for fenders and ropes. I used to have to power up the engine hatch, but that was always a bit of a PITA
Also planning some steps on the front cockpit bulkhead. We use it a lot for day-dripping and sandbar beaching, so most everyone gets off over the bow in those cases. Maybe step pockets or fold out steps
 06-10-2024 | 11:00 PM
#45
Thread Starter
Registered
Joined: Sep 2020
Posts: 60
Likes: 23
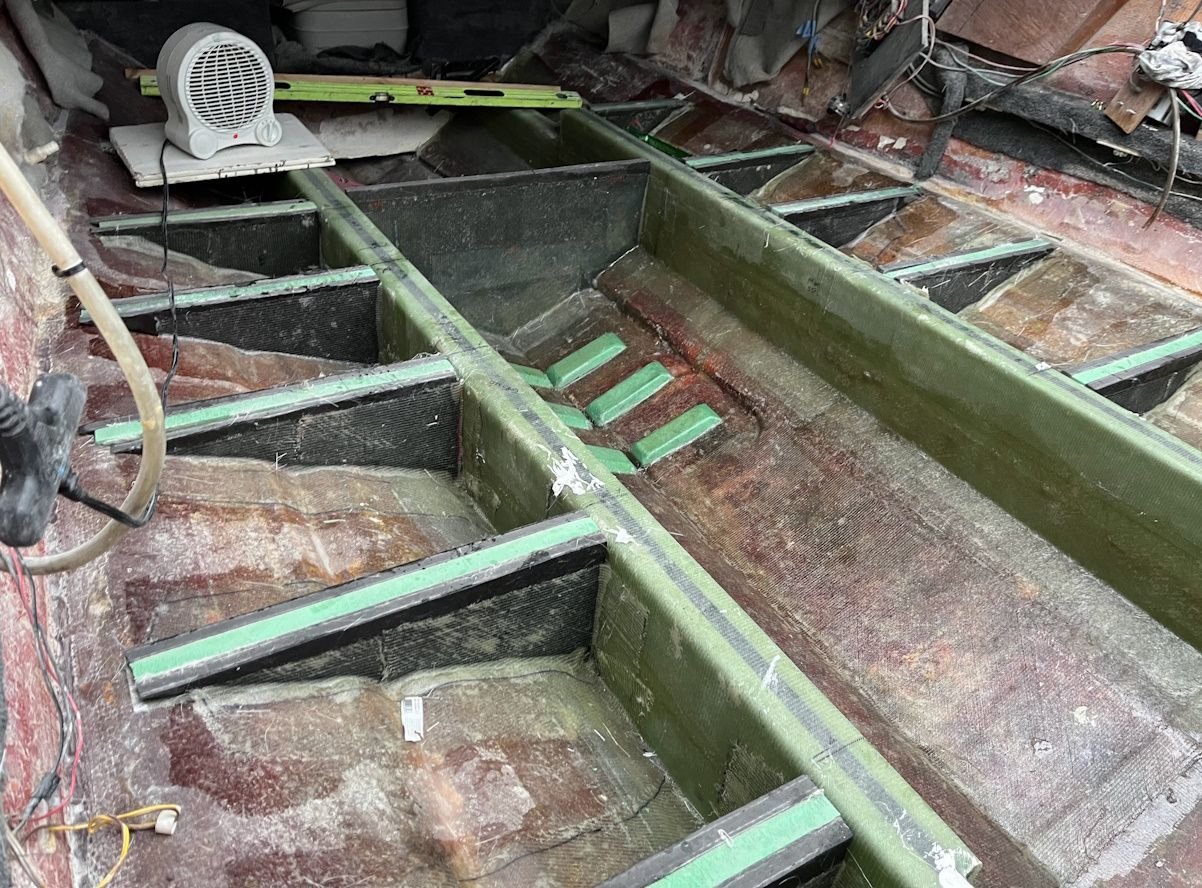
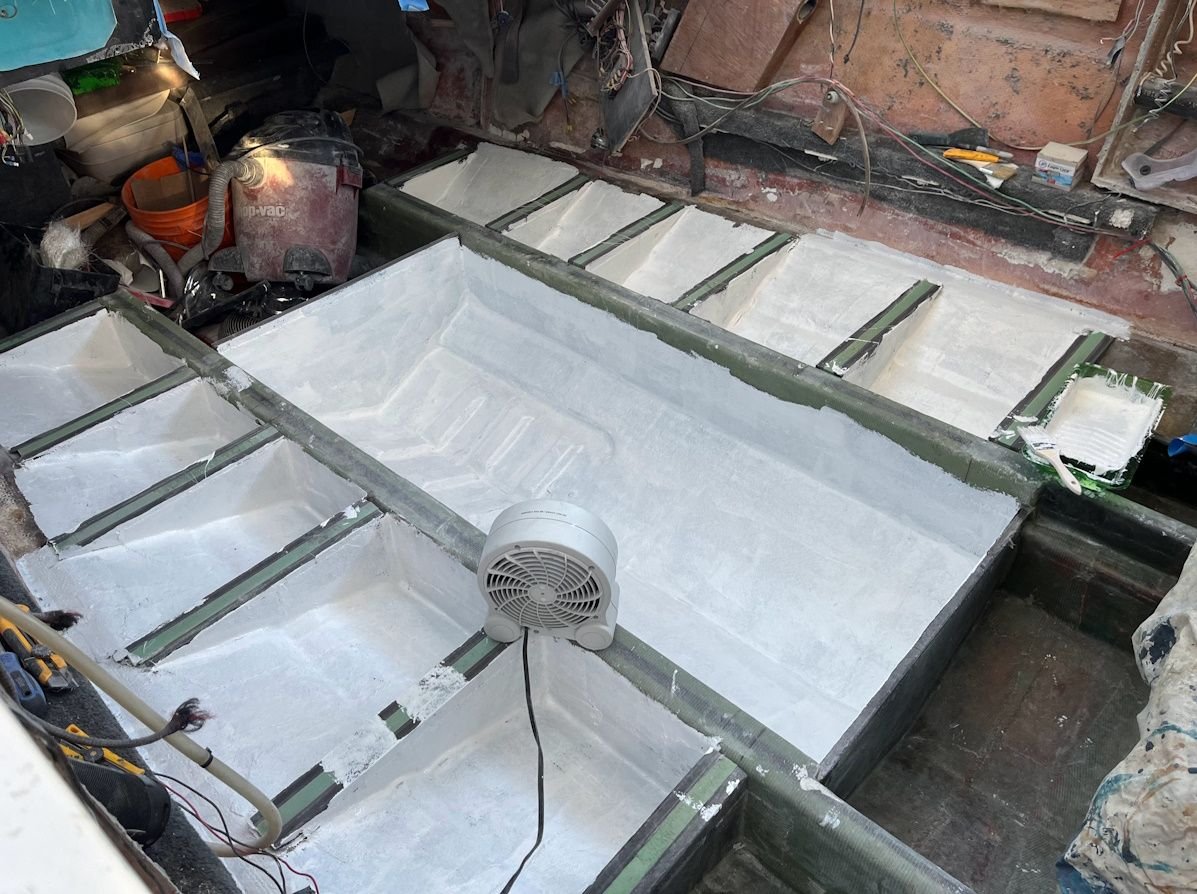
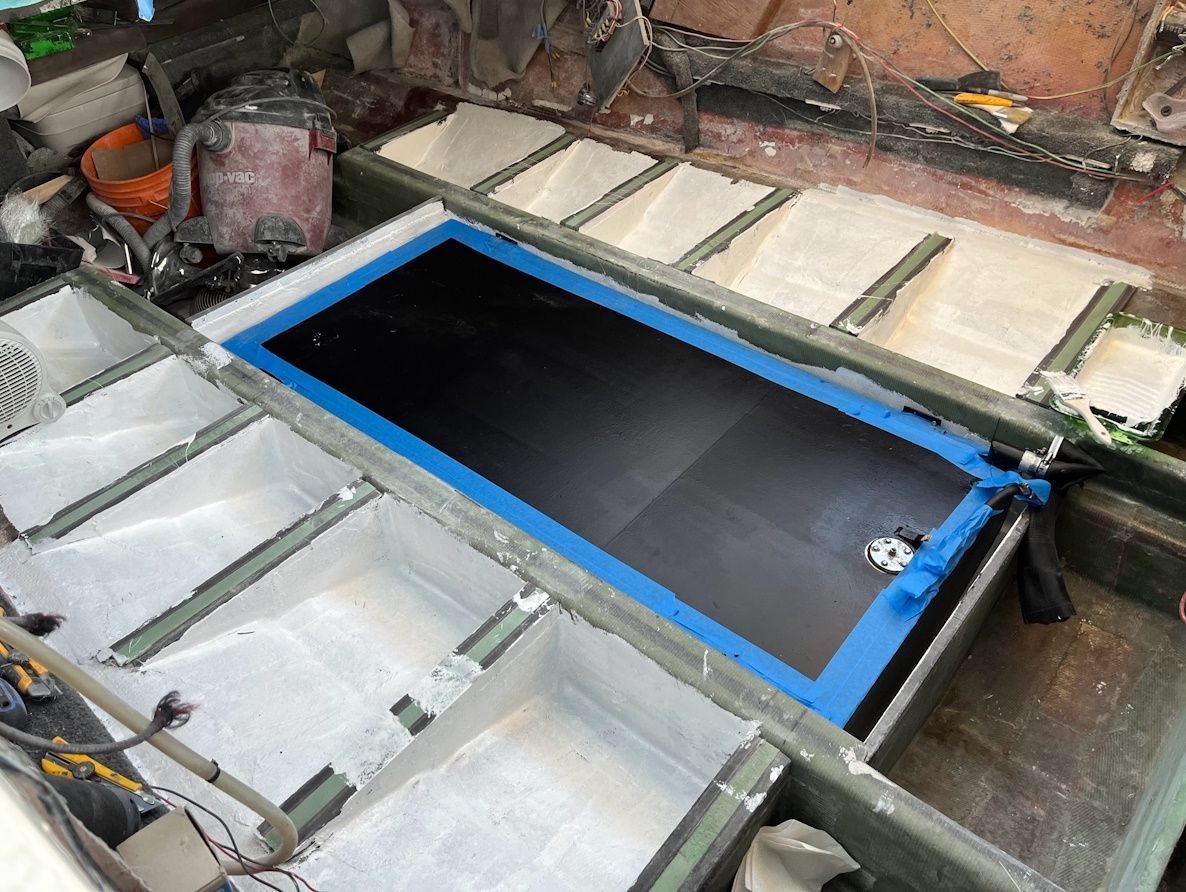
Good start to the week. Picked up another sheet of Coosa for the floor. That should do it I hope. I leveled the bulkheads and stringers to receive the floor, Gel-coated the insides of the hull. Fitted the fuel tank and temporarily fastened it to ready it for foaming.
Hope things trend faster now that I am mostly out of the hull.
Foaming and trimming the foam will probably be time consuming, we'll see.
Hope things trend faster now that I am mostly out of the hull.
Foaming and trimming the foam will probably be time consuming, we'll see.
06-13-2024 | 11:31 PM
#46
Thread Starter
Registered
Joined: Sep 2020
Posts: 60
Likes: 23
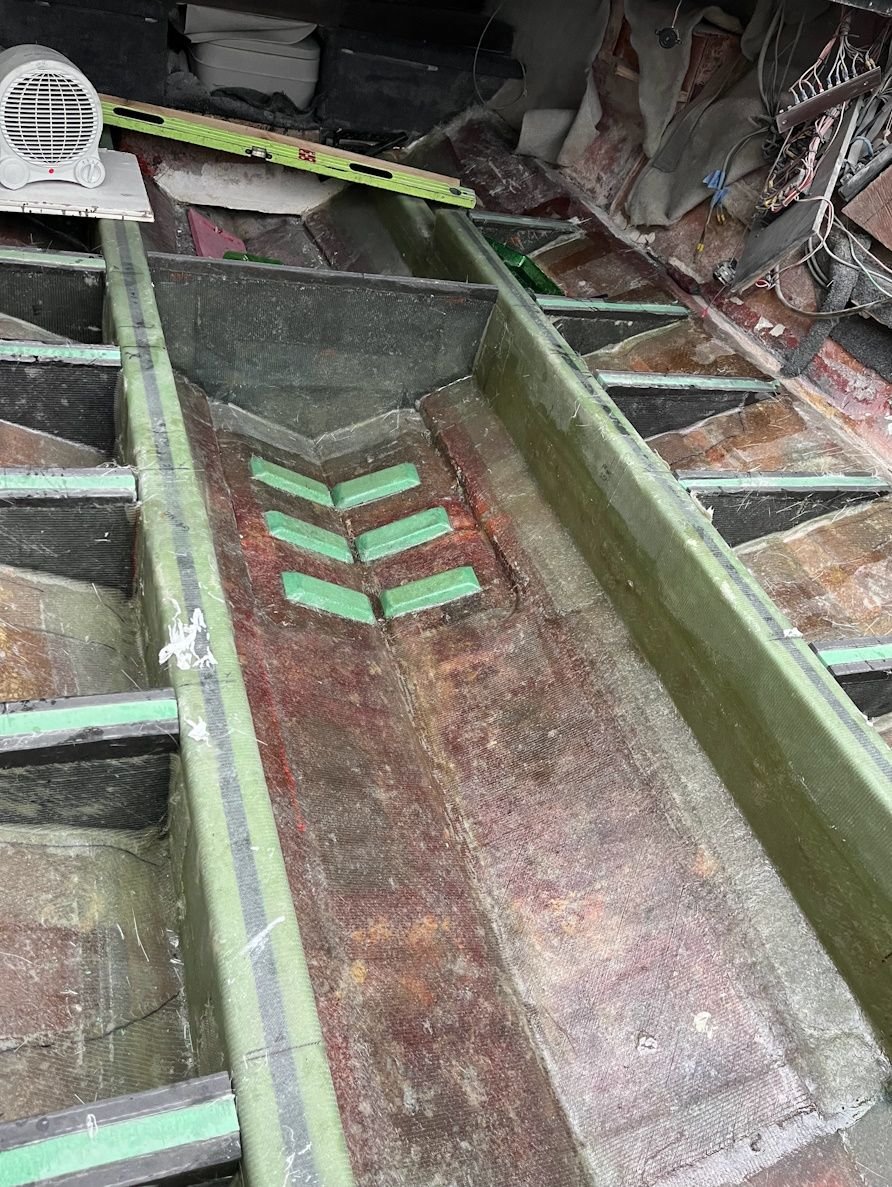
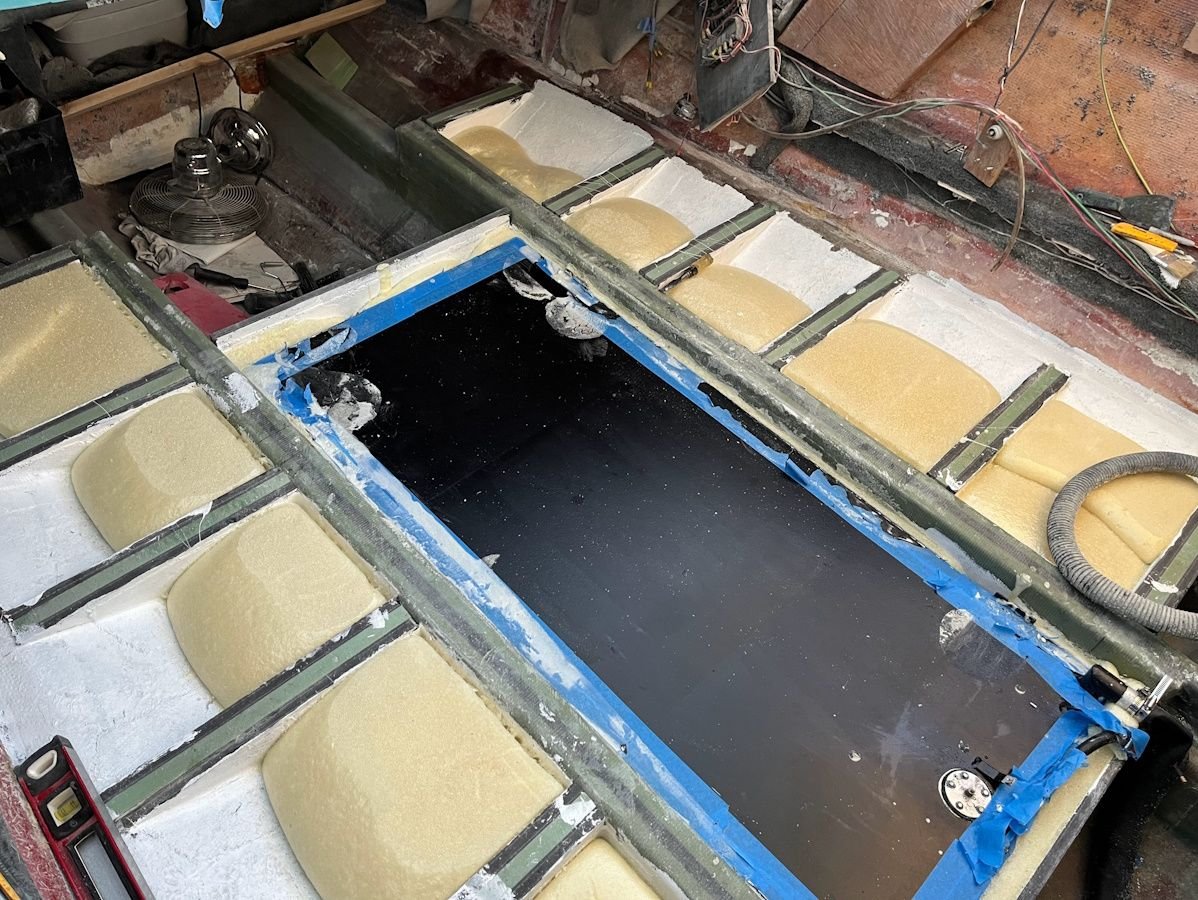
Was quite sick for a few days, but kinda getting better. First pass of pour foam. The tank area was the most challenging, trying to make sure that I poured it so the foam distributed under the tank.
That went pretty well, but I'll need another kit or two to finish the foam. One thing I noted, was that when I trimmed the new foam, it was feather-light, compared to the bags of water logged foam I removed earlier.
I plan on sealing the top of the foam once it's all filled, before I install the floor.
06-15-2024 | 12:36 AM
#47
Thread Starter
Registered
Joined: Sep 2020
Posts: 60
Likes: 23
Gelcoated the last few compartments to seal them, and poured hopefully enough foam to level everything.
The idea in compartmentalizing the foam, is to prevent future water ingress, or if one area happened to get moisture in the future, it would be less likely to transfer to the next compartment.
And after trimming the first part of foam, I learned an important bit of detail, and reinforced what I had planned to do. I'd left the foam off-cuts outside overnight, and noticed how feather-light they were compared to the demo'd old foam.
But it had rained a bit overnight. Just out of curiosity I picked up a piece again. Wow that **** absorbed a ton of water. It had easily doubled or tripled in weight. Honestly I'm questioning if it was a smart idea even using the foam. I know it can stiffen the hull and quiet things a little, but that's a crappy trade off. I knew it could get wet, but I thought it was closed cell and difficult to get saturated. I guess not!
Anyway the plan is to resin-seal the cut foam prior to capping it. That reinforces how absolutely necessary that is, and I better do a good job, sealing the top of the foam.
06-15-2024 | 11:22 PM
#48
Thread Starter
Registered
Joined: Sep 2020
Posts: 60
Likes: 23
From mess to something that looks a little better. Trimmed, leveled all the foam. Prepped the tank edge and foam for a resin seal. It was a lot more work than I planned, but I think doing a good job here will have a lasting impact. I plan at least two passes/coats with the resin seal, probably tomorrow, then laying out the fastening points for the floor sections as well as adding structure over the tank for floor support.


06-17-2024 | 10:17 PM
#49
Thread Starter
Registered
Joined: Sep 2020
Posts: 60
Likes: 23
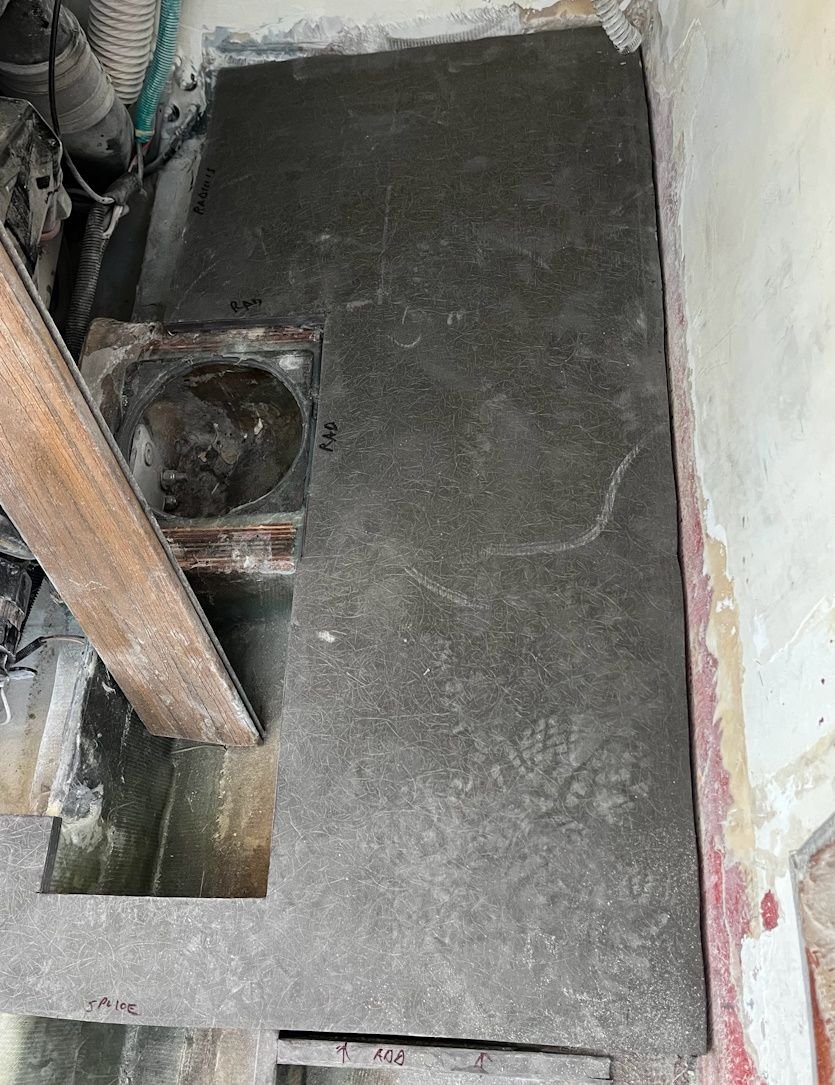
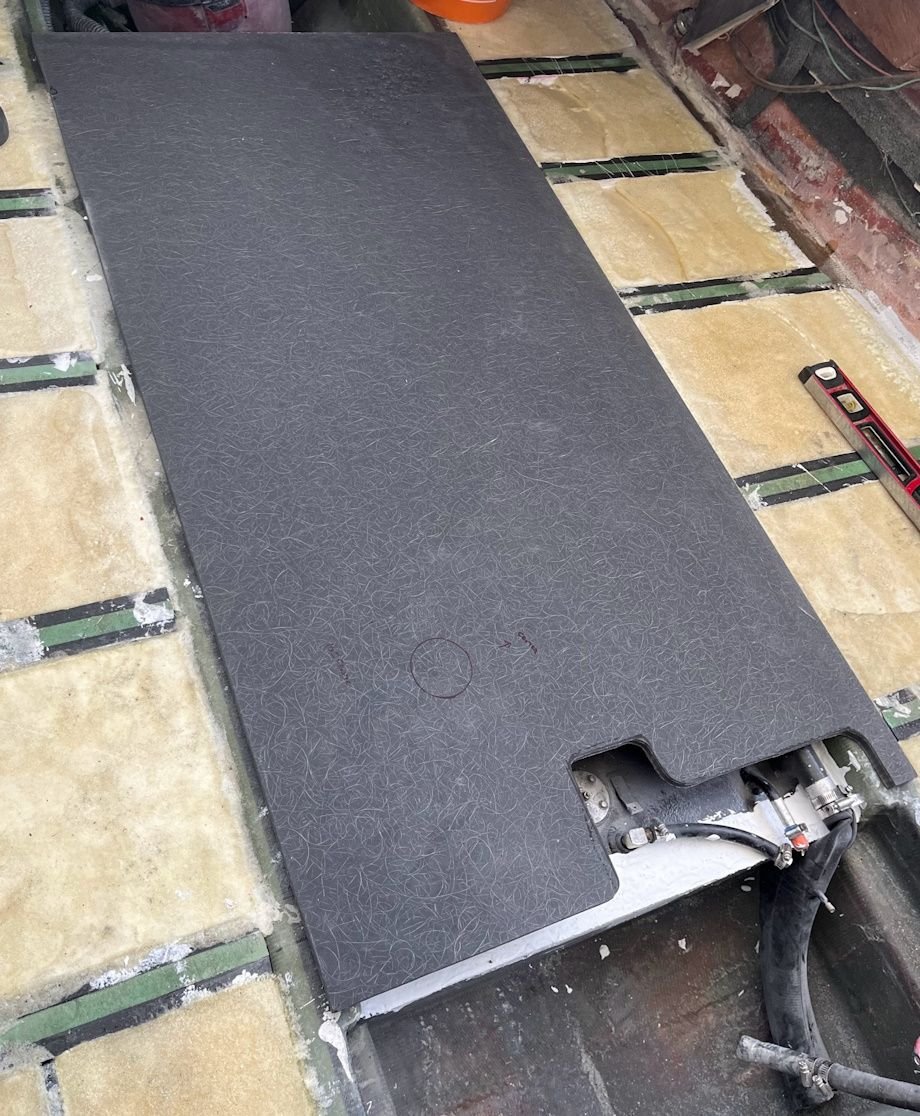
Yesterday after sealing the foam and the tank perimeter foam from water ingress, I cut the main section of Coosa to cover the fuel tank.
My original plan was to craft multiple intermediate supports. Kind of like an egg-crate or lattice. There were a couple of issues with that. They'd only be an inch and a half to two inches tall, and then I'd need to glass them all up to make then strong. Lastly then drive fasteners all through the floor to help attach it.
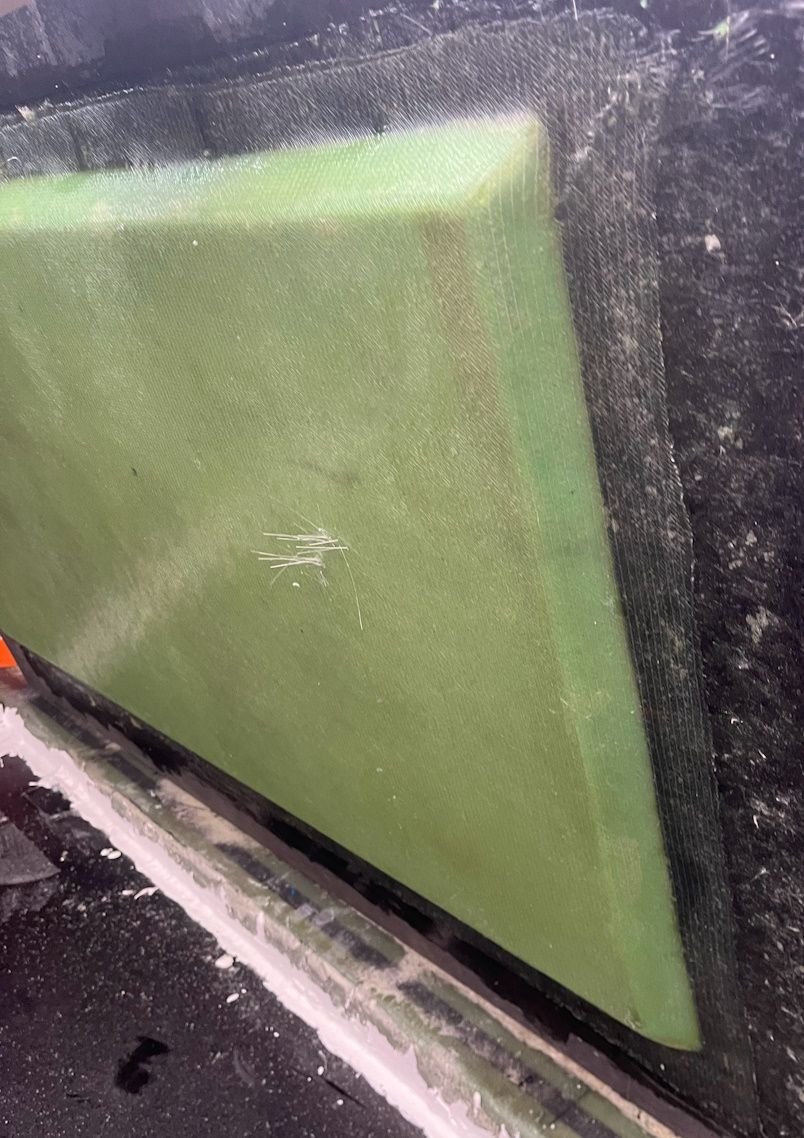
My idea changed for the better. I had some extra 1" carbon core, so decided instead to bond the lightweight core to the underside of the Coose.
Wow, is all I can say. There is zero flex in the floor there now, and probably lighter than doing a substructure. Laid it up with some mat between the materials and finished off with one layer of mat and then 1708.Super strong and good compromise on weight. I'm really happy with the solution. The floor feels rock solid even though there is no bonding or fastening to the stringers below yet.
A couple days off due to a heart procedure, and hopefully get back at it in 3-4 days.

My original plan was to craft multiple intermediate supports. Kind of like an egg-crate or lattice. There were a couple of issues with that. They'd only be an inch and a half to two inches tall, and then I'd need to glass them all up to make then strong. Lastly then drive fasteners all through the floor to help attach it.
My idea changed for the better. I had some extra 1" carbon core, so decided instead to bond the lightweight core to the underside of the Coose.
Wow, is all I can say. There is zero flex in the floor there now, and probably lighter than doing a substructure. Laid it up with some mat between the materials and finished off with one layer of mat and then 1708.Super strong and good compromise on weight. I'm really happy with the solution. The floor feels rock solid even though there is no bonding or fastening to the stringers below yet.
A couple days off due to a heart procedure, and hopefully get back at it in 3-4 days.
06-19-2024 | 11:57 PM
#50
Thread Starter
Registered
Joined: Sep 2020
Posts: 60
Likes: 23
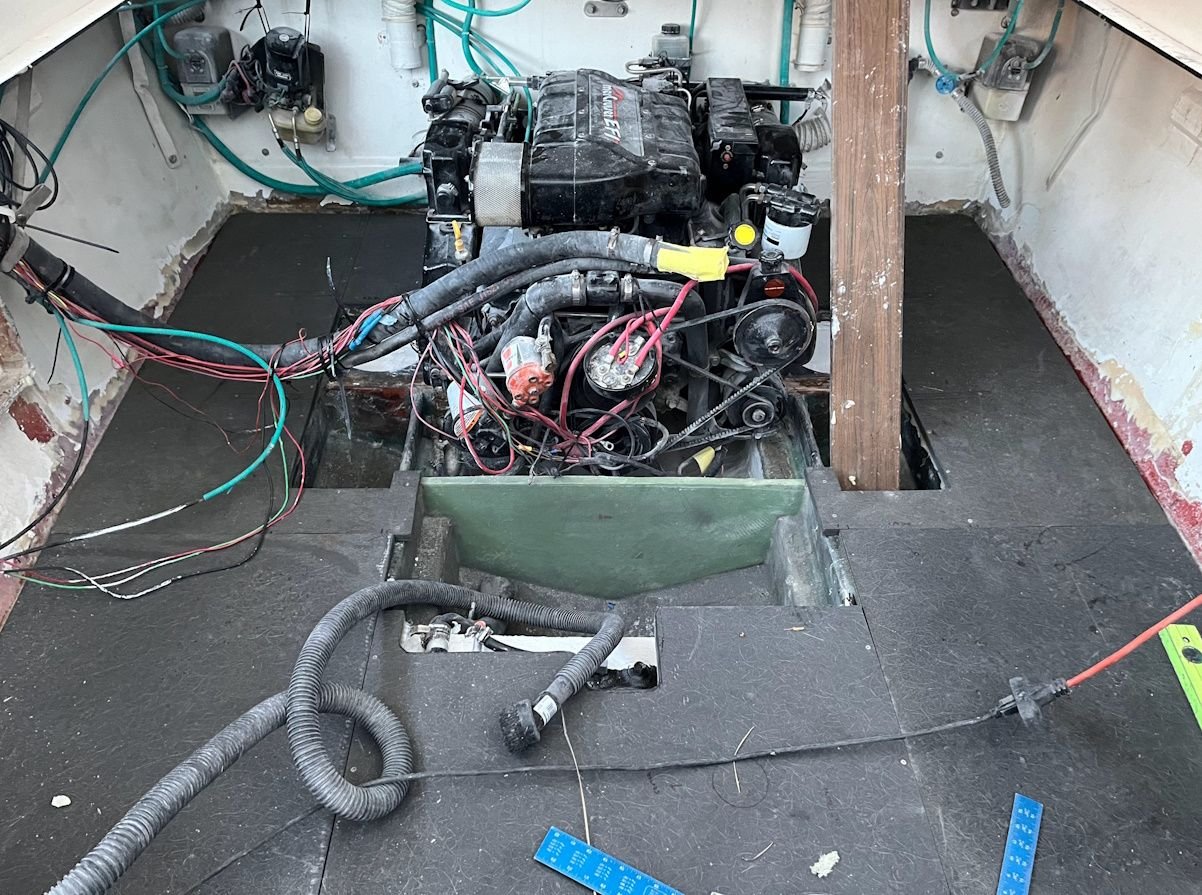
Last few nights, I fastened the first main floor sections over the fuel tank and engine bay. After that just making patterns and pieces. The floor is nice and flat and the hull quite symmetrical so it's been consistent.
I have only three main (small) floor pieces to do in the cuddy. I should be able to bed and fasten over the next couple of days.
I tried to cut as efficiently as I could, but looking like I'll need one more piece of Coosa to finish.
Definitely likeing putting things back together as opposed to demo, but I think it unlikely that I'll get everything including all the details finished before the summer vacation. Still if I get it solid, and put back the old upholstery etc, I can take my time next year doing the rest of the details. The main thing is getting it water tight and structurally solid.

