

Installing k-planes...
 05-09-2020 | 04:11 PM
#1
Thread Starter
Registered
Joined: May 2010
Posts: 55
Likes: 0
From: Grand Rapids, Mi
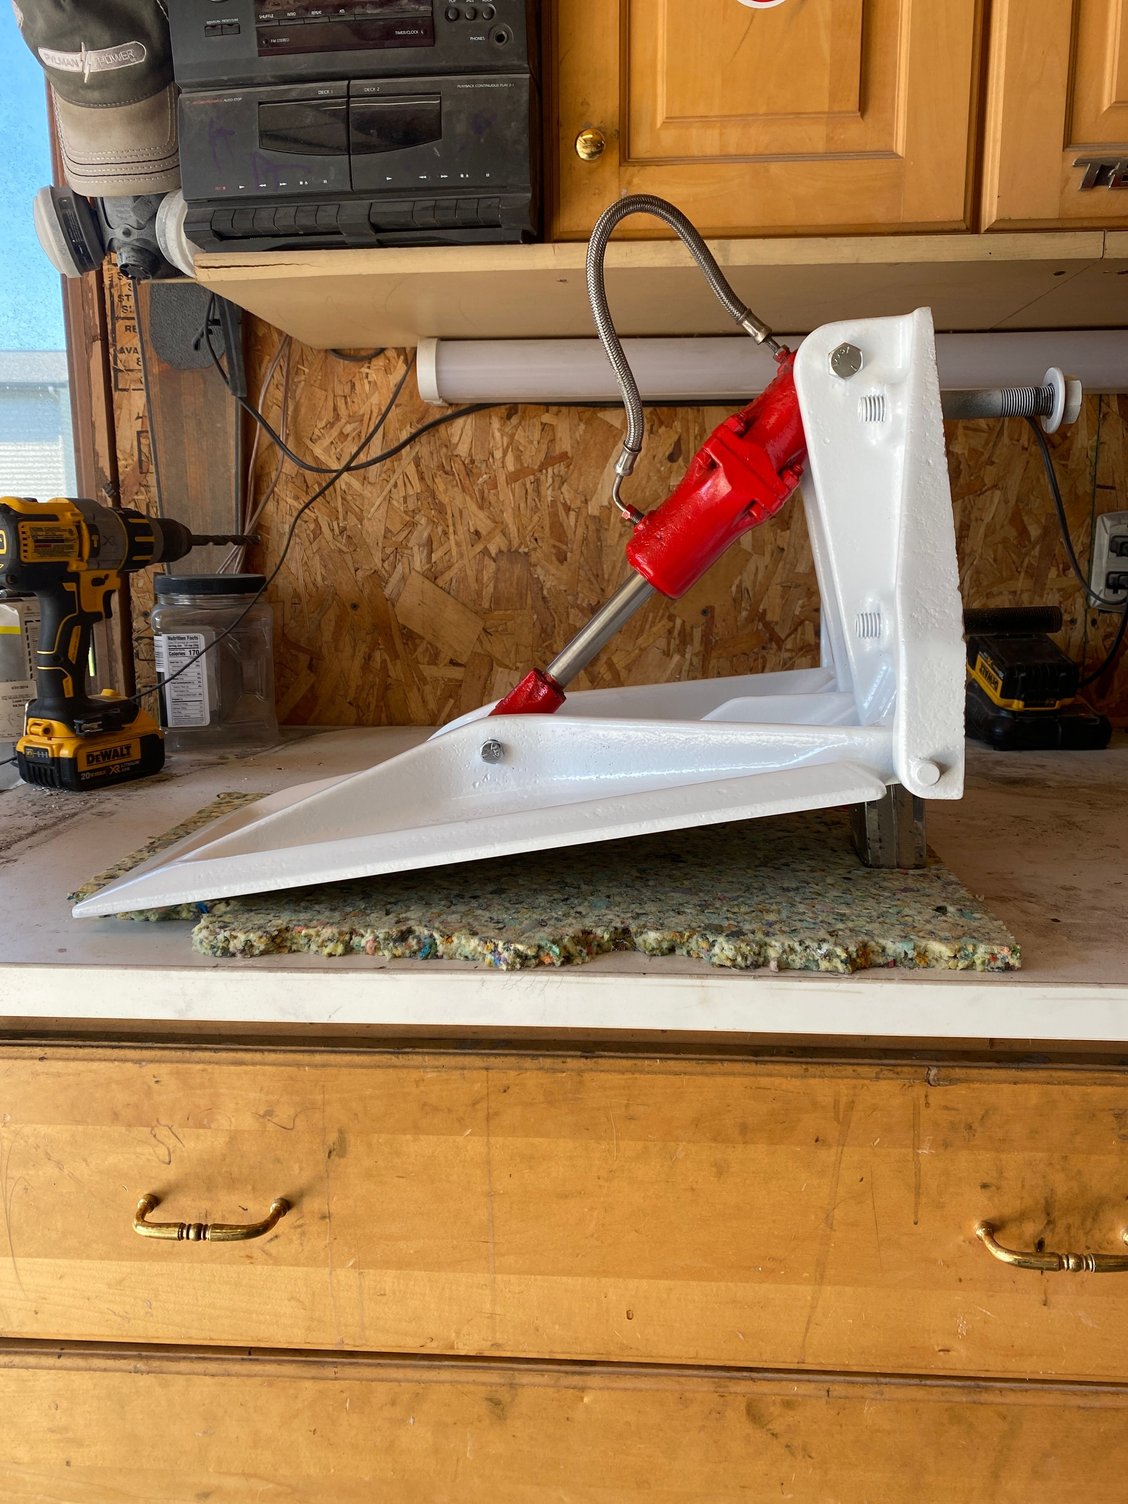
I have a set of 280 k planes I have been putting together to install on my 27’ boat. Older units with old rams. First question fully extended they are down about 3-4” lower than if it was 90 degrees. Is that correct? In some ways it seems like it should go lower but on the same thought, it probably doesn’t need a lot, right?
Also before I drill holes, is the most common location, 3-4” in from the chine and 1/4 “ up from the running surface? It seems like that’s the most I have seen. Some have been parallel and I seen a few that were a combination of the two.
Any help/guidance would be greatly appreciated!
Thanks
Also before I drill holes, is the most common location, 3-4” in from the chine and 1/4 “ up from the running surface? It seems like that’s the most I have seen. Some have been parallel and I seen a few that were a combination of the two.
Any help/guidance would be greatly appreciated!
Thanks
 05-09-2020 | 07:28 PM
#2
Registered

Joined: Aug 2005
Posts: 263
Likes: 11
From: Gothenburg, Sweden
The stroke looks shorter than the newer square rams, but I do not have any experience with the old rams. Maybe someone that knows will chime in.
Regarding location on the transom, they should be installed at least 1/2” above the running surface. Before you drill, make sure there are no conflict with the stringers.
Regarding location on the transom, they should be installed at least 1/2” above the running surface. Before you drill, make sure there are no conflict with the stringers.
05-10-2020 | 01:40 PM
#3
Registered

Joined: Jul 2011
Posts: 43
Likes: 7
The stroke on the rams is as it should be. The reason it looks like they should go down more is that when mounted on the boat, the transom angle which is most likely 12-14 degrees , will position the tabs so that fully retracted it is just above parallel with the bottom. When extended the tips of the tabs will be around 5 inches below the bottom running surface due to that transom angle leaning the entire assembly down from horizontal. Also some may disagree, but I used 3M 4200 sealant to mount mine, a good 1/2 " bead around the perimeter and around each through hull bolt hole. I didn't "paint" the entire thing with sealant. It make a huge mess and wastes material


