

252 Islander - hatch brackets/wood rot
 10-13-2020 | 06:52 PM
#1
Thread Starter
VIP Member

Joined: Nov 2005
Posts: 1,225
Likes: 769
From: Wichita, Kansas
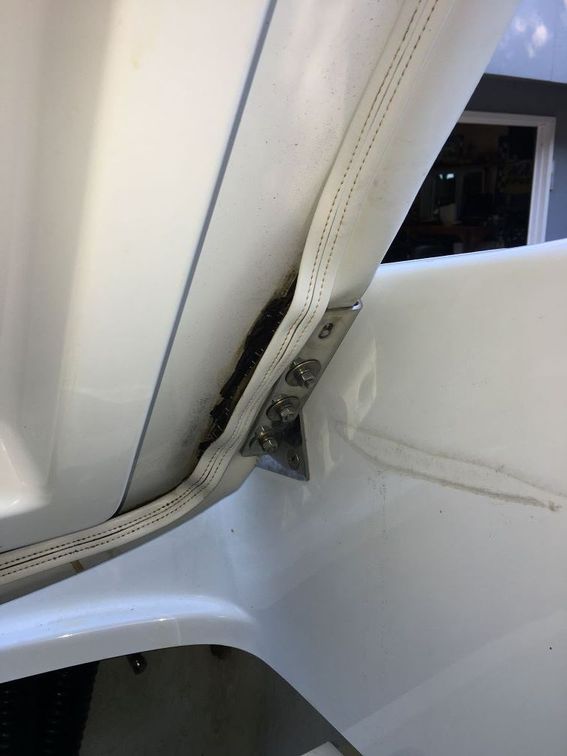
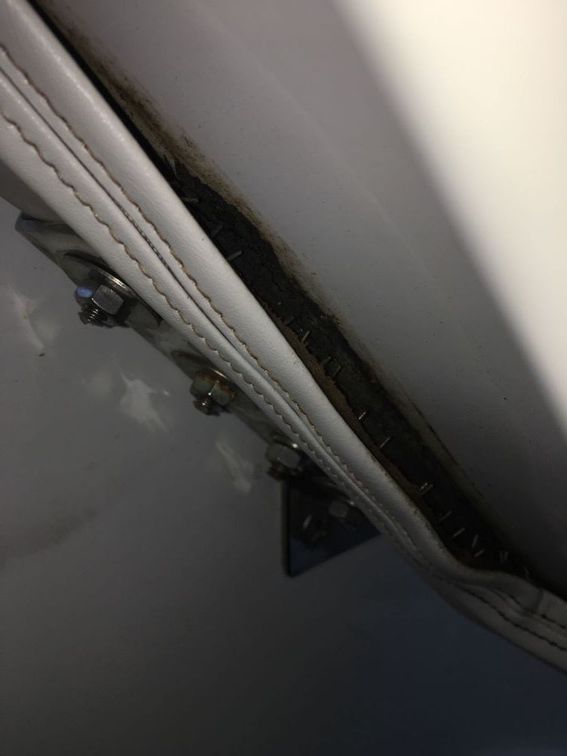
Bought a very nice 2000 252 Islander a few weeks ago, the boat has been kept in extraordinary condition. The only thing that needs attention is the sunpad/engine hatch where attached to the brackets; there is some wood rot that I am going to fix. Does anyone have any idea how this area is constructed? It almost appears that there is/was a layer of wood on the underside of the perimeter of the hatch used to staple the vinyl to. The underside of the hatch is fiberglass. On the port side, one bolt has sheared off, the others seem to spin freely when I attempt to turn the nuts...indicating the heads of the fasteners are not secure, not surprising since this wood seems to be nearly totally rotted away.
My plan at this point is to use an oscillating tool with a carbide blade to cut the bolts off, then pull the entire hatch off and evaluate for repair. If anyone has any understanding of how this is all constructed, I'd really appreciate your comments.
Thanks!
My plan at this point is to use an oscillating tool with a carbide blade to cut the bolts off, then pull the entire hatch off and evaluate for repair. If anyone has any understanding of how this is all constructed, I'd really appreciate your comments.
Thanks!
 11-27-2020 | 07:02 AM
#2
Thread Starter
VIP Member
Joined: Nov 2005
Posts: 1,225
Likes: 769
From: Wichita, Kansas
To the top. I am trying to figure out how much wood is in the hatch...how big of a project this could turn into.
Has anyone had a hatch/engine cover off and apart? I assume there is the vinyl covering, foam, then either fiberglass or wood then fiberglass. The inside of the hatch is obviously fiberglass.
Thanks!
Has anyone had a hatch/engine cover off and apart? I assume there is the vinyl covering, foam, then either fiberglass or wood then fiberglass. The inside of the hatch is obviously fiberglass.
Thanks!
11-27-2020 | 09:42 AM
#3
VIP Member
Joined: Nov 2002
Posts: 4,176
Likes: 333
From: ankeny,ia.
I had to repair the hatch on my 33 in the hinge area, you�ll need to get it down to the base hatch( all upholstery and foam removed) then, from the top side ( upholstery side) you�ll have to cut through the glass with a cutting wheel and remove the wood ( I don�t know what the framing structure of a 252 is, but a 33 just had blocked in areas) as needed.
They use threaded inserts with barbs on them that you drive into the plywood, I cut the wood as needed, resined it into place, clamped, then from the existing holes in the opening of the bottom of the hatch, I drilled holes for the inserts, installed the inserts, then feathered back the areas around the cut and glassed it back up...I think I used at least 4 layers to match the thickness but can�t be sure... this was 15 years ago when I did this
They use threaded inserts with barbs on them that you drive into the plywood, I cut the wood as needed, resined it into place, clamped, then from the existing holes in the opening of the bottom of the hatch, I drilled holes for the inserts, installed the inserts, then feathered back the areas around the cut and glassed it back up...I think I used at least 4 layers to match the thickness but can�t be sure... this was 15 years ago when I did this
11-28-2020 | 07:38 AM
#4
Thread Starter
VIP Member
Joined: Nov 2005
Posts: 1,225
Likes: 769
From: Wichita, Kansas
I had to repair the hatch on my 33 in the hinge area, you�ll need to get it down to the base hatch( all upholstery and foam removed) then, from the top side ( upholstery side) you�ll have to cut through the glass with a cutting wheel and remove the wood ( I don�t know what the framing structure of a 252 is, but a 33 just had blocked in areas) as needed.
They use threaded inserts with barbs on them that you drive into the plywood, I cut the wood as needed, resined it into place, clamped, then from the existing holes in the opening of the bottom of the hatch, I drilled holes for the inserts, installed the inserts, then feathered back the areas around the cut and glassed it back up...I think I used at least 4 layers to match the thickness but can�t be sure... this was 15 years ago when I did this
They use threaded inserts with barbs on them that you drive into the plywood, I cut the wood as needed, resined it into place, clamped, then from the existing holes in the opening of the bottom of the hatch, I drilled holes for the inserts, installed the inserts, then feathered back the areas around the cut and glassed it back up...I think I used at least 4 layers to match the thickness but can�t be sure... this was 15 years ago when I did this
How heavy was your hatch, do you remember? I know the weight is one thing and the awkwardness is another. Just trying to figure out if the wife and I can handle this thing...?
11-28-2020 | 04:05 PM
#5
VIP Member
Joined: Nov 2002
Posts: 4,176
Likes: 333
From: ankeny,ia.
2 people can handle it pretty easy, it’s the getting the fasteners removed and being able to hold it while you remove it, and getting it off that is the difficult part.
I used a couple forklifts to get it off, 1 at the rear for a catcher and 1 from the side with a rope/ strap, through the hatch actuator bolt to hold it up vertically, then removed the fasteners, climbed up on the forks, ( of the forklift at the rear)lifted it up enough to get the tension off of the rope, removed it, slid the hatch back on to forks of the rear unit far enough back to where it was stable and moved it down to the ground.
You could basically do the same thing with an overhead hoist by just lifting it at the hatch actuator bracket, but I had an abundance of forklifts to use, so I did it this way


