Titan BrakeRite EOH actuator - low/no pressure fix
 07-01-2018 | 08:51 AM
#1
Thread Starter
Registered
Joined: May 2015
Posts: 116
Likes: 16
From: Silverdale, WA
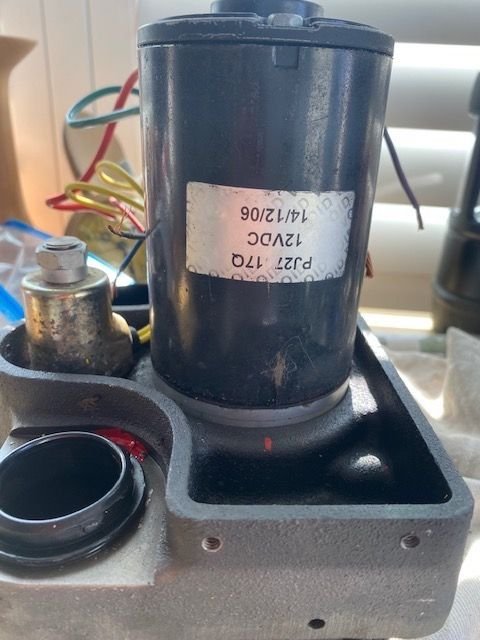
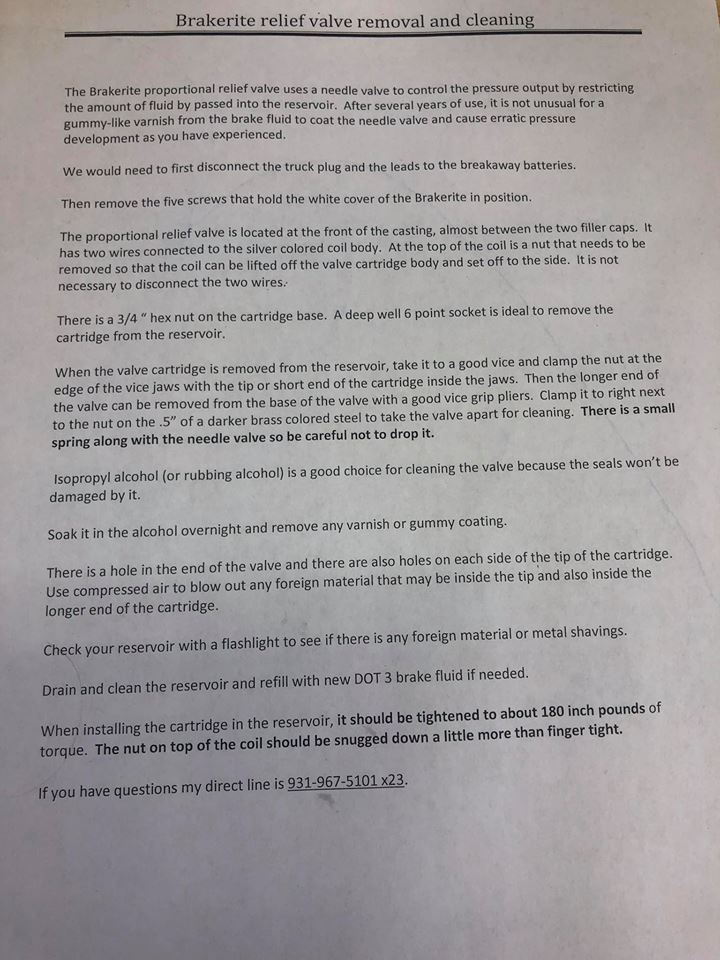
Here’s a tip for those that have a BrakeRite Titan electric over hydraulic actuator and it's not performing as well as it use to or as expected. In my case, my brand new actuator never built any pressure and I’ve messed with it for weeks trying to figure out what could be wrong with no luck. Eventually I found the phone number for Lon at Dexter and he was fantastic to work with. Since this unit had been setting for a year without being used he suspected the “test fluid” they use at the factory had collected moisture and possibly gummed up the valve. Though he acknowledged that it was still under warranty, he authorized me to pull it apart and clean the valve and sent me the attached instructions. As you can see by what was a clean white shop towel, the valve was filthy. I cleaned it in alcohol and reinstalled it and it works fantastic. It’s honestly a 15 minute project so easily done and might not be a bad idea if yours doesn’t seem to hit as hard.
Good luck! john
Good luck! john
 07-04-2018 | 09:17 AM
#4
Thread Starter
Registered
Joined: May 2015
Posts: 116
Likes: 16
From: Silverdale, WA
I have since talked to a friend and he's experiancing something similar so it may be a bigger issue that what we realize. Figured that it's such an easy fix, I would share.

 07-23-2021 | 03:59 AM
#6
Registered
Joined: Jul 2021
Posts: 1
Likes: 1
I have a brakerite SD EOH and also experienced a running motor and no/low pressure. A working unit should produce ~1,000psi.
Upon disassembly, I found the oring between the motor and the base split. allowing prump pressure to just return to the reservoir past the oring. The will be evident as a problem if pump is running, and you see fluid flowing around in the reservoir.
To resolve, drain fluid, Mark the motor to the base for orientation, remove the motor from the base using the 2 screws underneath the base. .
Remove the motor. It might be tight as there is an oring seal there too. Motor will pull straight up and out.
You will see a small oring that sits between the motor and the base somewhere. Find it either in the reservoir, or on the motor still. . Dont know what size it is. I just grabbed one from a set I had. The motor pump has 2 holes, one picks up fluid from the res, the other is pressure output to the relief valve. Oring obviously goes on the one hole that sits on the base.
For reassembly, clean motor area where o ring sits. Apply wheel grease on oring to hold it there during install.
Put motor back into the base in correct orientation. Install 2 screws. Ensure the motor draws down and sits properly into the base with a flashlight into the filler caps.
Ensure the oring did not fall off during installation using flashlight. Should be done.
Bleed as necessasry
Thats it. Fixed my problem.
07-23-2021 | 08:32 AM
#8
Registered

Joined: May 2012
Posts: 503
Likes: 26
Thanks for the tip.
The problem with mine was one of the two screws that hold the pump to the base broke and brake fluid pumped out past oring. Defective or to small of screw I don’t know?? So I drilled and taped to the next size bigger 1/4in.or 5/16in.i don’t remember and it’s been working great for years now.
Thanks again and happy boating everyone!!
07-08-2023 | 05:08 PM
#9
Registered

Joined: Jul 2009
Posts: 570
Likes: 33
From: Newburgh, IN/Freeport, FL
I am working through this same issue currently, I have the pump motor removed and the o-ring at the base was intact the larger O-ring around the top of the pump motor was not in good shape. I have two new o-rings btu now I can not get the pump motor to drop back into place. I marked it before removal and have threaded the bolts back into place but the pump motor lacks about 1/4" from dropping into place. Should it just drop into place? What am I missing here?