

Phil'R Up 2001 Baja 25 Outlaw

 05-18-2017, 02:20 PM
#142
Registered
Awesome. Sounds like you've done your homework and should be pretty well prepped. Did you end up marking a custom input shaft for your drive?
05-18-2017, 02:52 PM
#143
Registered
Thread Starter
yep I purchased a used XR ITS yokes and u joints from double R and they took it to machine shop there to mill it down to the standard bravo diameter and respline it.. I won't have that for another week or 2 tho.
Just info for everyone that is new I'm doing 2 things that i'm not sure have been done before.
1. mating a standard bravo drive to an ITS transom assembly(no one makes a 7 inch driveshaft with the smaller bravo U-joints)
2. converting the standard steering actuator to push the ITS steering rams. (using Hardin Marine's brazilian manifold which they use to add external steering rams while keeping the cable to the helm) Hopefully this situation is only for this year and next winter I'll be able to upgrade to the full hydraulic system to the helm.
05-18-2017, 03:46 PM
#144
Registered
Interesting. So the actual diameter of the shaft of a standard bravo 1 input shaft is smaller than a x or XR, that would mean the standard transom assembly uses a smaller gimbal bearing? I thought the bearing cap diameters of the u joint were the only differences.
05-22-2017, 10:08 AM
#145
Registered
Thread Starter
Update on the weekend..
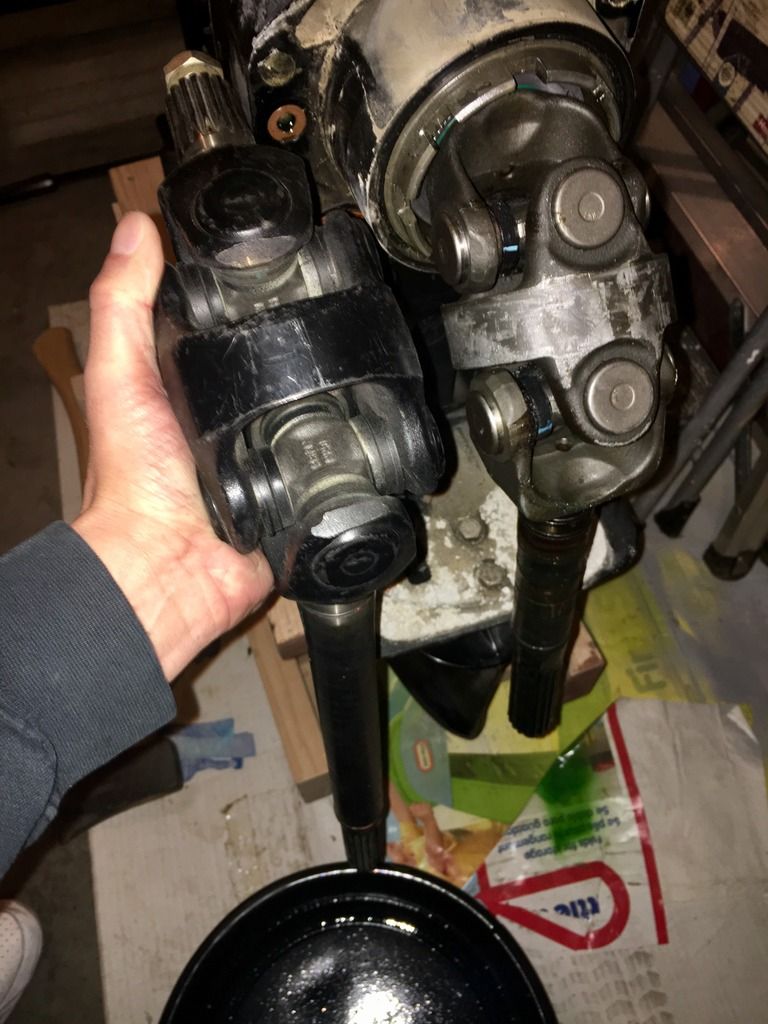
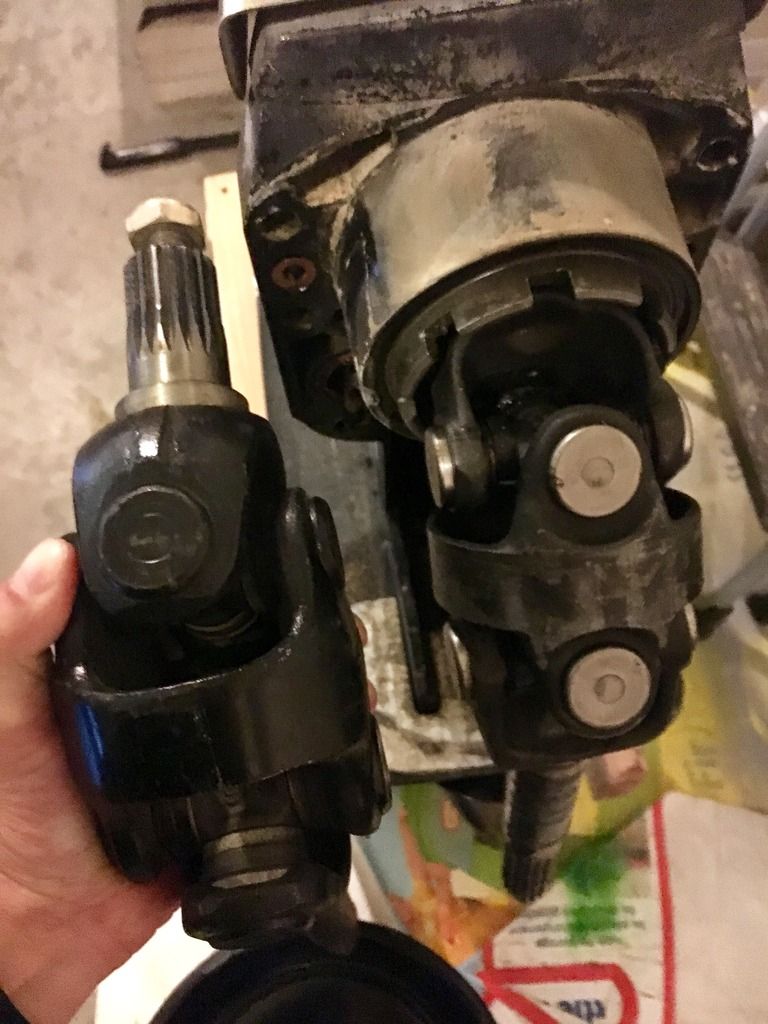
Pics of the new XR ITS shaft next to the standard bravo one:
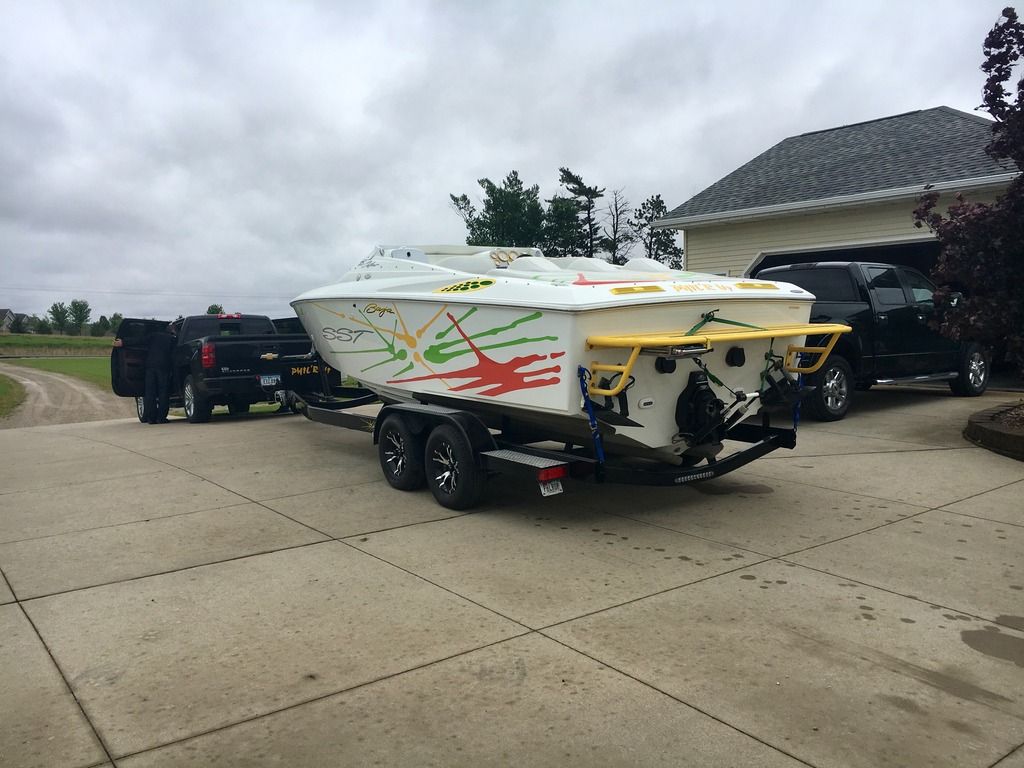
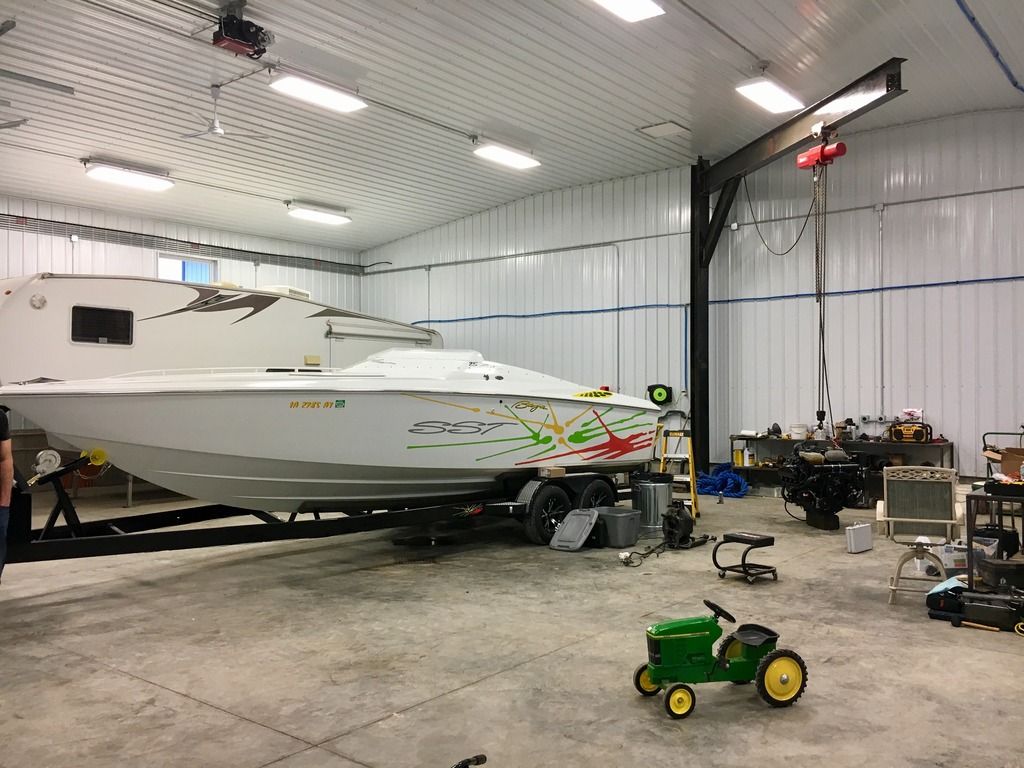
Pulling the boat out headed up to the shop:
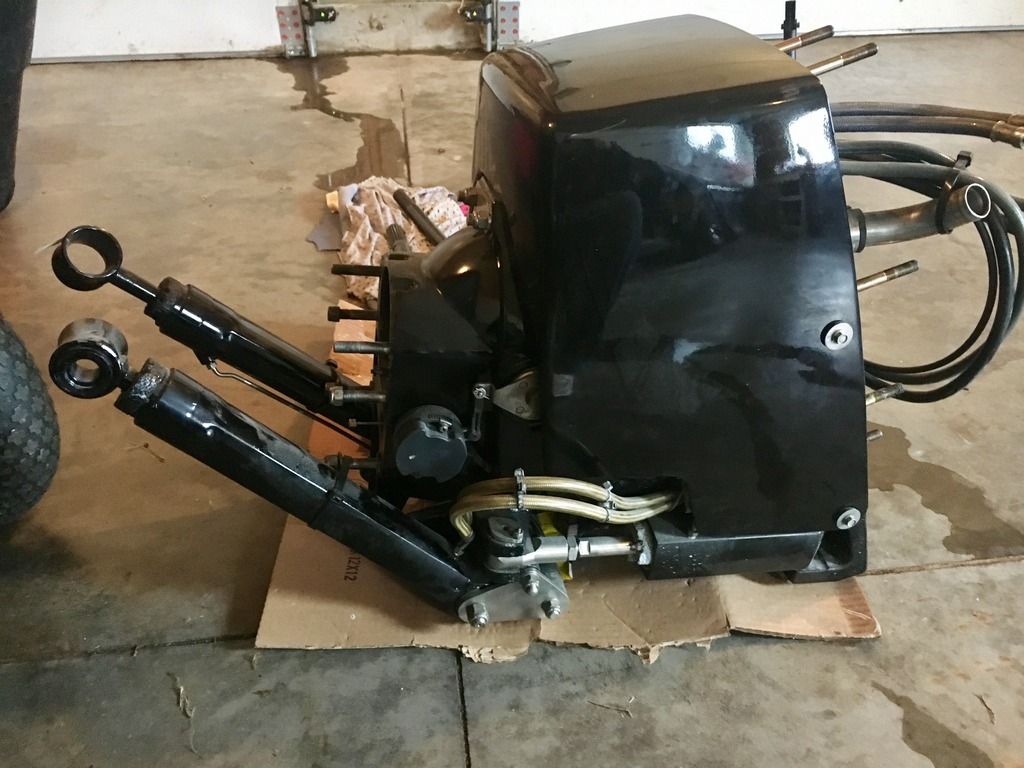
New ITS box
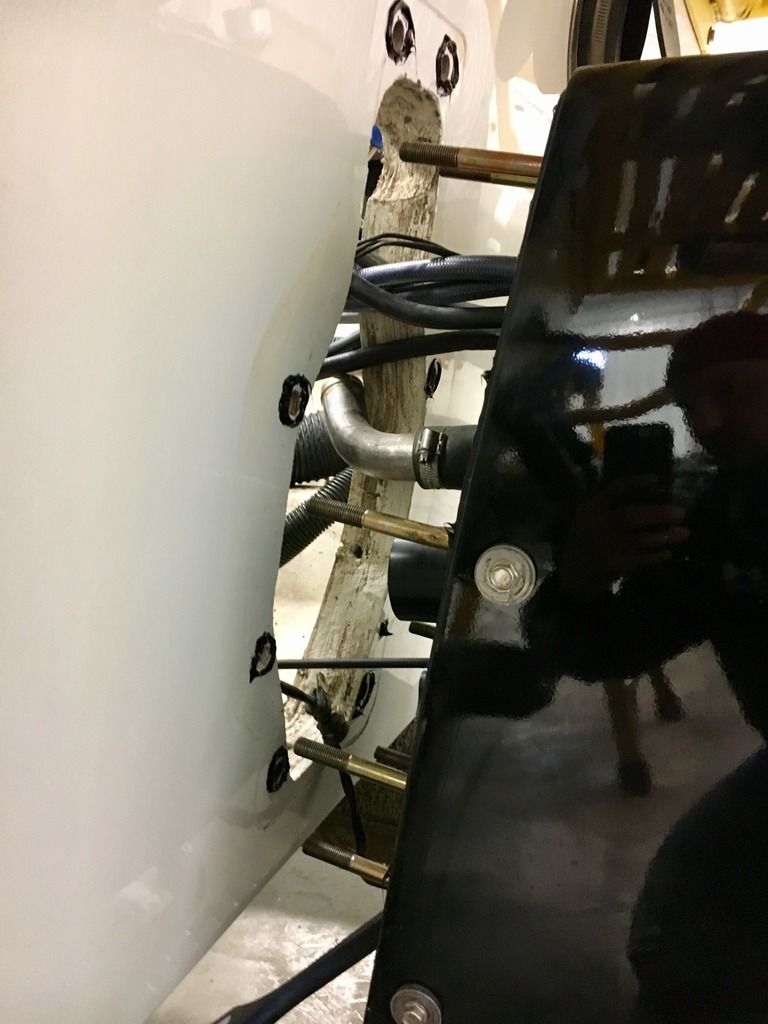
Unhooking everything:

Siliconed the new depth transducer holder down after sanding the bottom flat:
Right before the ITS box went on:
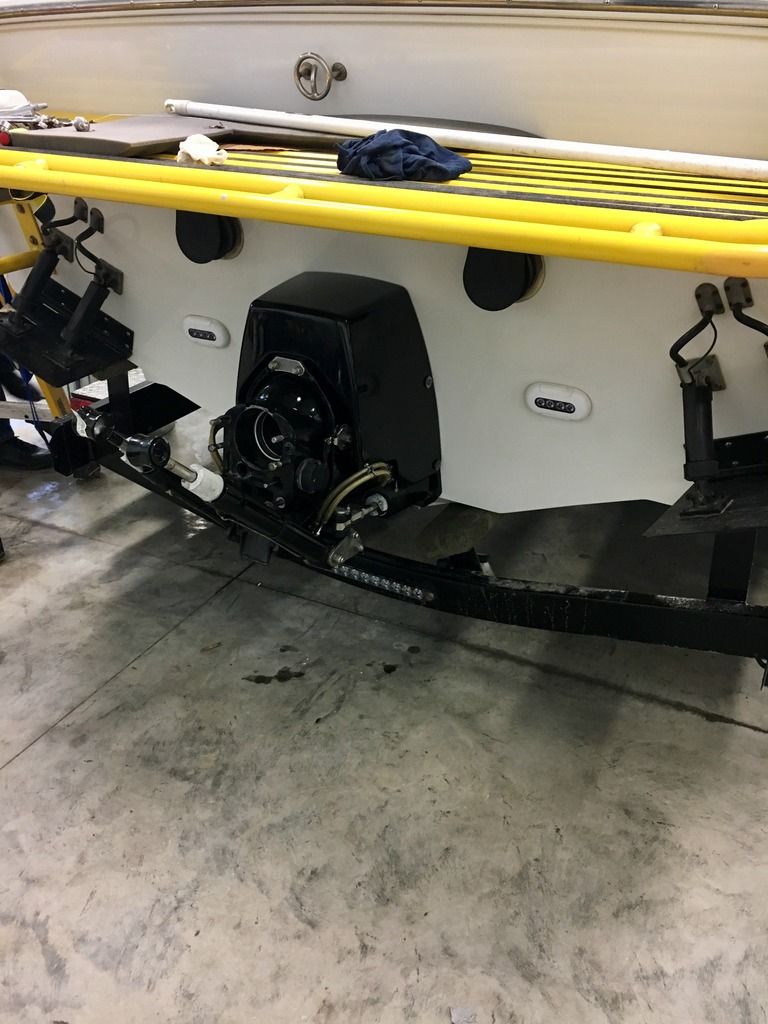
Looks pretty good hanging off the back:
Sunday morning ready to put the motor back in:
Closer up of the motor with the new Hardin sea pump on:
Pics of the new XR ITS shaft next to the standard bravo one:


Pulling the boat out headed up to the shop:

New ITS box

Unhooking everything:

Siliconed the new depth transducer holder down after sanding the bottom flat:

Right before the ITS box went on:

Looks pretty good hanging off the back:

Sunday morning ready to put the motor back in:

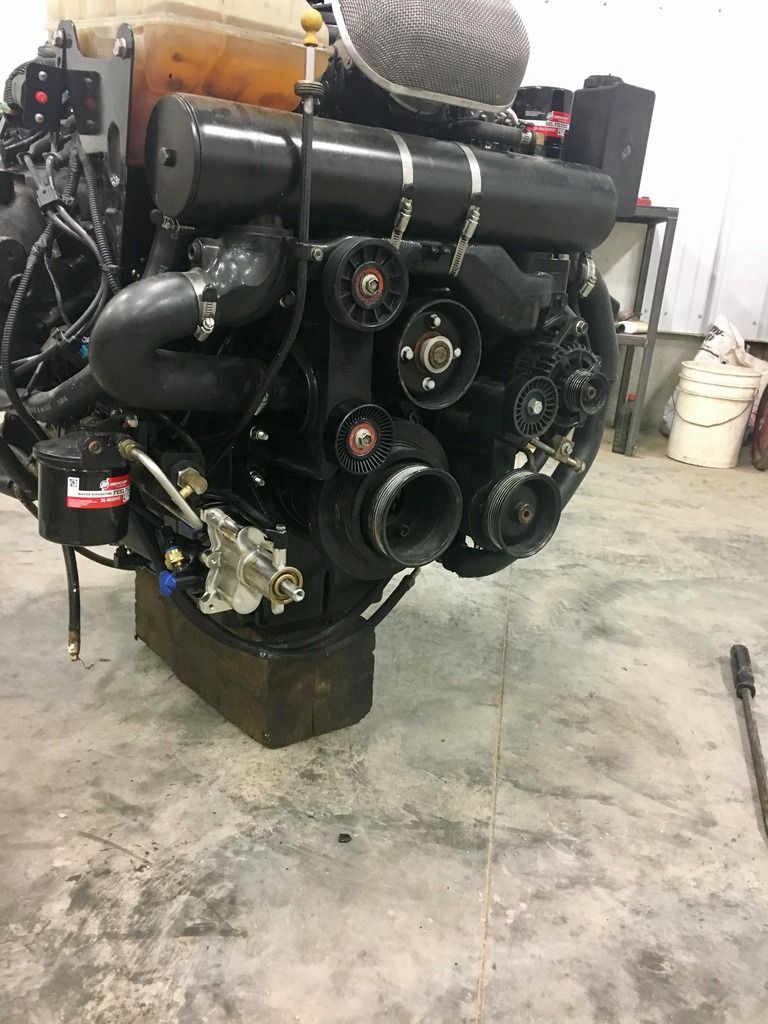
Closer up of the motor with the new Hardin sea pump on:

Last edited by iaoutlaw; 05-22-2017 at 10:16 AM.
05-22-2017, 10:51 AM
#146
Registered
Thread Starter
As far as how everything went; Friday was pretty smooth Thanks to IGetWet who answered a few questions I had along the way that saved us a bunch of time. We had an extra hand friday (6 guys total) so we got ahead of schedule and got the pulley pulled and installed on the sea pump and installed on the motor. The only real issue we ran into pulling the motor out was getting the water and exhaust hoses of they were stuck on pretty good after 16 years especially the water line between the transom and the water drain system you can't get leverage on it and it's hard to get at being under/behind the motor.
Saturday was the easiest day being we couldn't do much while we were waiting for the silicone to dry on the depth transducer but we cleaned up the transom and the back of the ITS then installed it on the boat. The only issue was getting the exhaust y tube installed on the ITS. 1 of the bolt holes on the ITS was slightly damaged and we couldn't get the bolt in so we had to carefully drill it out until a bolt would go in and grab a thread.
Sunday was the longest day as I expected it would be took us about 10 hours to get everything back together. Cleaned up all the wiring, Installed the Transducer, then dropped the motor back in. I thought that aligning the motor would take alot longer than it did but the tool makes it real easy to see how far you have to adjust and in 20 mins we were done. Once again the water line was the biggest issue trying to get it back on behind the motor just no room to get leverage on it. The other issue was getting the Hatch back on we took the hinges off the boat If I did it again I would leave them on. Probably didn't help that we were all sore and tired from being in cramped spaces and on our knees for 3 days straight.
One of the guys has a lot more pictures (over 200) and few videos (one of the motor coming out) that I'll get a few more up once I go thru them. We were meticulous in labeling everything and taking a picture which made the install a lot easier.
Last edited by iaoutlaw; 05-22-2017 at 10:59 AM.
05-22-2017, 08:14 PM
#147
Registered
Nice work Phil. That's a lot of work for one weekend. The ITS is a very clean setup, I love the look. The hydraulic steering should be a ton better than what you were describing with the old transom assembly. Did you get to look at that one and see in fact there are parts worn out? Now with the 7" of set back you should be able to benefit from a shorty lower.... in the future of course.... after a couple more ponies are added under the hatch 
Glad to see I'm not the only one who enjoys their "little" 25 outlaw and is willing to spend some bucks to make it more enjoyable. Hoping to meet up somewhere this summer!
Glad to see I'm not the only one who enjoys their "little" 25 outlaw and is willing to spend some bucks to make it more enjoyable. Hoping to meet up somewhere this summer!
Last edited by IGetWet; 05-22-2017 at 08:17 PM.
05-23-2017, 07:15 AM
#148
Registered
iTrader: (2)
I am really interested in this ITS conversion Phil. I would be keeping the standard Bravo 1 drive also and was thinking of drive shaft options. I had not contemplated your solution so please keep us informed on that.
What was your prop shaft depth prior to the change? Our 252 is really deep at 8 inches. I also like the fact that you are going through a lot of trouble to keep the diverters. I enjoy the option of the switchable exhaust, but would dearly love to get rid of that system for the maintenance and accessibility reasons that you mention. One of the problems with running a short lower and keeping the exhaust diverter is that you lose the anti-ventilation plate above the prop. This in turn prevents you from opening up the exhaust ports in the lower, with the exception of the through the prop port. I am not sure that this is enough of an exhaust area for any diverted exhaust except at idle speeds.
Where did you purchase the ITS? I have been looking around for a nice one.
Dan
05-25-2017, 09:04 AM
#149
Registered
Thread Starter
BajaDan.. I should have the machined input shaft in a week or 2 so I'll take pics when I get it to show the difference between the XR and the bravo. Regarding the shorty you do loose the standard cavitation plate with a bravo but they send a plate that you bolt on top the Imco's do the same thing and bmax shorty's have a solid S cavitation plate built into the lower so I have some options with that. What are you talking about with the exhaust ports on the lower? I'm assuming you mean the plugs on the side of the prop in which case mine are currently in so I wouldn't loose any exhaust flow by adding the shorty.. It wouldn't make a much of a difference anyway the only time I switch it is when I want to talk to someone or if I'm cruising late at night and don't want to be harassed by DNR both are way below redline so the backpressure from running thru prop should be at an acceptable level. I purchased the ITS from DoubleR in Canada great guys to work with it came off a 525 boat that upgraded to #6's. I think they still have the other one if your interested.
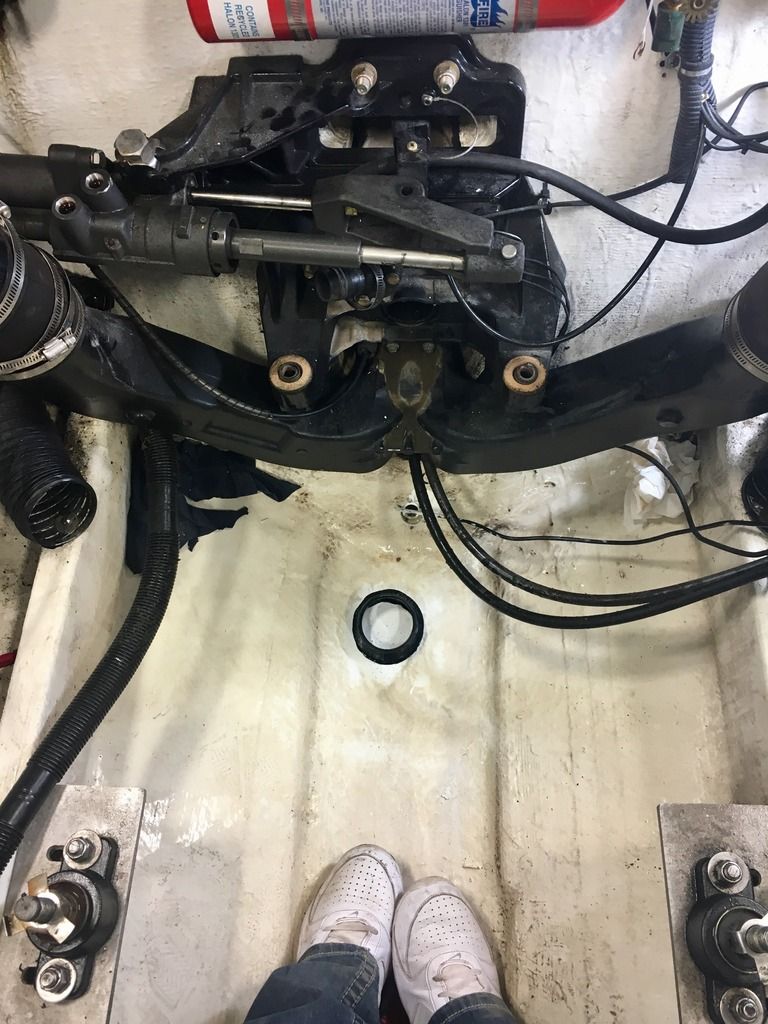
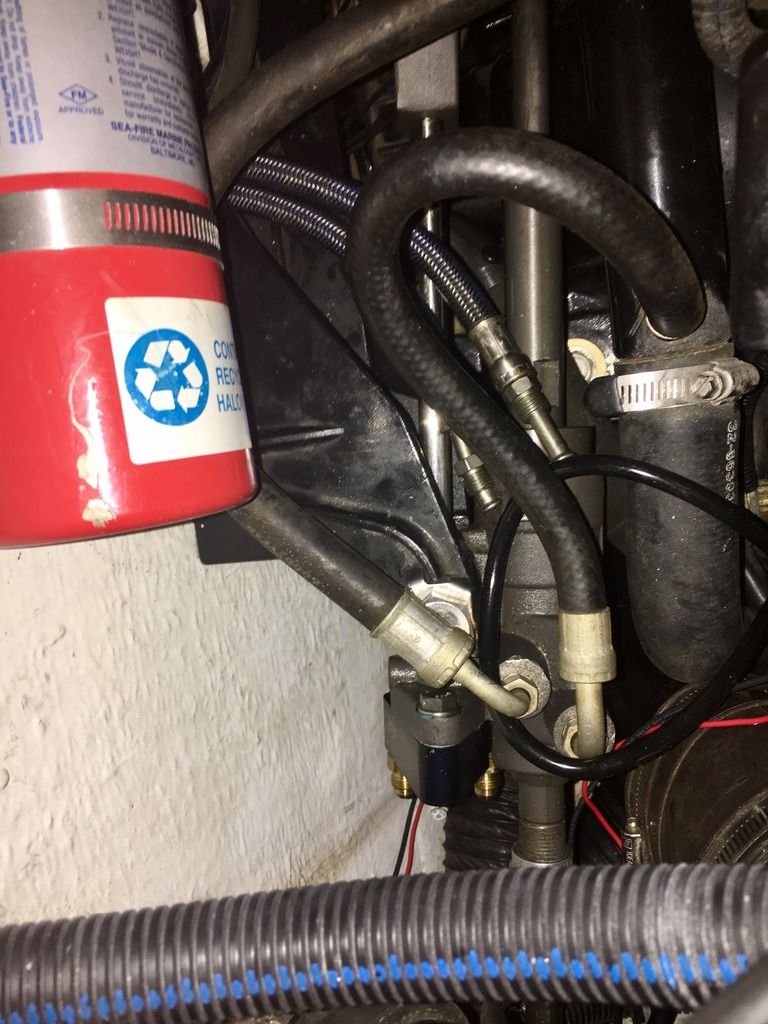
Better pic of the steering system.. you can see the 2 lines coming out of the transom and the brazilian manifold where the steering ram use to be. I took measurements last night so I can get hoses made to connect the 2. Brazilian manifold has NPT fittings and the lines from the transom have JIC.
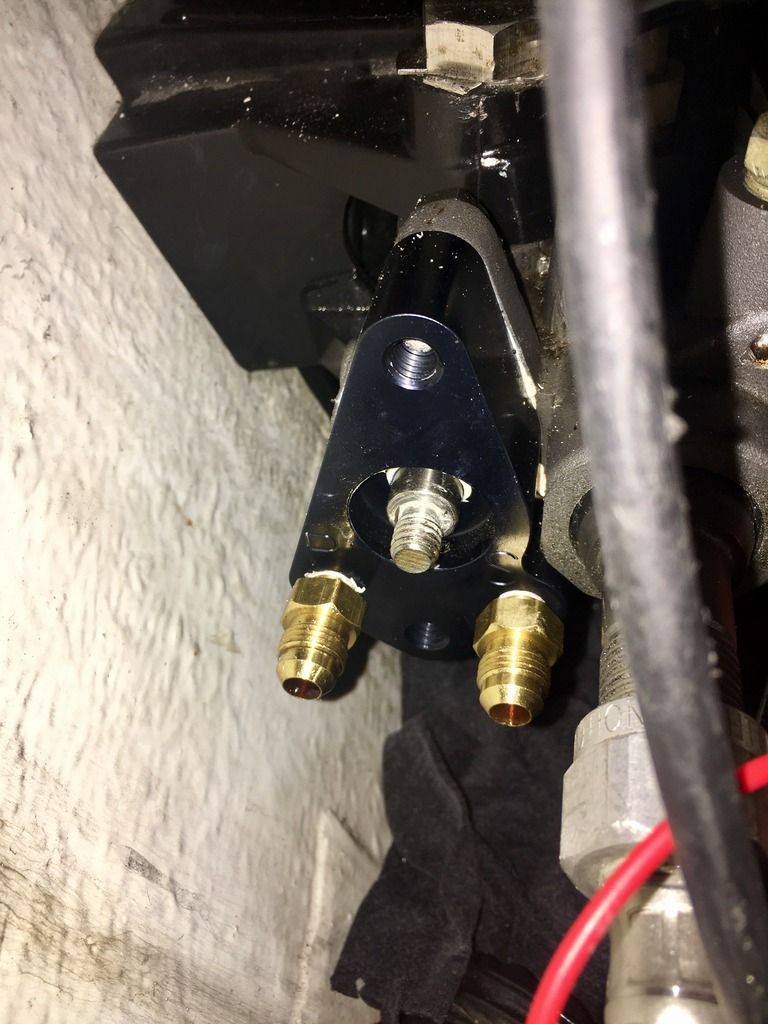
Close up of the Brazilian manifold:
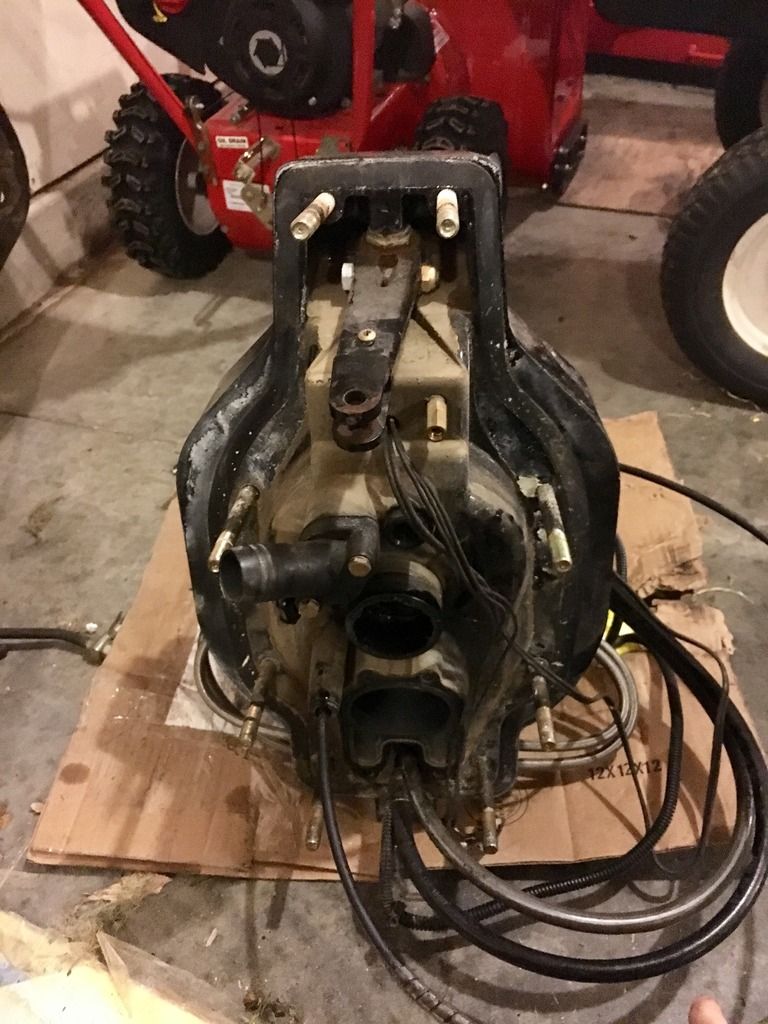
Backside of the old transom.. you can see how bad the gimbal ring was and exactly where it was leaking from just by following the trail of caked on mud. It's going to be nice to have the hydraulic steering even better not having a leaky boat anymore.


