


353 with separating rub rail. (repair)
 03-10-2021, 08:18 PM
#11
Registered
You gain access thru the lights and speaker grills. I have the same boat, plexus just fell off like yours. I pushed a plastic shim to separate the hull and deck to run a bead between the hull and deck.
I didn't run the bead all the way to the tip, I left the thru bolted section in the very front alone. I went back with 5200 once the Plexus dried, and filled screw holes and any gaps.
For any broked screws that I couldn't remove or the hole was too big for a new screw, I drilled a new hole a 1/2" away (for the plastic part of the rub rail only. The stainless insert was not an issue.
Last edited by snowrunner; 03-10-2021 at 08:23 PM.

The following users liked this post:
Audiofn (03-12-2021)
03-12-2021, 05:32 PM
#12
Charter Member #232
Thread Starter
Thanks that is what I assumed. I have to hit Maine this weekend to do some work on my house. Hopefully I can get a night to take a look at it in the upcoming week.
__________________
Put your best foot forward!
Put your best foot forward!
03-12-2021, 06:13 PM
#13
Registered
04-07-2021, 10:15 PM
#14
Charter Member #232
Thread Starter
I have the valances loose in the middle of the bolt. As Snowrunner said you go through the lights. One of the screws is JUST in reach. They must have some cats with skinny arms at the factory. The fronts I have not been able to figure out for the life of me. There is no light up there, Any ideas would be great as I hope to hit the port side this weekend.
__________________
Put your best foot forward!
Put your best foot forward!
04-26-2021, 08:35 AM
#15
Charter Member #232
Thread Starter
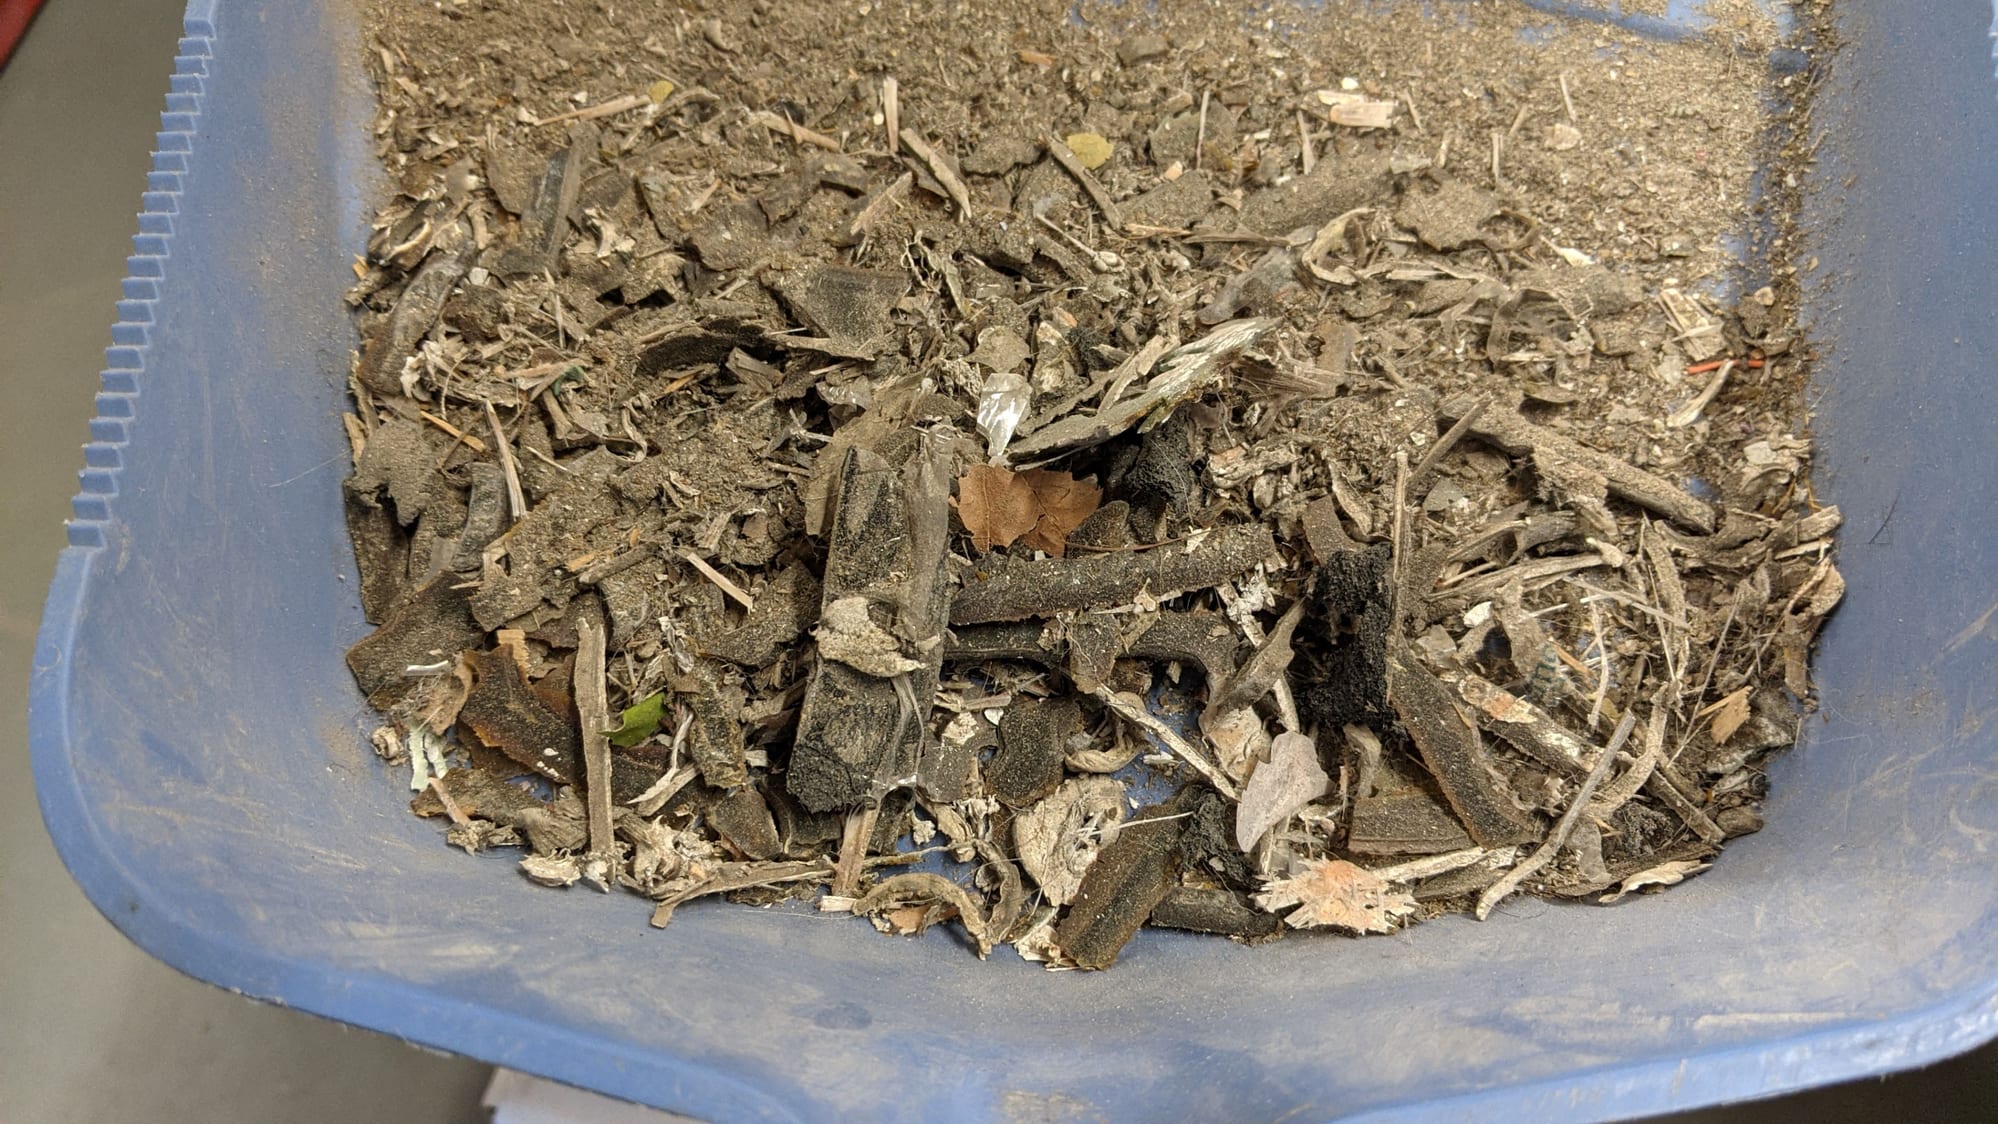
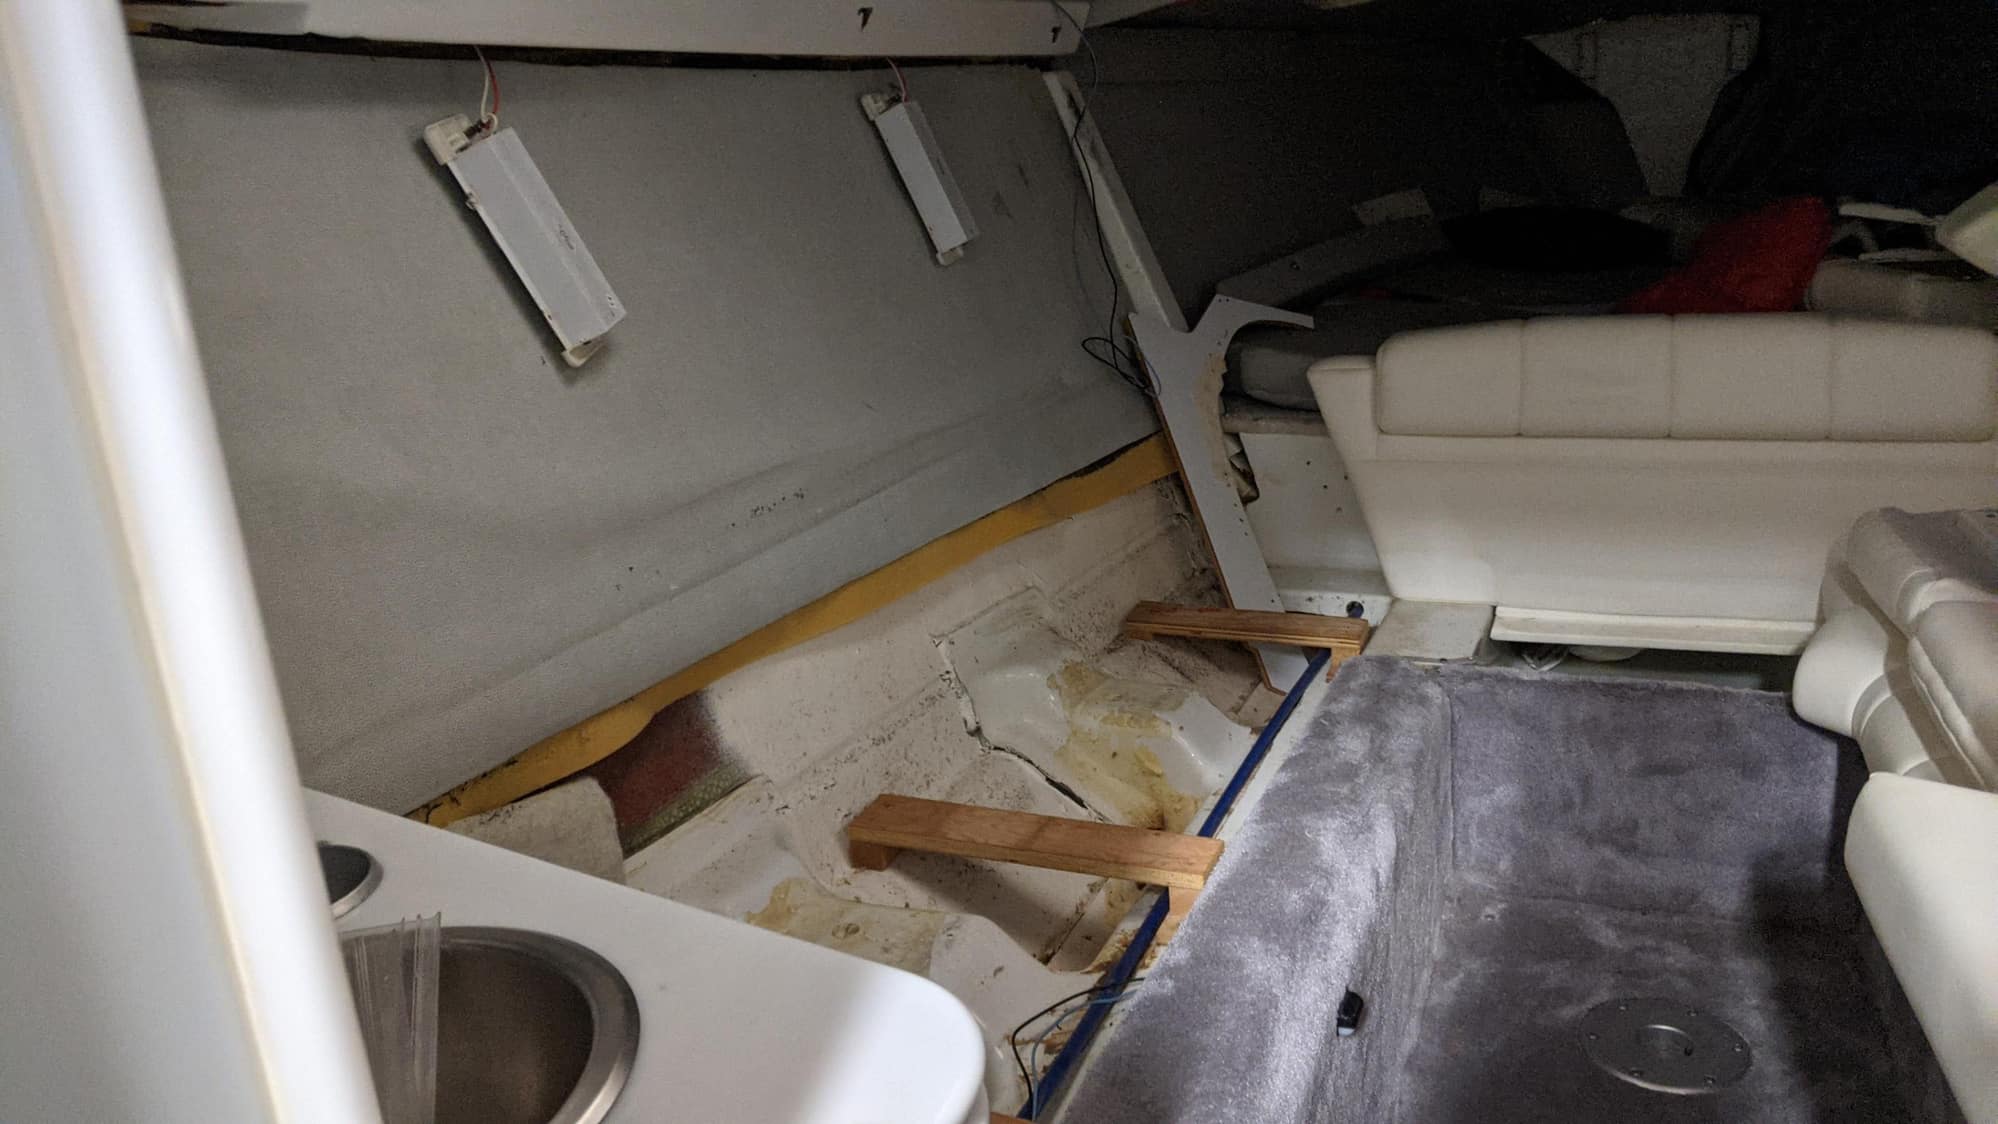
Unfortunately like so often happens life is getting in the way. I worked with a friend of mine to get the rest fo the interior apart and get to the bolts inside the boat. I was then able to scrape out all the plexus fairly easily as it was not bonded at all. The entire side fo the boat was not bonded other then about the front 4 feet. Kind of scary to think about. There were a number of screws and bolt that were broken off. I was able to put a wedge between the hull halves and use a pair of needle nose vice grips to back the screws out. It was a pain but IMO worth doing. I used strips of strapping across the hull to support the rub rail so it would not bend/storage. As it sits now I have to get some time with a friend to bond the hull together and get the bolts in. Also note about the entire interior has to come apart. This was a. HUGE bummer. I will make a few changes going back together again. At least we made some progress. Maybe this weekend I can get a little time on it.
__________________
Put your best foot forward!
Put your best foot forward!
The following users liked this post:
TomZ (04-28-2021)
06-25-2021, 01:28 PM
#16
Charter Member #232
Thread Starter
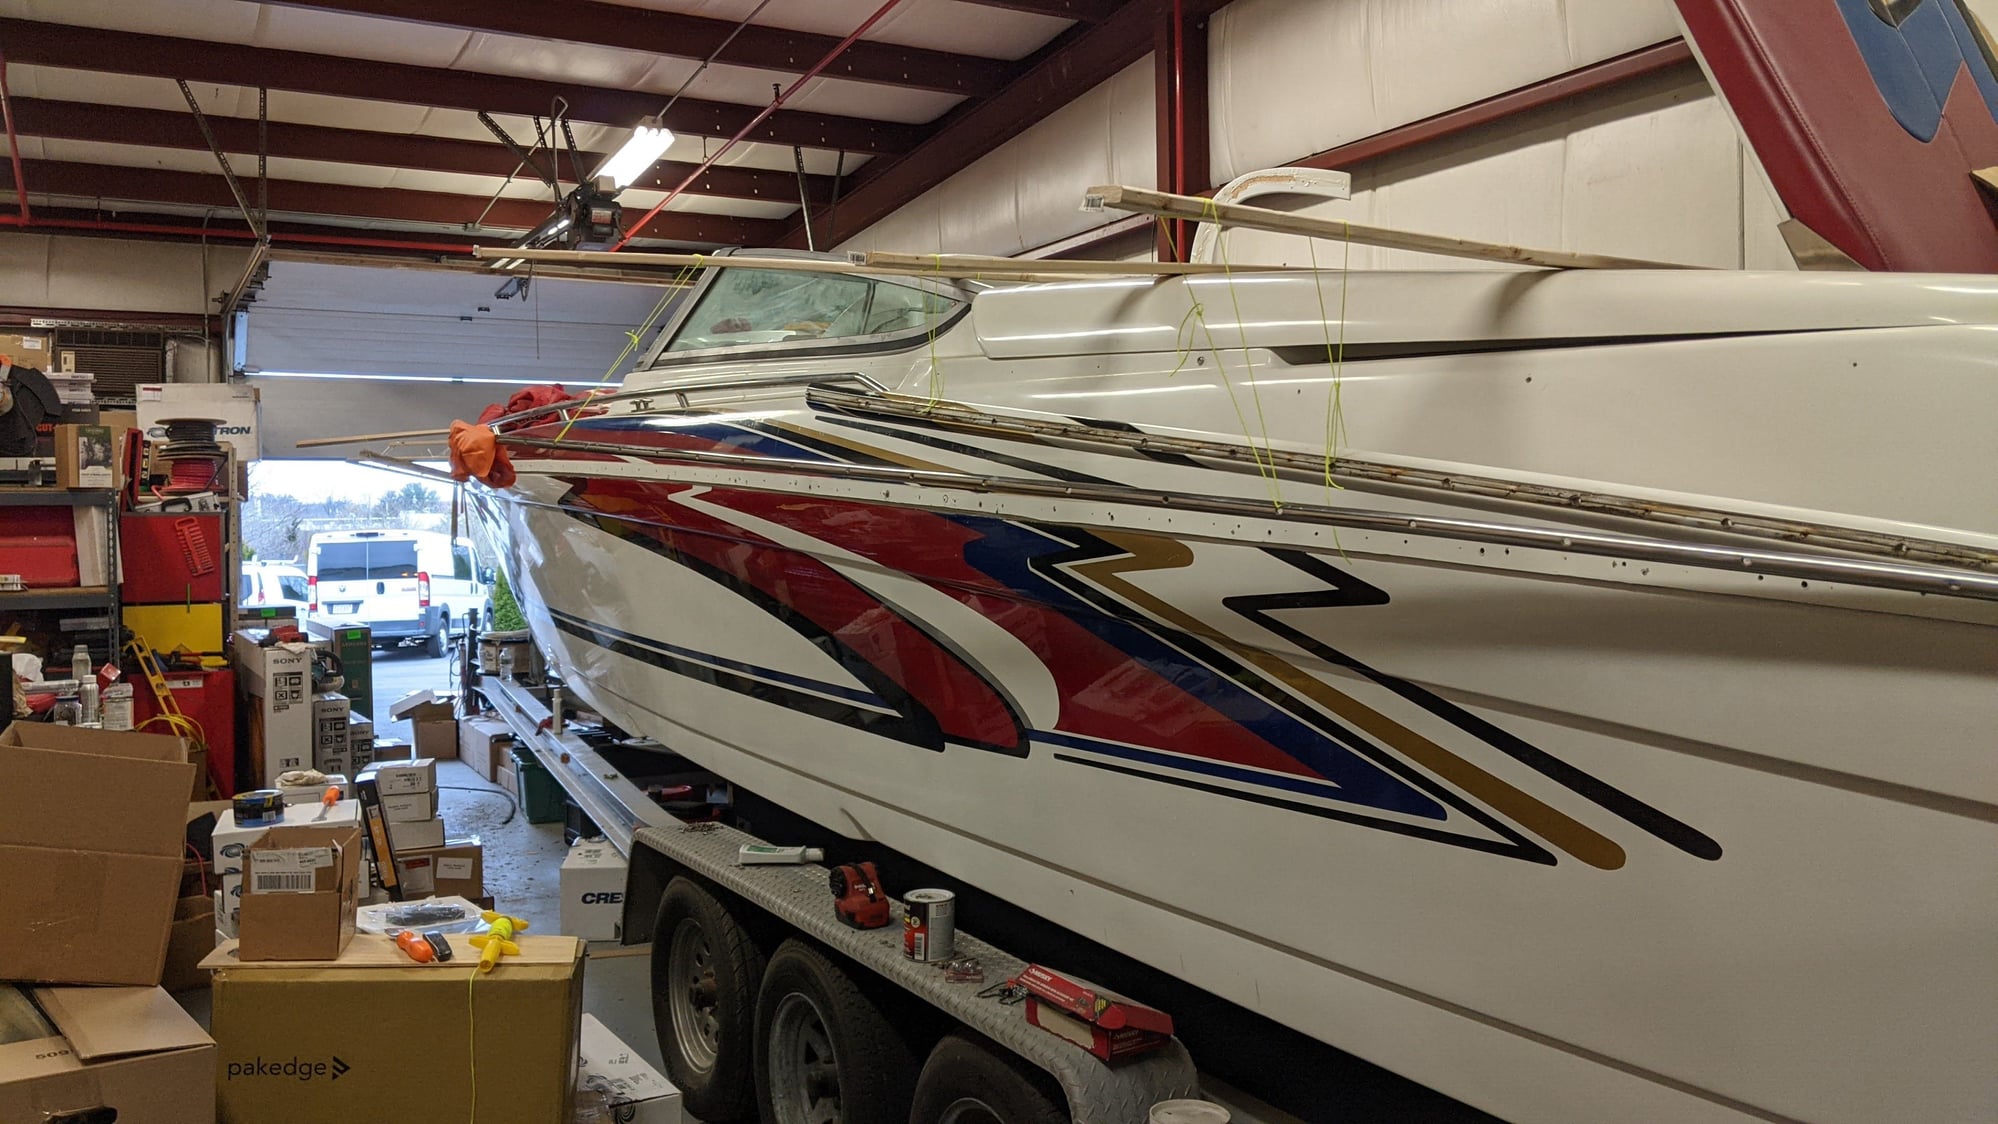
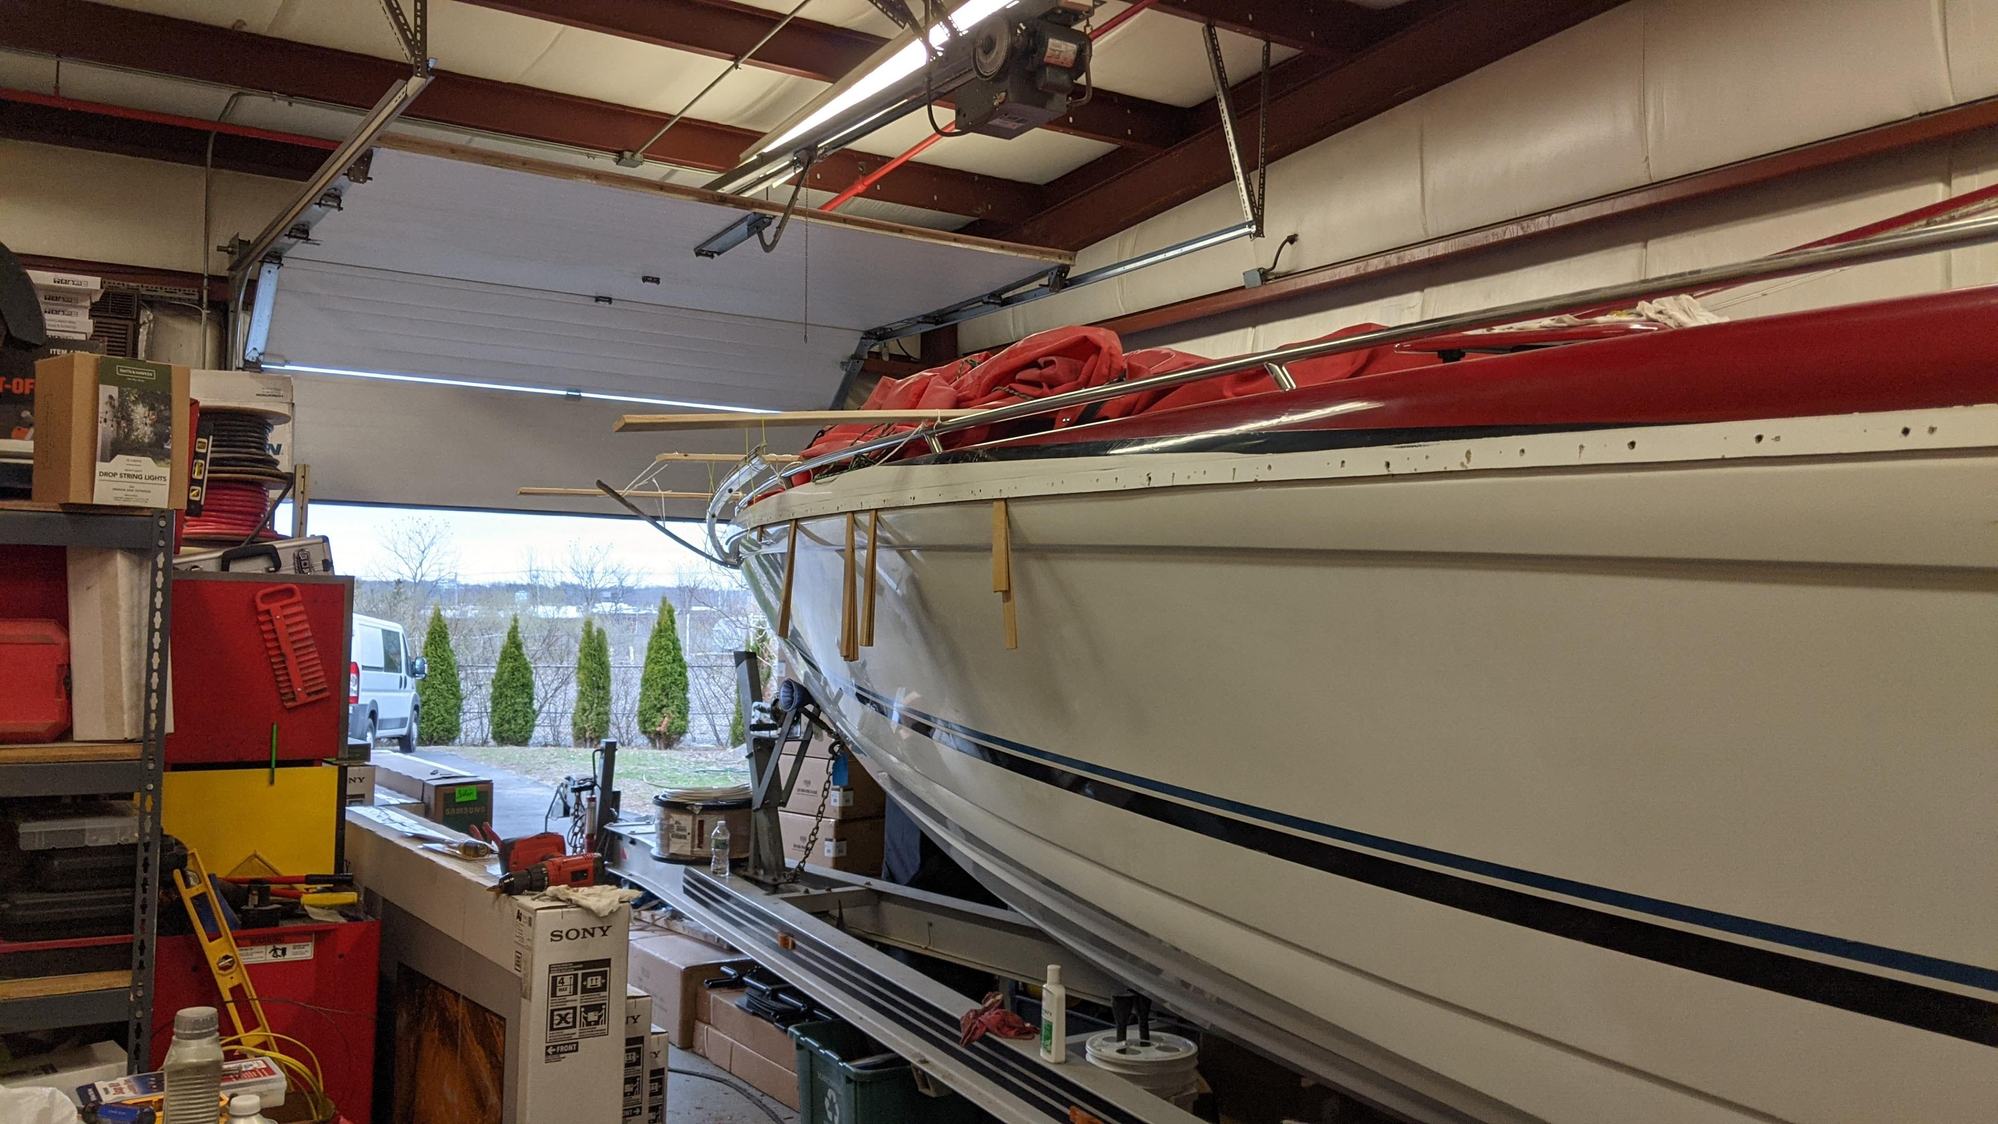
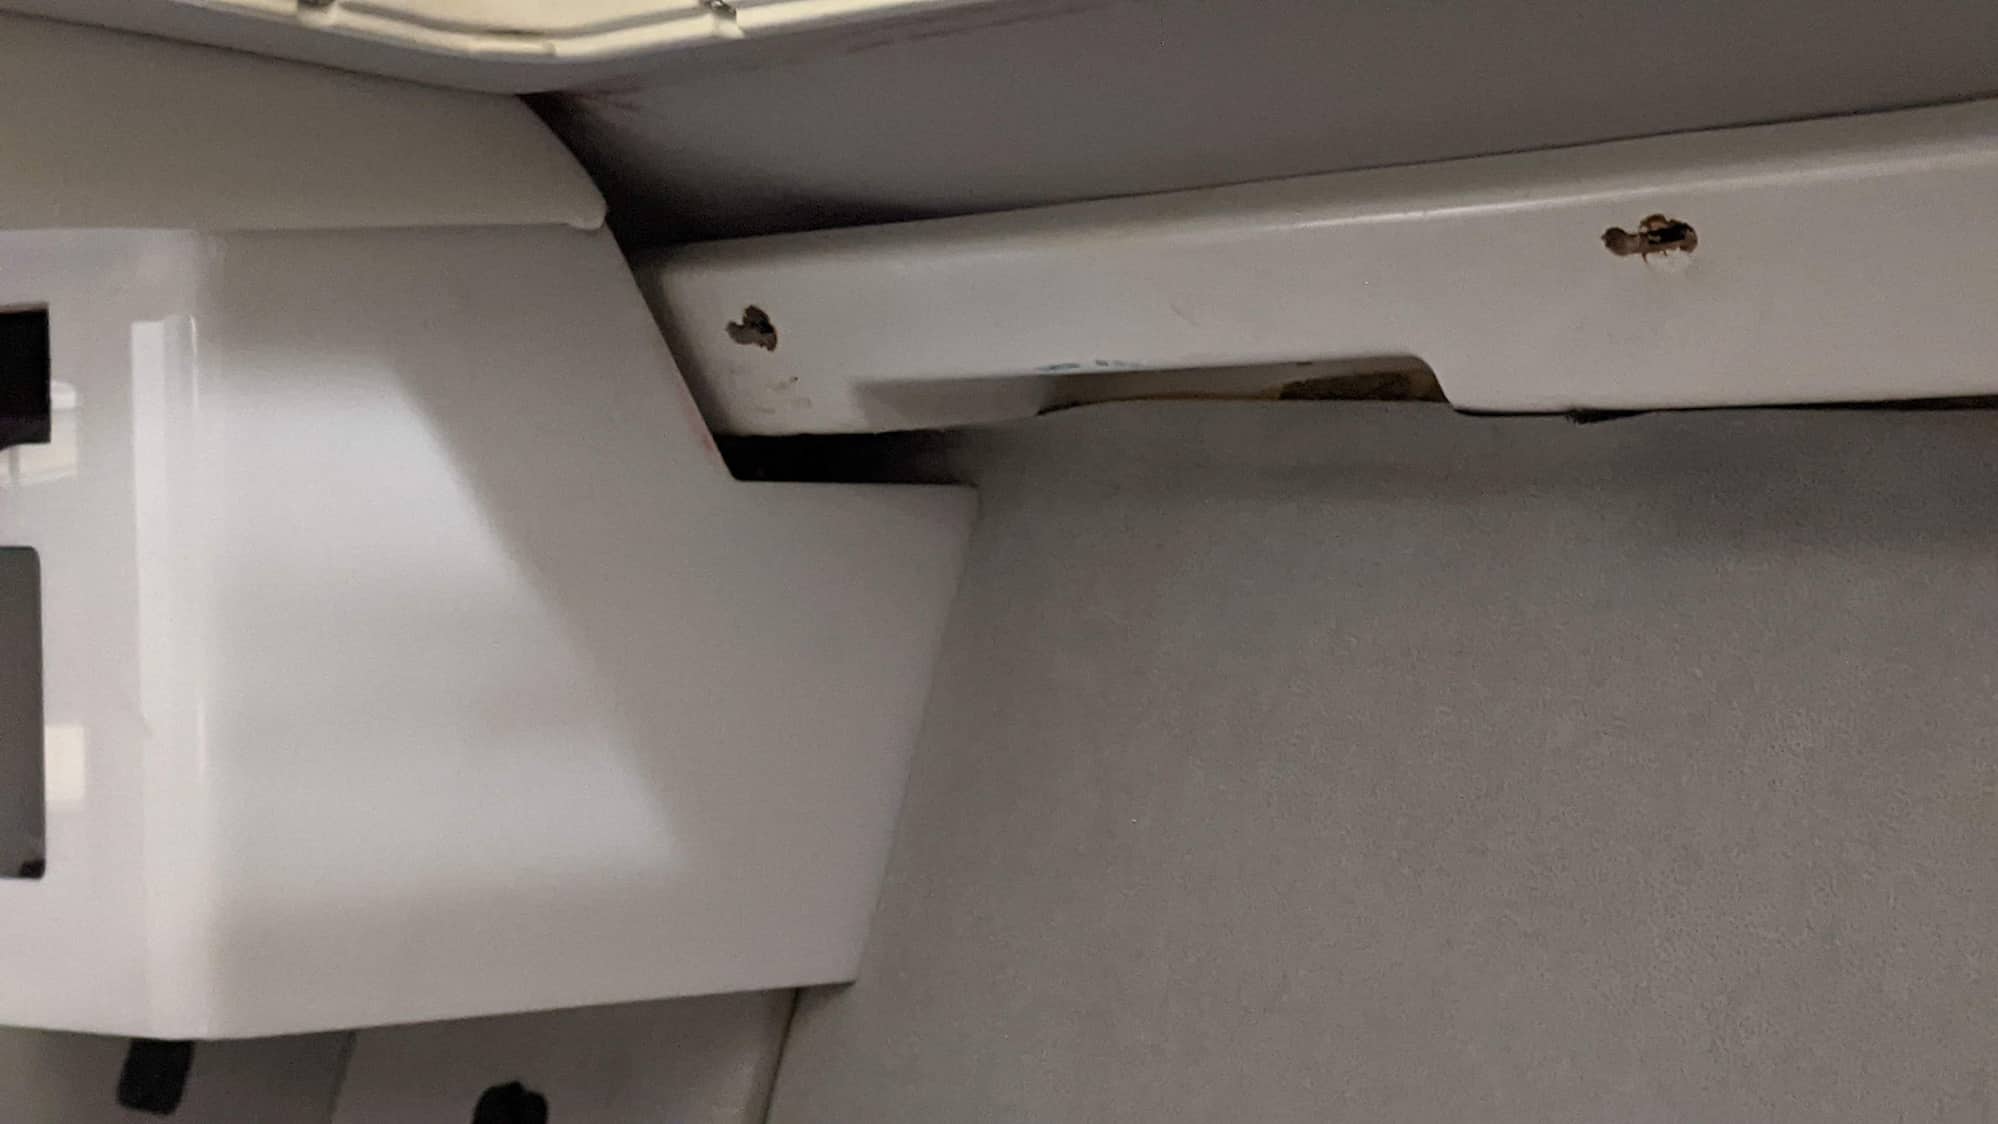
Ok finally some updated photos! Still a slow roll getting this done as I struggle through how to make things better and so I never have to deal with this ever again. There are screws that hold on the stainless part of the rub rail. They came out easy for the most part. There were screws that hold the plastic part of the rub rail to the boat. Most of those were sheared off due to the fact that the plexus was used incorrectly and the bond was never made. This presented a difficult problem because I had to back out all the broken screws. It took some time but with some wedges I was able to separate the deck and hull joint enough that I could grab the broken part with needle nose vice grips and slowly work them back out. Took me about 3-4 hours to get them all out. Once I had the rub rails off then all the 1/4 20 bolts had to be removed. Most of them were also sheared clean off. Basically gravity was holding the boat together other then 4 feet of the bow of the boat. So that is really scary to think about.
__________________
Put your best foot forward!
Put your best foot forward!
06-25-2021, 01:55 PM
#17
Charter Member #232
Thread Starter
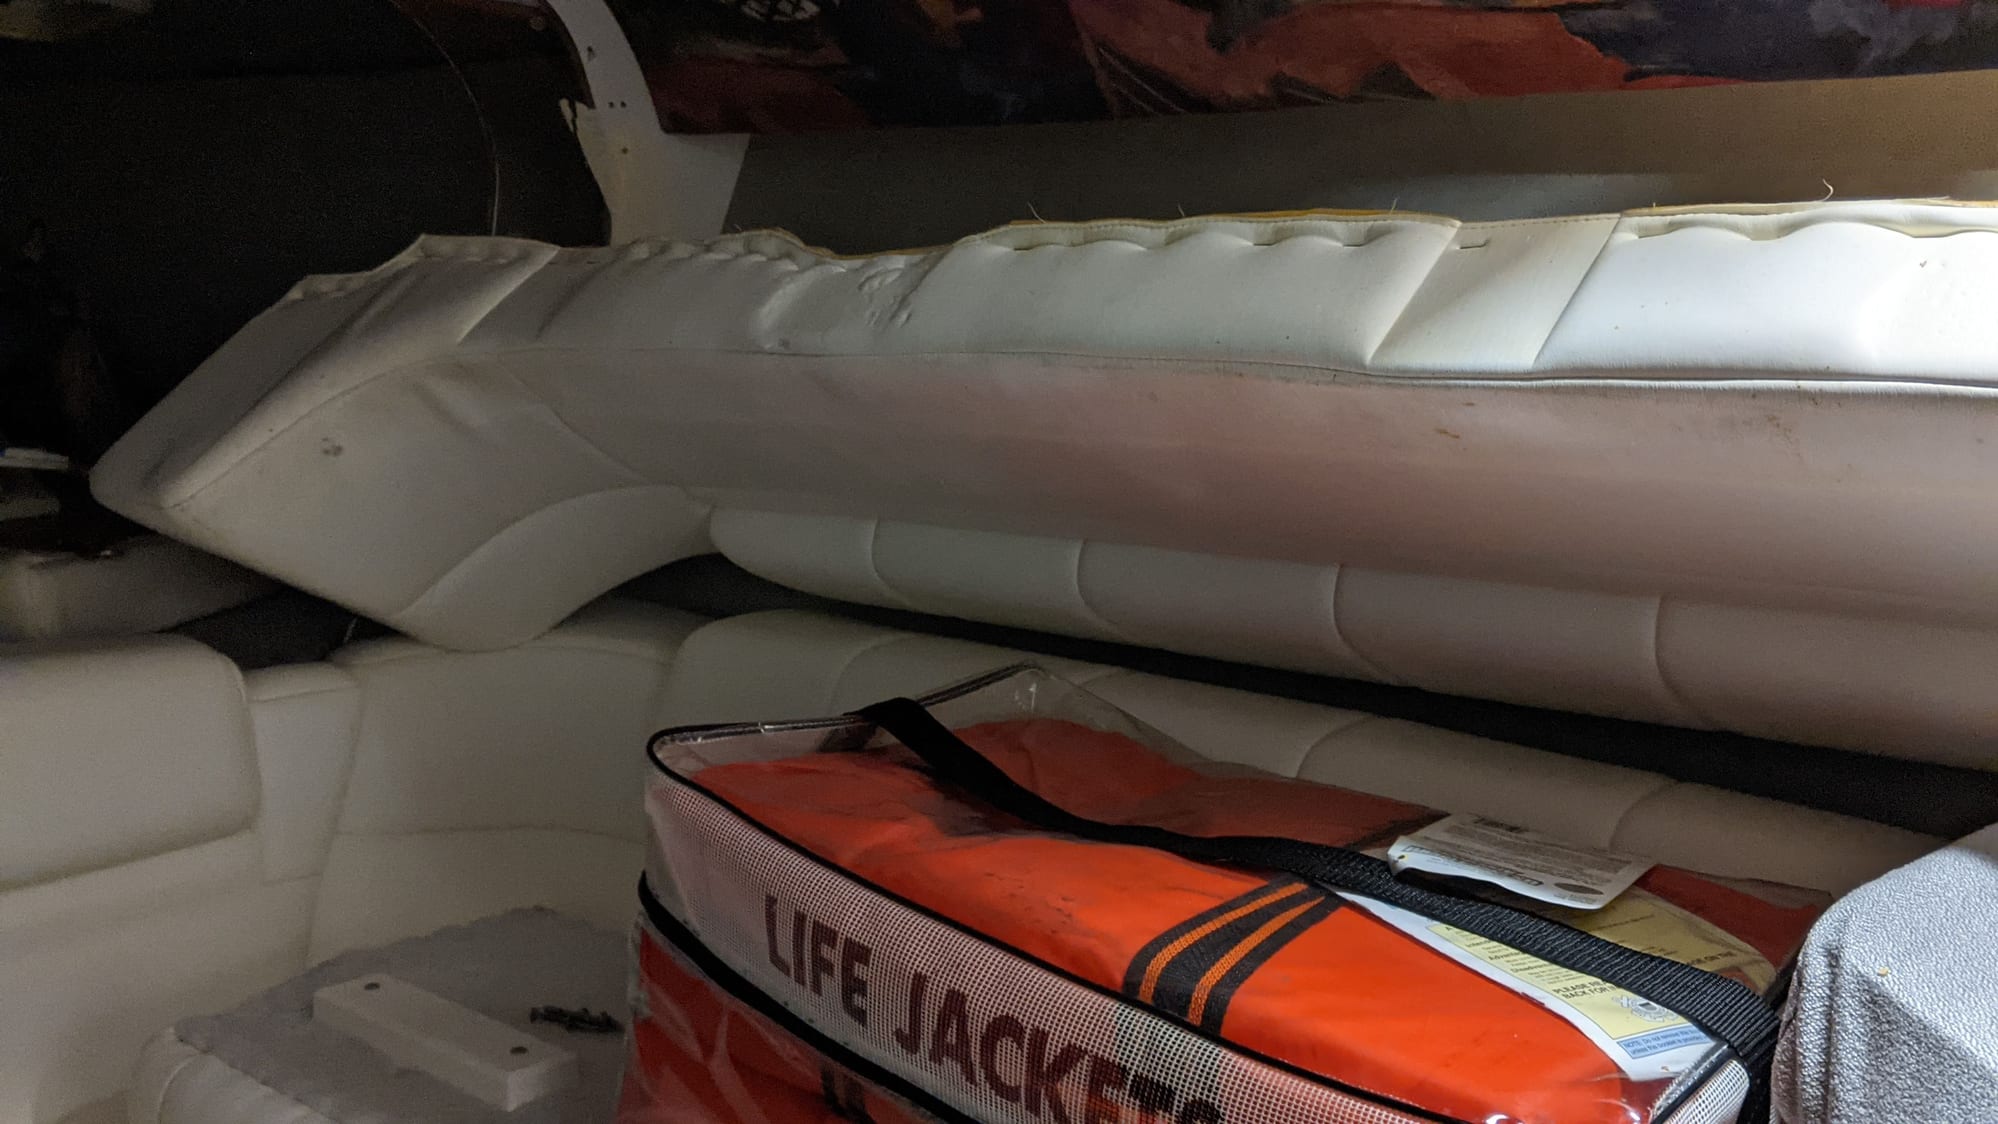
We supported the rub raid from above with strapping and string. This helped me so that I could do only one side at a time.
__________________
Put your best foot forward!
Put your best foot forward!
Last edited by Audiofn; 06-28-2021 at 05:02 PM.
06-25-2021, 02:01 PM
#18
Charter Member #232
Thread Starter
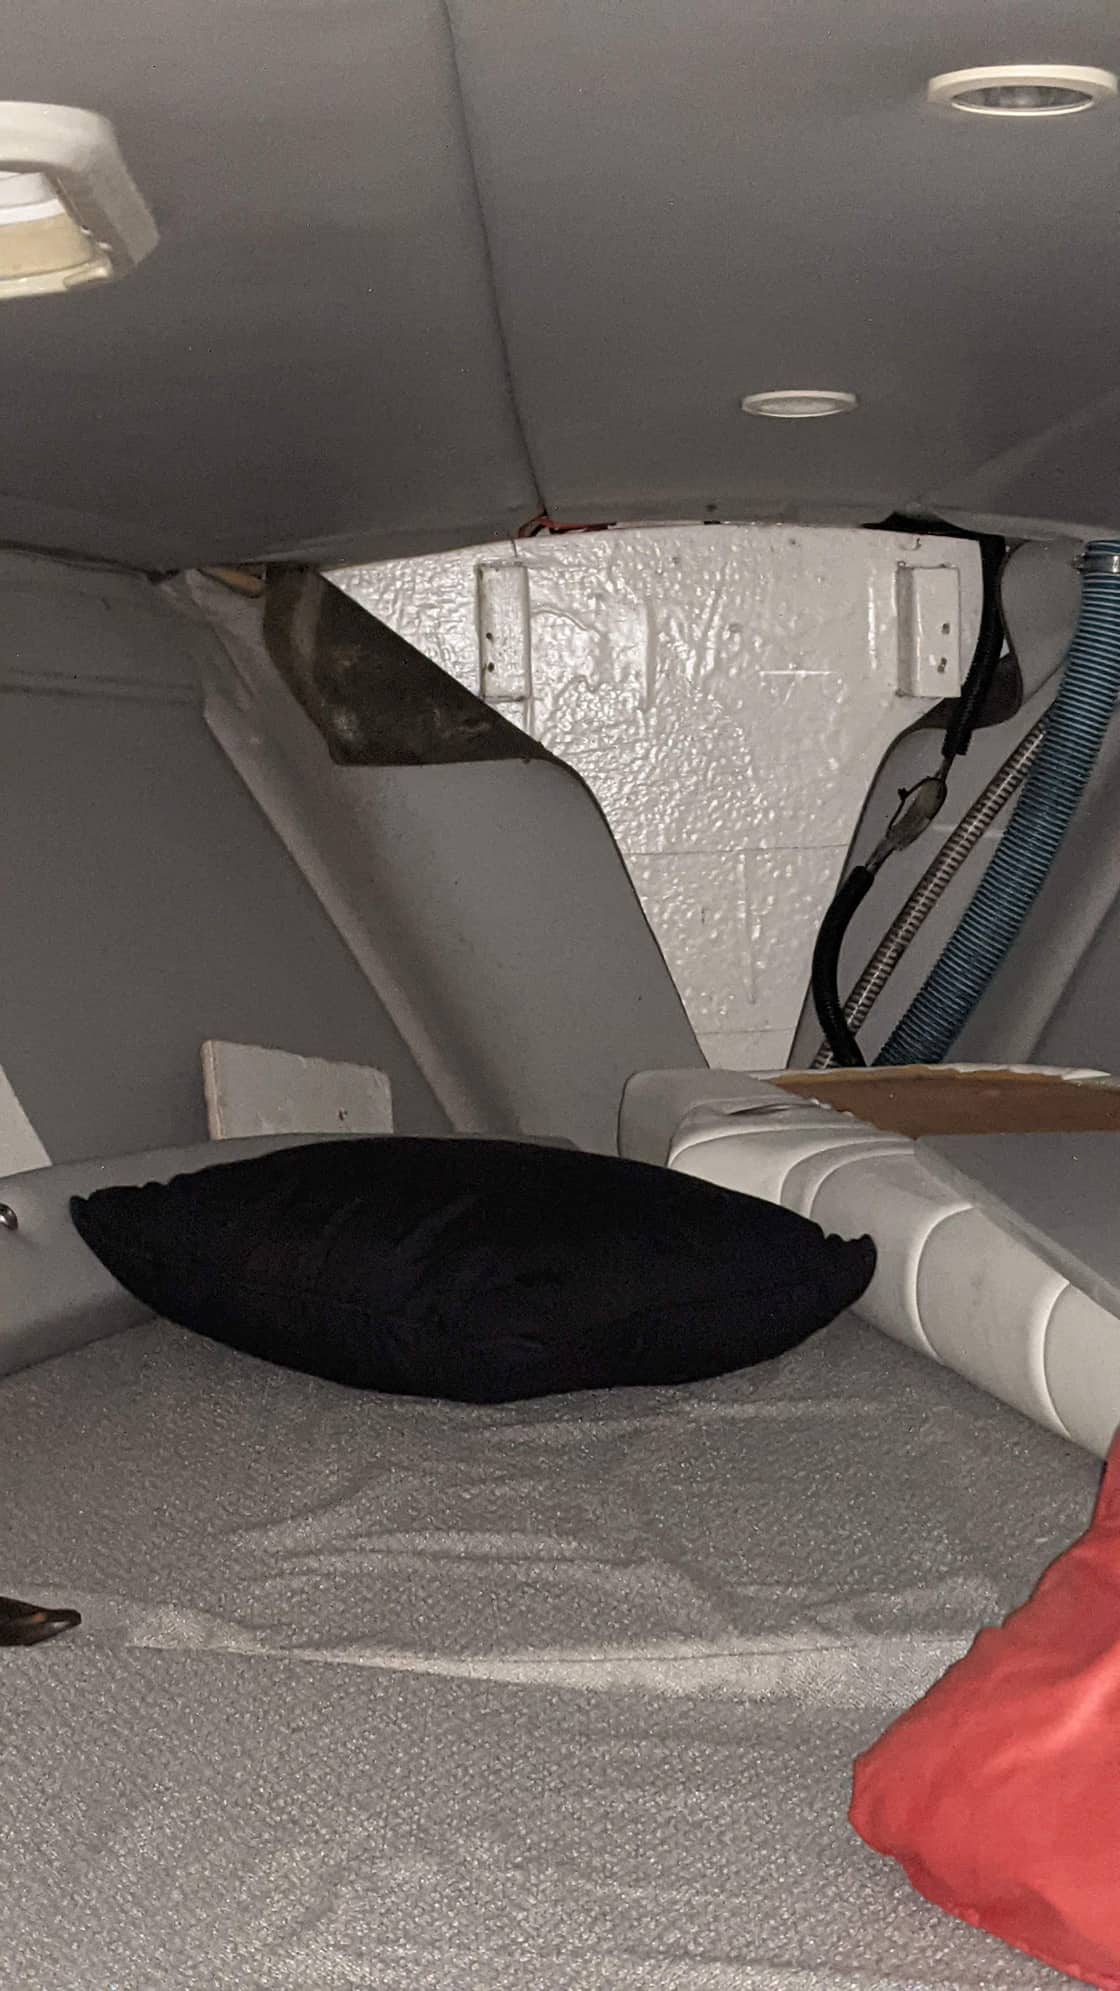
Removing the screws was probably one of the biggest issues. Every screw down the port side was sheared off. Even the 1/4 20's were broken clean off. So basically there was nothing holding the deck to the hull from 5 feet off the bow all the way to the stern. Maybe two screws that the previous owner stuffed in to try and hold the rub rail on. That was super concerning to me of course. If that last few feet in the bow had let go it really could have been a bad result. This picture is my putting wedges in the gap so that I could get the plexus out. In my case this was very easy to do. I used gasket scrapers from Snap On. The stuff basically fell out or just took a hit from the scraper to get it out.
__________________
Put your best foot forward!
Put your best foot forward!
Last edited by Audiofn; 06-28-2021 at 05:28 PM.
 06-28-2021, 05:33 PM
#20
Charter Member #232
Thread Starter
Then I wanted to gain access to the inside so that I could through bolt everything that was possible to through bolt.
__________________
Put your best foot forward!
Put your best foot forward!

