

Nose cone removal
 08-11-2023 | 11:03 PM
#21
Registered


Joined: Aug 2019
Posts: 1,250
Likes: 420
From: BC
Saw this link as well. Good layout photo at the end.
re drilling water pickup holes on bravo 1 drive
re drilling water pickup holes on bravo 1 drive
 08-12-2023 | 05:18 AM
#22
Thread Starter
VIP Member

Joined: Jul 2009
Posts: 783
Likes: 51
From: NJ
If you keep them on for the next 6-8weeks of season, I think you would be able to focus better with a proper solution, and not be pressured to cut corners to keep it seaworthy.
bravo 1 low water intake
Interesting perspective about drilling new holes. Merc suggests 4 vs 8. So maybe reviewing the whole plan of water inlet...maybe there is a better location to have them.
If you want to drill out the original locations, make sure you drill at the correct angle. Account for the shape of the inlet holes.
I would use smallest drill bits strong enough to do the job without breaking.
Try a sharp pointy center punch to align the drill bit.
Increase drill bit size until you've reached your desired hole size.
Don't discount a little Dremel type tool with a small round burr to open up the angled inlet portion for the holes.
Last edited by 35fountain; 08-12-2023 at 08:12 AM.
08-20-2023 | 10:29 AM
#24
Thread Starter
VIP Member
Joined: Jul 2009
Posts: 783
Likes: 51
From: NJ
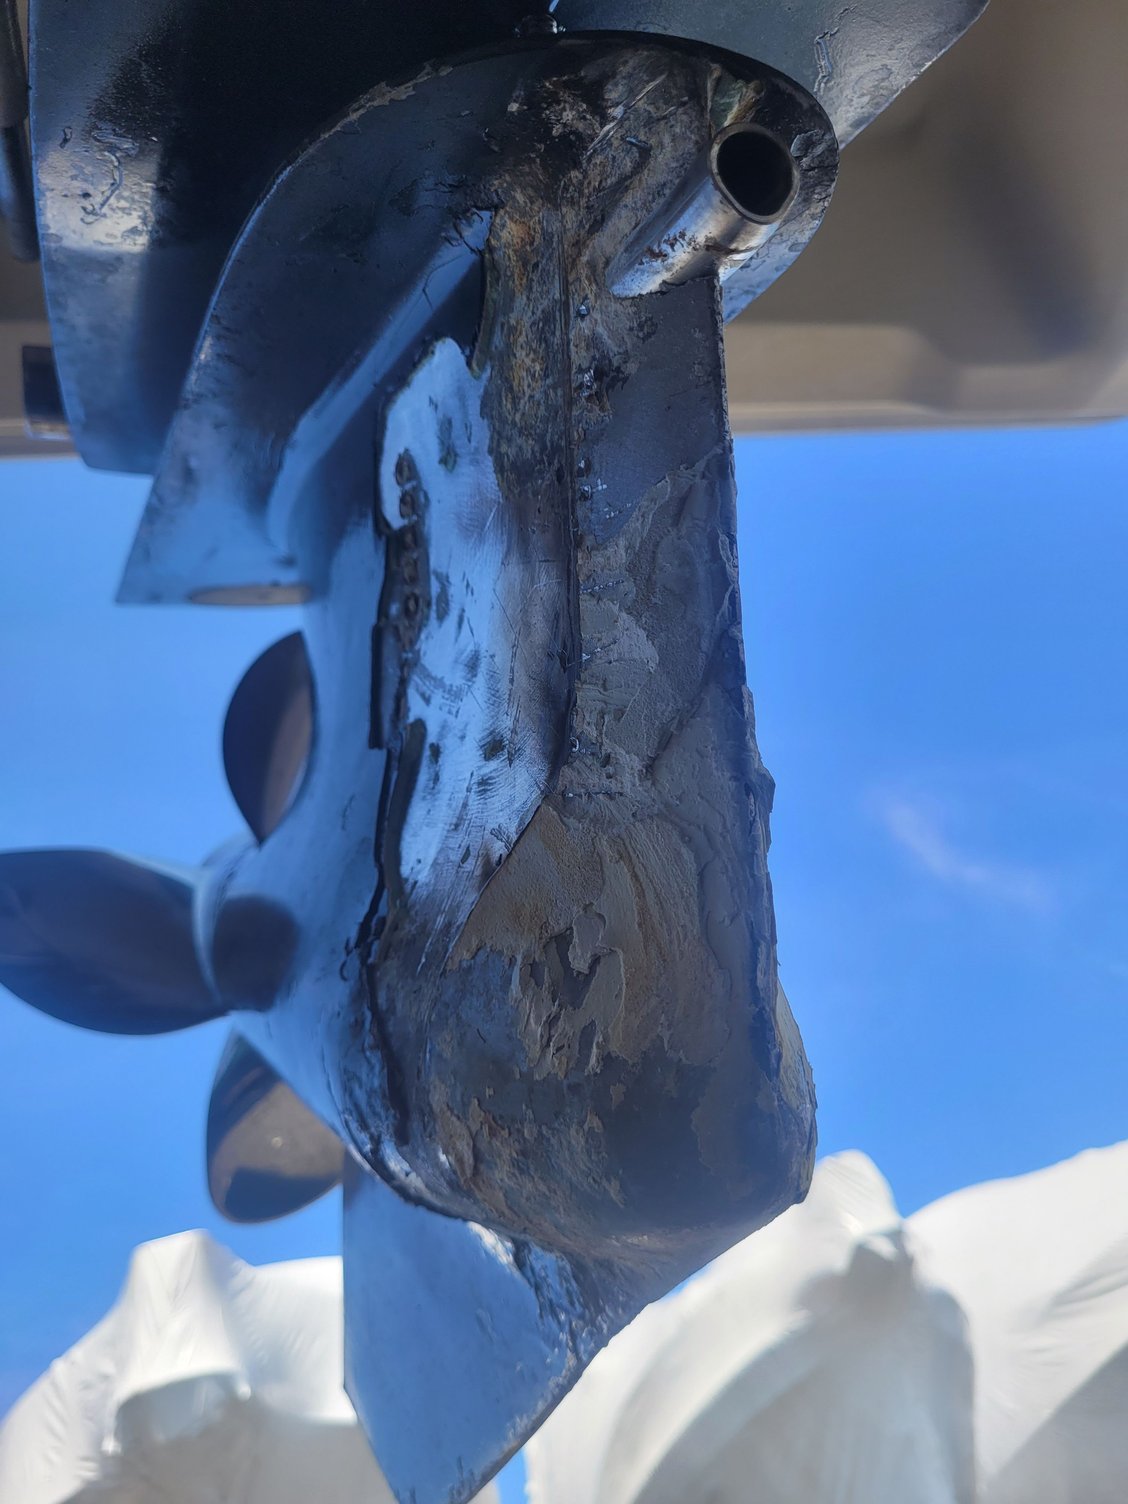
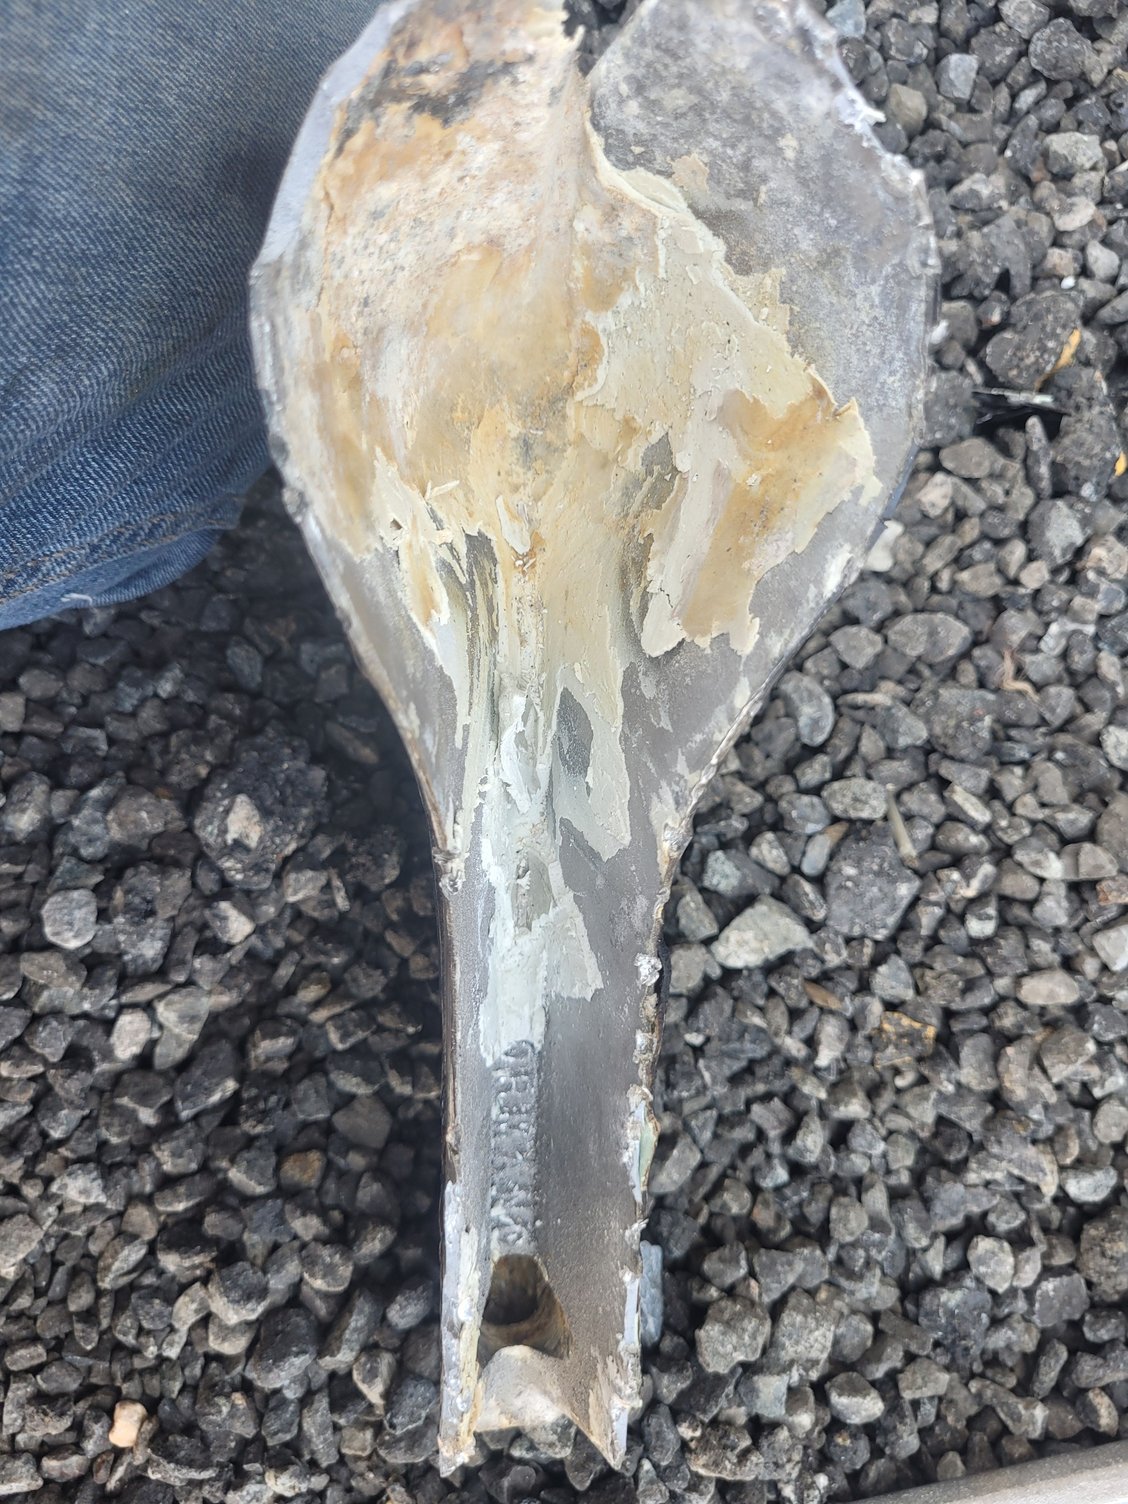
At 75mph marine tex started to come off. I think the water entering the inlet of the nose cone for cooling is somehow is getting between the inlet and the putty holding the nose cone on even though I cannot see an area exacty where though.its towards the low part mid section of pics posted previously. Starboard drive putty cracked on the side....here we go.
08-22-2023 | 01:01 PM
#26
Thread Starter
VIP Member
Joined: Jul 2009
Posts: 783
Likes: 51
From: NJ
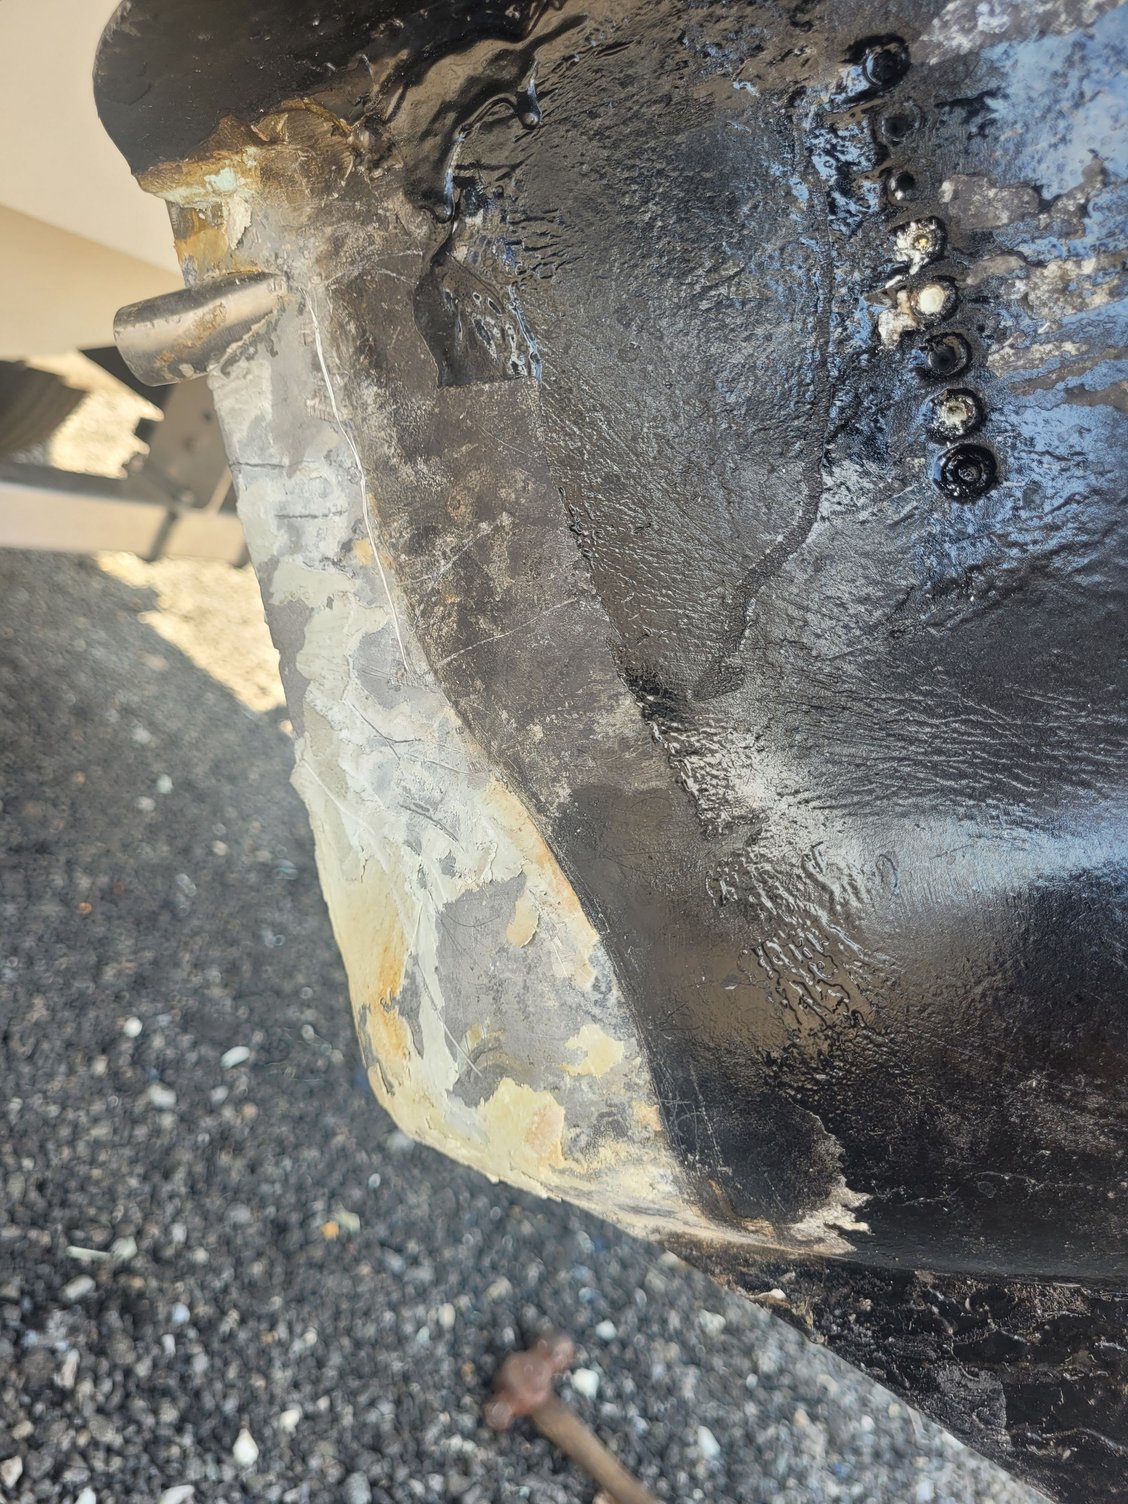
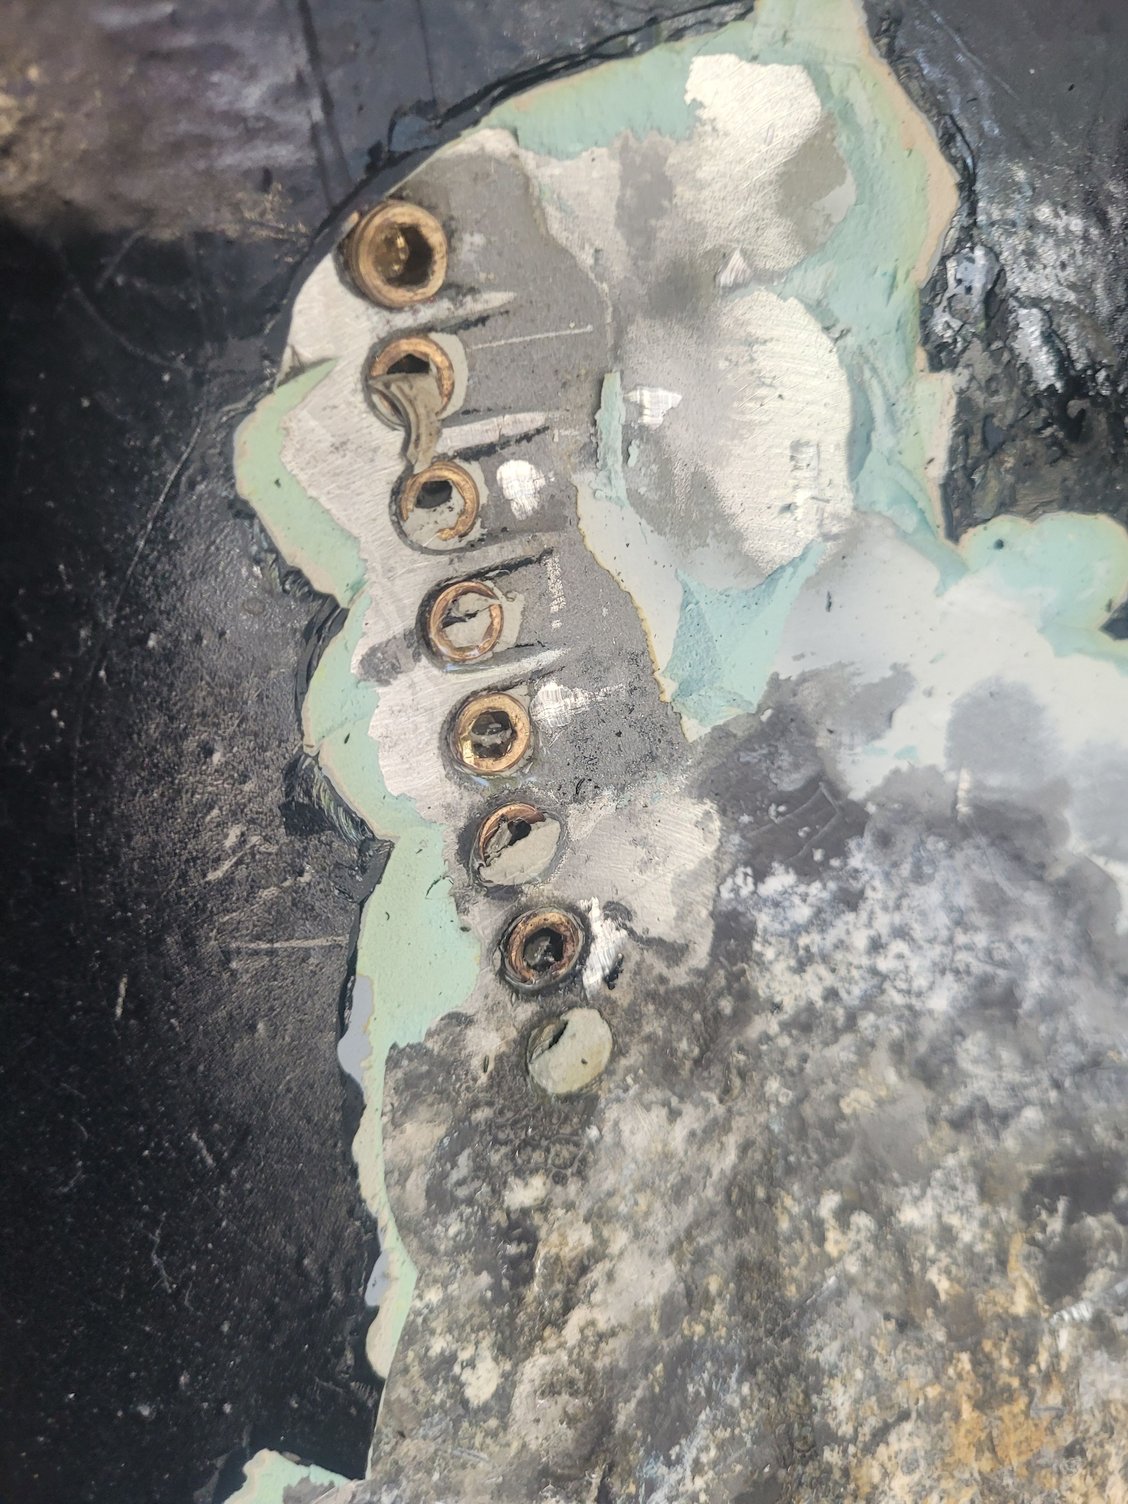
Got one cone off. Looks like it was never a lwp there. Looks like they created it. Now what?
the side water inlets has screw in brass plugs.but some are stripped.

the side water inlets has screw in brass plugs.but some are stripped.
Last edited by 35fountain; 08-22-2023 at 01:13 PM.

 08-22-2023 | 01:51 PM
#28
Registered

Joined: Jun 2005
Posts: 8,410
Likes: 797
From: Central IL
Wow. Honestly, at this point I'm looking for new lower cases or complete lowers.
Heck, worth the price just to get new cases - https://www.sterndrivereplacement.co.../lower-unit-4/
Heck, worth the price just to get new cases - https://www.sterndrivereplacement.co.../lower-unit-4/
08-22-2023 | 02:31 PM
#29
Thread Starter
VIP Member
Joined: Jul 2009
Posts: 783
Likes: 51
From: NJ
I was told to cut the tube flush with the drive. Plug it up with marine tex. Then remove all water inlet side plugs from drive sand paint and your good to go. A lot cheaper than new drive lowers. I think those were SEI?? if not mistaken, A OEM Mercruiser drive lower will not cost only $1199.00 I have heard good and bad about SEI. Why are the so inexpensive?
Last edited by 35fountain; 08-22-2023 at 03:02 PM.
08-22-2023 | 03:24 PM
#30
Registered
Joined: Aug 2019
Posts: 1,250
Likes: 420
From: BC
I was told to cut the tube flush with the drive. Plug it up with marine tex. Then remove all water inlet side plugs from drive sand paint and your good to go. A lot cheaper than new drive lowers. I think those were SEI?? if not mistaken, A OEM Mercruiser drive lower will not cost only $1199.00 I have heard good and bad about SEI. Why are the so inexpensive?
...no wonder you never got anywhere with little drill bit by hand.
Great progress so far.

