

496 Rocker Arm Stud


 11-28-2025 | 11:30 PM
#23
Registered


Joined: Aug 2019
Posts: 1,250
Likes: 420
From: BC
Tartilla,
I don�t need the tooling. We�ve got all that. I was hoping for a drill/tap guide that would save me a bunch of setup time on the mill. But, with the compound angle of the stud holes, that�s probably not a feasible prospect. Nothing worth doing is easy, I guess.")
Thanks. Brad.
I don�t need the tooling. We�ve got all that. I was hoping for a drill/tap guide that would save me a bunch of setup time on the mill. But, with the compound angle of the stud holes, that�s probably not a feasible prospect. Nothing worth doing is easy, I guess.
Thanks. Brad.
The hand held cutters for spring side guides remediation are suitable.
11-29-2025 | 10:19 AM
#24
Registered


Joined: Oct 2005
Posts: 285
Likes: 170
From: texas
Boxes of stuff sitting on tool box ...that are for the liberator
still have 3 weeks until next x ray
at this rate. March i might get done , at least I broke the foot while in the boat
You are embarking on a path of time, think, set up
action, check and finish, and go.
I am eager to see how good it turns out.
11-29-2025 | 10:48 AM
#25
Registered

Joined: Jun 2009
Posts: 9,989
Likes: 6,484
From: Chicago
The geometry isn`t perfect so you`re going to reinvent the wheel?
You over think wayyy too much buddy.
When I took off the valve covers for the first time after a season of running the Cig this is what I found.
Ran fine, anything better than this will be just fine, go find something else to do.
You over think wayyy too much buddy.
When I took off the valve covers for the first time after a season of running the Cig this is what I found.
Ran fine, anything better than this will be just fine, go find something else to do.
Last edited by ICDEDPPL; 11-29-2025 at 10:51 AM.
11-29-2025 | 11:38 AM
#26
Registered
Joined: Oct 2005
Posts: 285
Likes: 170
From: texas
The geometry isn`t perfect so you`re going to reinvent the wheel?
You over think wayyy too much buddy.
When I took off the valve covers for the first time after a season of running the Cig this is what I found.
Ran fine, anything better than this will be just fine, go find something else to do.
You over think wayyy too much buddy.
When I took off the valve covers for the first time after a season of running the Cig this is what I found.
Ran fine, anything better than this will be just fine, go find something else to do.
All or just the one.
is it just camera angle or is rocker arm bent or twisted ...the high side on valve
the other side looks lower.
That would certainly give me the oh **** look
12-04-2025 | 08:54 PM
#28
Thread Starter
VIP Member
Joined: Jun 2021
Posts: 3,533
Likes: 2,142
From: SW Ohio
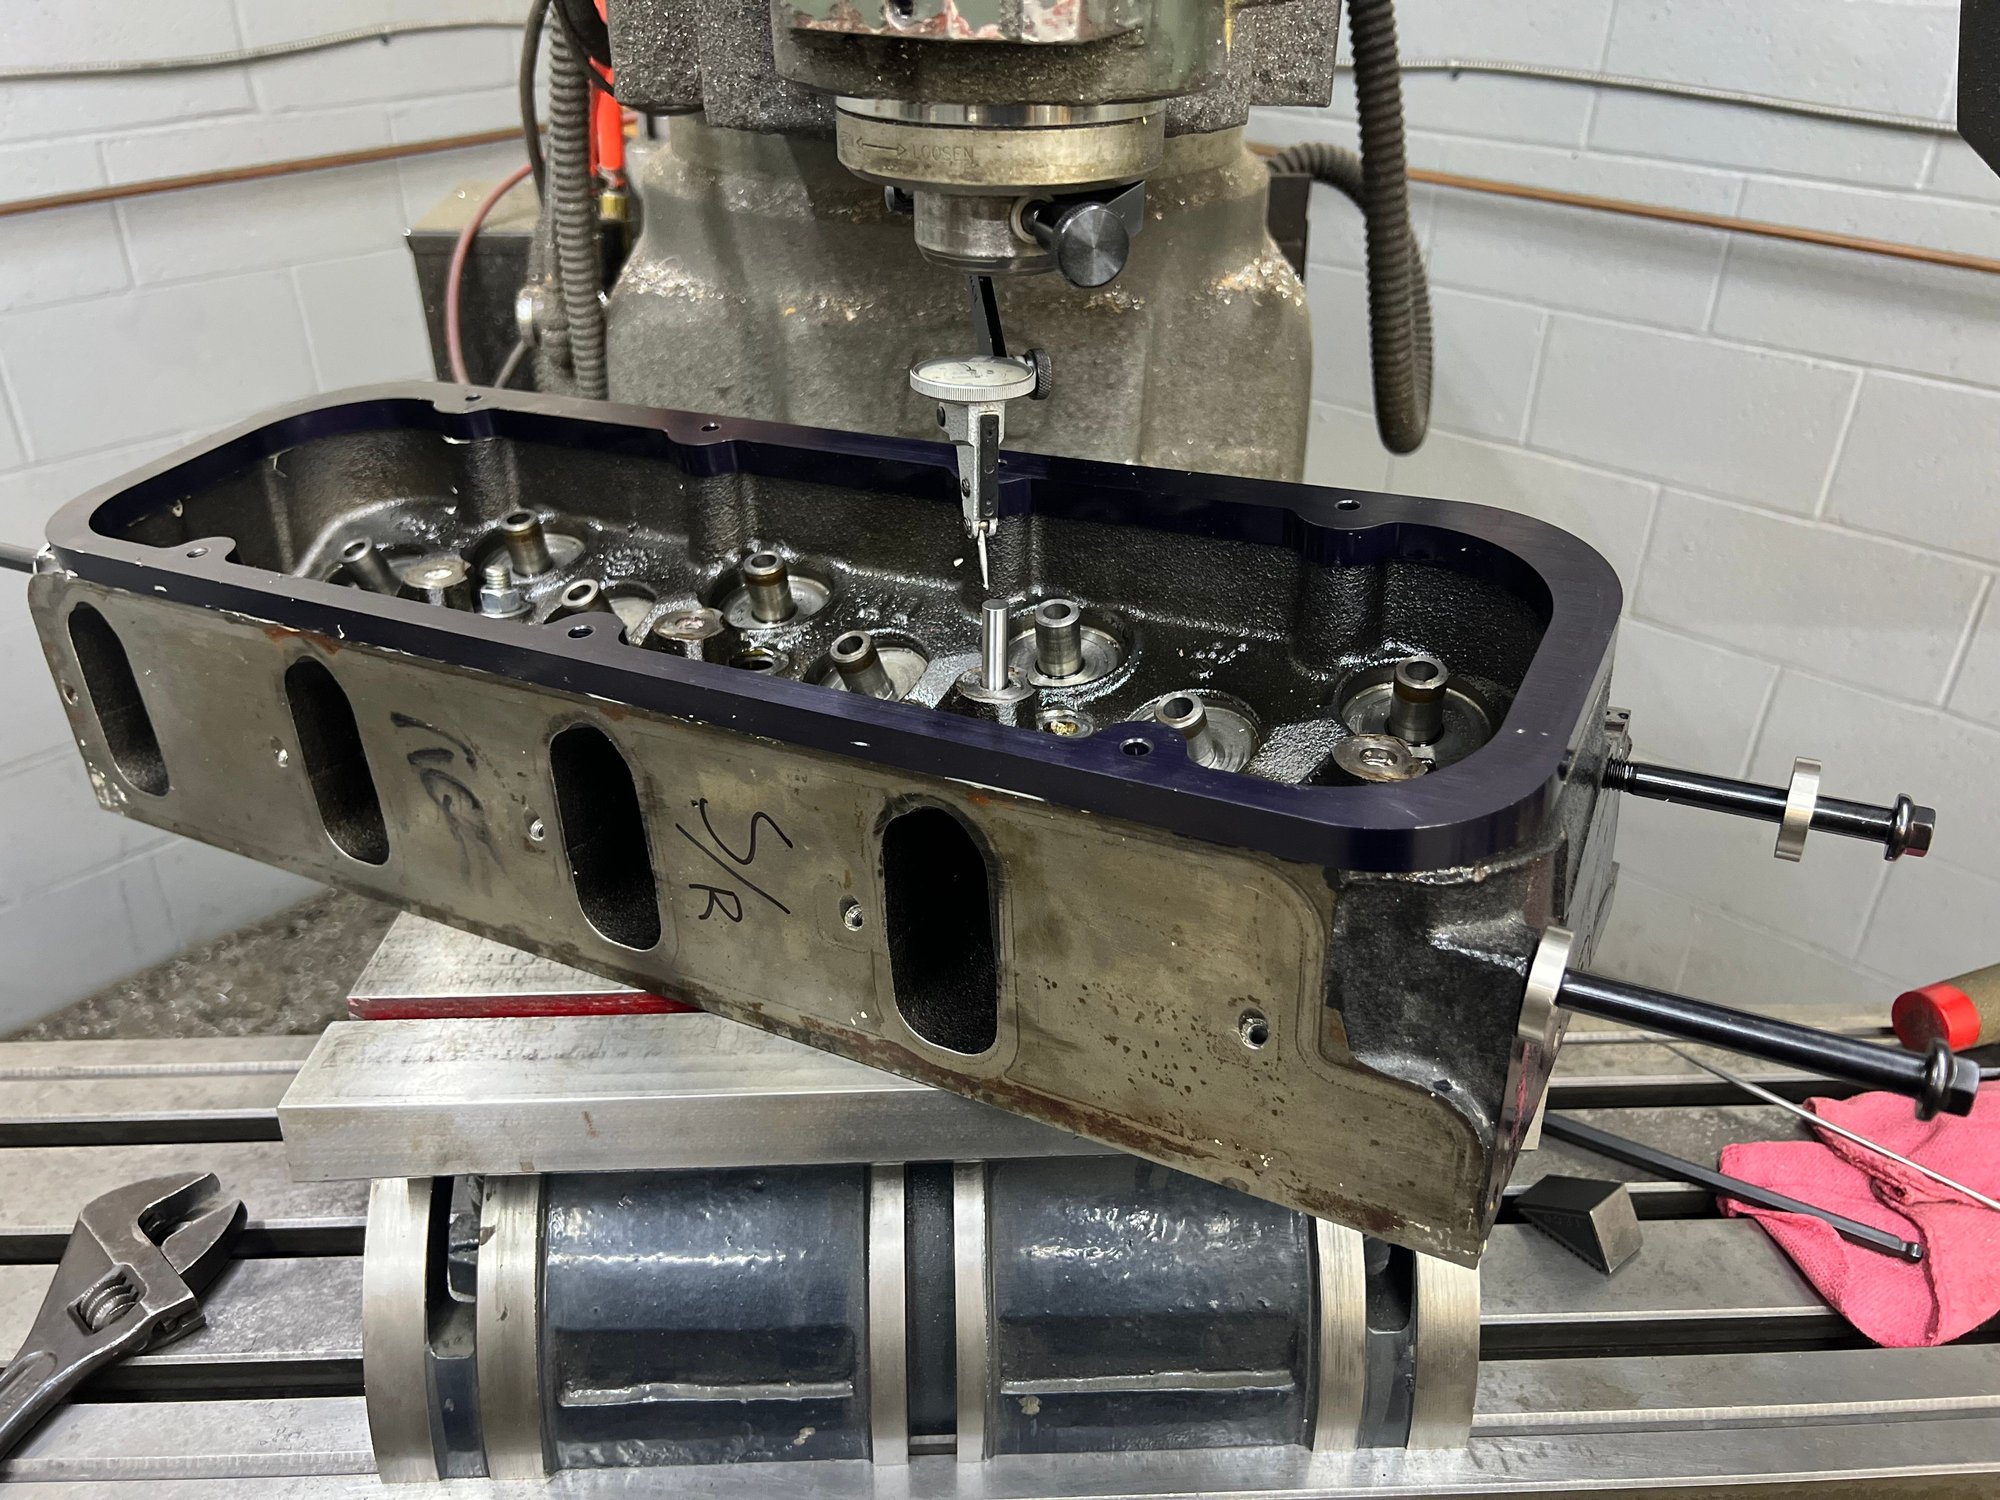
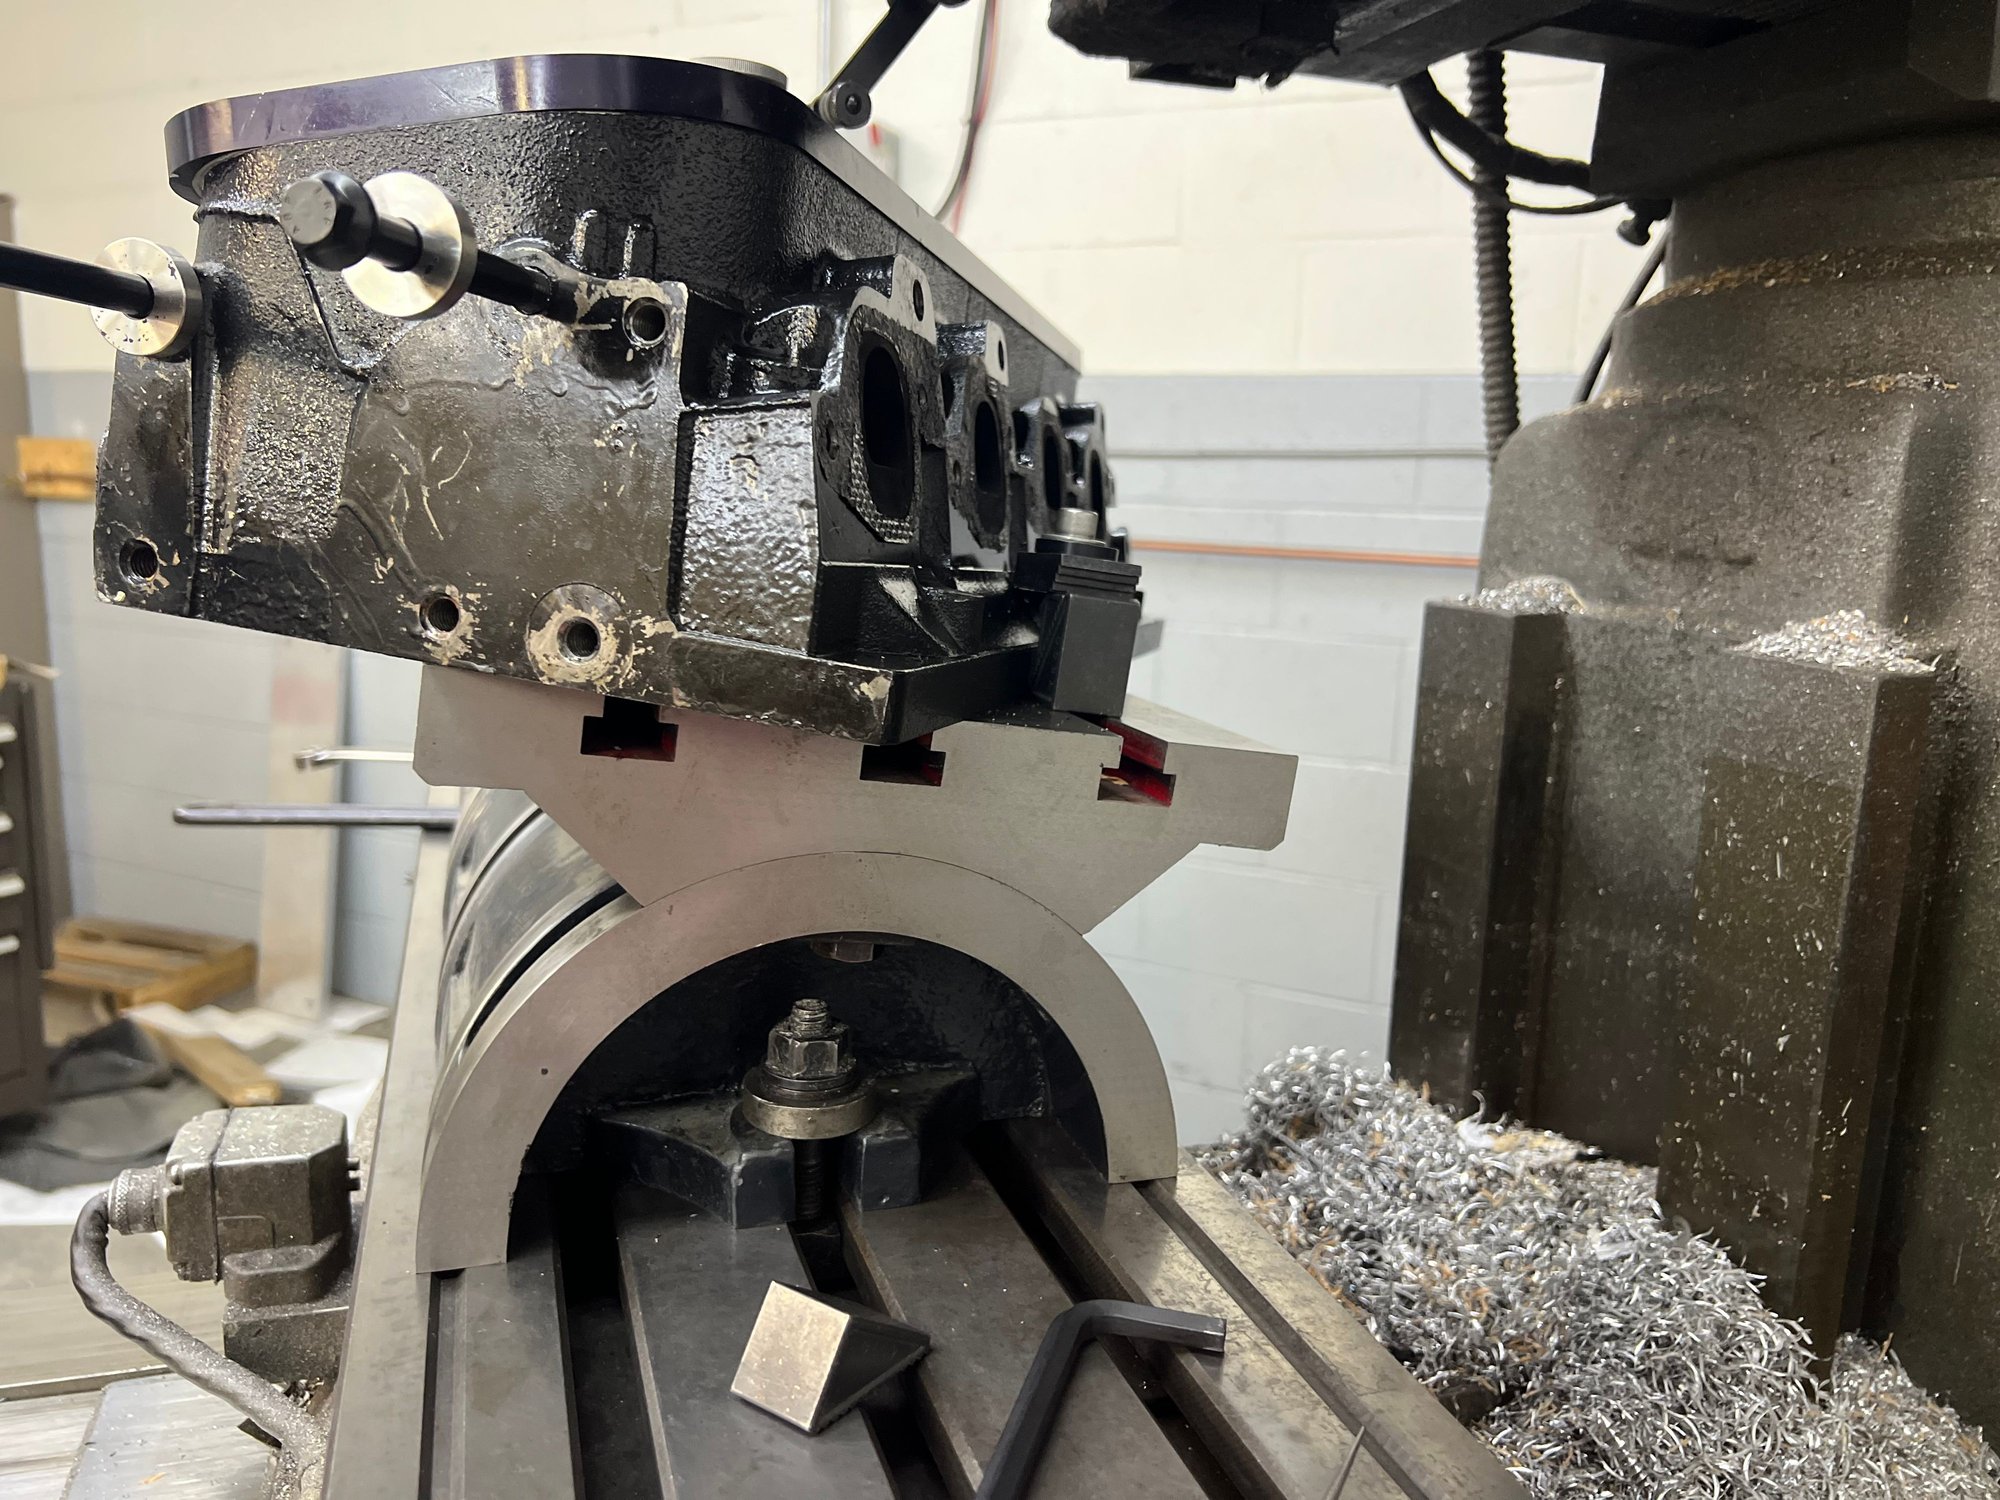
Pretty much what I did. First you rotate the head on the tilting table until it�s straight in the �X� axis, then tilt the tilting table until it�s straight in the �Y�. There was a bit more to it than that, but that�s the gist. We set up a �guide� against the intake side of the first head, then did either the intake or exhaust studs for both heads (can�t remember which we did first), holding the second head against the guide, eliminating the need to �find� the first angle, then rinse/repeat for the other set of studs. As is very typical with these sorts of projects, there was a lot of setup for not a lot of chip.
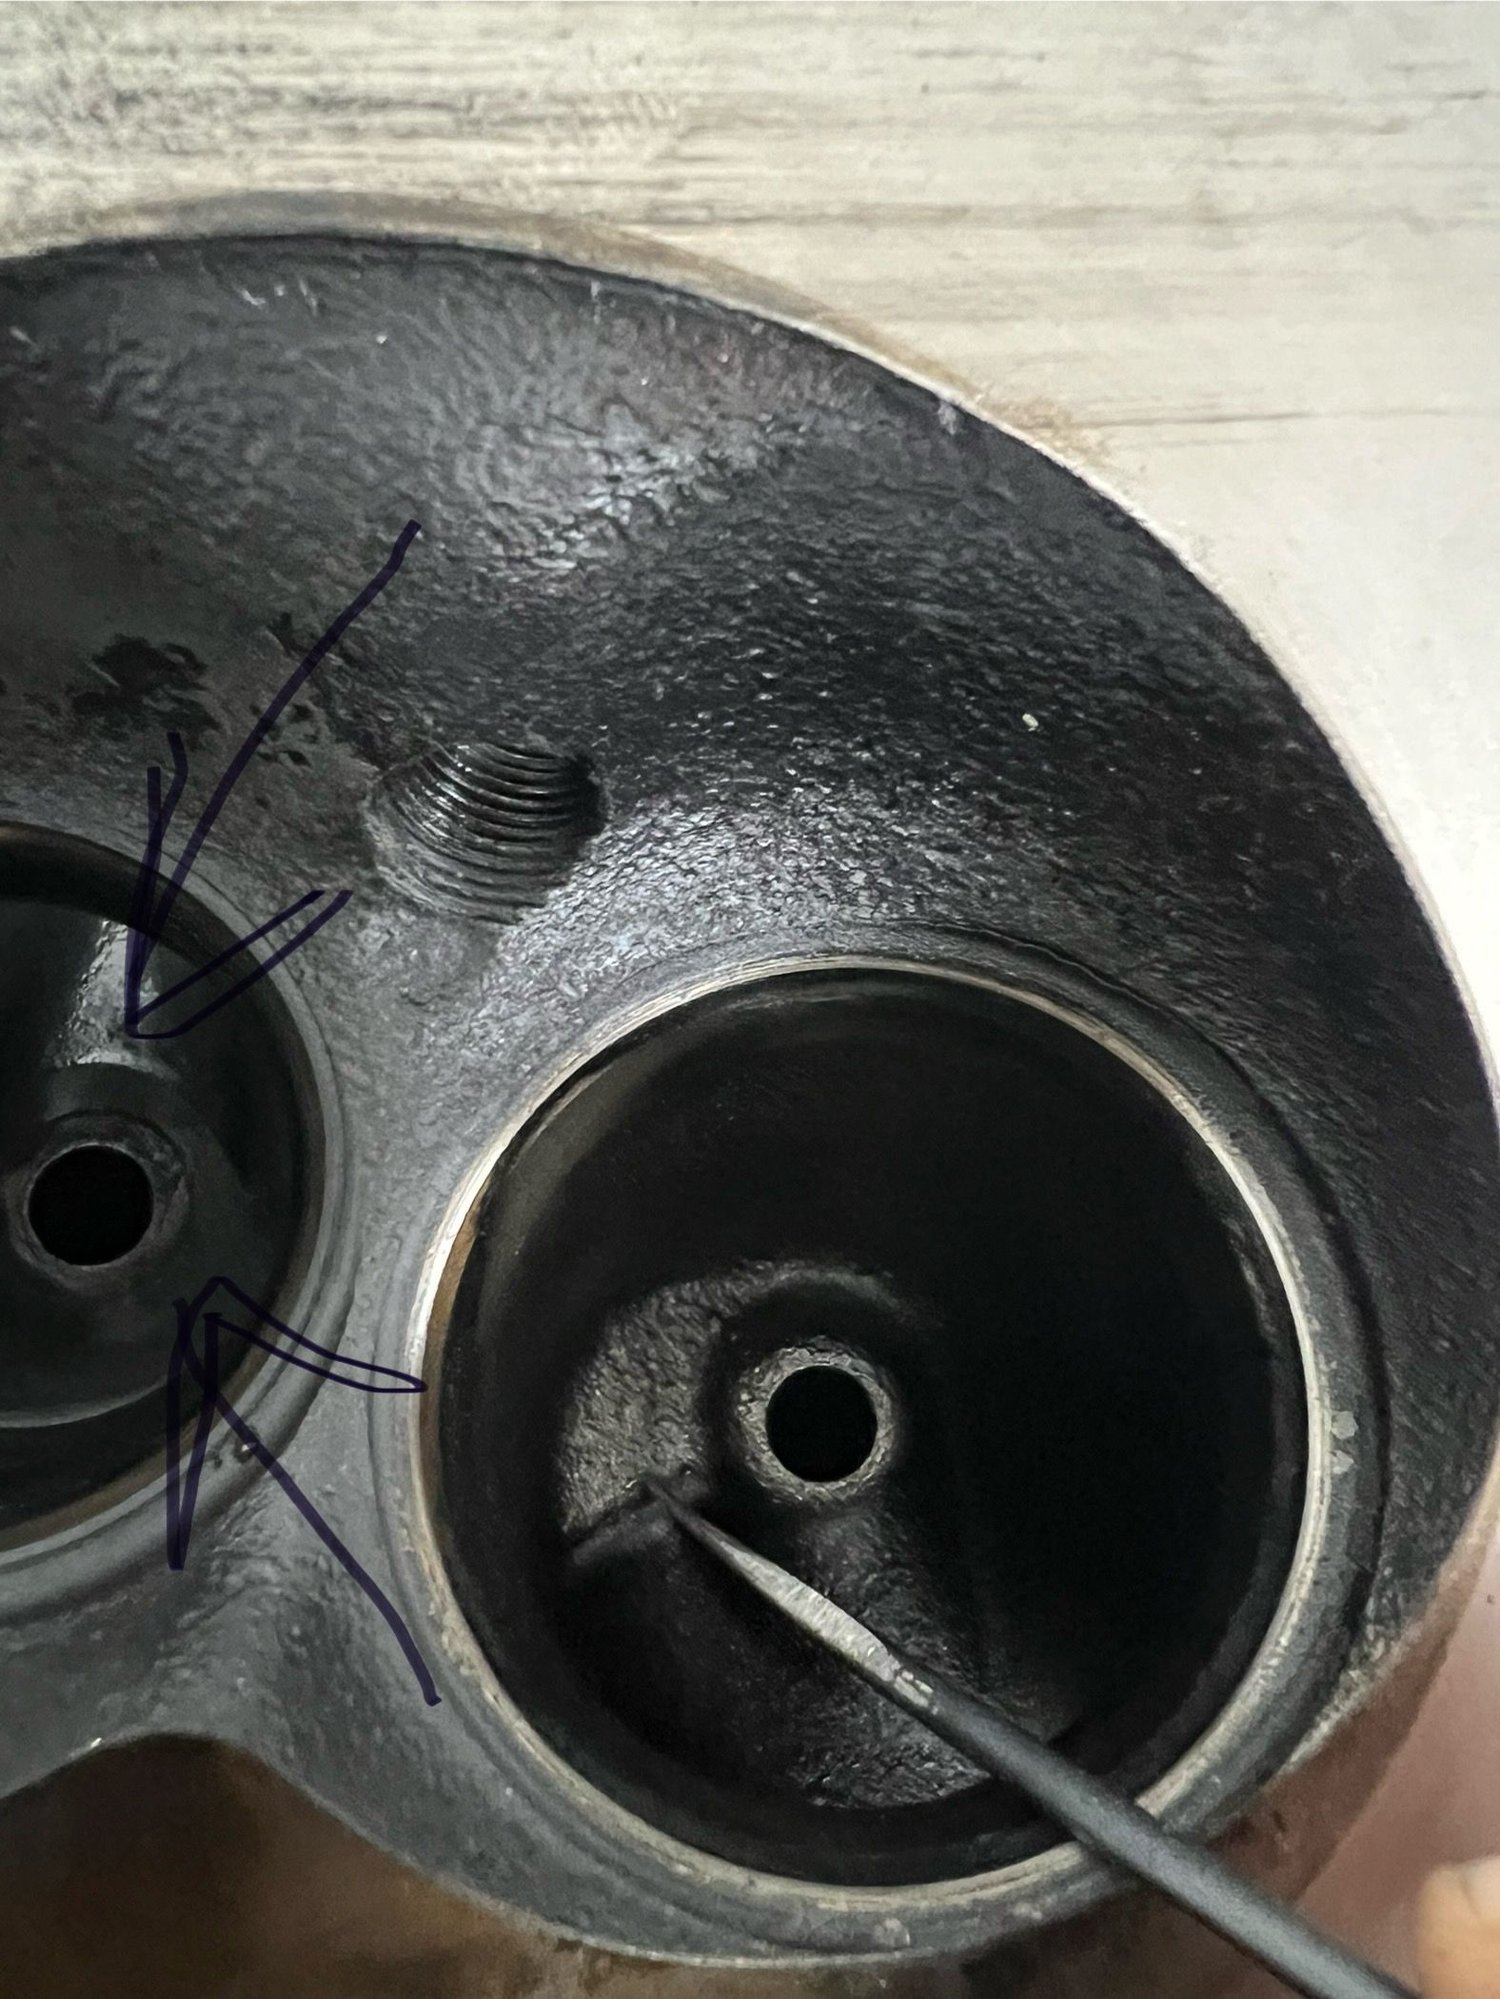
Turbulence ramp in the intake runner.
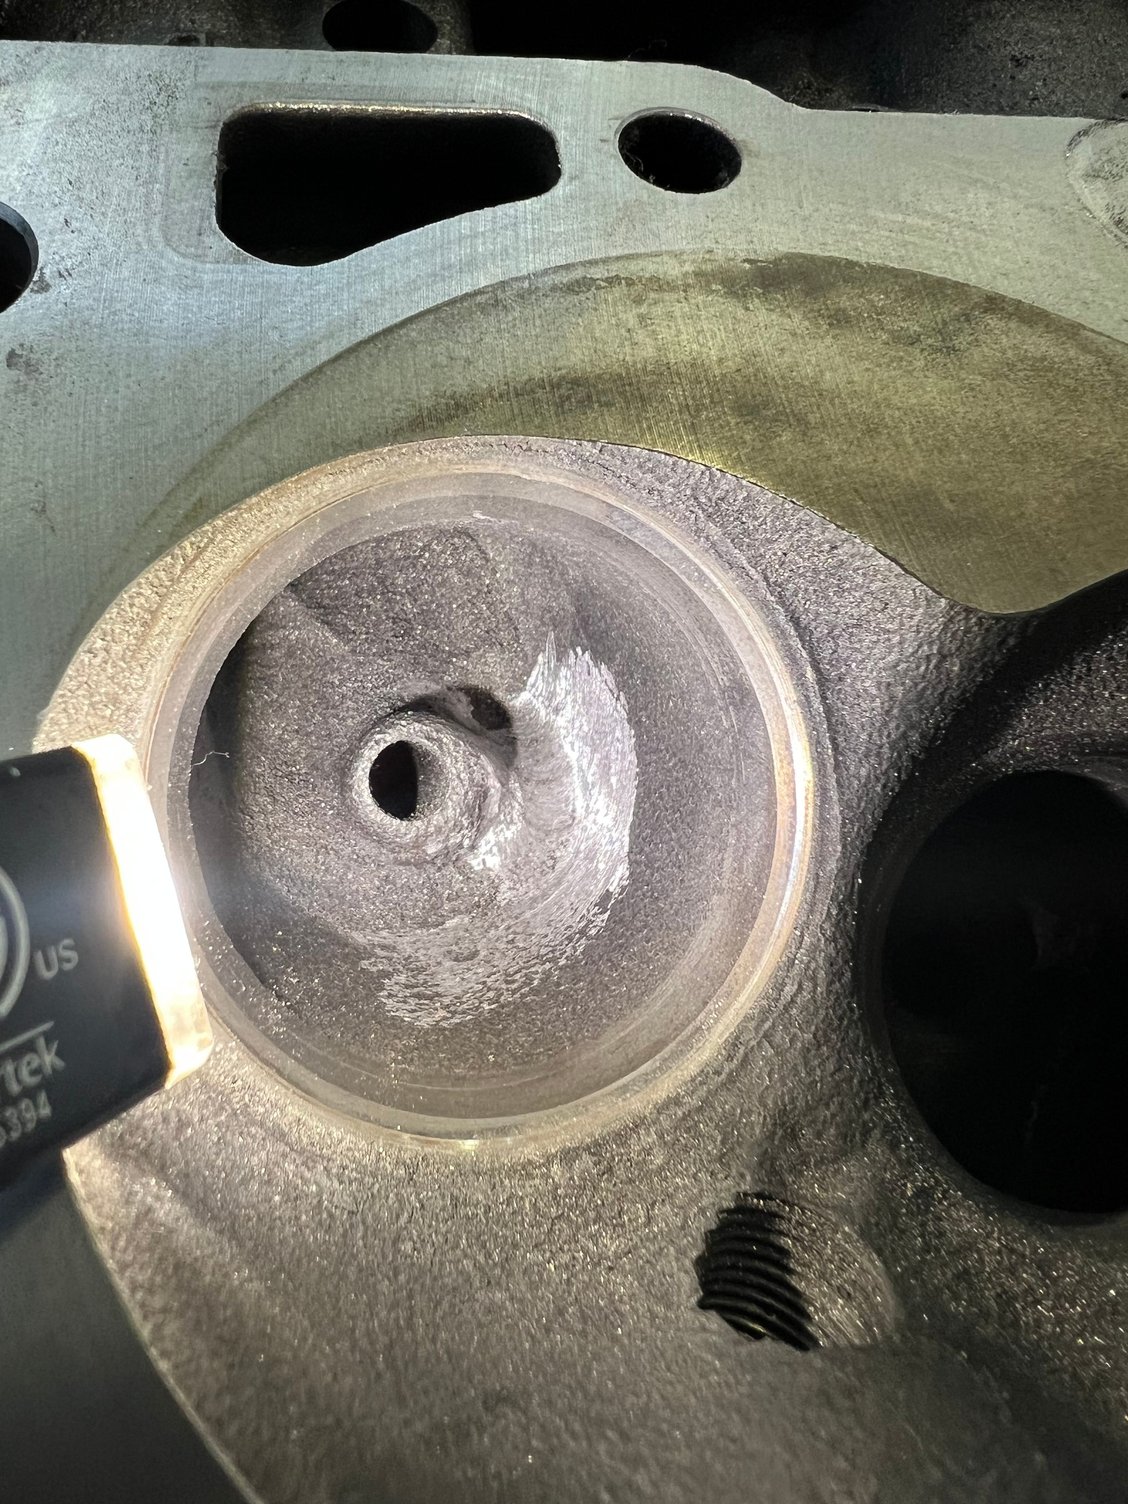
Gone.
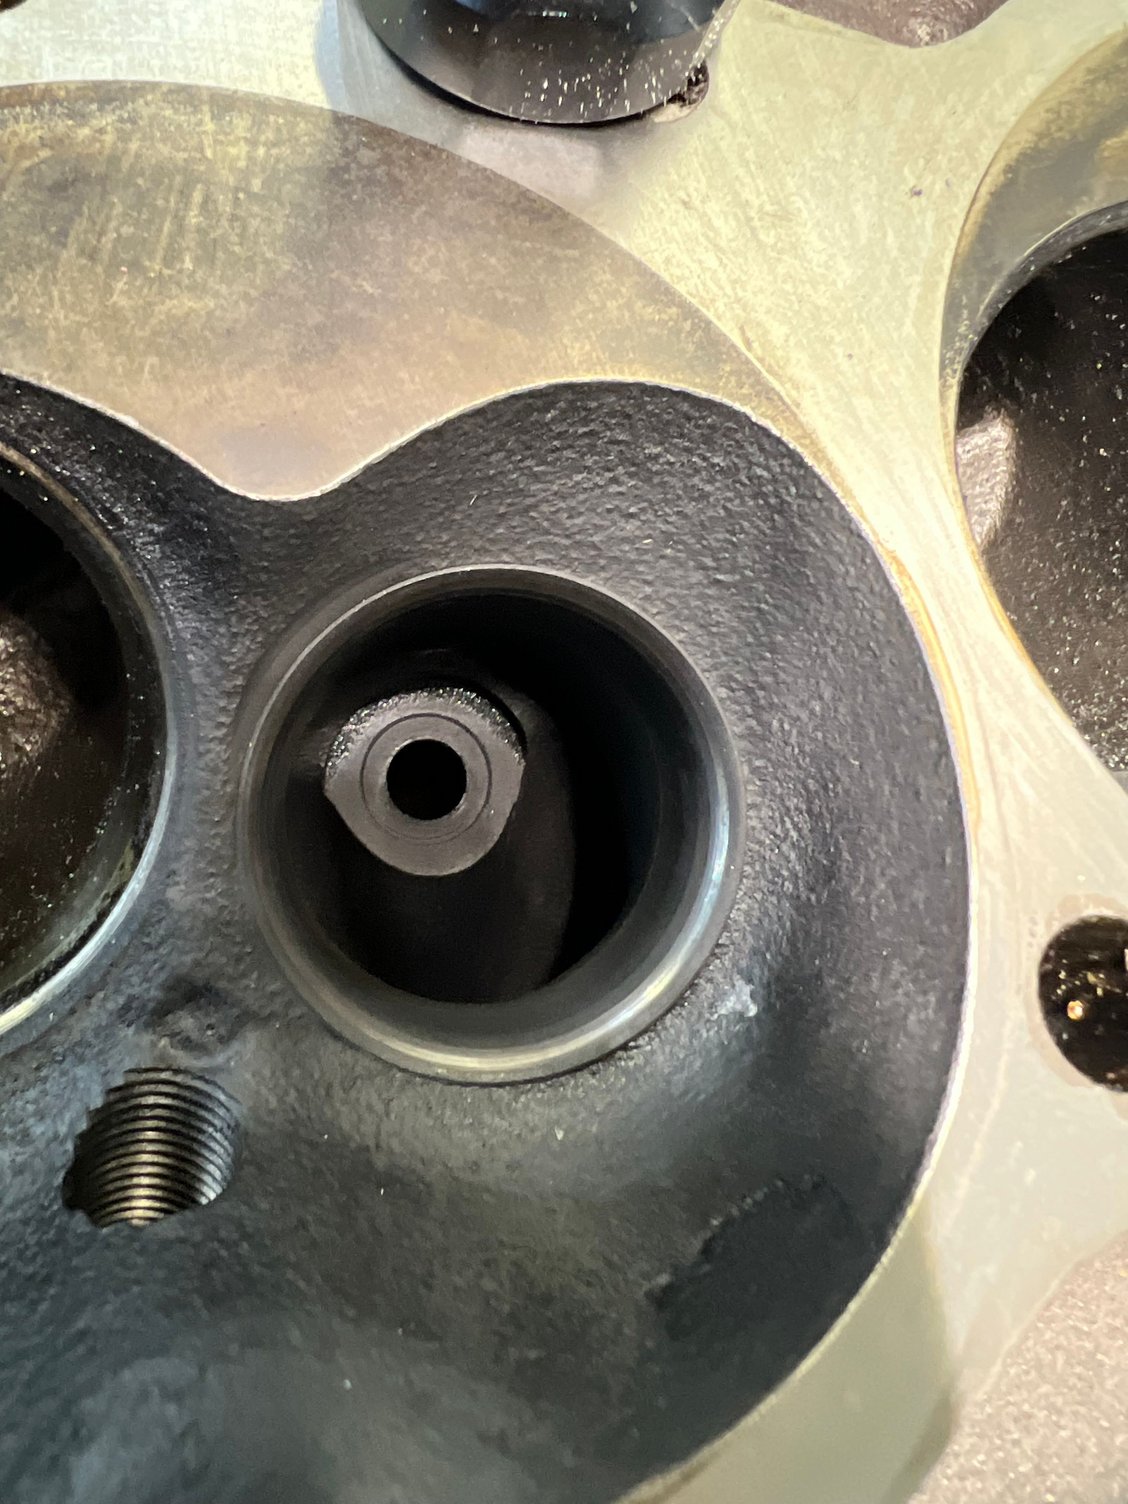
Quarter sized flat surface facing incoming exhaust flow in exhaust runner.
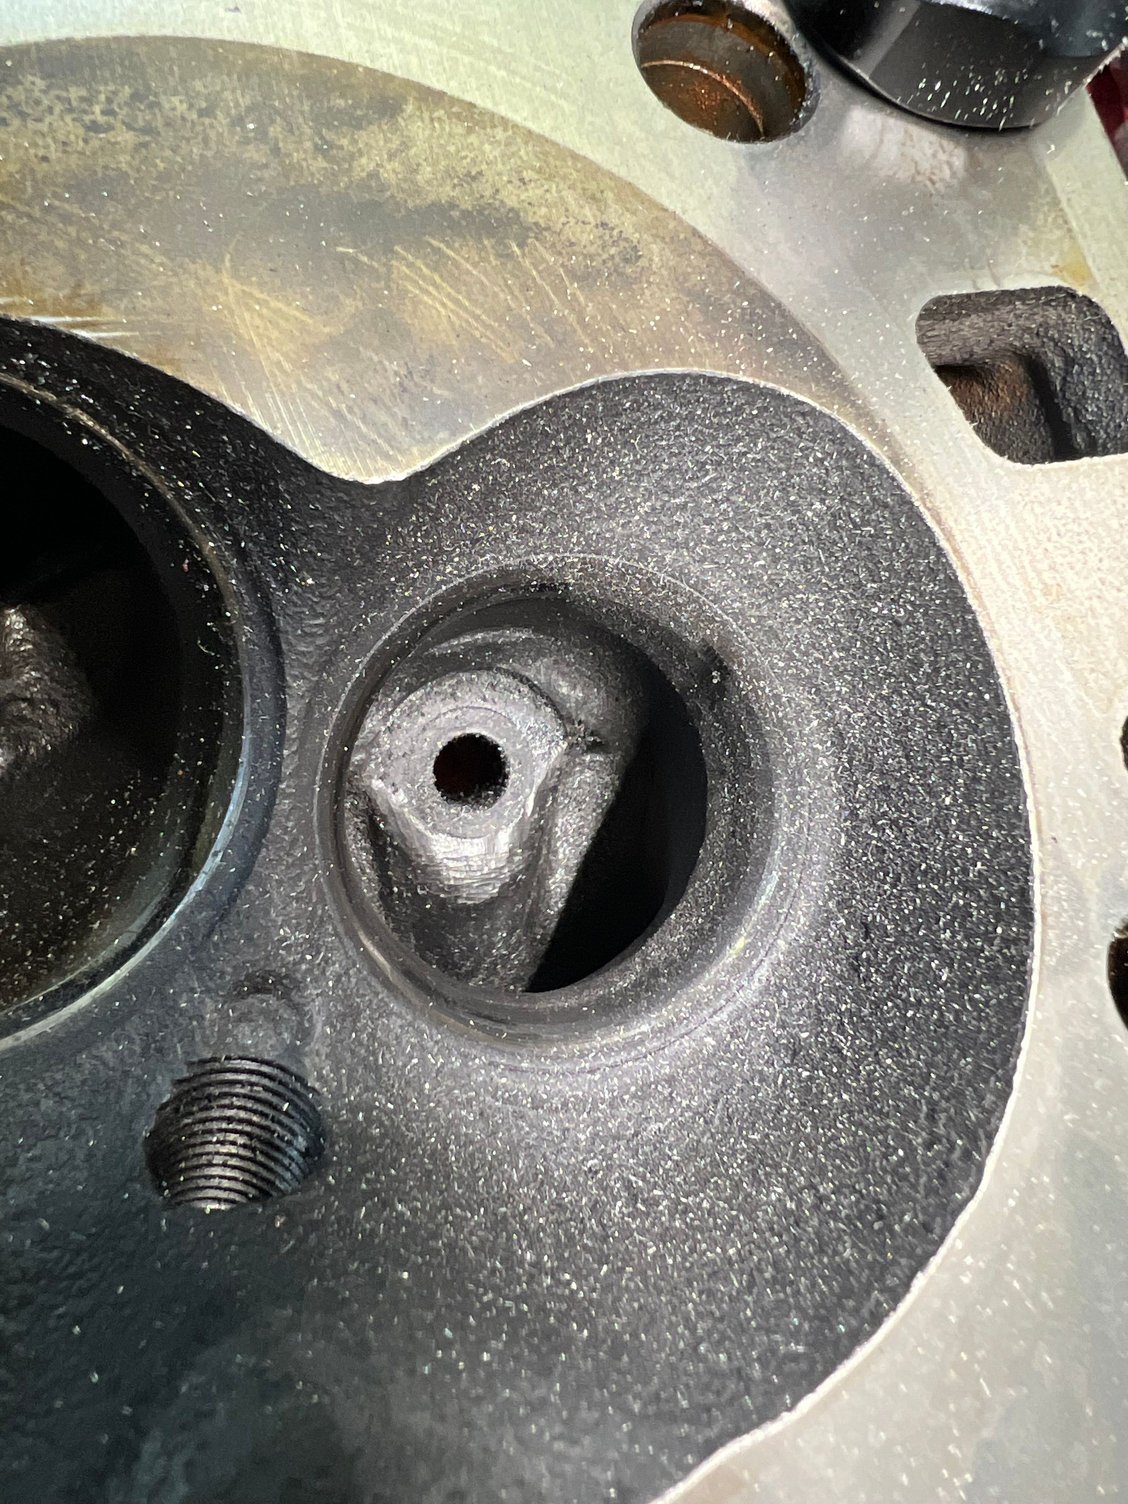
Streamlined. Probably could have done more here. Didn�t have the sack.
Per advice from Larry, Mr. Raylar himself, I decided to do some minor port work, while the heads were all dirty. Larry told me what to avoid. Also cleaned up any parting line flashing and general smoothing of the ports. No real material removal other than the obvious. Took them to the machine shop to be tank washed.
Got my Summit box today, with the new rocker studs and pushrods. I won�t get to play this weekend for reasons, so reassembly will start on Monday. Hopefully.
Thanks. Brad.
Last edited by Brad Christy; 12-05-2025 at 05:39 AM.
12-04-2025 | 09:14 PM
#29
Thread Starter
VIP Member
Joined: Jun 2021
Posts: 3,533
Likes: 2,142
From: SW Ohio
The geometry isn`t perfect so you`re going to reinvent the wheel?
You over think wayyy too much buddy.
When I took off the valve covers for the first time after a season of running the Cig this is what I found.
Ran fine, anything better than this will be just fine, go find something else to do.
You over think wayyy too much buddy.
When I took off the valve covers for the first time after a season of running the Cig this is what I found.
Ran fine, anything better than this will be just fine, go find something else to do.
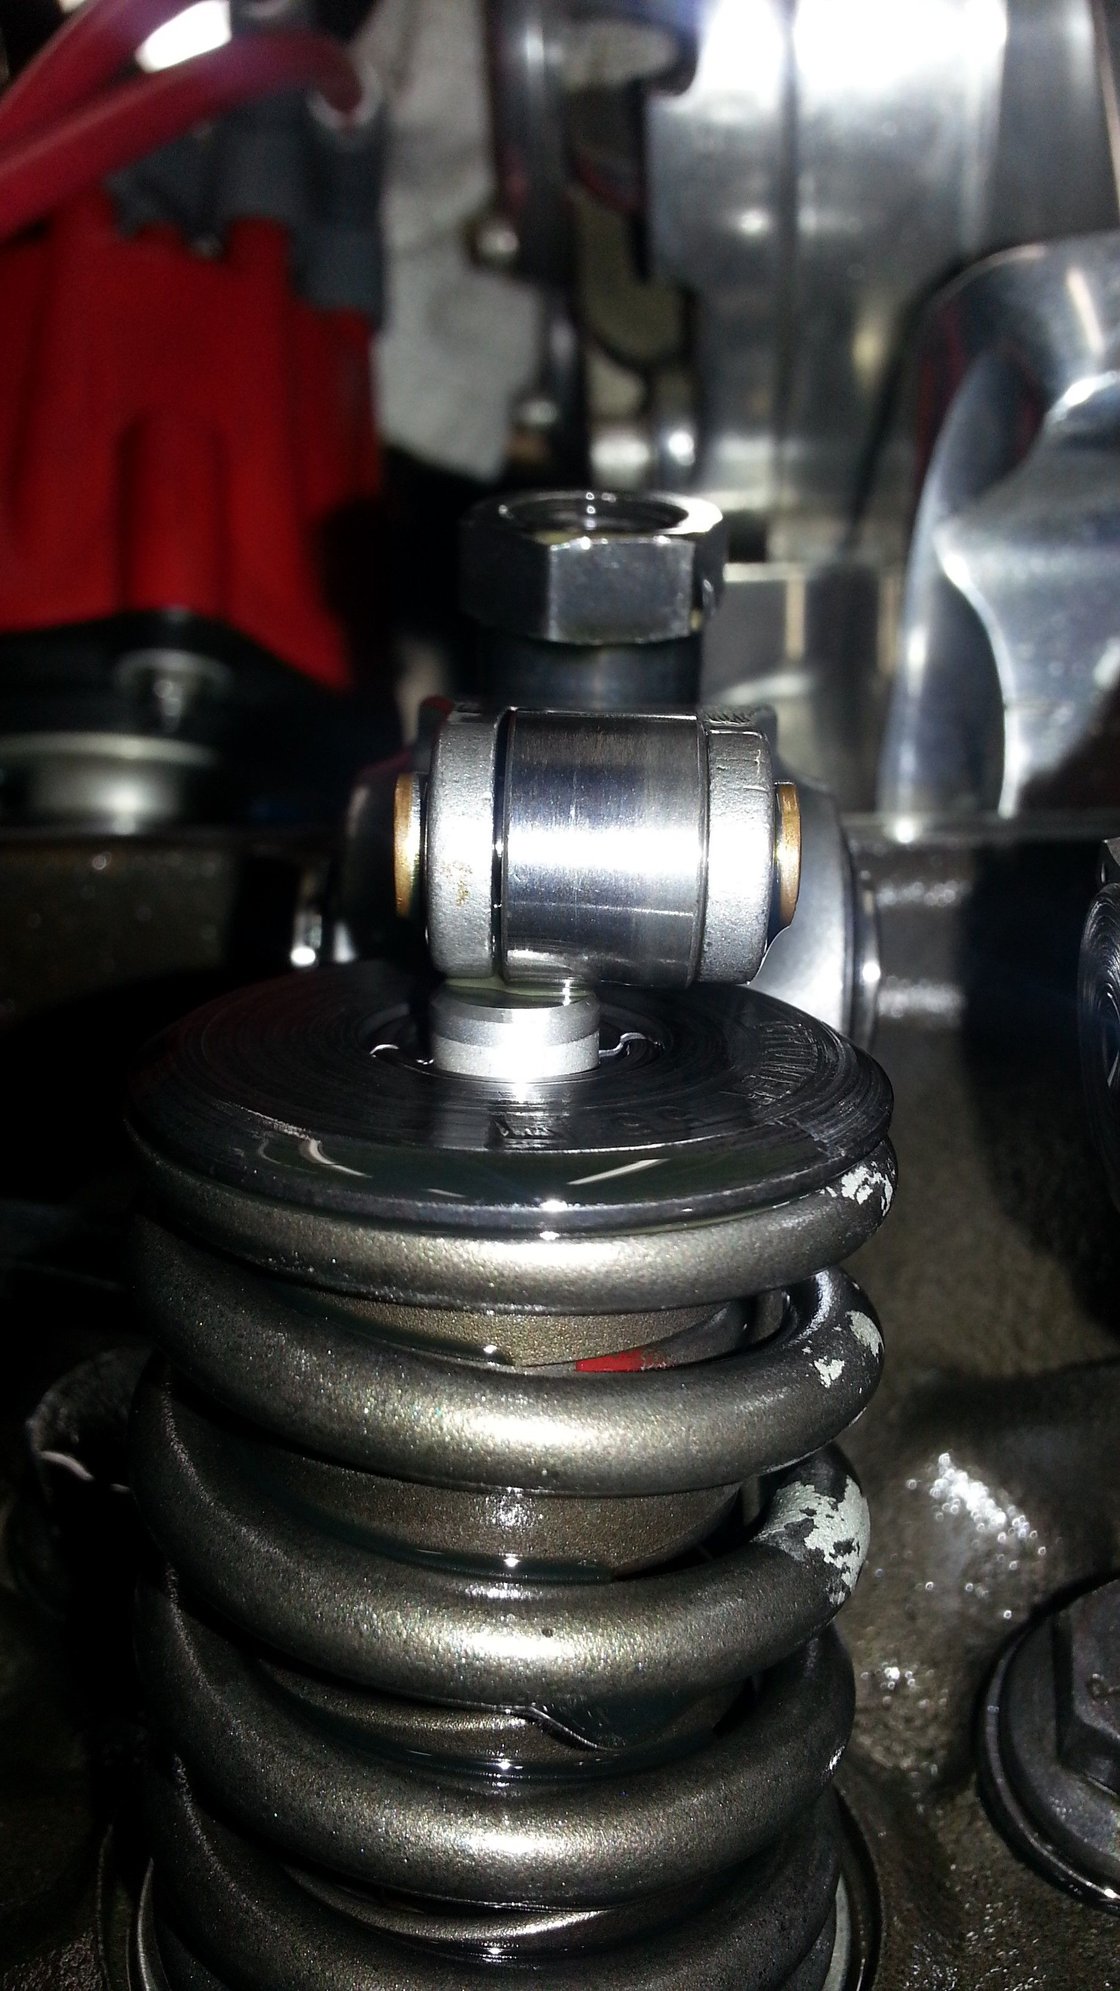
My issue with rocker geometry was in the other direction; the rockers were tilted WAY back, to recover rocker nut thread engagement. The builder had even added a spacer under the studs to recover a couple threads.
Drilling and tapping the rocker stud holes in these heads is not a novel idea. It�s actually a fairly common modification among those who can�t afford the Raylar aluminum heads.
As it is now, I will have 7/16� bottom threads, with deeper engagement than the M10 bottom threads, almost double the rocker nut thread engagement, AND �perfect� rocker geometry, other than the roller being slightly off center on the valve step tip, front to back. I�m good side to side.
Thanks. Brad.
Last edited by Brad Christy; 12-04-2025 at 09:55 PM.
12-04-2025 | 09:39 PM
#30
Registered
Joined: Aug 2019
Posts: 1,250
Likes: 420
From: BC
Hard to say how you'll fare without the ski jumps. The help bias the port flow and induce swirl...helping keep the fuel atomized and assist in healthy turbulence. It should increase the cfm a bit.
You can have too much swirl. Biased ports are often sufficient.
Have you back cut your intake valves 30�?
Helps with low lift flow..and getting the air moving earlier...allowing it to flow more on the larger valve opening phase.
You can have too much swirl. Biased ports are often sufficient.
Have you back cut your intake valves 30�?
Helps with low lift flow..and getting the air moving earlier...allowing it to flow more on the larger valve opening phase.
Last edited by Tartilla; 12-04-2025 at 10:04 PM.

