

32 Skater Rebuild

 03-06-2019 | 03:49 PM
#32
Thread Starter
Registered

Joined: Dec 2018
Posts: 198
Likes: 2
From: Zeeland, MI
Who knows... September 25....... of twenty twenty something.. 202__?
Thanks for the kind words. Have you ever seen the boat when it was on st Clair?
 03-06-2019 | 09:07 PM
#35
Thread Starter
Registered
Joined: Dec 2018
Posts: 198
Likes: 2
From: Zeeland, MI
It�s crazy from NJ to MI the shipping was $325
its a 800 mile trip so I figured by the time I were to drive out there and back (1600 miles) and a day and a half�s worth of time that was pretty cheap. $240 in fuel and time or $325 to click a button. Easy choice
its a 800 mile trip so I figured by the time I were to drive out there and back (1600 miles) and a day and a half�s worth of time that was pretty cheap. $240 in fuel and time or $325 to click a button. Easy choice
03-07-2019 | 06:21 AM
#36
Registered
Joined: Feb 2019
Posts: 30
Likes: 1
From: Michigan
lol, yeah I guess timelines on boat projects are pretty open-ended, that's just the project manager in me mixed with impatience. No I've never seen that boat or any skater for that matter out there but then again I wouldn't expect to see it tied up in the line at the moot! In fact the only cat I've really known out there was a 34ish Warlock from Canada.
03-19-2019 | 01:38 PM
#37
Thread Starter
Registered
Joined: Dec 2018
Posts: 198
Likes: 2
From: Zeeland, MI
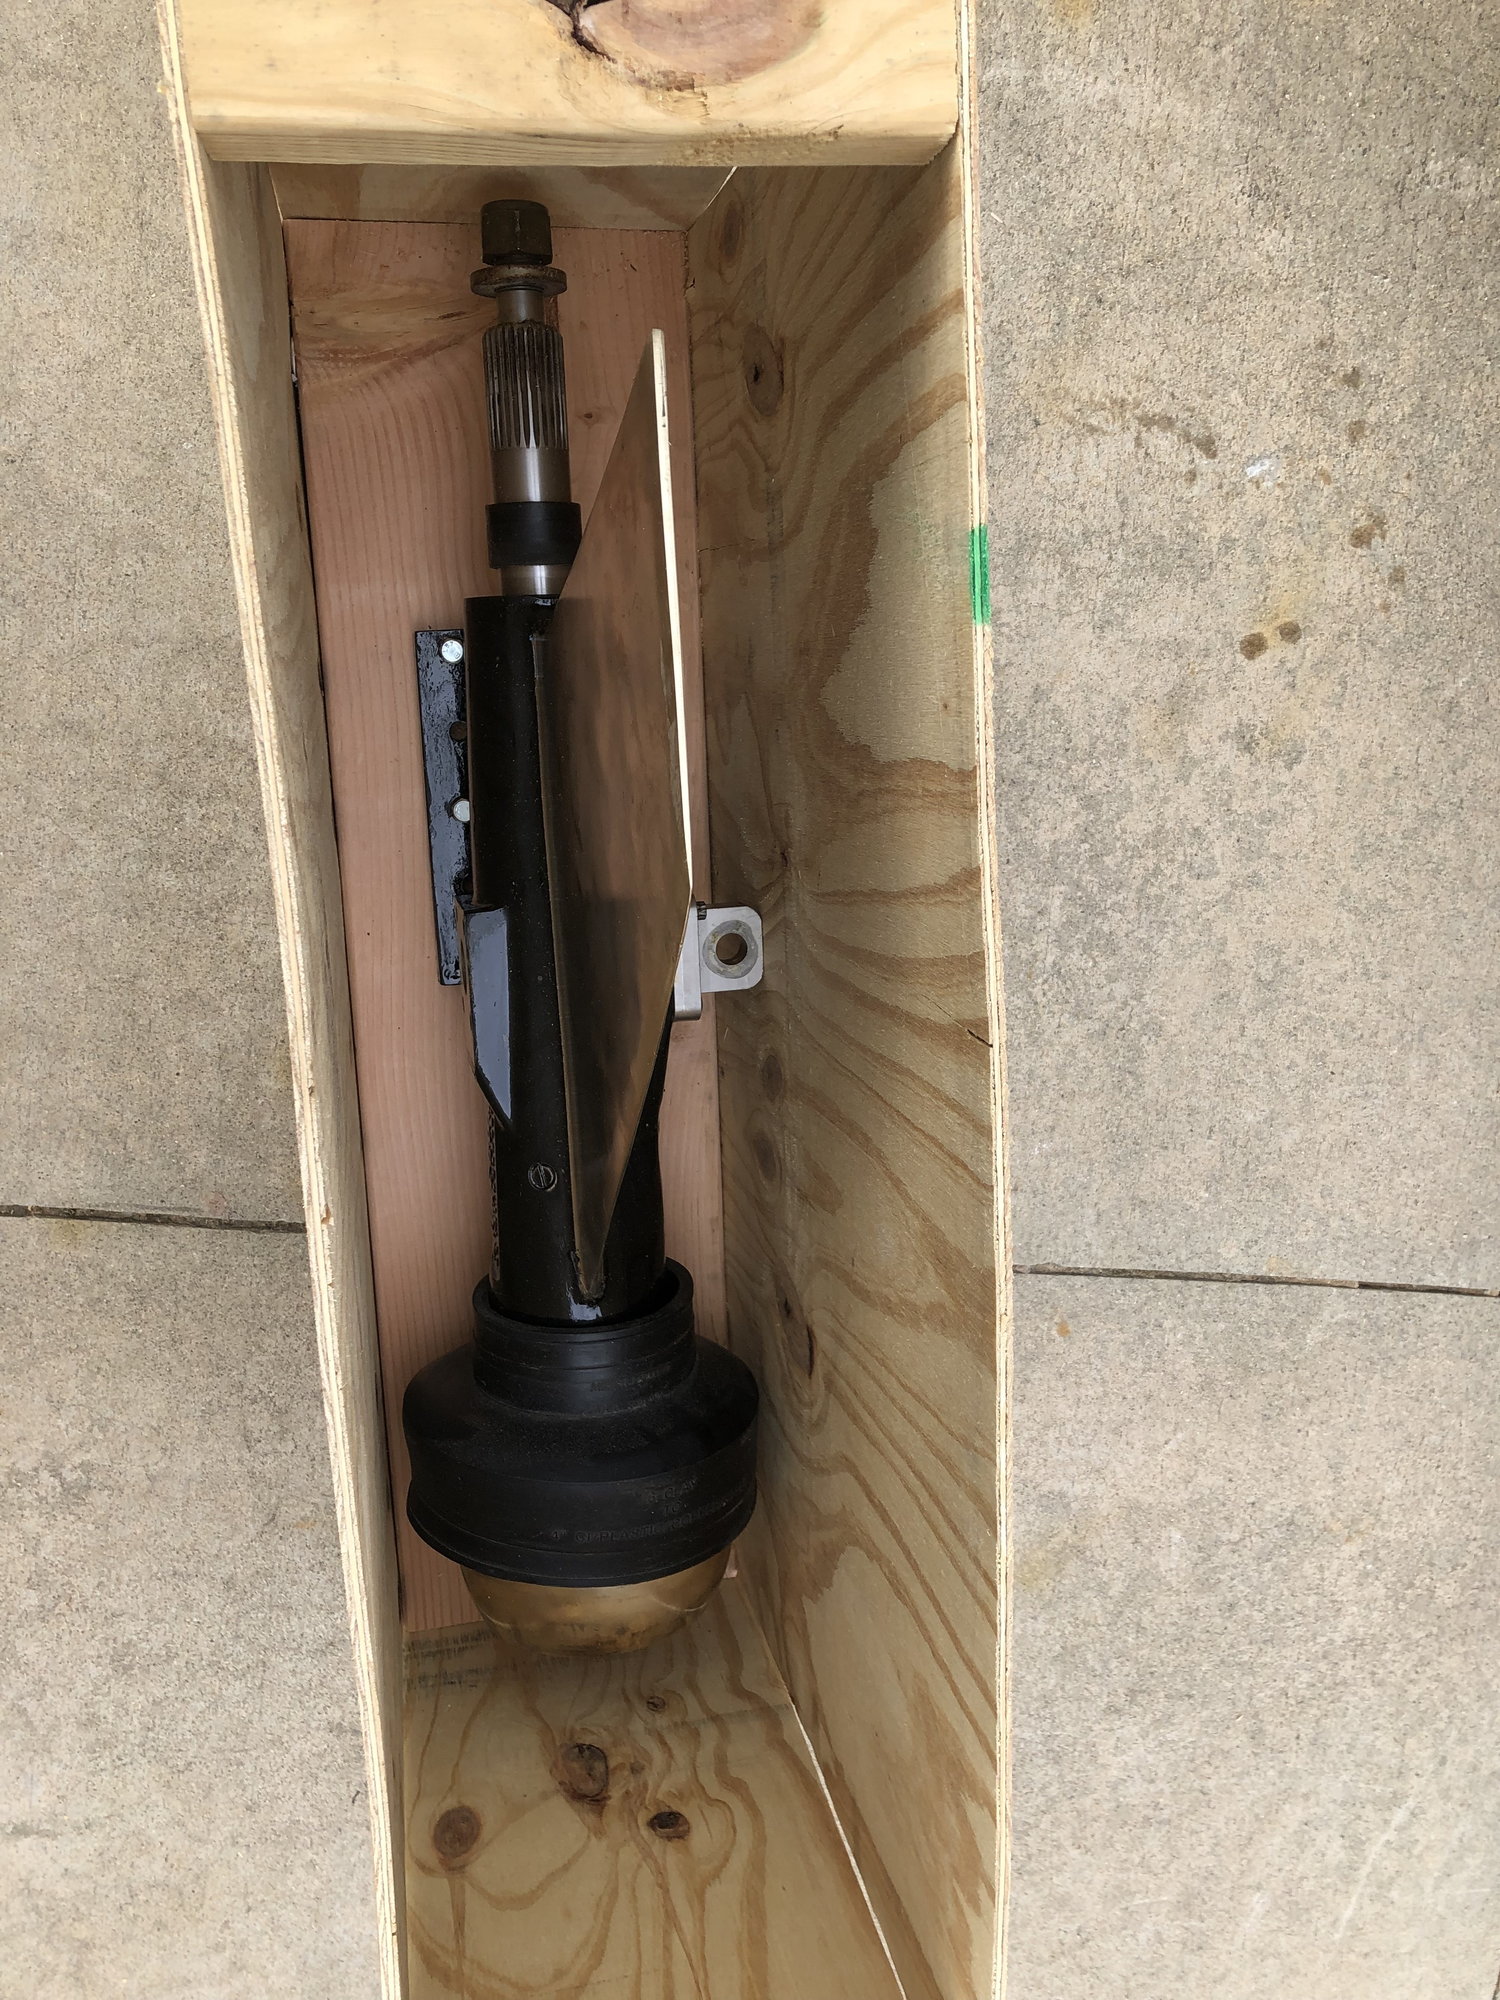
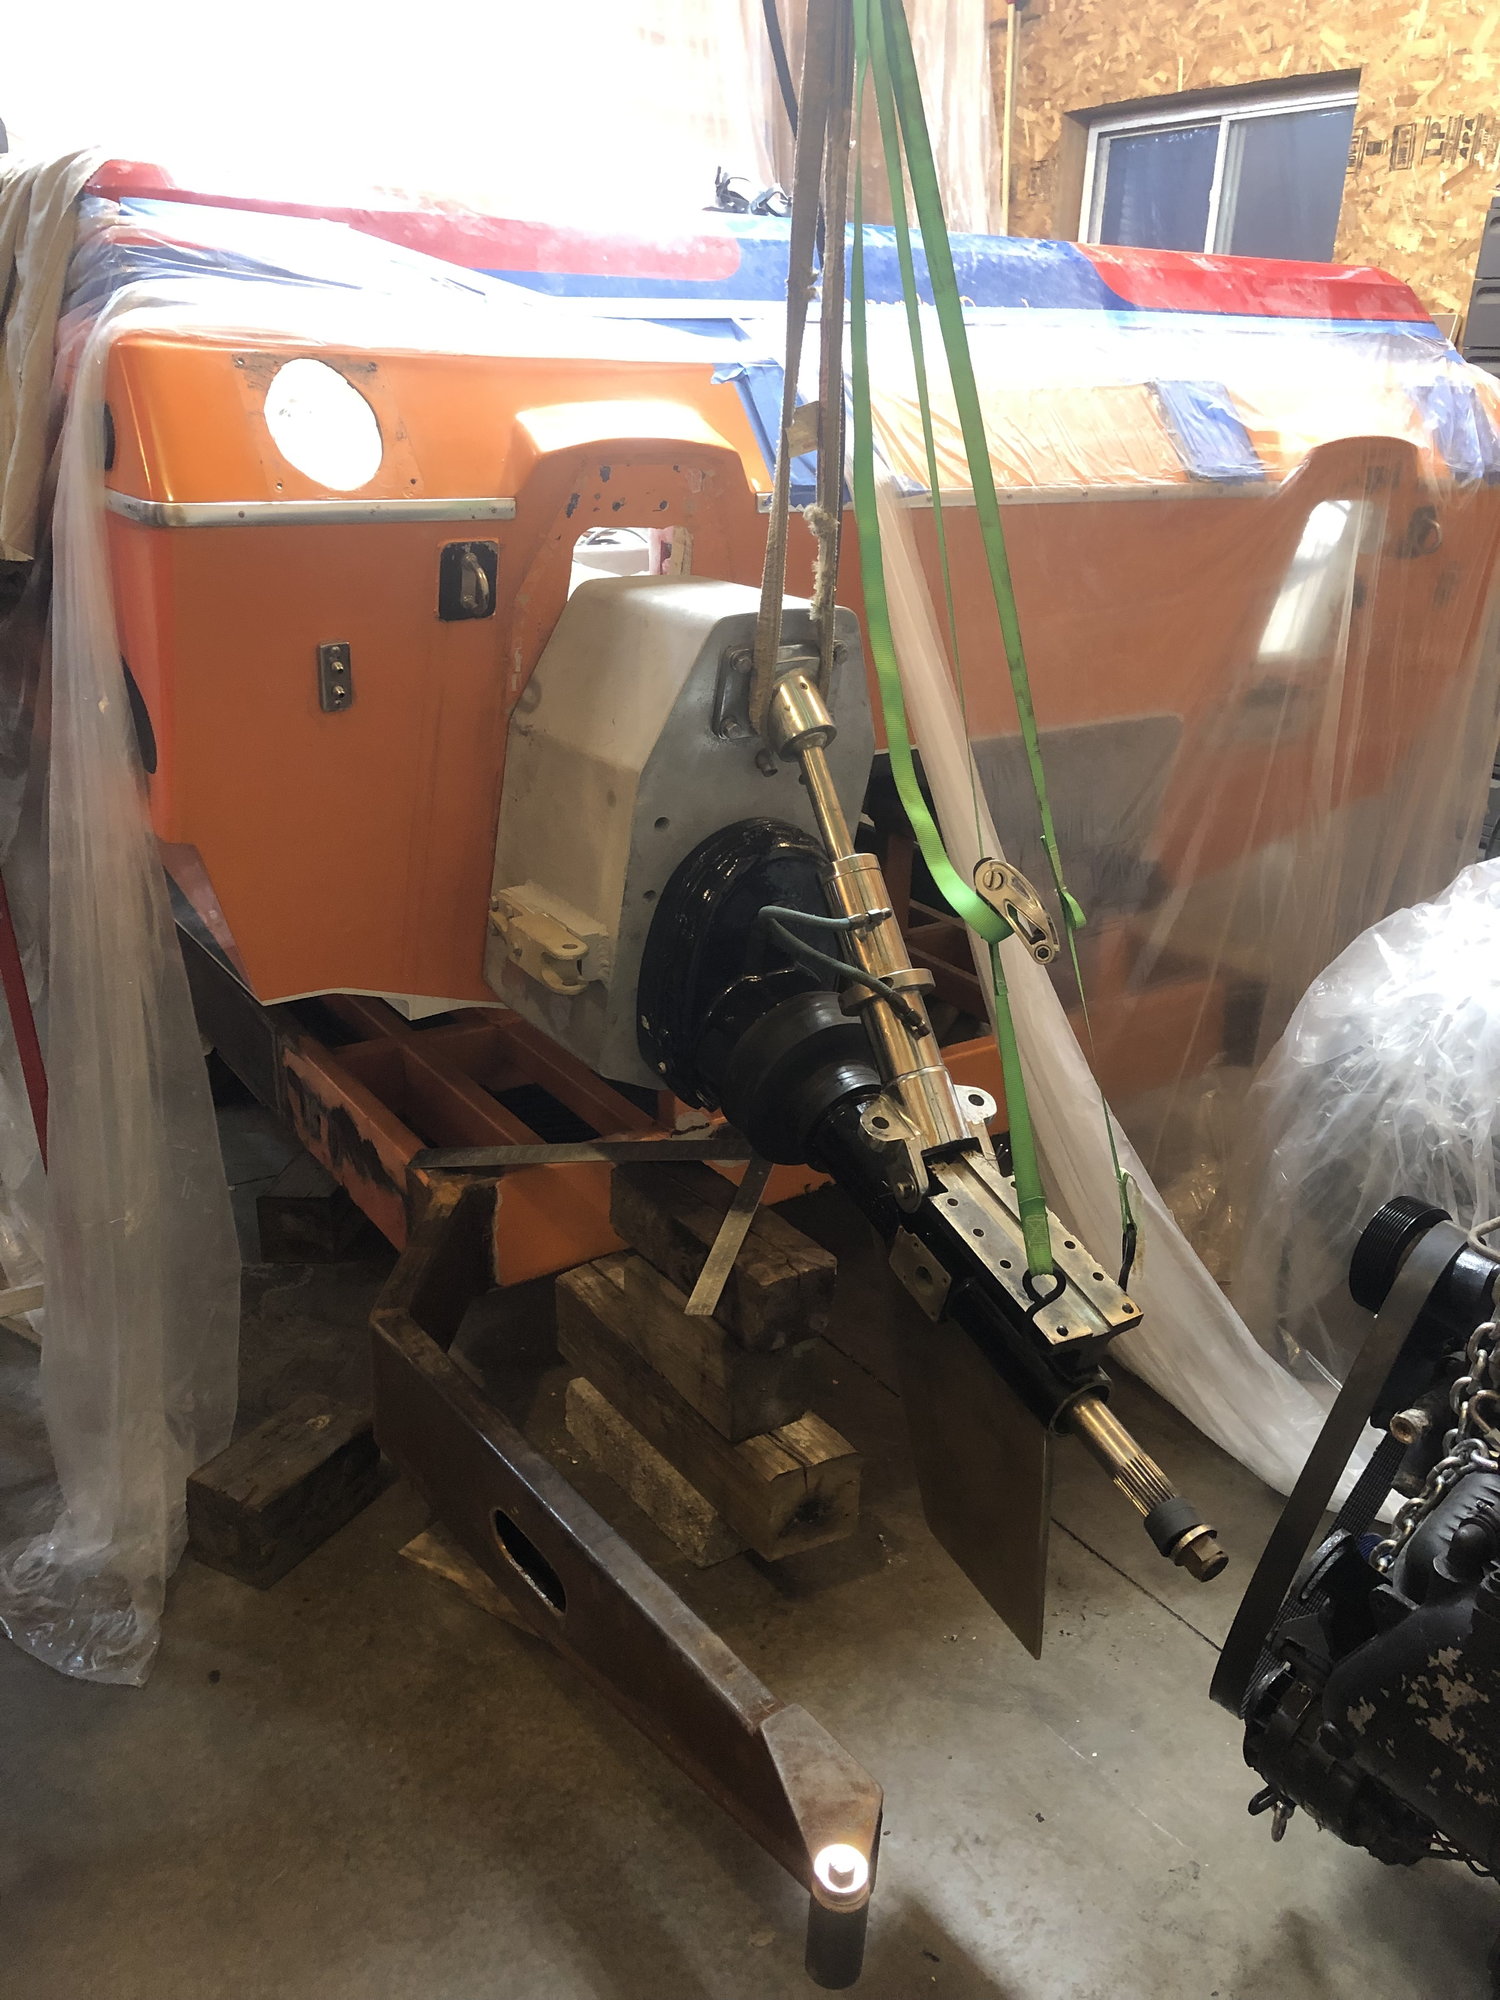
Resting on the stringer
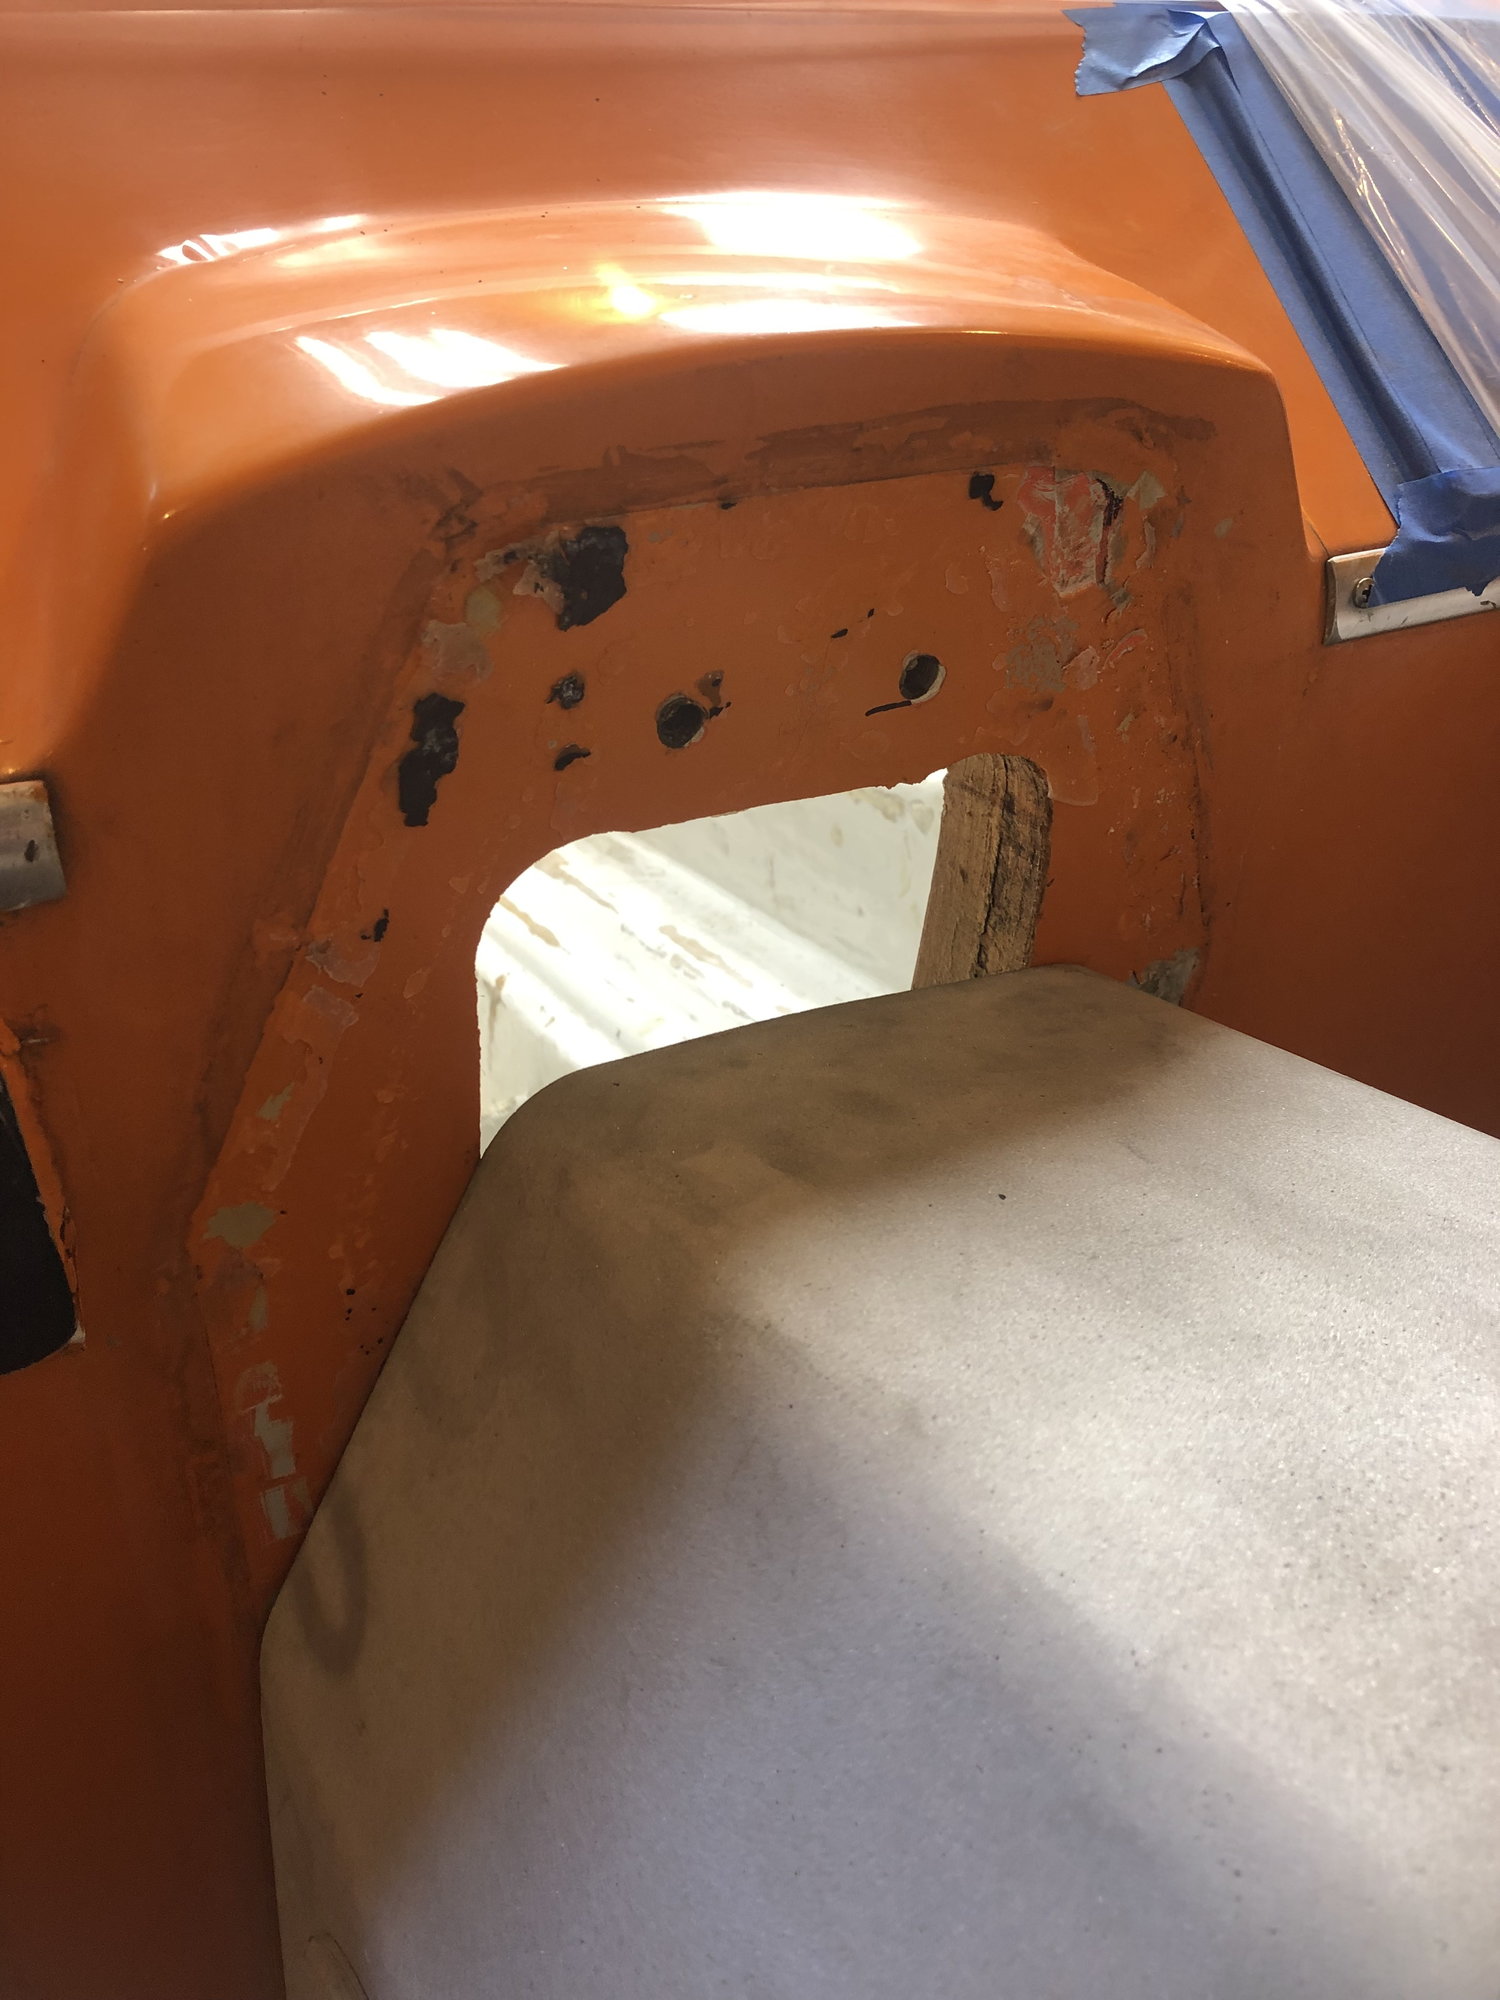

Thinking I need to go up a touch yet
Finally home! For a minute...
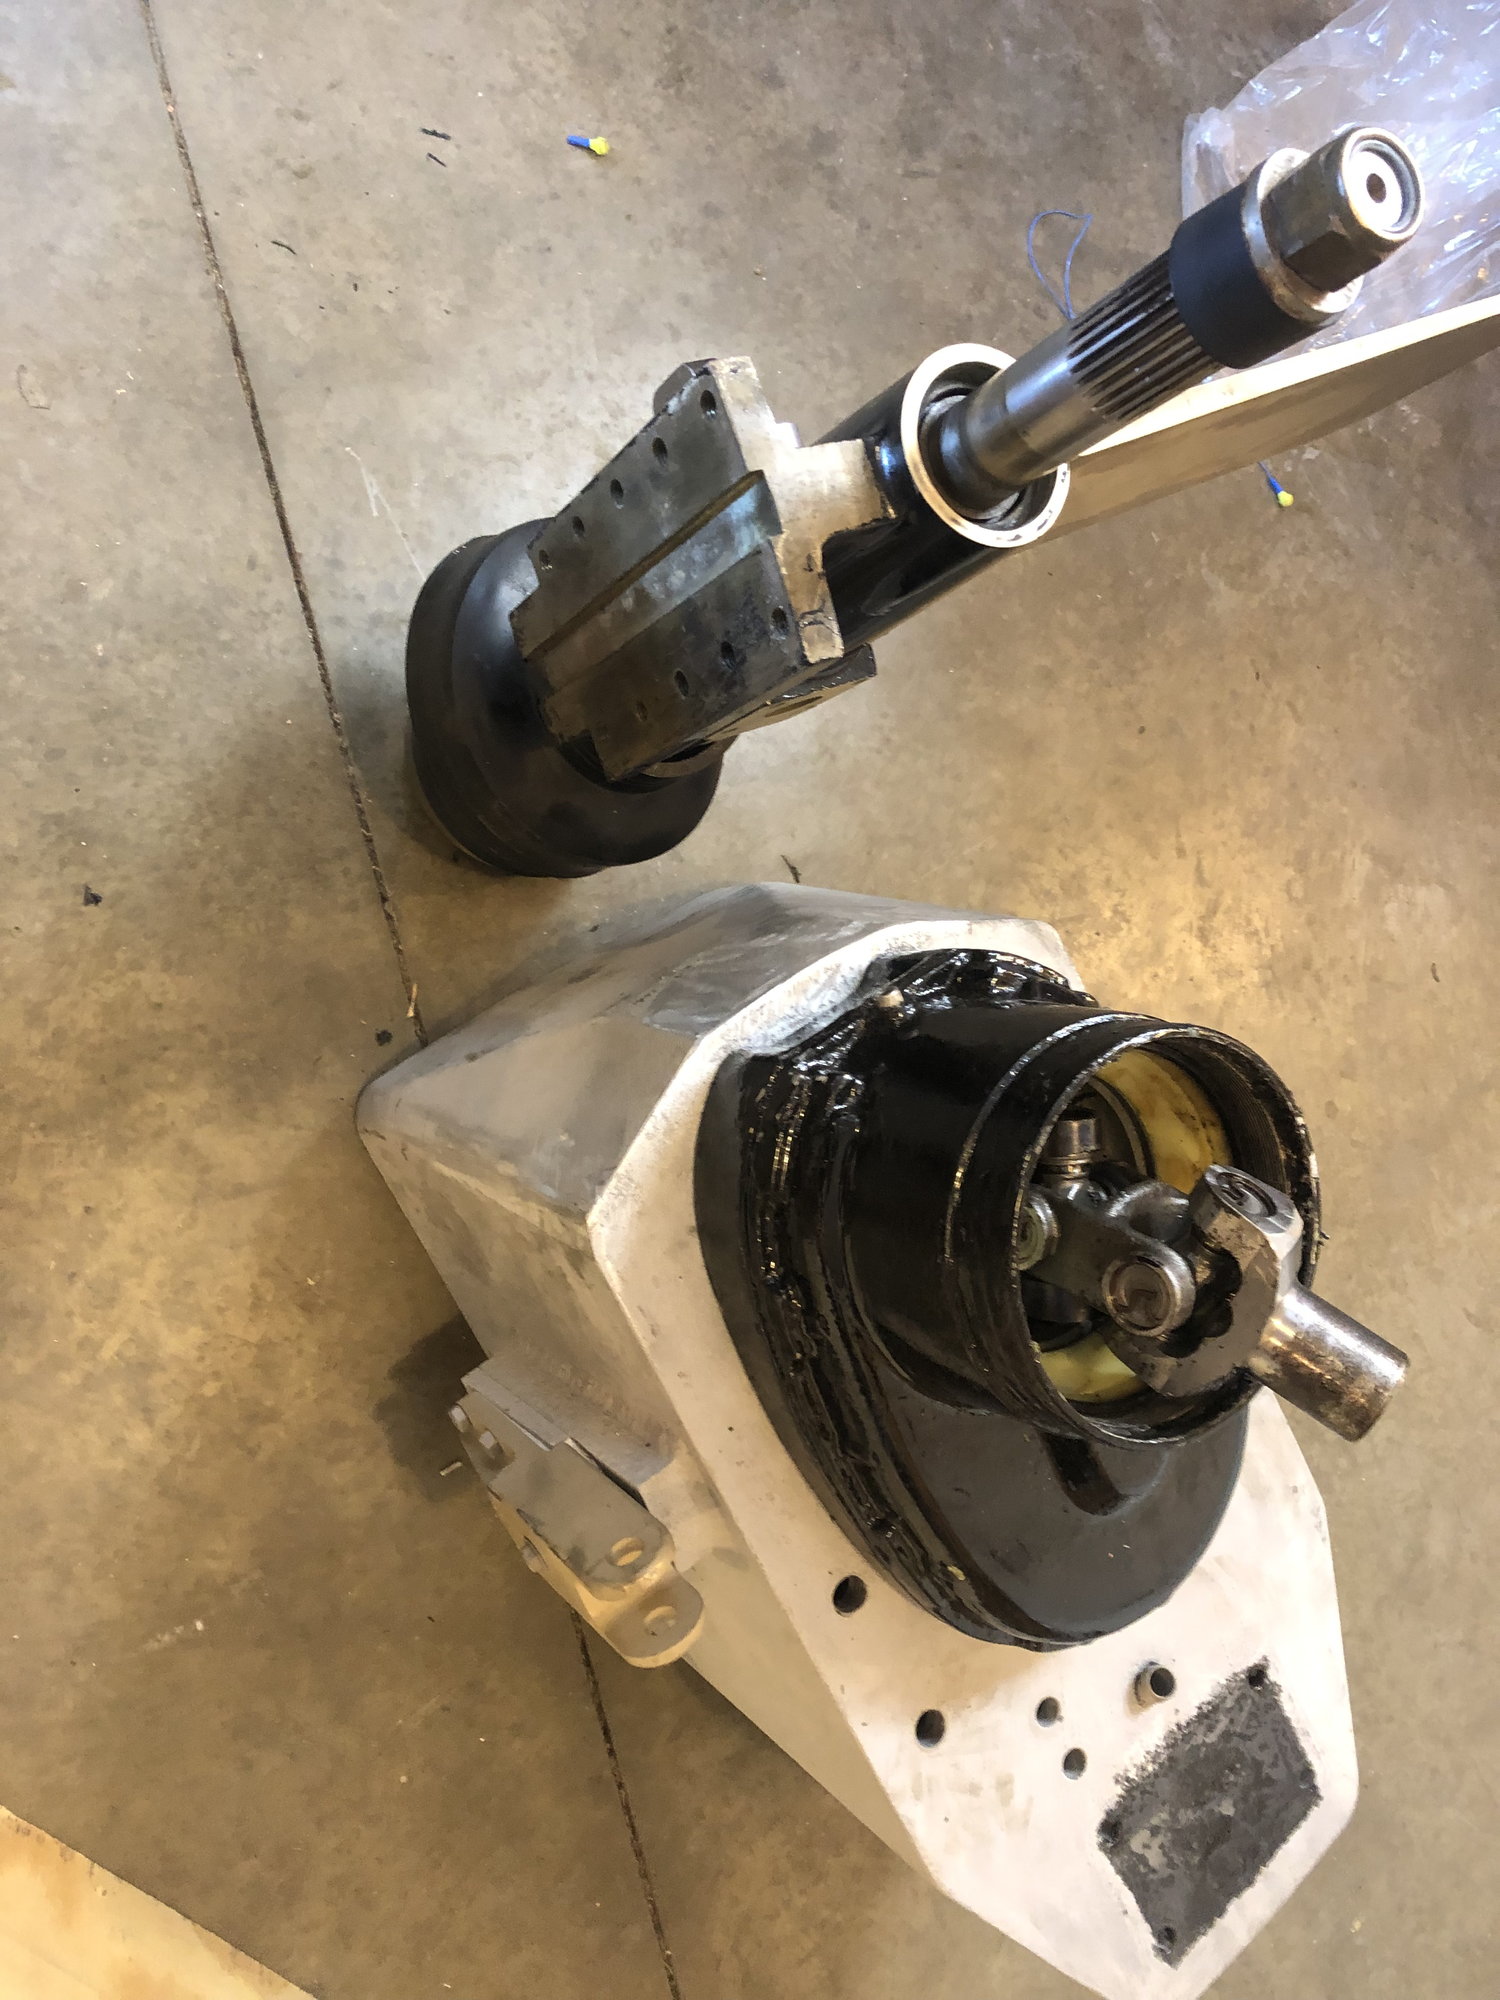
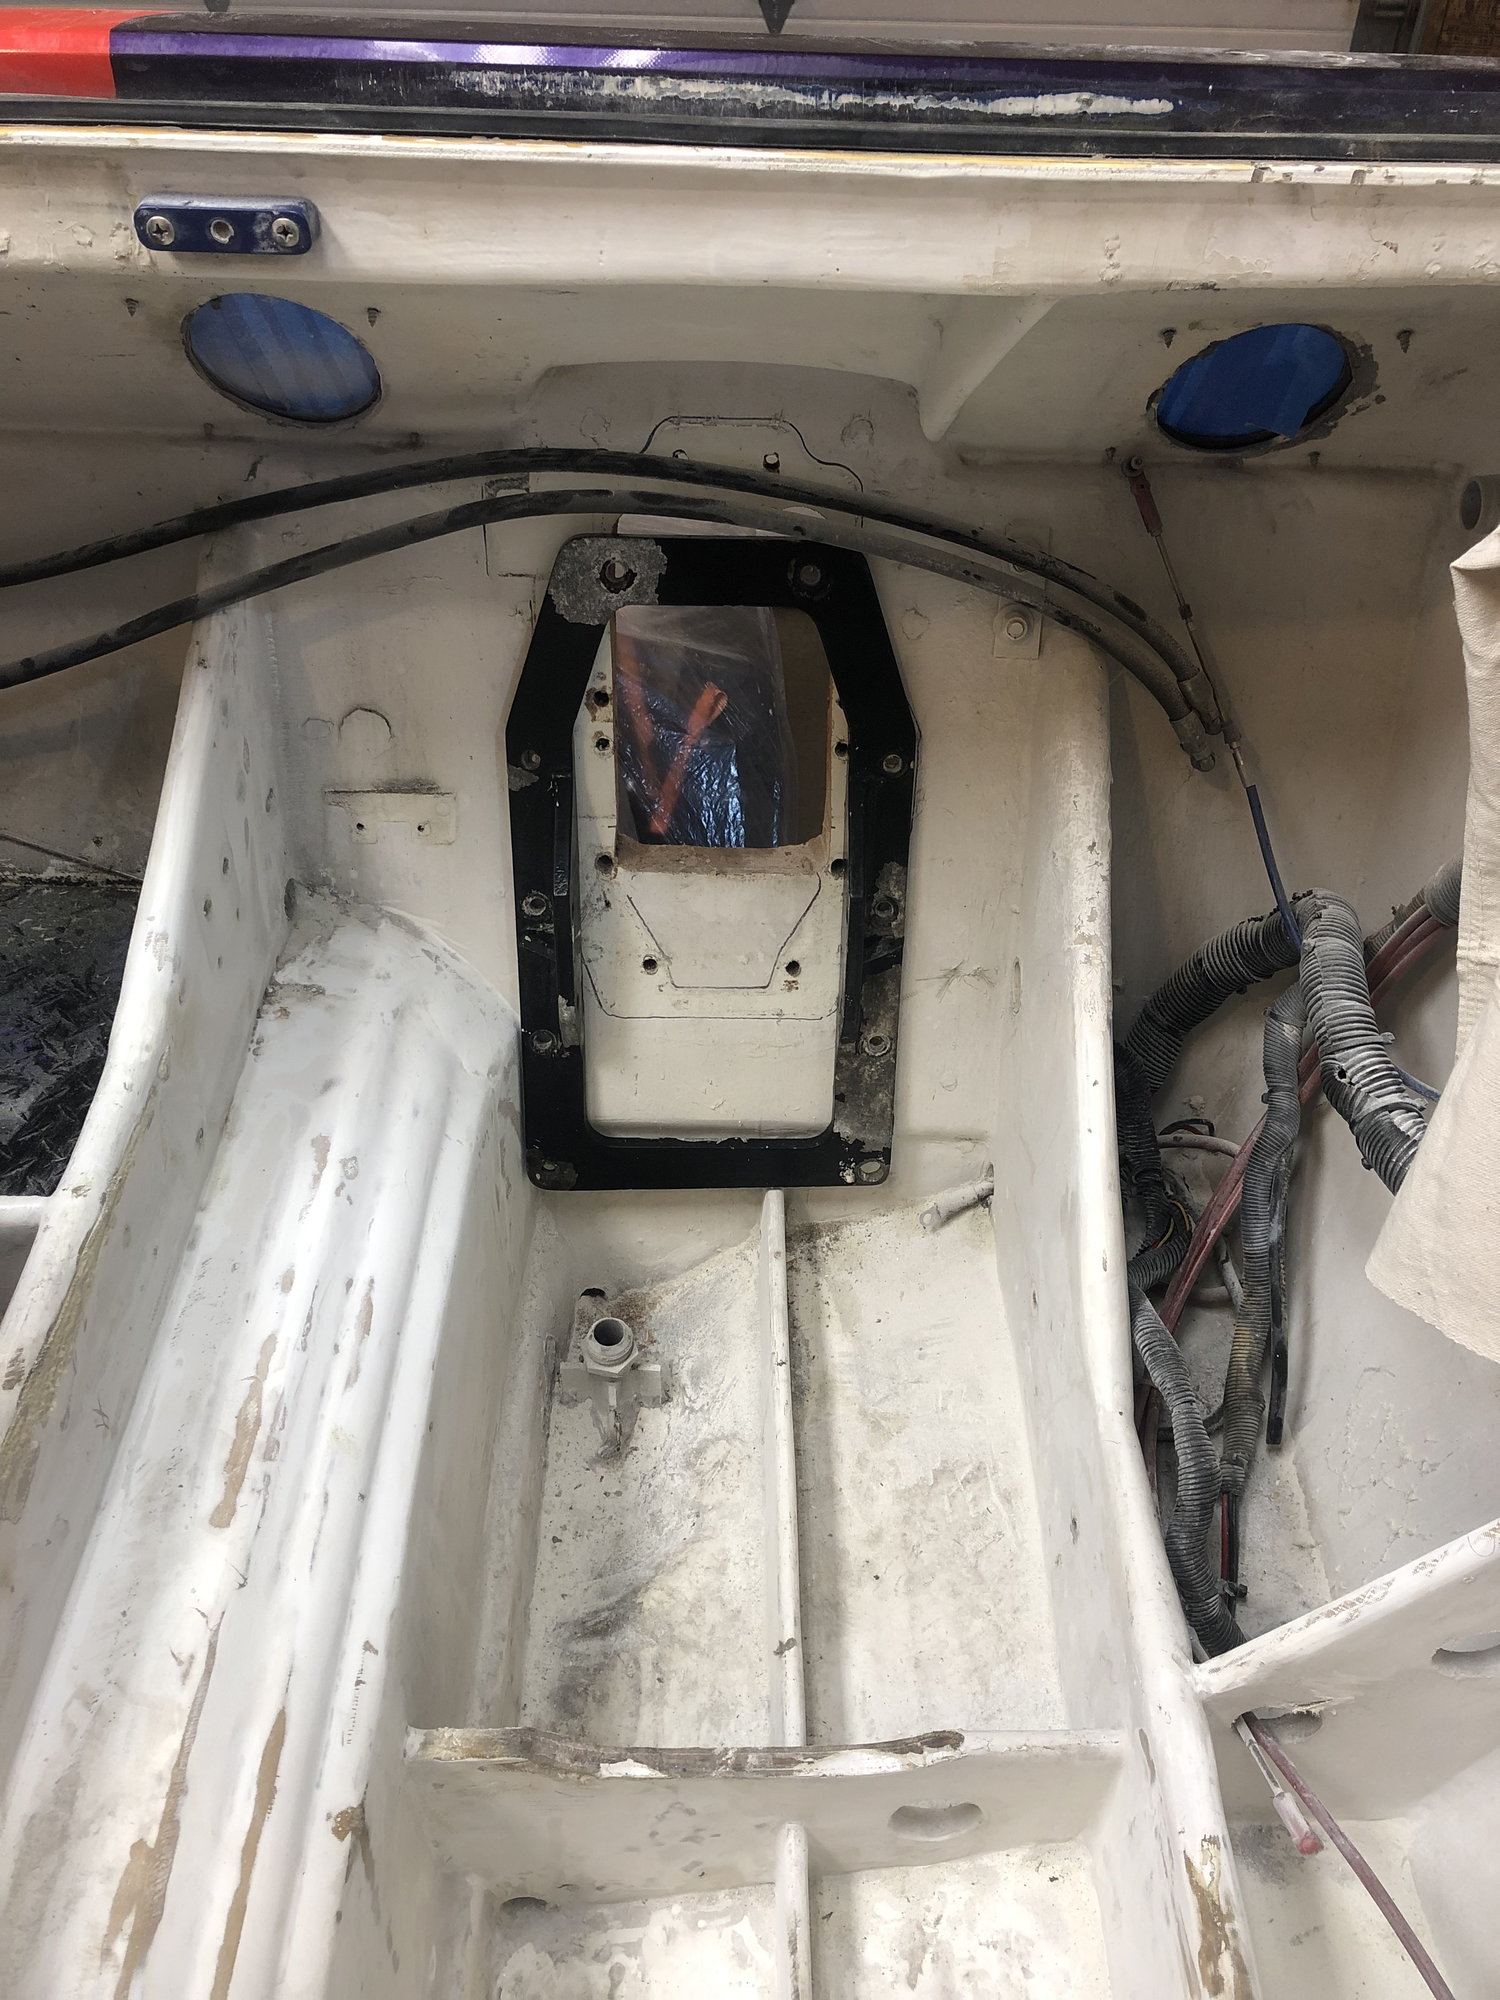
Drives showed up and started playing around with the inner transom assembly plate to see what would need cut / moved / added to get the Arnesons on the hull. Will have to call Rik again now that I�ve got them in my hands to see about mounting height for the drives. Ken was nice enough to sand blast the boxes for me and put some new bearings in before sending them my way. Need to do some glass work on the transom and fill in all of the holes.... can�t wait! LOL
03-22-2019 | 03:31 PM
#38
Registered

Joined: Jan 2010
Posts: 617
Likes: 144
From: syracuse ny
Looks like a nice set-up I would be curious to know what Rik tells you for the installed height for the boxes mine are on a V hull and are mounted 1/2 in above the running surface directly in front of the boxes .
03-23-2019 | 12:22 PM
#39
Thread Starter
Registered
Joined: Dec 2018
Posts: 198
Likes: 2
From: Zeeland, MI
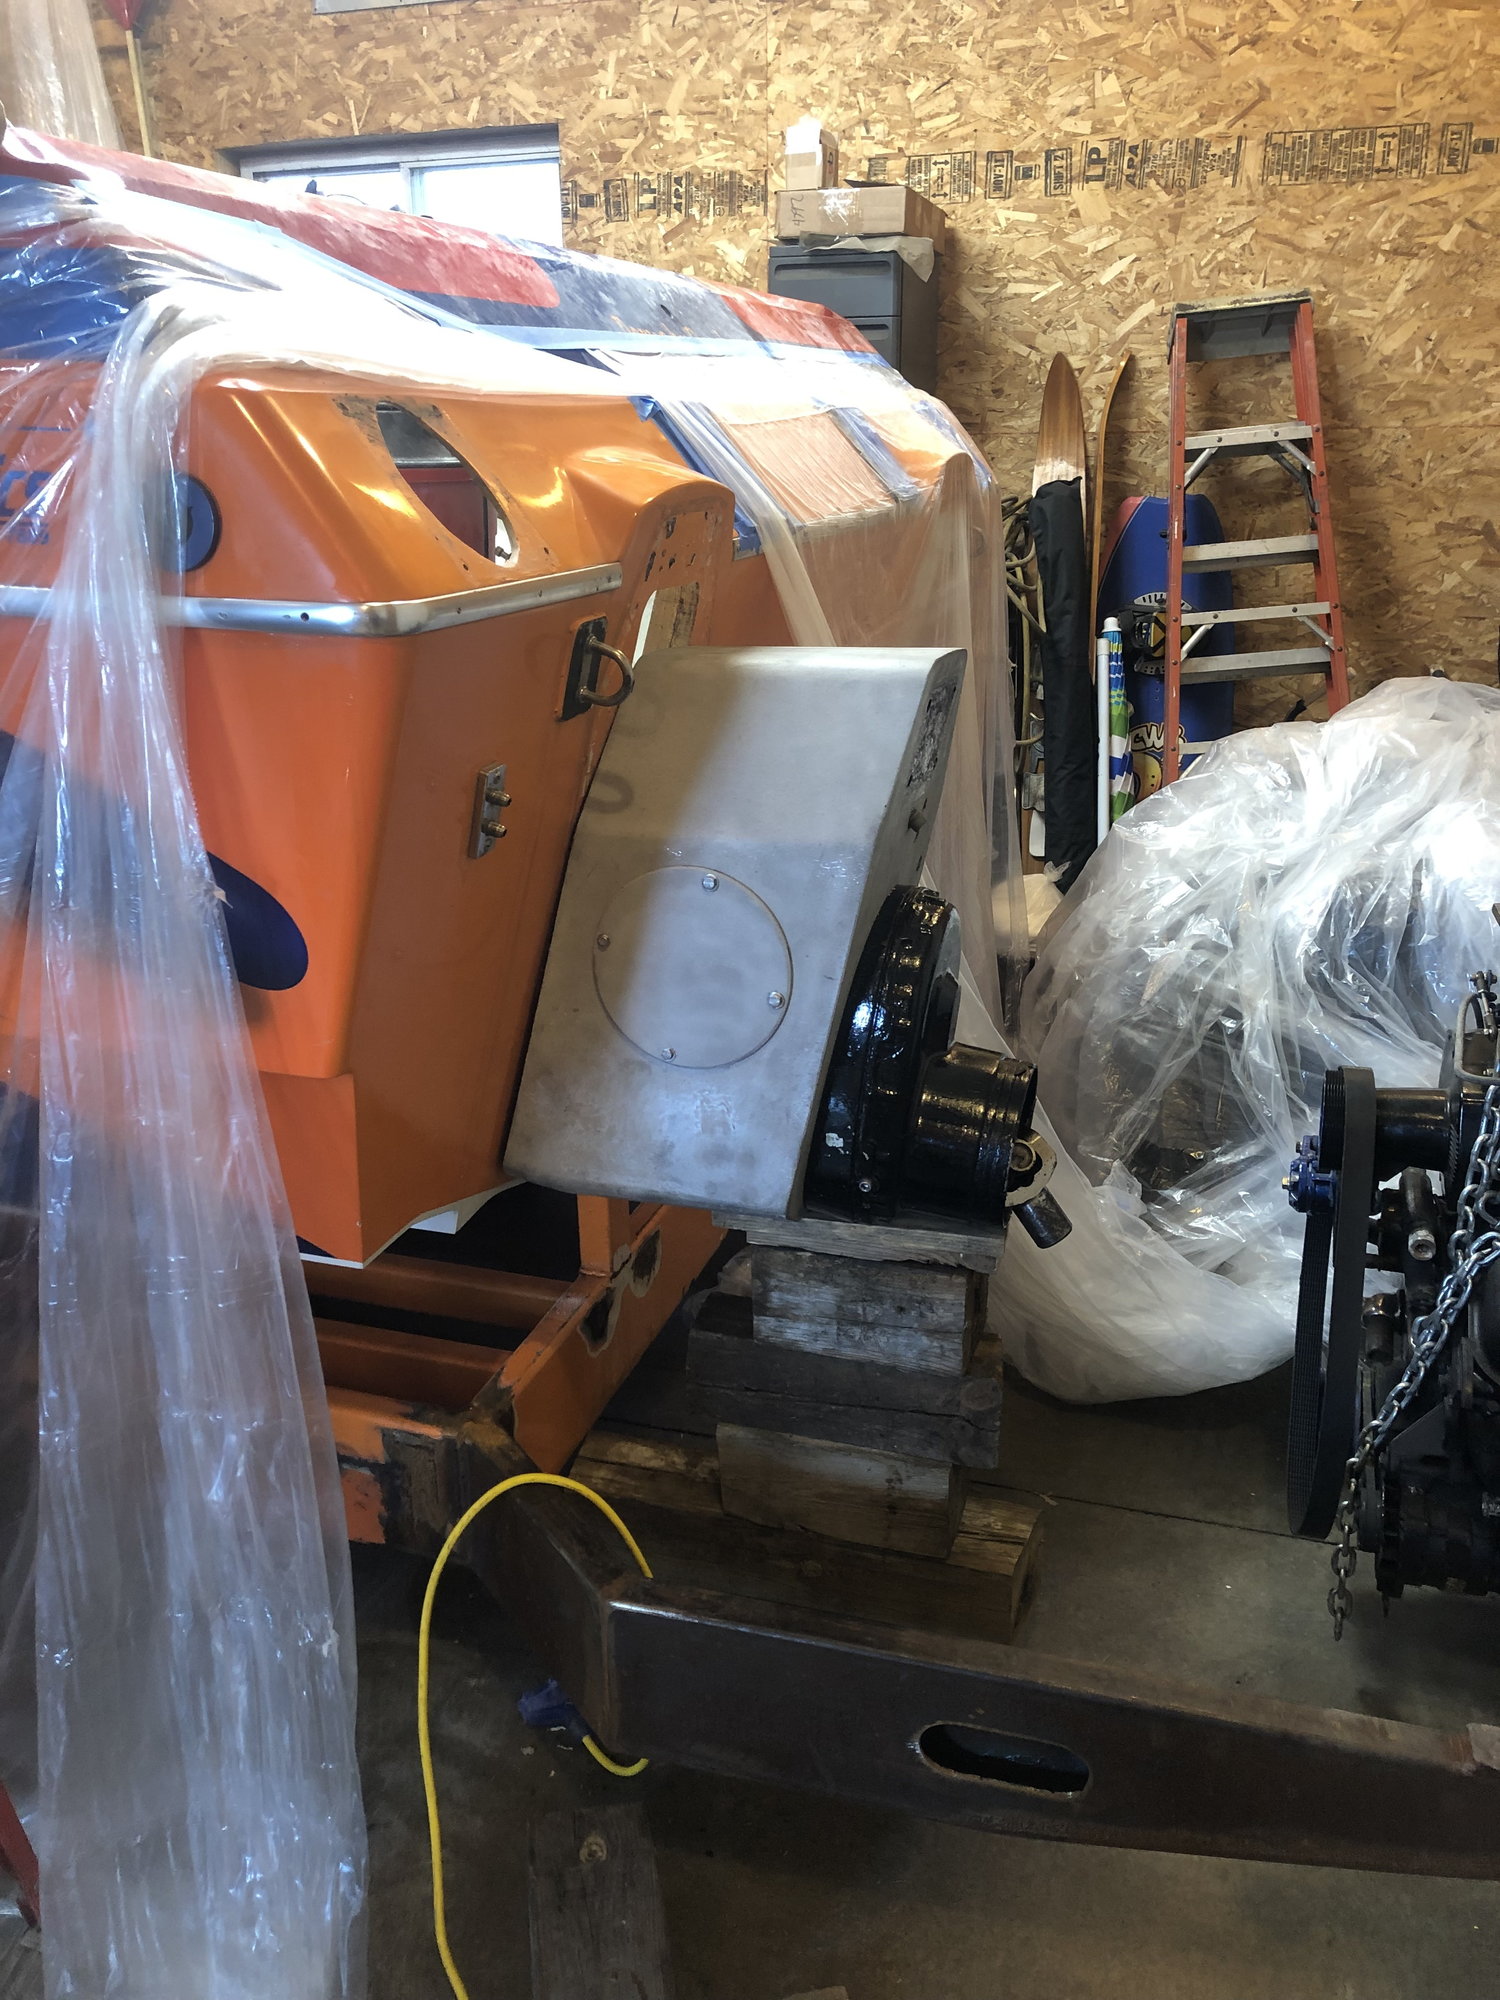
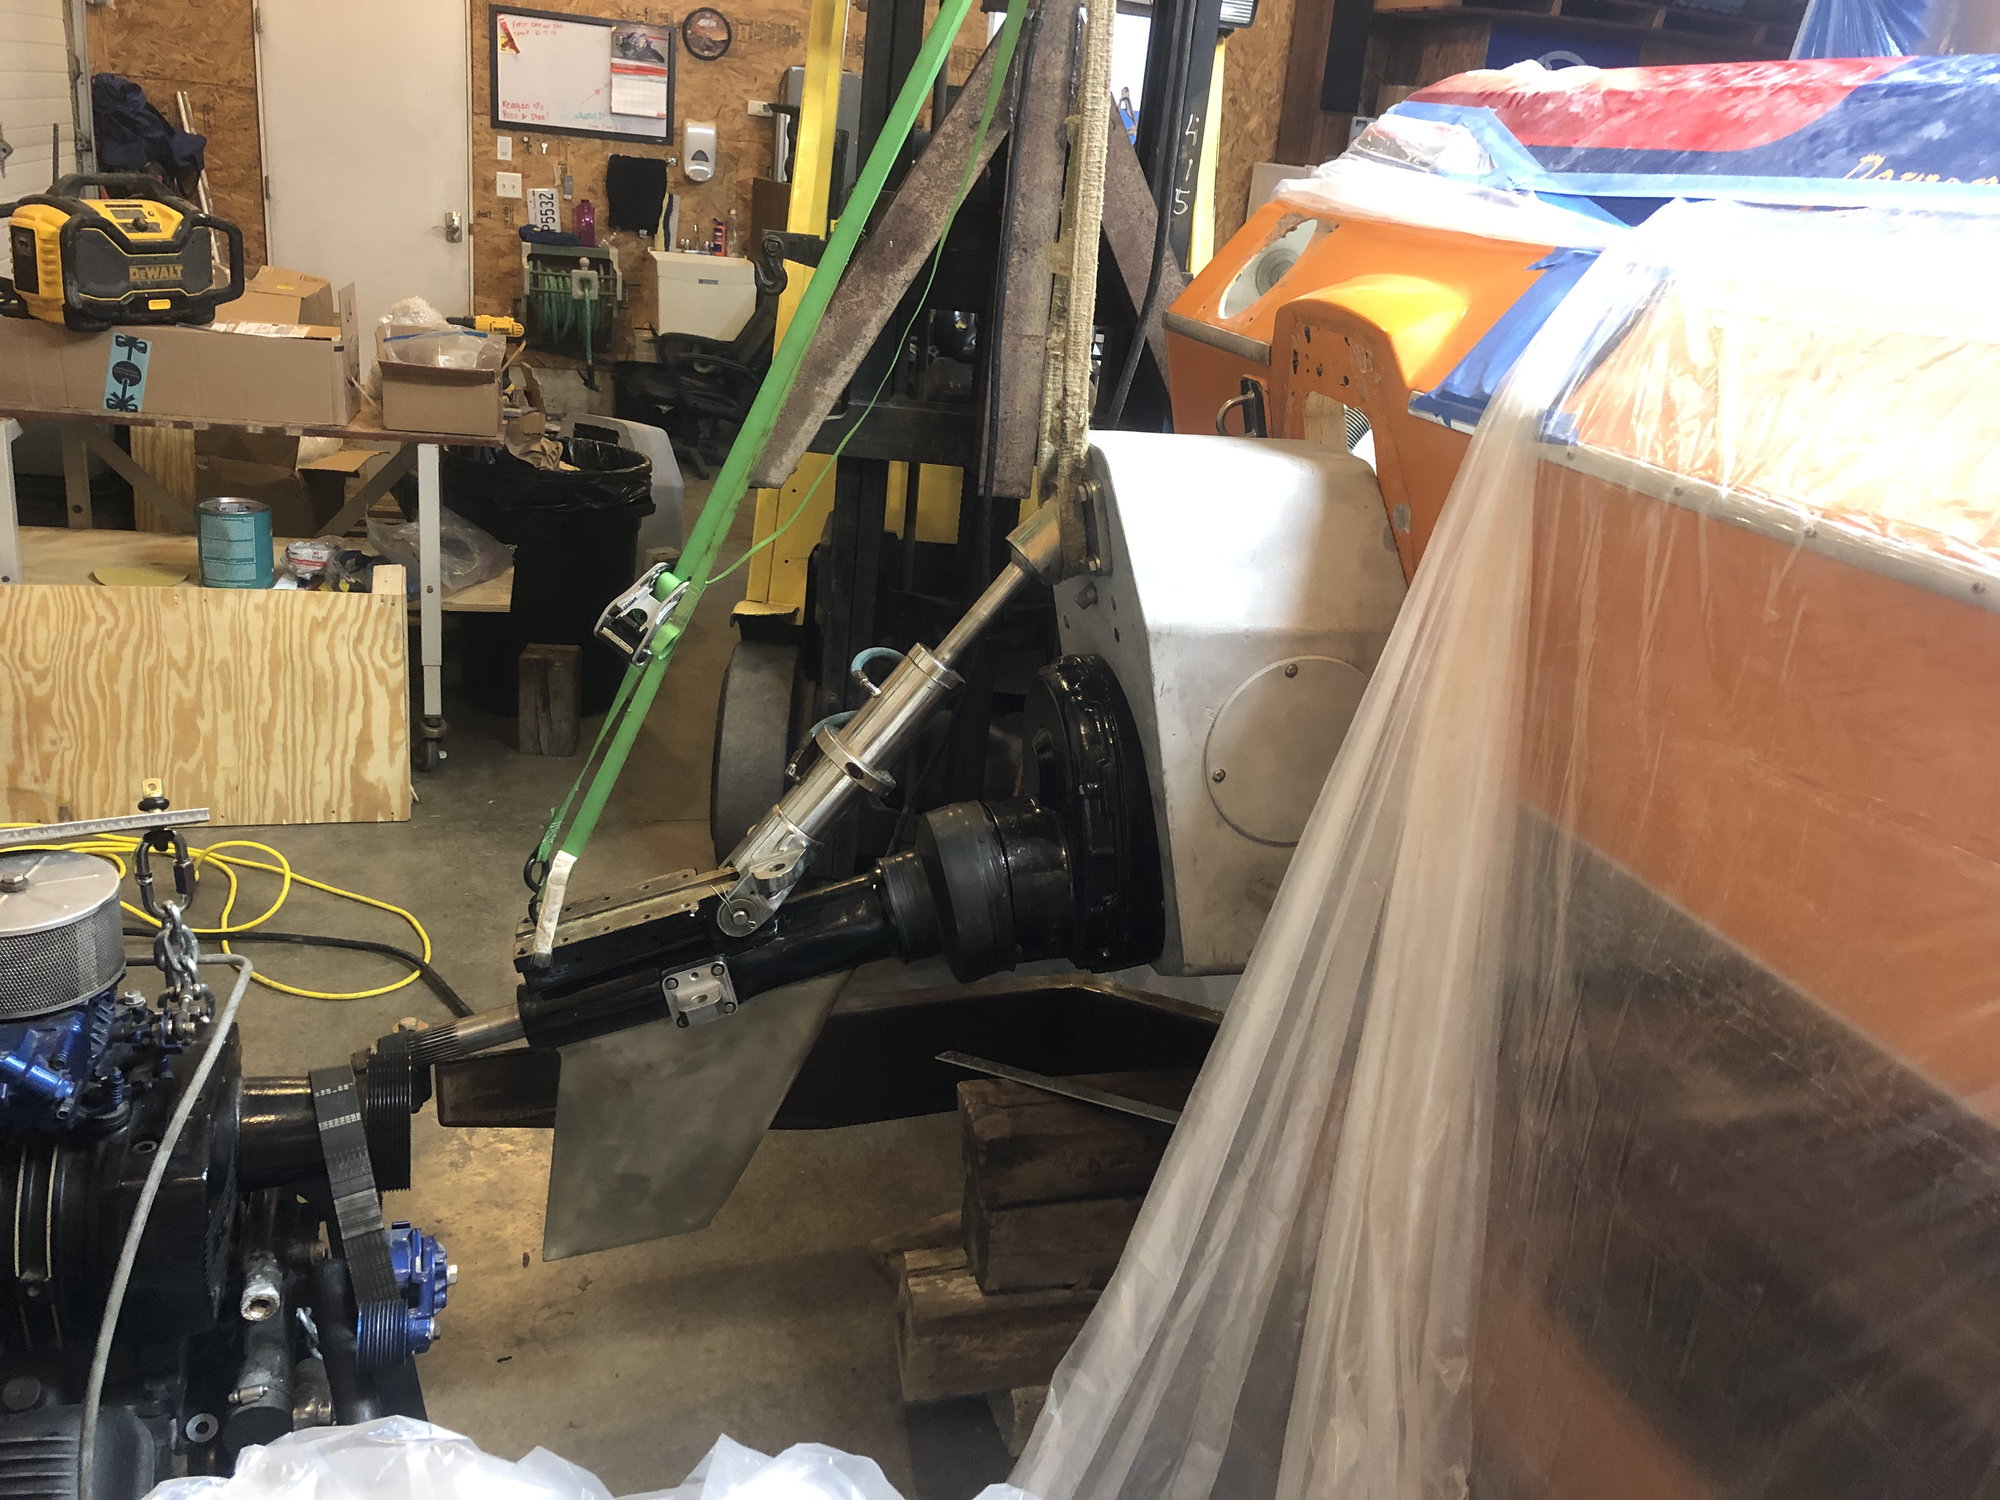
Got a hold of Rik again yesterday and assembled both drives. 5/8� - 3/4� above the bottom of the running surface to the rear most center of the box. I will not be able to achieve this as the outside would be dragging in the water. I am limited to 1/2� clearances on the bottom corners of the boxes. I will try and take some pics when it�s not just me around. Holding a straight edge, tape measure, and trying to take a pic is impossible!
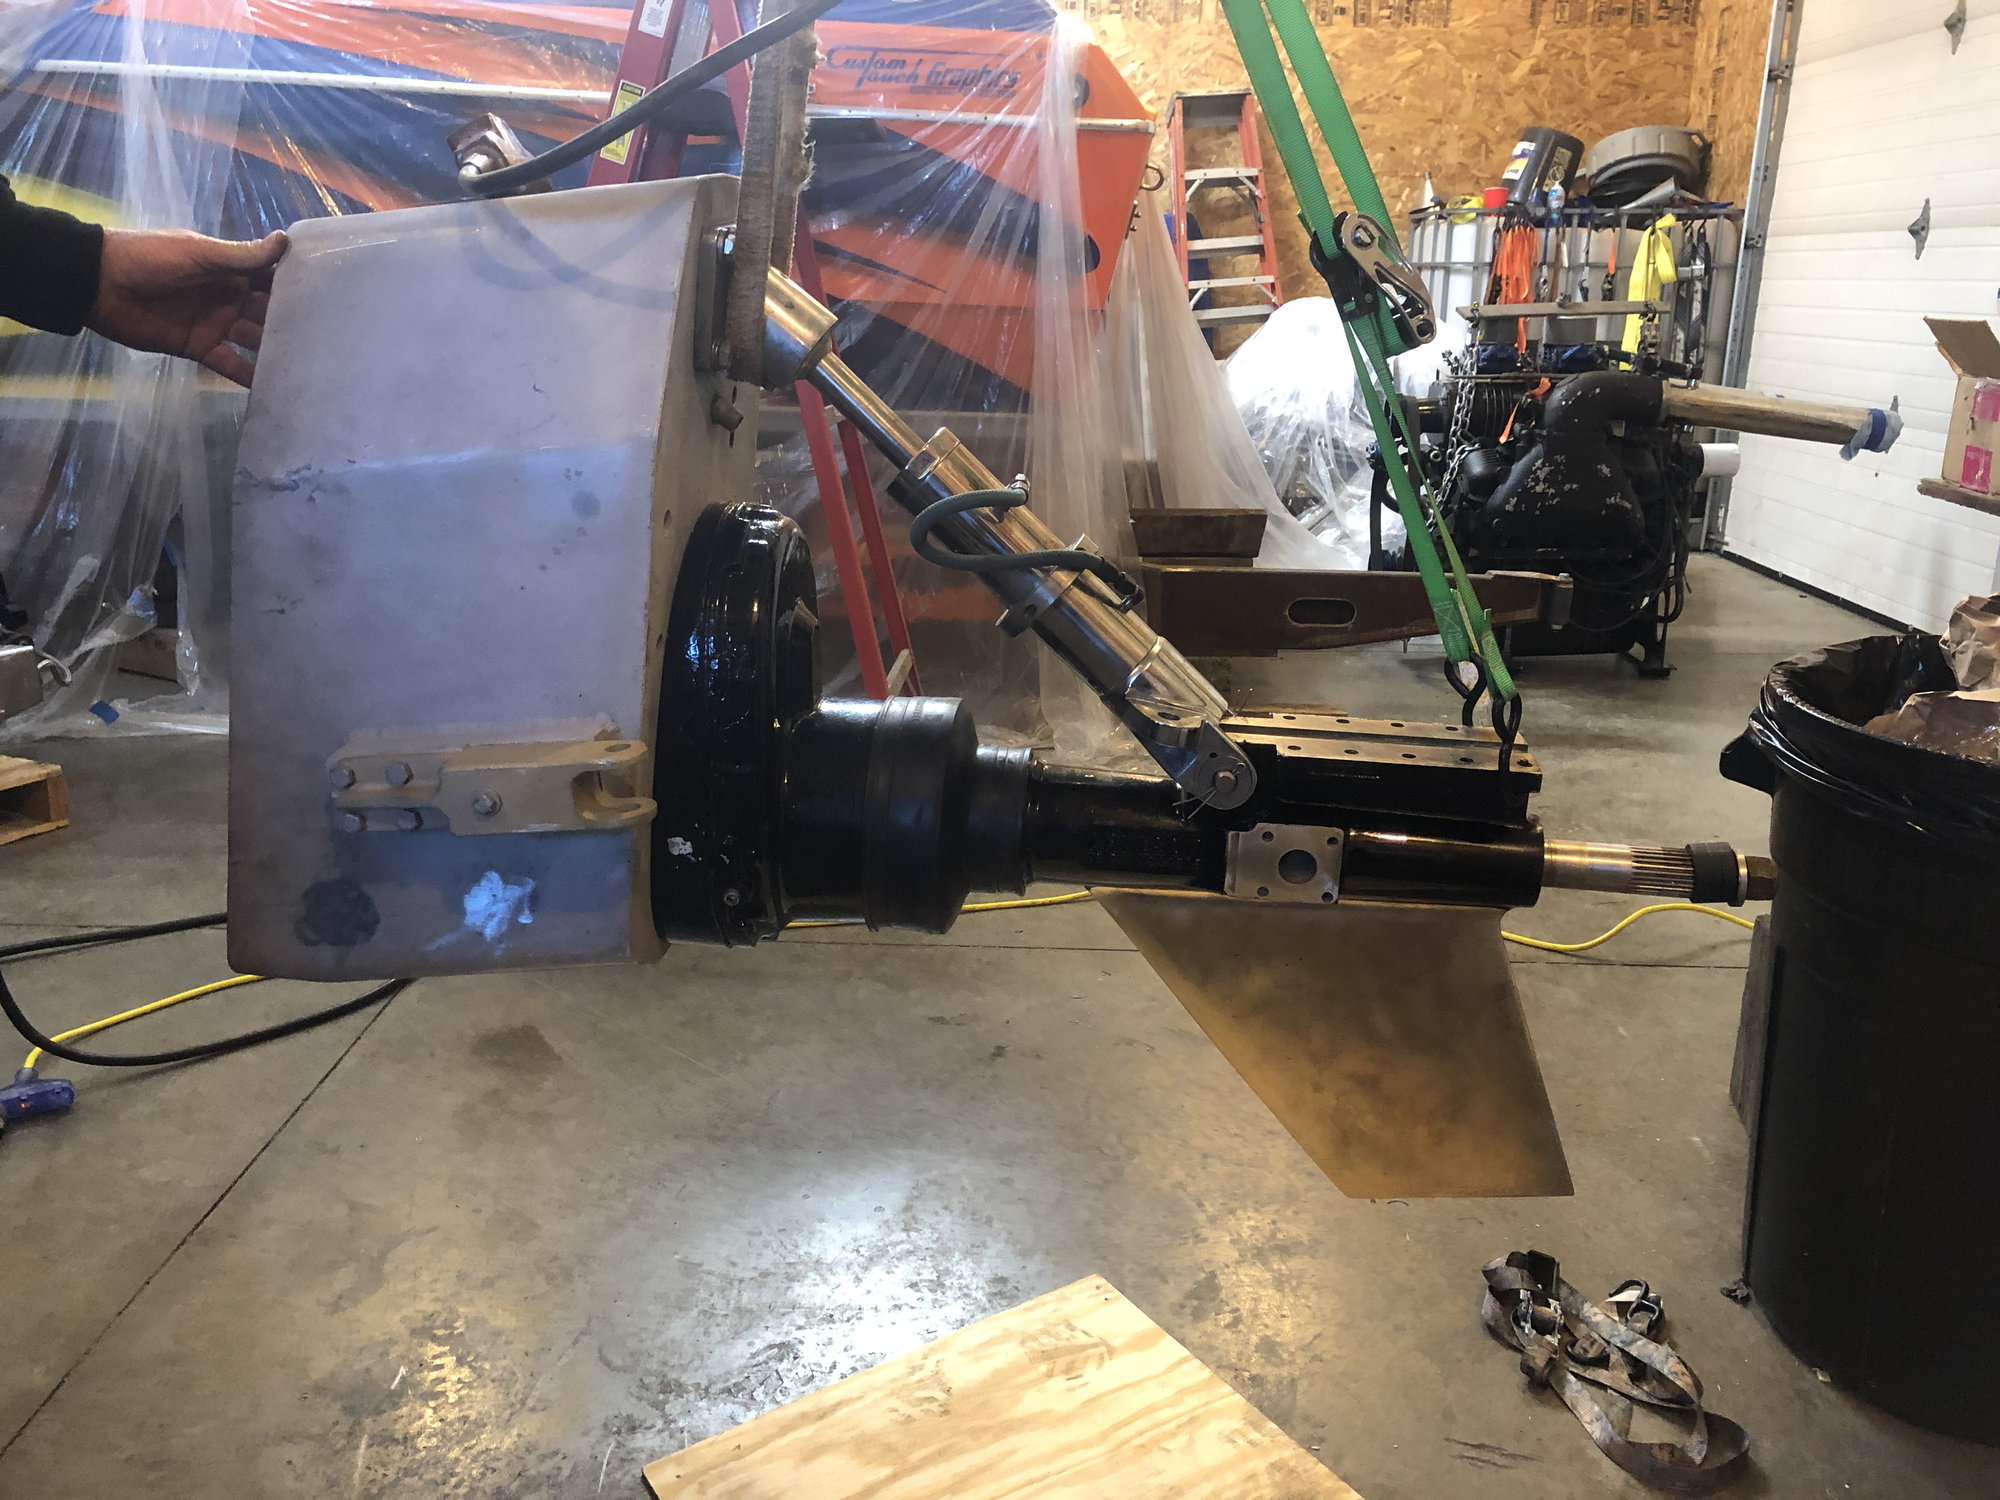
Dry fit together ( No silicon or thread lock etc). They went together very simply when I hung the box from the Hilo then lowered it onto the thrust tube to keep all of the u-joints and cardigan joint straight. Lower it down and spun the prop shaft and wahla.
In much need of a spring cleaning soon

Close to where she will land
Going to start filling holes hopefully today. Need to get a scale for mixing resin / Hardner and I would like to get some thinner glass as well. Stay tuned
Dry fit together ( No silicon or thread lock etc). They went together very simply when I hung the box from the Hilo then lowered it onto the thrust tube to keep all of the u-joints and cardigan joint straight. Lower it down and spun the prop shaft and wahla.
In much need of a spring cleaning soon
Close to where she will land
Going to start filling holes hopefully today. Need to get a scale for mixing resin / Hardner and I would like to get some thinner glass as well. Stay tuned
03-23-2019 | 02:22 PM
#40
Registered
Joined: Jan 2010
Posts: 617
Likes: 144
From: syracuse ny
What I ended up doing was make a jig using the motor center line , pin it to the bottom of the boat with some jacks put a peace of 1/2 wood for a spacer upward and it also doubled as a work bench and just set the boxes on top of that made real easy to draw around the boxes to set it up for the drill jig

