

Need help! Persistent Cav Burn on Imco Shorty
 05-15-2012 | 07:39 PM
#1
Thread Starter
Registered
Joined: Oct 2005
Posts: 5,825
Likes: 612
From: Clarkston, Michigan
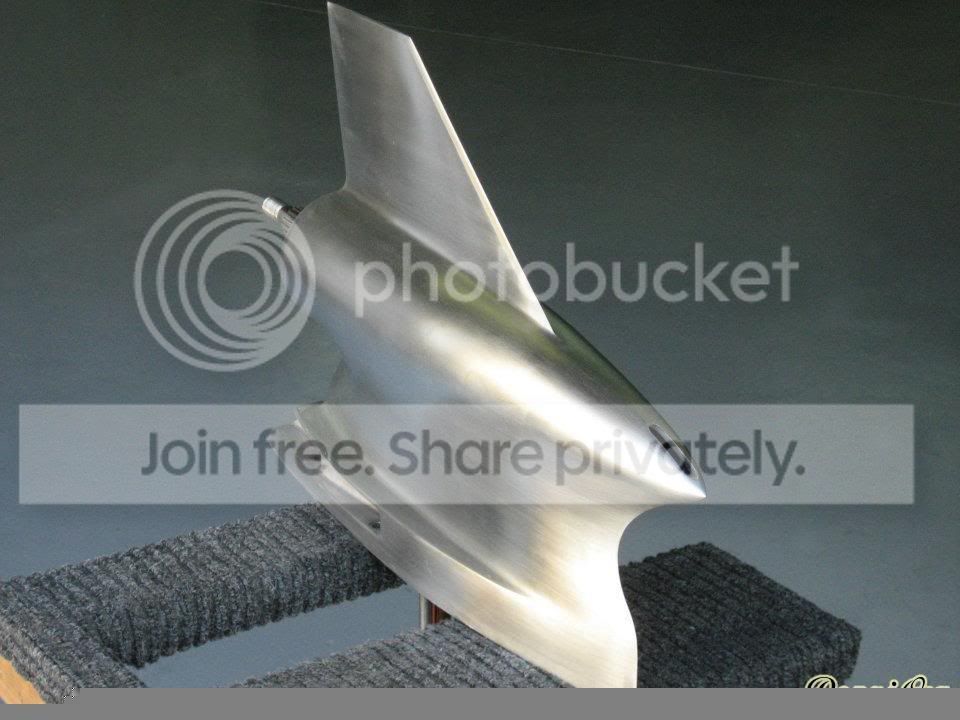
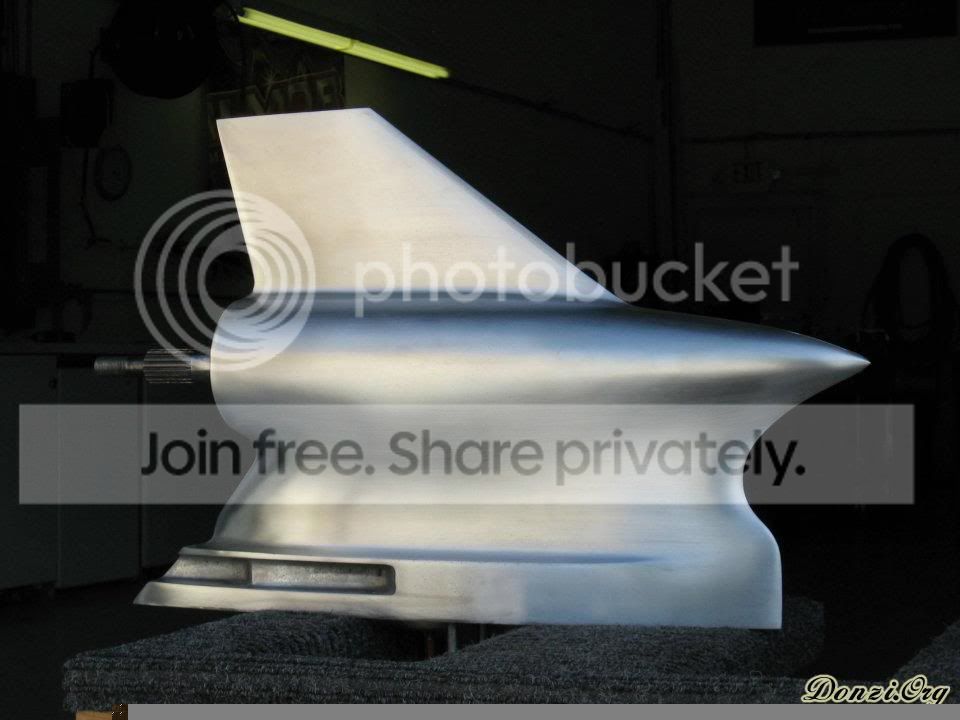
My Imco shorty has been getting cavitation burn for awhile now. This year it finally got so bad that it had eaten half way through the housing. After doing some research here and on other forums I decided to weld up the damage and modify the water inlet. My welder closed up 3/4" of the rear of the inlet and filled in the eroded area and I opened up the inlet toward the front. I've seen this mod done before and some have said that it fixed their cavitation burn issues. While I was at it I sharpened the leading edge of the lower and cleaned up the rough surface quite a bit. The castings of these lowers seem to be of a poor grade of aluminum and they are also porous. I had high hopes for this fix but after less than 2 hours of running on plane I have signs of the cav burn again. The larger holes in the "after" pics are from air pockets in the weld. My welder will fix this but if the cav burn is going to continue then I need to look further for a cure. I've looked at a few of these lowers on other boats and every one had the cav burn. Has anyone moved the water inlets to the top of the bullet and filled in the stock inlet? Any other ideas? I am stumped. The first pic is of the burn before I had it welded up. The next two pics are of the lower after I reworked it and moved the inlet forward. The last pic was taken today and shows signs of the erosion starting again. The larger holes are from problems with the weld.


 05-15-2012 | 07:51 PM
#2
Registered
Joined: Oct 2003
Posts: 1,393
Likes: 13
From: Blaine, TN
Hmmnn, Maybe an option is to make a small Stainless Insert that fills that area and is held in with some flat head screws. IDK if stainless burns like that or not. Or some work may need to be done to the shape of the nose cone to keep that part wetter, unless the water pickup hole just screws up the laminar flow there sooo bad changing shape in front of it doesn't matter IDK  Good Luck
Good Luck
05-15-2012 | 09:22 PM
#4
Registered
Joined: Oct 2009
Posts: 277
Likes: 0
Do you have a pic from this angle after you got done with the rework? (I am assuming this is in the middle of the work when you were moving it forward?) I read the post, but it isn't 100% clear to me..
RD
Last edited by RiverDave; 05-15-2012 at 09:26 PM.
05-15-2012 | 09:47 PM
#6
Registered

Joined: Jan 2002
Posts: 4,612
Likes: 7
From: ALTO, MI
Are You using the water pick up built into the drive?
Are You trimming out a lot at max speed?
If you are trimming a lot it is probably disrupted water flow caused by the water pick up hole.
That hole looks a lot bigger than the ones in my drives.
Are You trimming out a lot at max speed?
If you are trimming a lot it is probably disrupted water flow caused by the water pick up hole.
That hole looks a lot bigger than the ones in my drives.
05-16-2012 | 01:25 AM
#7
Registered
Joined: Mar 2009
Posts: 1,194
Likes: 1
From: Delaware
My SC lower wasnt burning like that, but i was losing a little bit of water pressure at WOT when trimming out for max speed. I drilled a 3/8" hole straight through the case about 1" above the bullet. Straight back into the water passage. This serves two functions, it provides fantastic water pressure at speed, and will prevent a low pressure bubble from forming on the underside of the bullet when trimming it up, thereby dragging it through the water. It did not appear to scrub any speed, but dropped my oil temps from 260+ after 30seconds of WOT to basically never going over the 240-250 range, even after extended WOT runs.
i dont have a picture though.
i dont have a picture though.
05-16-2012 | 06:01 AM
#8
VIP Member
Joined: Feb 2004
Posts: 12,315
Likes: 1,557
From: Maryland
You're chasing a symptom, not the cause, you need to find out what is causing it and then rectify it. As said above to me it seems like there is a hydrodynamic problem. check with Wilson custom marine to see if they have heard of this.
05-16-2012 | 07:03 AM
#9
Thread Starter
Registered
Joined: Oct 2005
Posts: 5,825
Likes: 612
From: Clarkston, Michigan
There are two interesting suggestions here that I like. Drilling the hole above the bullet and rounding the edge of the rear of the inlet. I will probably try the rounding first. If I let any more water in I will need to run a relief valve since I am holding steady at about 35# pressure now, that is fine and actually about perfect for the 525 which can go up to 43#s safely.
Yes, I run some positive trim on flat water, maybe quite a bit of trim sometimes when trying to really air it out and get into the 80s. That probably is when most of the damage happens. Don't we all have to trim up for top speed though?
I have pics of an Imco blueprinted by Wilson and that is what I used as a model when I did my work.
Here are more pictures. The first 2 are of the Wilson Imco. They look very similar to the two pics of my reworked lower in my first post. The second is of the inlet before welding it up. I was also losing pressure when trimming up and rounded out the front of the opening. I had the cavitation burn problem before and after I did that so that was not the cause. That was done per Imco's recommendation. The last pic is of the lower after welding but before finishing the work on the inlet.
I have been told that some people have welded up the lower inlet entirely and made new inlets above the bullet. Does anyone know anything about that?
05-16-2012 | 07:52 AM
#10
Registered
Joined: Oct 2003
Posts: 1,393
Likes: 13
From: Blaine, TN
Can you put 1 hole on each side? How big is the Cavity inside there? I'm guessing when you are trimmed up it creates a low pressure area under the bullet that is causing the burn. it is possible that closing the bottom hole may not even be the cure. some how you need to keep the water stuck to the bottom of the drive. is it possibe to have another small hole that far back to relieve the pressure difference? IDK, I don't have one here

