


311 Engine Upgrades


 07-07-2021 | 03:08 PM
#214
Thread Starter
Platinum Member

Joined: Feb 2001
Posts: 4,303
Likes: 1,459
From: Virginia Beach
I've considered making a change, but the Delco really works well when it works. I've swapped out a number of failing TB-V distributors for the Delco and they've run perfectly. I may try swapping the distributor for the one on the port engine but that will take some doing to get the engine moved back to a spot so I can start it back up.
I do not want to run a TB distributor. Reliable, but the modules are getting scarce especially the ones with a usable curve.
If I can verify that the distributor will keep proper timing, I can run it. Advance is supposed to be all in by 2800 so if I'm loading it above that it should be fine. I've always set the timing up top and let the idle advance fall where it ends up, but this one was a little strange. I had it set to fire at 10 degrees or so and it was damn close to that and not increasing with RPM.
 07-17-2021 | 07:17 PM
#217
Thread Starter
Platinum Member
Joined: Feb 2001
Posts: 4,303
Likes: 1,459
From: Virginia Beach
Everything has been cleaned and painted. I wanted it to go back together with no shortcuts taken. I still need to clean up the trans coolers and make new lines etc, but at least the transmission is assembled.
Fair estimation, two weeks out for installation. I just ordered more hose to replace everything in the bilge. Might as well do it now� the engines have to come out to replace even small pieces.
I�ve also redone the connections to the water pumps. The MPI pump positions don�t match the offshore mounts so I�ve gotten creative with elbows and bends to make them work better. The idea is to keep hoses from breaking and making life easier when it comes to changing impellers.
I�ll get some pics to share.
Last edited by TomZ; 07-17-2021 at 08:14 PM.
07-29-2021 | 04:32 PM
#219
Thread Starter
Platinum Member
Joined: Feb 2001
Posts: 4,303
Likes: 1,459
From: Virginia Beach
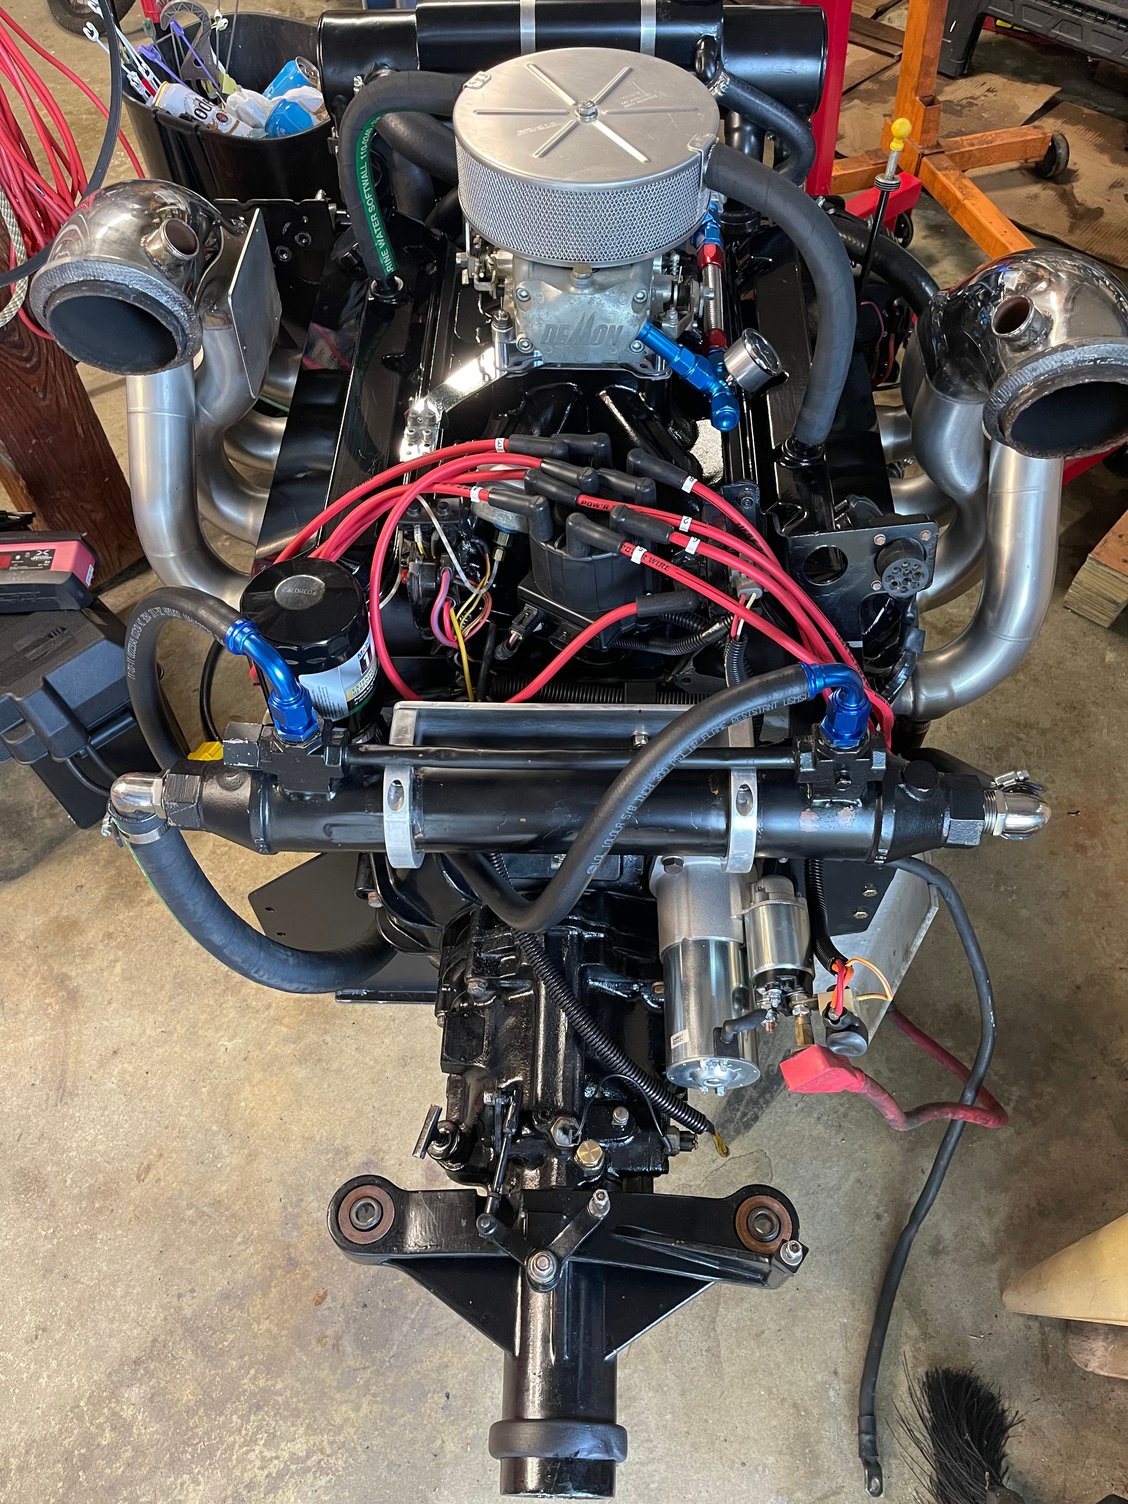
Engines are done.
Found a crack in the fuel bulkhead on the port side of the bilge. Runs right along the edge where the bulkhead transitions into bottom - 12-15 inches long. The glass is pretty thick in that area and I can push on it to widen the gap ever so slightly. I'm thinking it froze and caused the crack (meaning some water made it in there). FML
I'm debating on how to approach a fix.
One approach is to drill the crack ends to stop spread, drill into the area to see what I have for water in there, and possibly fill with thinned epoxy to give it some time. After epoxy, lay some mat and call it done.
Second approach is to rip the bulkhead out and replace. It's not that big of a deal to do though who knows what I'll find in there.
I need to get my moisture meter in there to get some readings to get an idea on the direction. I checked transom and hull in the past and found acceptable moisture readings (approximately 12 percent on average). I sounded the stringers and transom after I found the crack and they sound like concrete. Sounding the bulkhead was mixed.
Maybe I'll get lucky. Anyone got a good hull for sale??
07-30-2021 | 06:51 AM
#220
Registered

Joined: Mar 2019
Posts: 1,022
Likes: 321
From: Perdido Key, Madison, NC
Engines are done.
Found a crack in the fuel bulkhead on the port side of the bilge. Runs right along the edge where the bulkhead transitions into bottom - 12-15 inches long. The glass is pretty thick in that area and I can push on it to widen the gap ever so slightly. I'm thinking it froze and caused the crack (meaning some water made it in there). FML
I'm debating on how to approach a fix.
One approach is to drill the crack ends to stop spread, drill into the area to see what I have for water in there, and possibly fill with thinned epoxy to give it some time. After epoxy, lay some mat and call it done.

