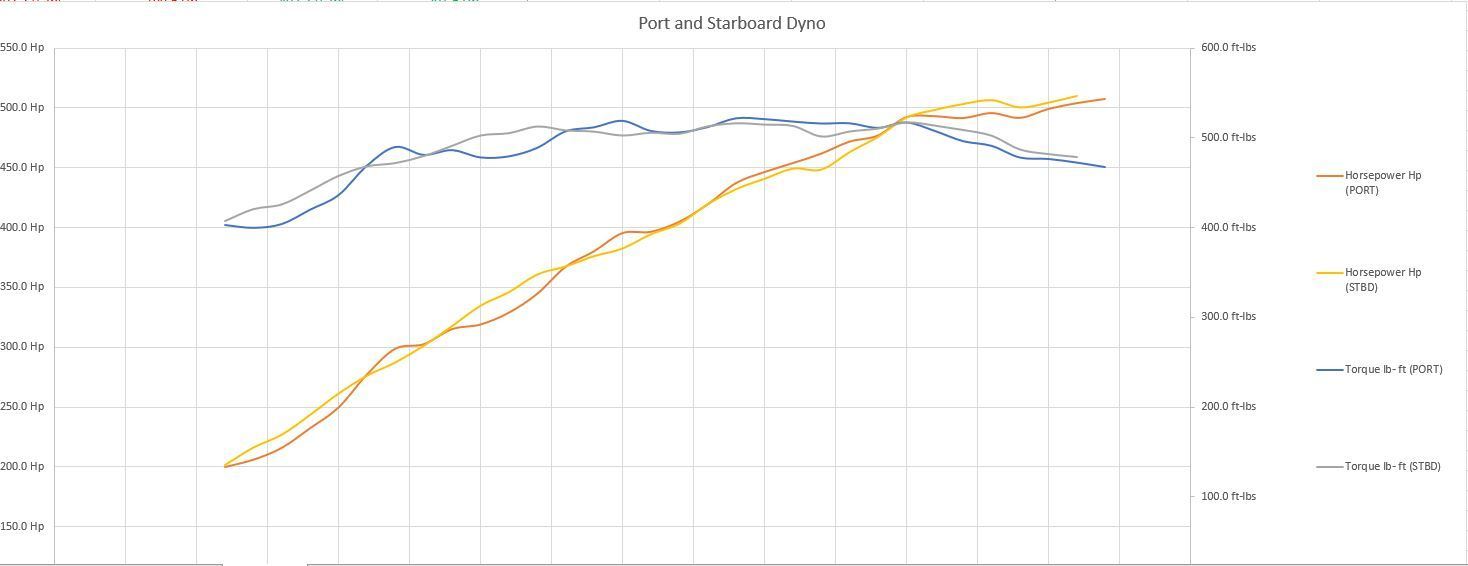
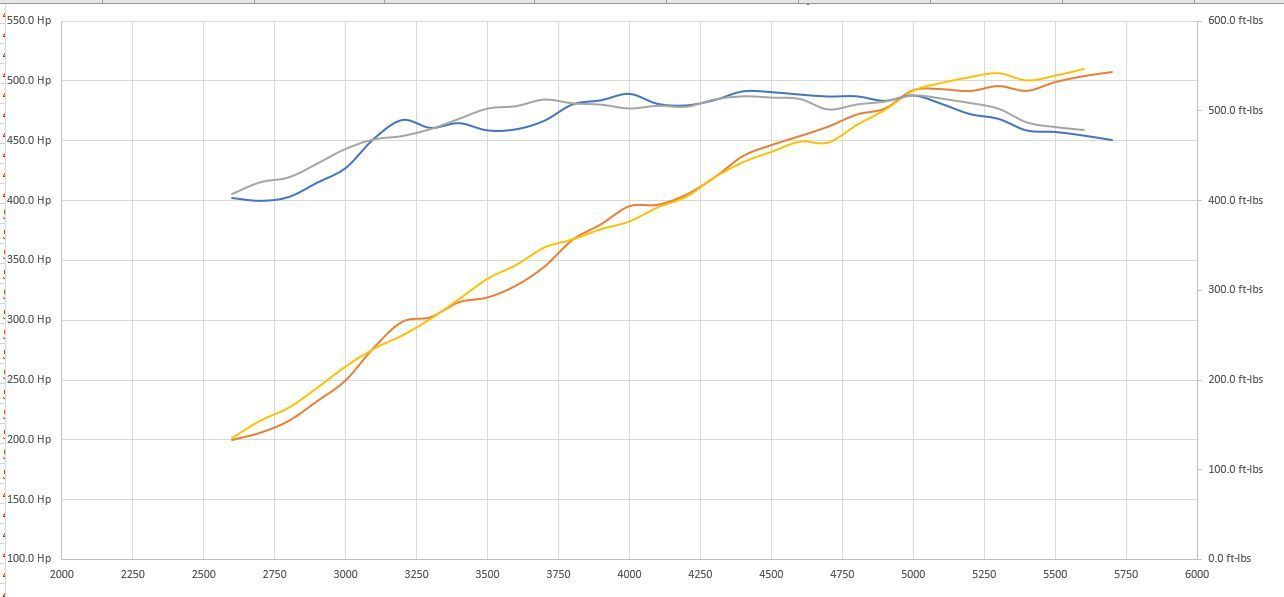
First Dyno Complete
 01-12-2023 | 02:59 PM
#121
Registered

Joined: Aug 2002
Posts: 1,256
Likes: 273
From: jenison mi
Holy crap this thread blew up!! Hahaha sorry been away for a couple days
Saber....I heard countless stories like yours about PE and that's why I went there however my experience was NOT as described. I don't like bashing people on the internet but being this thread is to educate and help PQ I will disclose some of my experience.
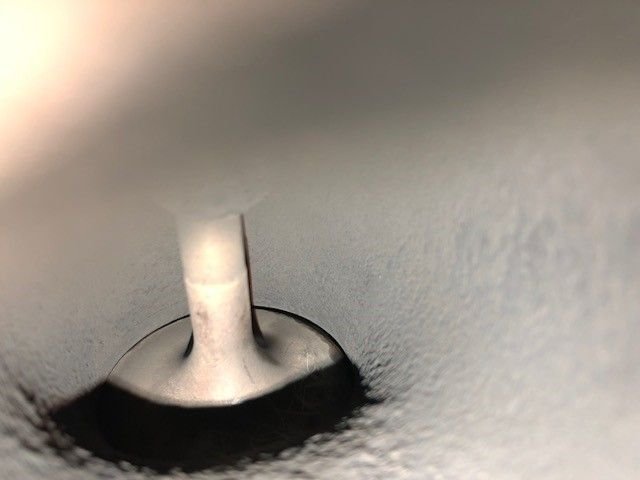
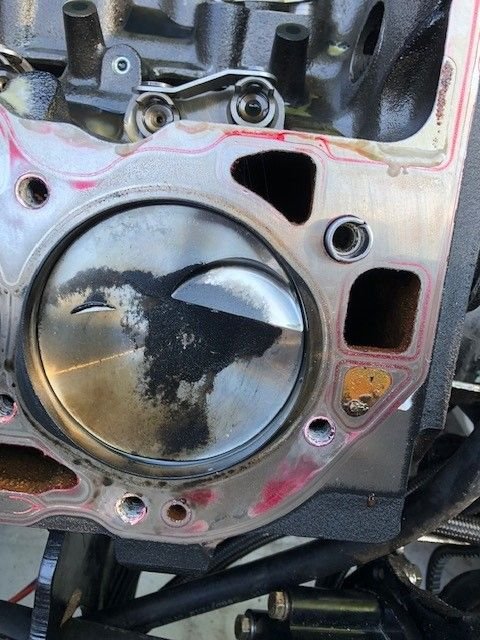
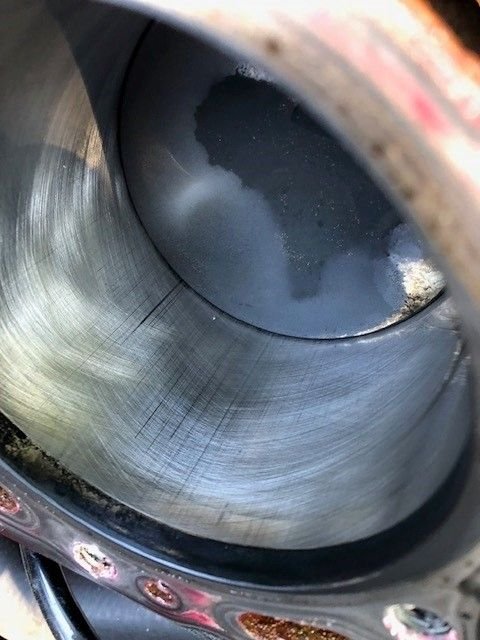
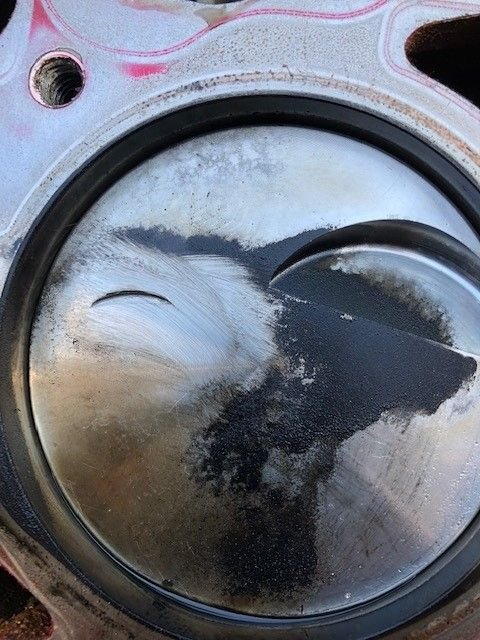
I will include pics to show the outcome. I paid them to assemble, machine, dyno my motor...the works they had it from day one. Ultimately I ended up with a stuck valve, ruined piston, 2 seasons of boating, ruined rocker arms, ruined head castings, and an enormous RAN UP BILL since it was brought up. I know everyone can have a bad day and sh!t happens but what ruined my experience was their lack of ownership for their work and the professionalism to make it right.
Valve clearances were set at less than .001 which is obviously a no go
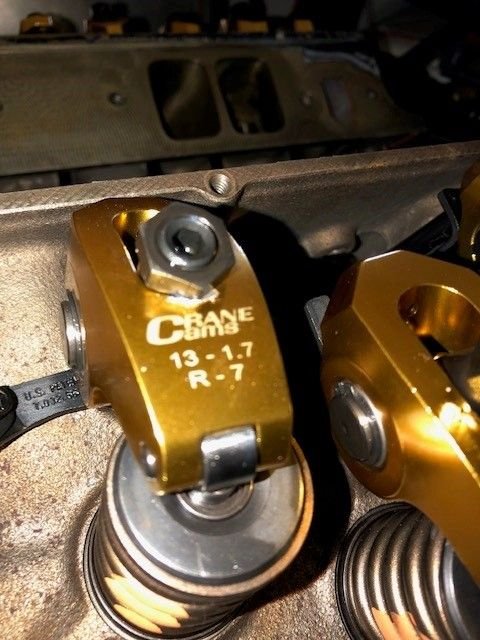
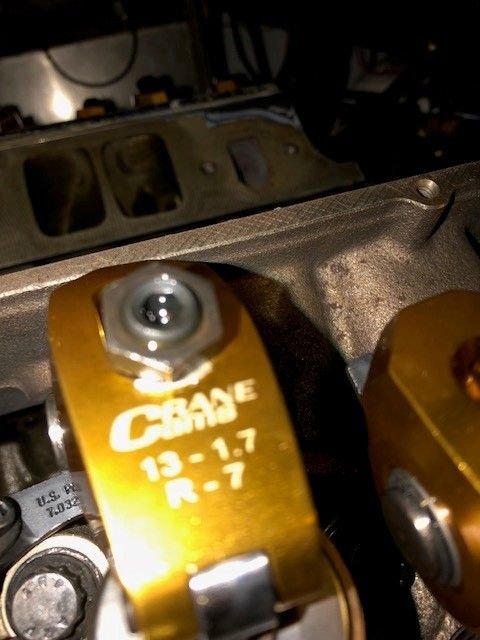
Push rod length was too short on exhausts if I remember right causing the rockers to bind and get ruined
The head guy that Dan(ICDEDPPL) recommended got my heads after the stuck valve and found all this...
PE did take the heads back and go through them again after the stuck valve and not being confident I went to Dan's guy with them untouched and he found that it broke the guide casting in the head and PE jb welded it back on never telling me what happened...the clearance he found was set to .001 which would have seized a valve again if used.
I don't remember numbers but the springs that PE sourced, sold me, and installed were so light that I was floating the valves at 4900 and the motor would not run over that rpm...remember they "dynoed" this motor to 5600 and 5 lbs of boost according to their sheet they gave me.
In the end, the bottom end was done pretty well but I ended up starting over with all new parts, went to a 540, bigger blower, heads built by Mike(Dan's guy), machine work done by another shop, all assembled by yours truly, cam spec'd by Mild Thunder, push rod length determined by me, and all put together then installed in the boat. So far 15 hours in all is well. Full disclosure I do have an oil leak that is my fault and I'm upgrading my EFI/ignition this off season but the nuts and bolts of the engine are still kicking strong.
Now...this is my experience with them and I get it every shop has bad days but what turned me away was the second time they "went through" the heads to make them right and almost 2 years in PE basically told me this is it and you're on your own good luck. NEVER ONCE did they tell me that there was any issue with the heads or that the seized valve broke the casting. Got them back and they were "good to go" good luck..obviously as stated above that was not the case...the bill was 1300 bucks higher than quoted with no explanation as to why...was just told that more parts were needed yet was never called and told..I asked what parts and the owner of the company told me he doesn't know and "didn't want to bug his builder to find out and it is what it is"
Just a bad experience all the way around and I will personally not go back...now as I said right at the beginning....I heard numerous great stories like Saber's but this was mine so take it for what it's worth.
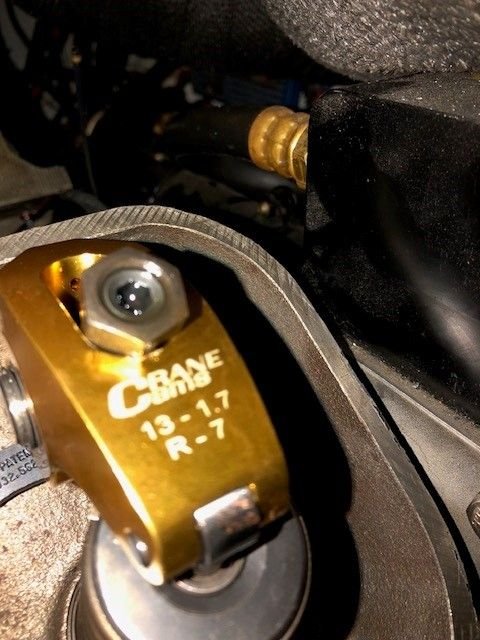
Here's some pics....this motor had dyno time and a half mile of idleing with 200 yards of 4800 rpm when these pics were taken....
Saber....I heard countless stories like yours about PE and that's why I went there however my experience was NOT as described. I don't like bashing people on the internet but being this thread is to educate and help PQ I will disclose some of my experience.
I will include pics to show the outcome. I paid them to assemble, machine, dyno my motor...the works they had it from day one. Ultimately I ended up with a stuck valve, ruined piston, 2 seasons of boating, ruined rocker arms, ruined head castings, and an enormous RAN UP BILL since it was brought up. I know everyone can have a bad day and sh!t happens but what ruined my experience was their lack of ownership for their work and the professionalism to make it right.
Valve clearances were set at less than .001 which is obviously a no go
Push rod length was too short on exhausts if I remember right causing the rockers to bind and get ruined
The head guy that Dan(ICDEDPPL) recommended got my heads after the stuck valve and found all this...
PE did take the heads back and go through them again after the stuck valve and not being confident I went to Dan's guy with them untouched and he found that it broke the guide casting in the head and PE jb welded it back on never telling me what happened...the clearance he found was set to .001 which would have seized a valve again if used.
I don't remember numbers but the springs that PE sourced, sold me, and installed were so light that I was floating the valves at 4900 and the motor would not run over that rpm...remember they "dynoed" this motor to 5600 and 5 lbs of boost according to their sheet they gave me.
In the end, the bottom end was done pretty well but I ended up starting over with all new parts, went to a 540, bigger blower, heads built by Mike(Dan's guy), machine work done by another shop, all assembled by yours truly, cam spec'd by Mild Thunder, push rod length determined by me, and all put together then installed in the boat. So far 15 hours in all is well. Full disclosure I do have an oil leak that is my fault and I'm upgrading my EFI/ignition this off season but the nuts and bolts of the engine are still kicking strong.
Now...this is my experience with them and I get it every shop has bad days but what turned me away was the second time they "went through" the heads to make them right and almost 2 years in PE basically told me this is it and you're on your own good luck. NEVER ONCE did they tell me that there was any issue with the heads or that the seized valve broke the casting. Got them back and they were "good to go" good luck..obviously as stated above that was not the case...the bill was 1300 bucks higher than quoted with no explanation as to why...was just told that more parts were needed yet was never called and told..I asked what parts and the owner of the company told me he doesn't know and "didn't want to bug his builder to find out and it is what it is"
Just a bad experience all the way around and I will personally not go back...now as I said right at the beginning....I heard numerous great stories like Saber's but this was mine so take it for what it's worth.
Here's some pics....this motor had dyno time and a half mile of idleing with 200 yards of 4800 rpm when these pics were taken....
 01-12-2023 | 03:18 PM
#122
Thread Starter
Registered
Joined: Jan 2022
Posts: 714
Likes: 209
From: West Michigan
LOL!!!! Snapmorgan, I SEE IT!!! Well like I said, it's confusing.....you know reading instructions. Now I know that the ring gap I have isn't even mentioned in the chart! I think the "Factor Number" would have to be .0050?
01-13-2023 | 10:01 AM
#123
Registered

Joined: Aug 2010
Posts: 1,386
Likes: 565
And FWIW just the piston to bore clearances are differentiated by bore size. the ring gap factors are for all bores.
Last edited by cheech; 01-13-2023 at 10:04 AM.
01-13-2023 | 11:16 AM
#124
Platinum Member

Joined: Feb 2001
Posts: 4,310
Likes: 1,461
From: Virginia Beach
01-13-2023 | 12:08 PM
#125
Registered

Joined: Jul 2014
Posts: 193
Likes: 62
From: Harrison Twp, MI
01-13-2023 | 01:47 PM
#126
Registered
Joined: Sep 2021
Posts: 43
Likes: 76