

Crank-mounted water pump?
 10-10-2021 | 06:49 PM
#31
Registered

Joined: Jan 2007
Posts: 2,078
Likes: 1,202
From: Murrayville Georgia
I feel for you. I did the same last year, slid off the back of a platform and dropped the last foot or so and the next day my knee was swollen up and I could not put any weight on it for a week. sucks getting old and falling apart.
 10-10-2021 | 07:18 PM
#32
Thread Starter
Platinum Member

Joined: Feb 2001
Posts: 4,295
Likes: 1,457
From: Virginia Beach
Boredom got the best of me so I went out to the garage to work on piecing these things together.
Parts needed….
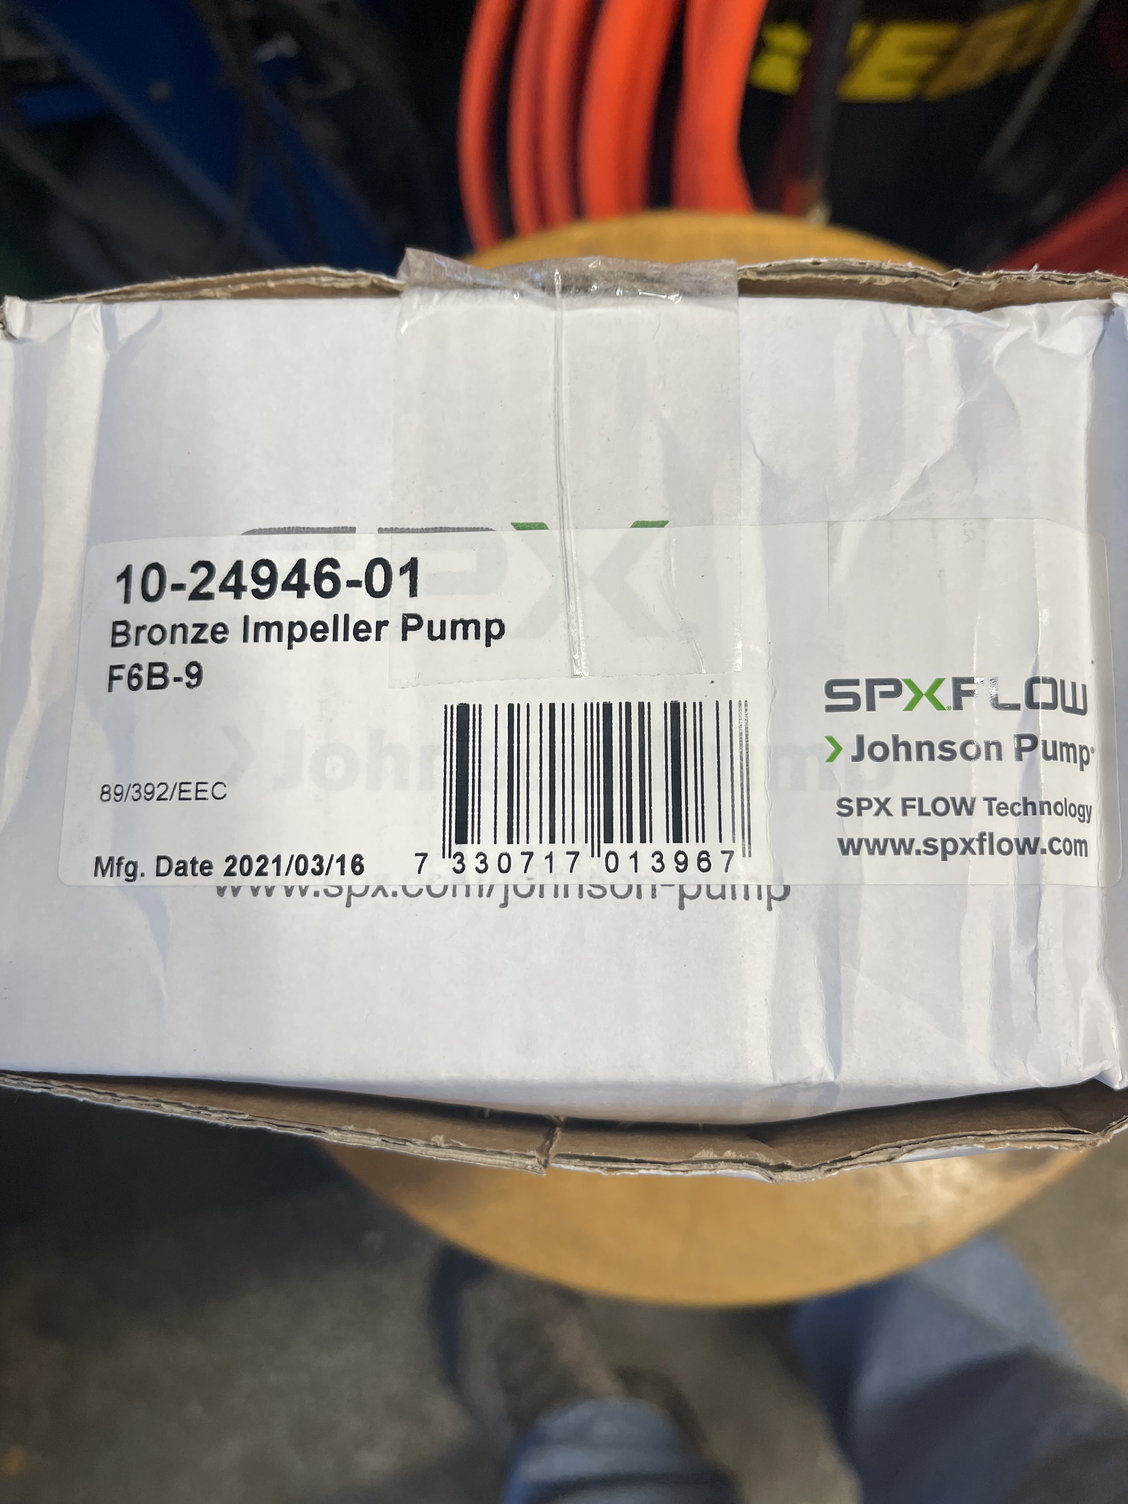
Johnson F6B-9 raw water pump.

Pump unboxed. Contains basic setup instructions and specs.
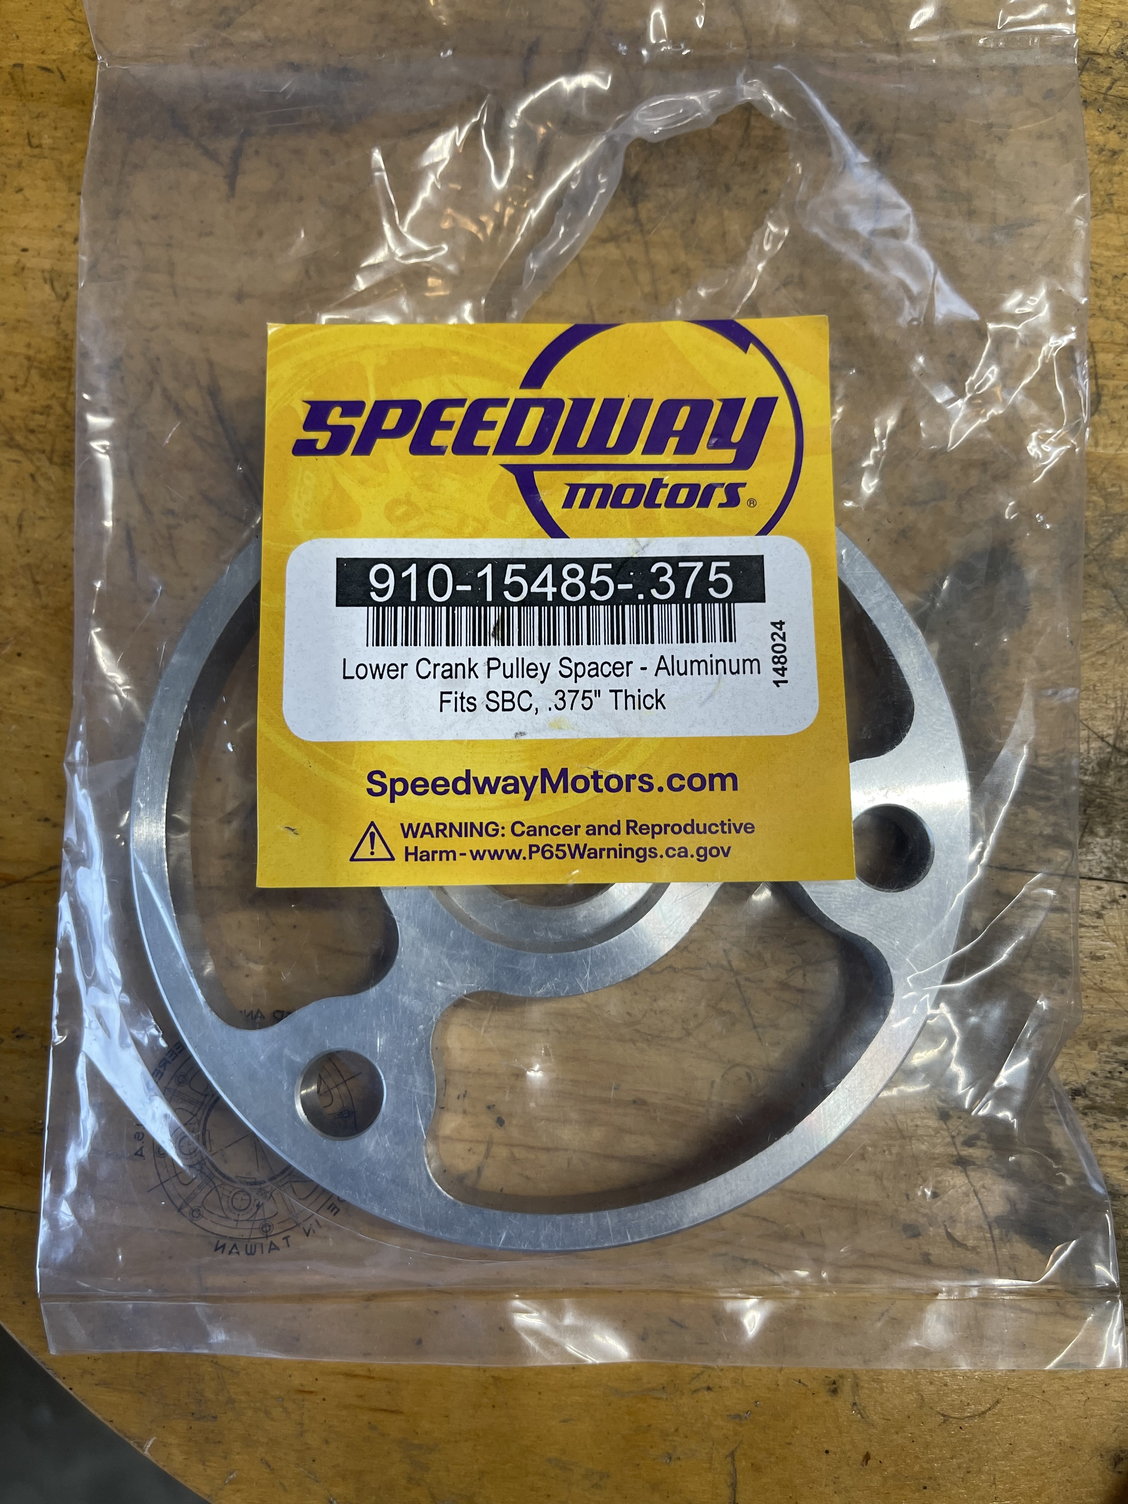
Speedway Motors 3/8 Pulley Spacer - Used to take up some of the depth of the pulley giving extra clearance for hoses.

1/2 outside, 3/8 inside bushings. These will be cut-down to the pump’s flange depth and used to center the bolt in the flange. Smallest holes in the flange are 1/2-inch diameter.

3/8-16 x 2-inch grade 8 socket head cap screws. Important - must have a shoulder to positively center the bushing (it’s almost an interference fit). Socket head screws are needed because a hex head interferes with the flange body.

3/8 grade 8 flat washers. Probably not needed but I always place a washer under bolt heads at assembly. I may remove these at final assembly.

Cut-down bushings and washers (the washers interfered with the flange body - again - I’ll probably remove at final assembly).

Showing bushing and bolt-to-flange relationship.

Flush with flange.
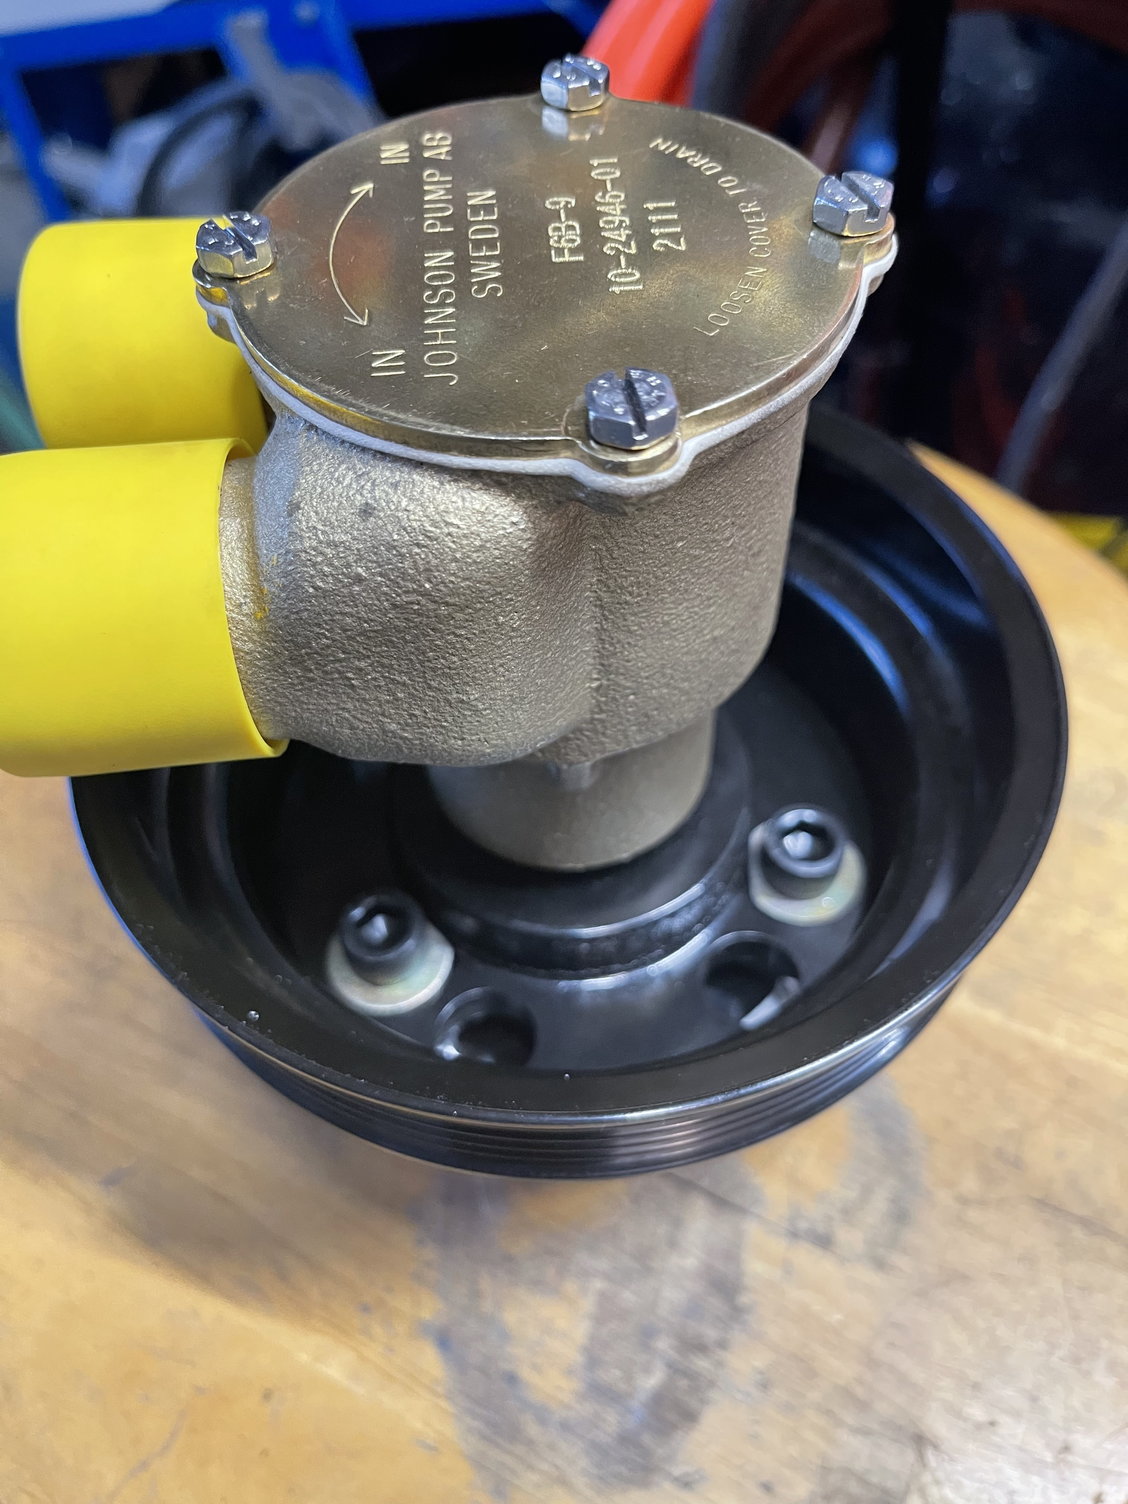
Assembled. The spacer plate required opening up the bolt holes a little. The spacer was spec’d for a small block. I figured it was okay since this pulley is used on V6 and V8 (sb and bb) Chevy engines. The bolt circle on all of them is the same. The bolts splayed inward so I opened them up to just under 7/16. It only acts as a spacer. Alignment is correct and it appears the spacer is equally spaced.
As soon as I’m able, I’ll get these mounted. The hardest part will be making and attaching the cooling hose to the starboard trans cooler with the header on. Port does not have exhaust yet so it should be a cakewalk. Hoses will be steel reinforced so no need to brace the pumps.
I had wanted to do this prior to the engines being installed but thought rerouting the accessory drive would be a pain. I’m glad I’m finally going in this direction. Impeller changes should be a breeze going forward.
I hope this helps others with similar installs. -Tom
Parts needed….
Johnson F6B-9 raw water pump.
Pump unboxed. Contains basic setup instructions and specs.
Speedway Motors 3/8 Pulley Spacer - Used to take up some of the depth of the pulley giving extra clearance for hoses.
1/2 outside, 3/8 inside bushings. These will be cut-down to the pump’s flange depth and used to center the bolt in the flange. Smallest holes in the flange are 1/2-inch diameter.
3/8-16 x 2-inch grade 8 socket head cap screws. Important - must have a shoulder to positively center the bushing (it’s almost an interference fit). Socket head screws are needed because a hex head interferes with the flange body.
3/8 grade 8 flat washers. Probably not needed but I always place a washer under bolt heads at assembly. I may remove these at final assembly.
Cut-down bushings and washers (the washers interfered with the flange body - again - I’ll probably remove at final assembly).
Showing bushing and bolt-to-flange relationship.
Flush with flange.
Assembled. The spacer plate required opening up the bolt holes a little. The spacer was spec’d for a small block. I figured it was okay since this pulley is used on V6 and V8 (sb and bb) Chevy engines. The bolt circle on all of them is the same. The bolts splayed inward so I opened them up to just under 7/16. It only acts as a spacer. Alignment is correct and it appears the spacer is equally spaced.
As soon as I’m able, I’ll get these mounted. The hardest part will be making and attaching the cooling hose to the starboard trans cooler with the header on. Port does not have exhaust yet so it should be a cakewalk. Hoses will be steel reinforced so no need to brace the pumps.
I had wanted to do this prior to the engines being installed but thought rerouting the accessory drive would be a pain. I’m glad I’m finally going in this direction. Impeller changes should be a breeze going forward.
I hope this helps others with similar installs. -Tom
Last edited by TomZ; 10-10-2021 at 10:32 PM. Reason: Predictive text and autocorrect makes one sound like an idiot...
10-11-2021 | 11:15 AM
#33
Registered

Joined: Jul 2013
Posts: 20
Likes: 2
From: Wolcott, Connecticut
I have a Baja 272 with a 496mag HO and I can't even see the pully on my pump. I removed my backrest and still could barely see it. After getting my balls broke replacing the impeller I decided next time I'm just gonna pay someone to do it. I hope that doesn't mean I have to hand in my man card.
10-11-2021 | 02:49 PM
#34
Thread Starter
Platinum Member
Joined: Feb 2001
Posts: 4,295
Likes: 1,457
From: Virginia Beach
I have a Baja 272 with a 496mag HO and I can't even see the pully on my pump. I removed my backrest and still could barely see it. After getting my balls broke replacing the impeller I decided next time I'm just gonna pay someone to do it. I hope that doesn't mean I have to hand in my man card.
10-11-2021 | 03:09 PM
#35
Registered

Joined: Nov 2003
Posts: 1,107
Likes: 686
i attended the funeral of a cousin this morning who retired a month ago was sleeping on his boat in a marina getting it ready to winterize got up in the night slipped hit his head and fell in in clayton ny son found him the next morning..... be careful guys boats are very slippery this time of year
10-13-2021 | 06:22 PM
#37
Thread Starter
Platinum Member
Joined: Feb 2001
Posts: 4,295
Likes: 1,457
From: Virginia Beach
The bushings gave me a little trouble requiring a more methodical approach to running in the bolts until the seated properly. That was the hardest part. The hoses came off the trans coolers easy, too.

Now to measure/test-fit for hoses and then measure for belts.
Now to measure/test-fit for hoses and then measure for belts.
Last edited by TomZ; 10-13-2021 at 06:51 PM.
10-13-2021 | 06:55 PM
#39
Thread Starter
Platinum Member
Joined: Feb 2001
Posts: 4,295
Likes: 1,457
From: Virginia Beach
I did the same with a lot of water pressure when it was raw-water cooled. It swelled enough to cut the hose from touching the belt. I�ll keep an eye on the raw water side. Thanks for the heads up!


