

Back from the Dead; '81 Scarab 38 Resto
 11-18-2017, 04:59 PM
#221
VIP Member
Thread Starter
Flying solo today. Got the rt main stringer tabbed in as well as the rt #3 bulkhead. Interesting that the deck hoist notch in the rt bulkhead is about 1/2� off of where the left one was. I don�t know if this was by design or because it was built on a Friday and it was beer thirty in Sarasota. I put the notch where they had it...
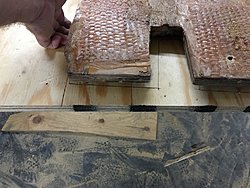

the hull hasn�t moved. My laser is still shooting thru the holes. And as Forrest Gump would say �that�s one less thing to worry about!�...

I�d like to have this baby ready to roll late spring. I happened on a guy on the powerboat swap shop on Facebook who had offshore mounts, transom raw water pickups and bellhousings. Spoke to Rik at arneson, I�m gonna send him the drives and he�s gonna refurb them and also send me some boxes. Also checking on some large rectangular port aluminum heads with larger combustion chambers so we can use smaller blower pulleys to get the power up. Anyways that�s it for now...
Last edited by hblair; 11-19-2017 at 02:45 PM.
 11-21-2017, 09:58 PM
#222
VIP Member
Thread Starter
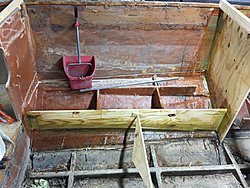
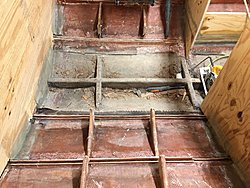
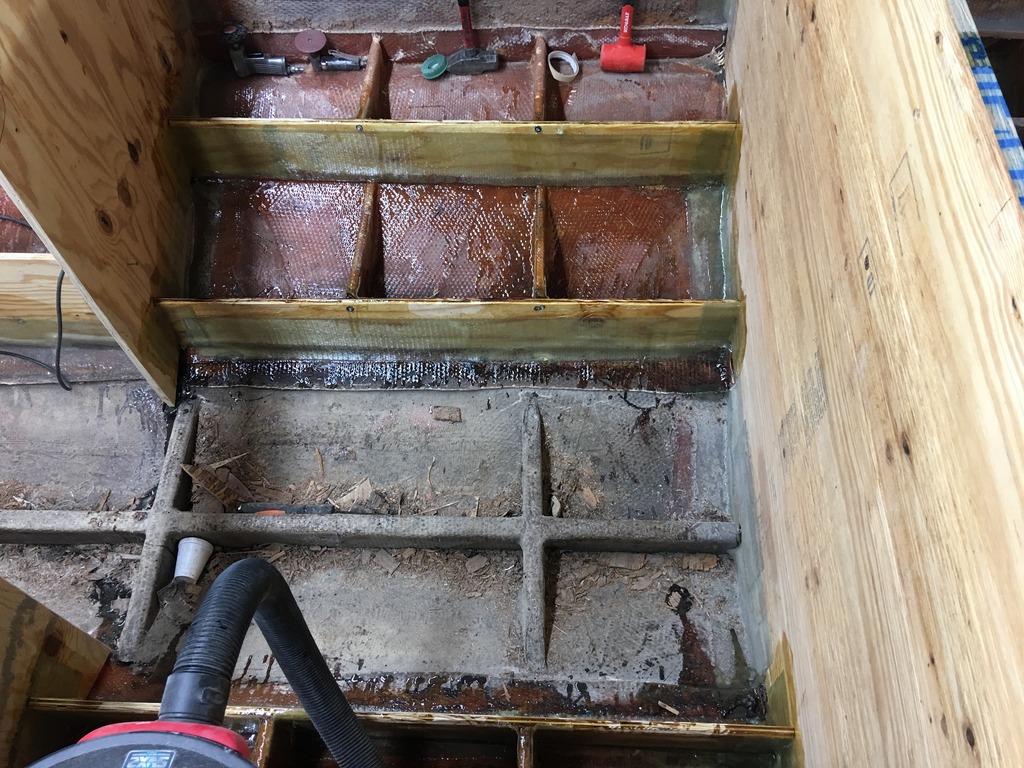
Me and Brian got some more done tonight. We went ahead and tabbed in the the left inner main stringer. We still have to section in the rear part of the outer main stringers. You can see in this photo where the rot ends...
main stringers...
Once we get the outer stringer ends replaced, we have to replace the 4 small stringers in the rear of the cabin and that�ll be all the rot replacement forward of the cockpit (excluding the center stringer framework under the floor) I hope to have all this done this week.

main stringers...


Once we get the outer stringer ends replaced, we have to replace the 4 small stringers in the rear of the cabin and that�ll be all the rot replacement forward of the cockpit (excluding the center stringer framework under the floor) I hope to have all this done this week.
Last edited by hblair; 11-21-2017 at 10:03 PM.
 11-25-2017, 08:14 PM
#226
VIP Member
Thread Starter
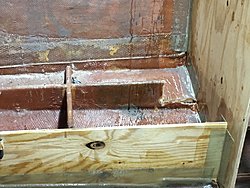
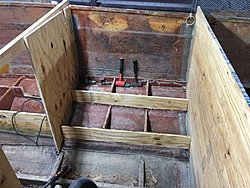
As normal my goal of having everything forward of the cockpit by the week and didn’t happen. Had a thanksgiving today. Then had to watch alabama get beat. Came up here and got some stringers ready to tab in. May get it done tomorrow afternoon. Takes a little while to prep the stringers as I am getting all wood out and then roughing up the fiberglass down in the channel as well as roughing up the glass where the mat will lay. As I’m doing all this nasty work I’m thinking of how worthwhile it is. When we took the 30 footer to bimini a few months ago, it was so rough the pickups in the fuel tank broke off and all kinds of screws in the cabin bulkheads were backing out, hurt my back on a few of them. but the stringers still looked fine on later inspection.


 11-25-2017, 08:18 PM
#227
VIP Member
Thread Starter
it�s not very expensive. They are going to build boxes too which is the main thing. I decided while I was shipping them out there I�d get them to build while they had them. I think Rik said 4-6 hours per drive times his mechanical rate.
 11-28-2017, 07:55 PM
#230
VIP Member
Thread Starter
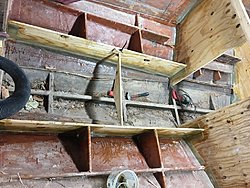
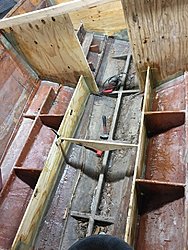
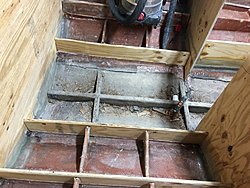
Got some cardio in tonight. Tore the center bracing out and got the two small pieces fit to go in the outer rear main cabin stringers. I also have to cut out the left rear cabin stringer and replace it. We noticed the rot extends under the v berth. We’ll be cutting into that later. My goal of being done forward of the cockpit by this weekend ain’t gonna happen...
48DA932E-D5C5-40AD-9887-FEF3F55B4866_zpsvau6pgam.jpg.html
7889D23E-8B60-40E4-8219-6EBFD53B9984_zpsgkpskxu2.jpg.html
48DA932E-D5C5-40AD-9887-FEF3F55B4866_zpsvau6pgam.jpg.html
7889D23E-8B60-40E4-8219-6EBFD53B9984_zpsgkpskxu2.jpg.html

