


Fountain 47, 2372cid single engine diesel



 03-31-2025 | 09:12 AM
#453
Thread Starter
Registered

Joined: Jan 2010
Posts: 346
Likes: 877
From: Finland

It's about 220cm long and there is 230cm free space in engineroom. 3 big blocks weight little more than this I think. Engine, transmission and splitbix weight about 1250kg ready, I will scale them soon.
04-18-2025 | 02:26 AM
#454
Registered


Joined: Aug 2019
Posts: 1,250
Likes: 420
From: BC
Cylinder head assembly is intresting.

Valve seat contact is good, contact widht is 2mm intake and 2.5mm exhaust. Should be good for this application, narrower surface flow more but wider cool valves better and in this heads, valve seats are not restrictor, I think more worse place for flow is valve stem area.

Valve stems are coat PKSX powder, they come significant more slippery.
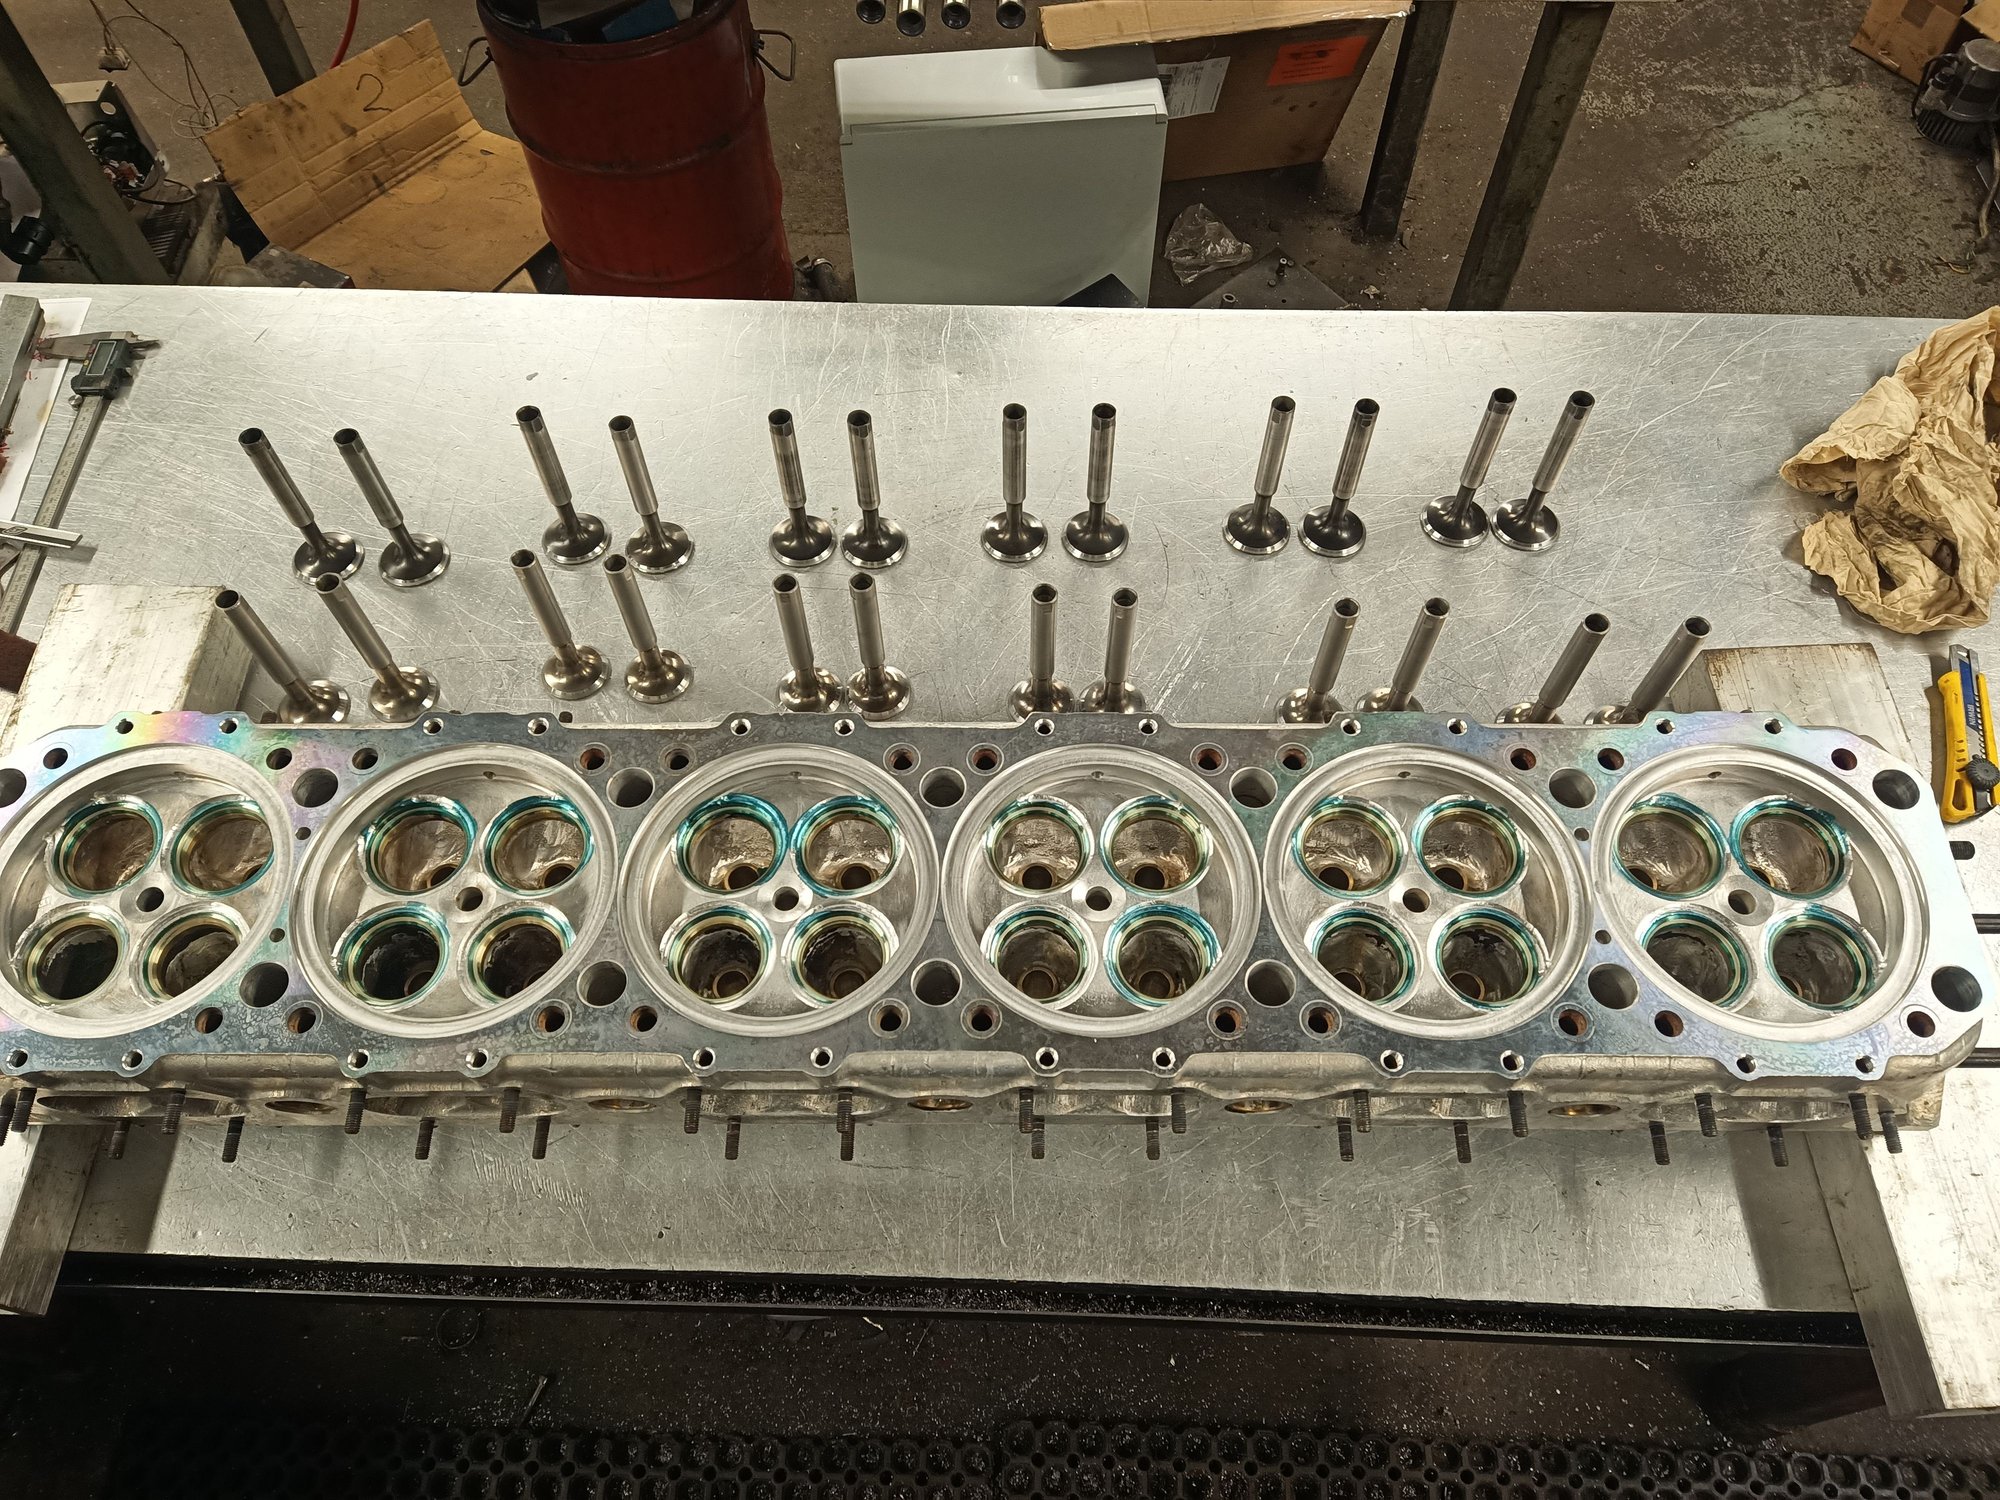
24 valves ready to going in place.

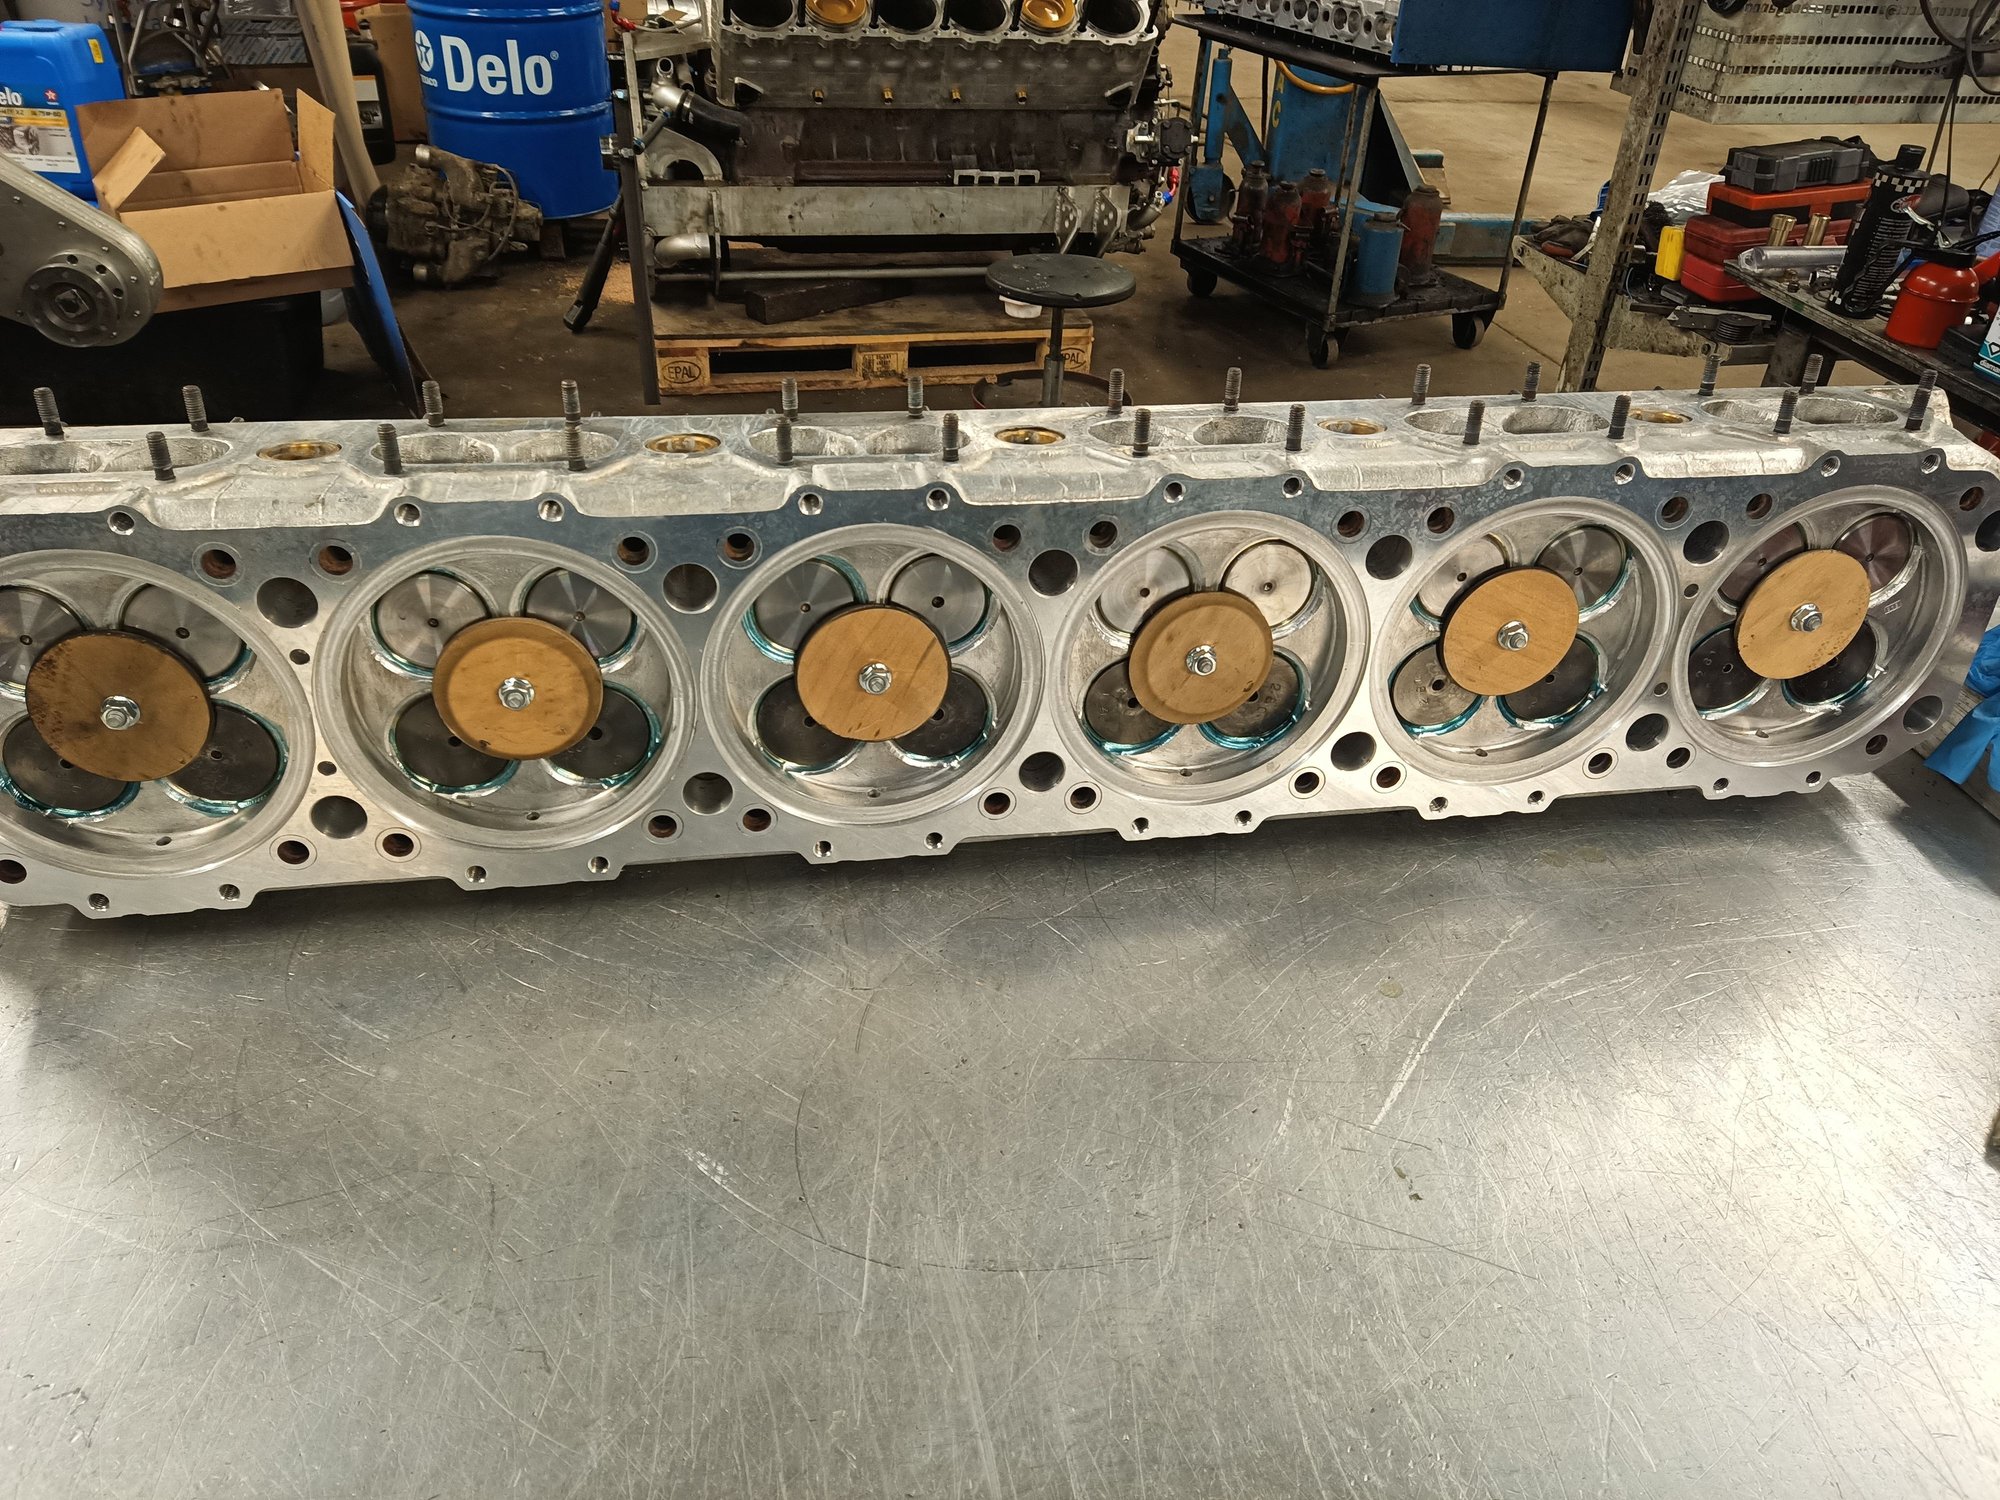
Plywood flaps keeps valves not to drop when it's turned over.

30x47x1mm axial bearing race fit straigt to under valve spring, they are hardened and allow valves rotate better. Original springs is on aluminium and friction keep them not to rotate, not good for lifters that are attached to valves.

New springs that I found stock from Germany spring shop are twice stiffer than original that had 22kg seat pressure and 45kg open pressure if I remember right, you can compress them fully by hand! New ones are 45kg seat and 90kg open. Grinded cams have 15mm lift, 2mm more than original.
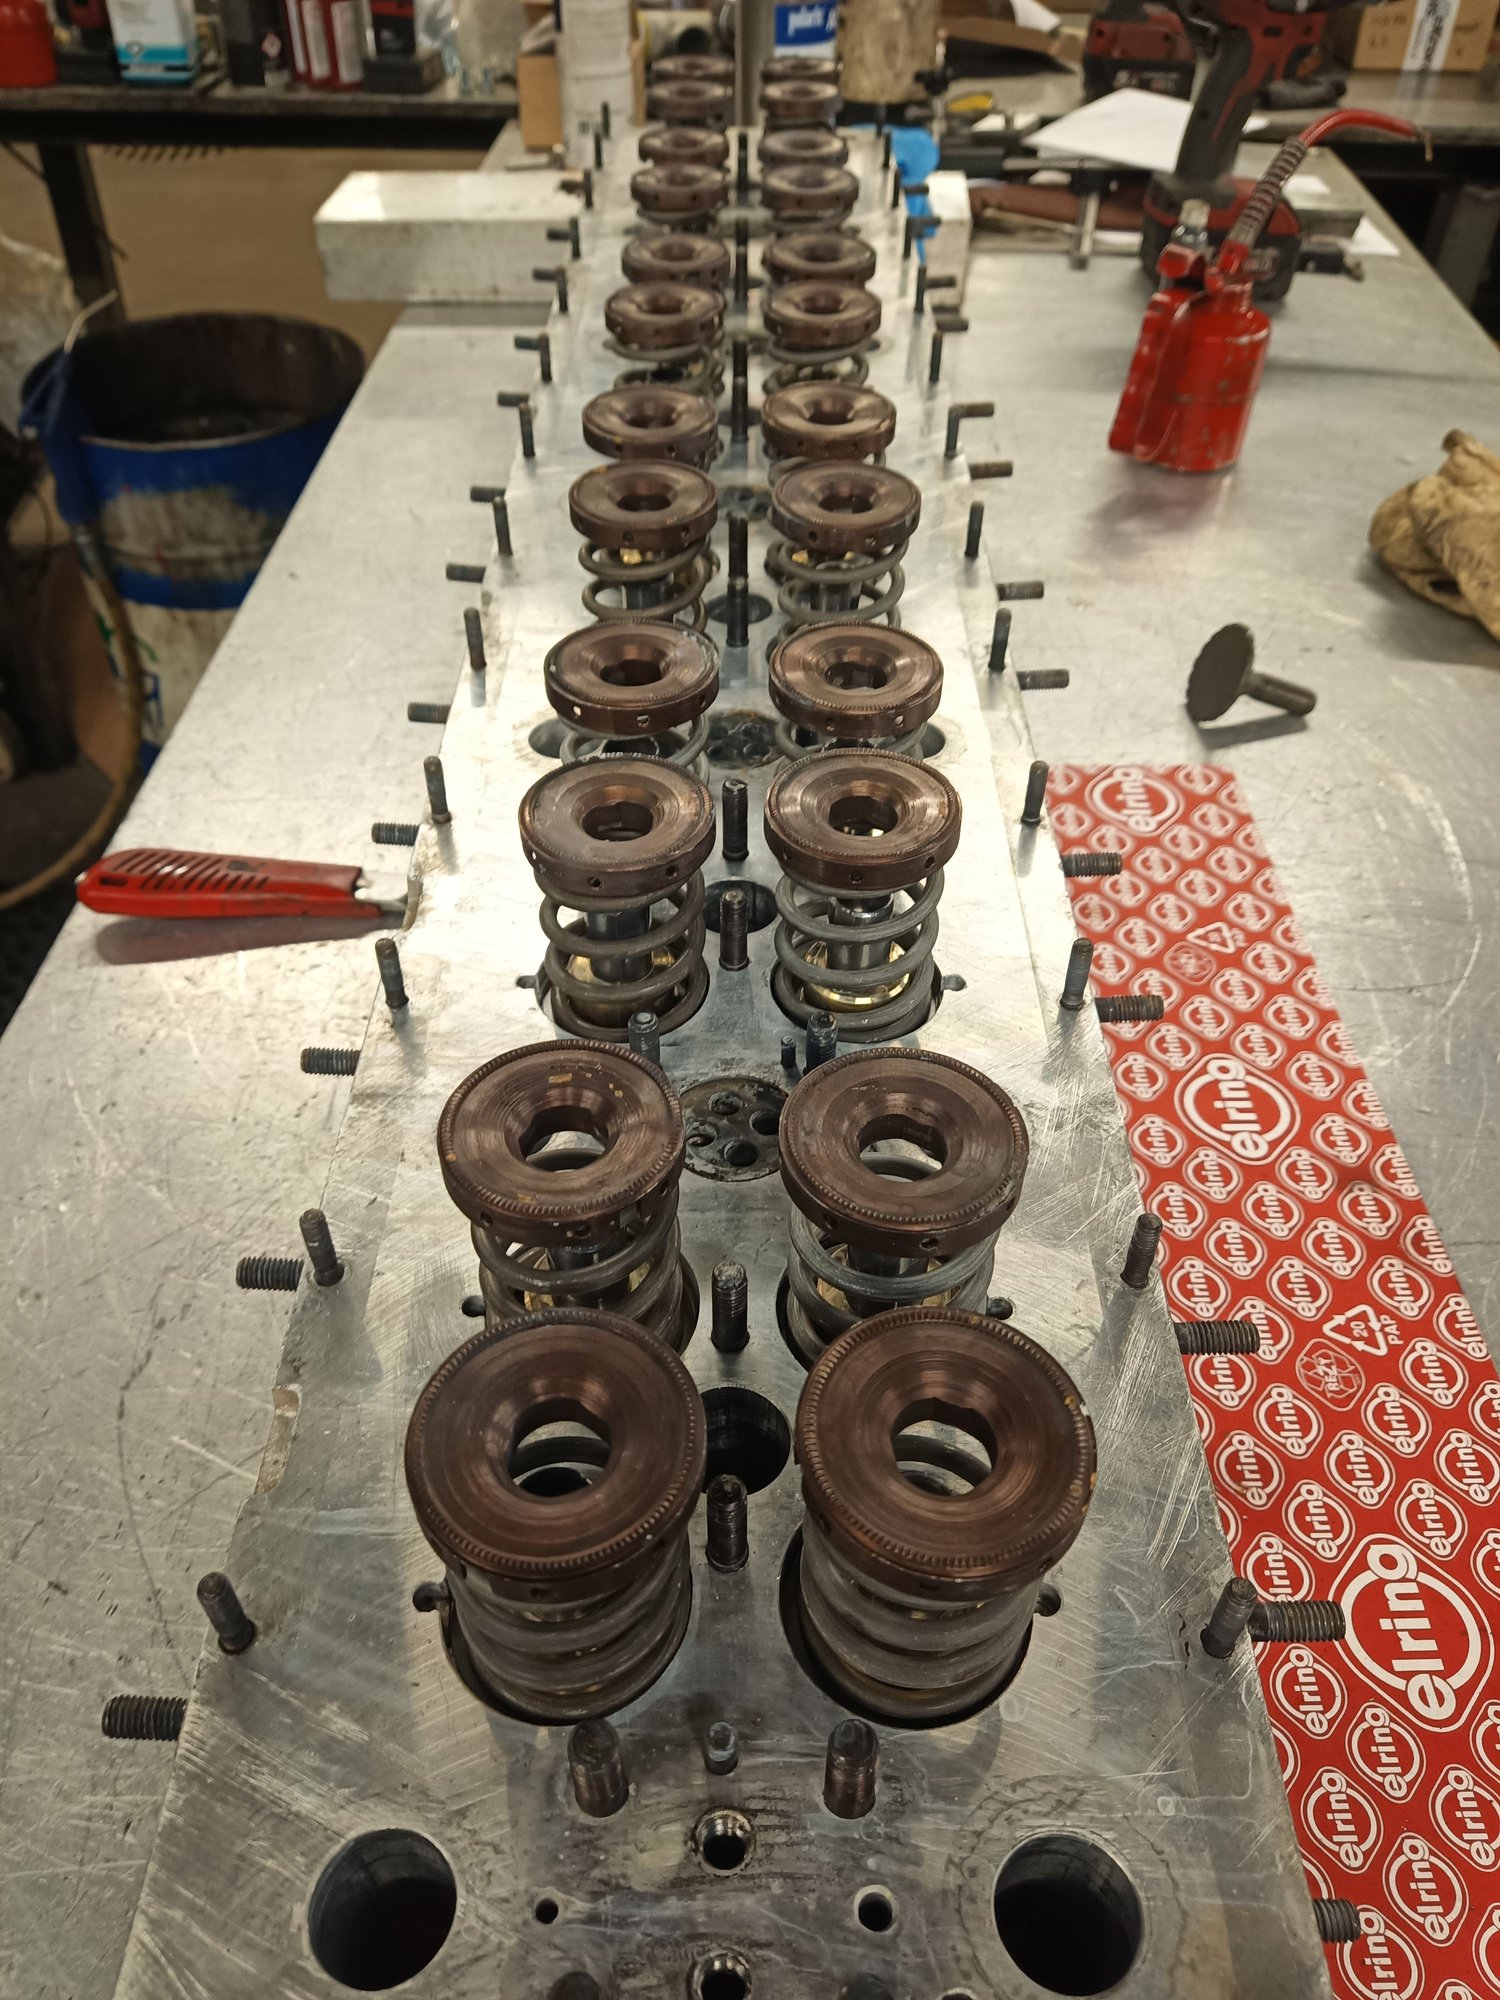
Retainers in place.

Transmash have clever valve adjustment. Lifter (or follower) have M14x1 thread and are screwed straight to valve stem, valve stem end have triangle shape outer side and retainer is machined same shape. Retainer and valve stem are locked that way, spring push retainer against to face spline that locks valve clearance adjustment. Clearance adjust is easy, just push retainer little down by tool and rotate follower, one turn is one millimeter, easy and precice system.

Some of followers was too tight going in valves so I buy M14x1 thread tool, cut it with angle grinder and get adjustable tool. This way I can keep thread as tight as possible but take it down just little to be able to screw them place by hand.

MoS2 (TLML) coated followers, if coating last and do it job I will be happy! Cams are now nitrided after grinding, this should be good sliding pair and good efficiency.

I make tool for milling machine to compress springs, It works pretty well.

Coarse valve clearance is set by caliber, it's now +-0.2mm, after engine is assembled I set lash better.

First head ready after 6 hours assembly, tool manufacture take maybe hour from that. I think other head go in four hours, maybe. I have now pretty much all parts ready, I can maybe drive it in this summer....
Valve seat contact is good, contact widht is 2mm intake and 2.5mm exhaust. Should be good for this application, narrower surface flow more but wider cool valves better and in this heads, valve seats are not restrictor, I think more worse place for flow is valve stem area.
Valve stems are coat PKSX powder, they come significant more slippery.
24 valves ready to going in place.
Plywood flaps keeps valves not to drop when it's turned over.
30x47x1mm axial bearing race fit straigt to under valve spring, they are hardened and allow valves rotate better. Original springs is on aluminium and friction keep them not to rotate, not good for lifters that are attached to valves.
New springs that I found stock from Germany spring shop are twice stiffer than original that had 22kg seat pressure and 45kg open pressure if I remember right, you can compress them fully by hand! New ones are 45kg seat and 90kg open. Grinded cams have 15mm lift, 2mm more than original.
Retainers in place.
Transmash have clever valve adjustment. Lifter (or follower) have M14x1 thread and are screwed straight to valve stem, valve stem end have triangle shape outer side and retainer is machined same shape. Retainer and valve stem are locked that way, spring push retainer against to face spline that locks valve clearance adjustment. Clearance adjust is easy, just push retainer little down by tool and rotate follower, one turn is one millimeter, easy and precice system.
Some of followers was too tight going in valves so I buy M14x1 thread tool, cut it with angle grinder and get adjustable tool. This way I can keep thread as tight as possible but take it down just little to be able to screw them place by hand.
MoS2 (TLML) coated followers, if coating last and do it job I will be happy! Cams are now nitrided after grinding, this should be good sliding pair and good efficiency.
I make tool for milling machine to compress springs, It works pretty well.
Coarse valve clearance is set by caliber, it's now +-0.2mm, after engine is assembled I set lash better.
First head ready after 6 hours assembly, tool manufacture take maybe hour from that. I think other head go in four hours, maybe. I have now pretty much all parts ready, I can maybe drive it in this summer....
Have you got any informarion on the PKSX powder? Where you source it, price, where you use it, how you apply it?
Seems like Total Seal has some, but it's in a micro amount. They want you to apply it and the pistons dry into the bore...for initial break in.
Thanks.
 04-19-2025 | 02:24 PM
#455
Thread Starter
Registered
Joined: Jan 2010
Posts: 346
Likes: 877
From: Finland
Tartilla, PKSX is easy to just wipe on parts, it doesn't need anything else than degrease with aseton and wipe PKSX on with clean cloth. Here is instructions https://techlinecoatings.com/wp-cont...structions.pdf
Quantity needed to coat basic engine parts is just few grams, just small amount stick on metal parts.
I bought it from Finland, Martelius exhaust Oy. It's not expensive, maybe 50€/bottle, I don't remember exact.
PKSX is so slippery that I think dry assembly is possible.
Quantity needed to coat basic engine parts is just few grams, just small amount stick on metal parts.
I bought it from Finland, Martelius exhaust Oy. It's not expensive, maybe 50€/bottle, I don't remember exact.
PKSX is so slippery that I think dry assembly is possible.
04-19-2025 | 02:54 PM
#456
Thread Starter
Registered
Joined: Jan 2010
Posts: 346
Likes: 877
From: Finland
Engine is running, finally. Lot of probles to solve, there is so much self design and modified parts that this thing is not turn key project.
First tryinjection timing was 20 degree late, pretty strong smoke. 4 injector lines was also crosswise, so it fires 8 cylinders. Late night assembly would cause problems, injection pump timing was in my own marks, I didn't check it by bleeding method. Now it's precise 22 degree timing, it was 0 degree.
I solved those problems, start valve didn't work and engine had very rough idle. Injection pump have RQV controller, it's good for boat because it try keep constant RPM controlled by throttle lever, so pump give more power if rpm drop or take fuel out if engine rev more than throttle lever is set. Pump will do throttleman job itself. Downside is that control is against spring force vs centrifugal force so engine start resonance hump easily. This video show rough idle.
After adjusting pump and figure out everything what is happening, now it runs smooth but idle is pretty high. I think it's not a big deal if this is running high idle, driving happening all time in higher than idle rpm anyway and I have four speed transmission.
There was a lot of another problems too, I tell more in next update.

Transmission and splitbox run great after I loaded shift program written by me to to Crouzet logic controller. Here is video testing it in simulation mode:
First tryinjection timing was 20 degree late, pretty strong smoke. 4 injector lines was also crosswise, so it fires 8 cylinders. Late night assembly would cause problems, injection pump timing was in my own marks, I didn't check it by bleeding method. Now it's precise 22 degree timing, it was 0 degree.
I solved those problems, start valve didn't work and engine had very rough idle. Injection pump have RQV controller, it's good for boat because it try keep constant RPM controlled by throttle lever, so pump give more power if rpm drop or take fuel out if engine rev more than throttle lever is set. Pump will do throttleman job itself. Downside is that control is against spring force vs centrifugal force so engine start resonance hump easily. This video show rough idle.
After adjusting pump and figure out everything what is happening, now it runs smooth but idle is pretty high. I think it's not a big deal if this is running high idle, driving happening all time in higher than idle rpm anyway and I have four speed transmission.
There was a lot of another problems too, I tell more in next update.
Transmission and splitbox run great after I loaded shift program written by me to to Crouzet logic controller. Here is video testing it in simulation mode:




 .......third vid sounds pretty smooth

